A quick introduction to Google test
视频参考:Google C++ Testing GTest GMock Framework
为什么要使用 Google C++ Testing Framework?
使用这个框架有许多好理由。本文讨论其中几个。
某些类型的测试有糟糕的内存问题,这些问题只在某几次运行期间出现。Google 的测试框架为处理这种情况提供了出色的支持。可以使用 Google 框架重复运行相同的测试一千次。当出现故障的迹象时,自动地调用调试器。另外,这只需要在命令行上传递两个开关即可实现:--gtest_repeat=1000 --gtest_break_on_failure。
与其他许多测试框架相反,可以把 Google 测试框架内置的断言部署在禁用了异常处理(通常由于性能原因)的软件中。因此,也可以在析构函数中安全地使用断言。
运行测试很简单。只需调用预定义的 RUN_ALL_TESTS 宏,而不需要通过创建或驱动单独的运行器类来执行测试。这比 CppUnit 等框架方便多了。
只需传递一个开关即可生成 Extensible Markup Language (XML) 报告: --gtest_output="xml:<file name>"。在 CppUnit 和 CppTest 等框架中,需要编写很多代码才能生成 XML 输出。
创建基本测试
以下代码均在Linux下运行。也可以利用VS2017 cross platform feature 在Windows本地进行Gtest测试。
sample.h
#ifndef _SAMPLE_H_

#define _SAMPLE_H_

// Returns n! (the factorial of n).  For negative n, n! is defined to be 1.

int Factorial(int n);

// Returns true iff n is a prime number.

bool IsPrime(int n);

#endif
sample.c
#include "sample.h"

// Returns n! (the factorial of n).  For negative n, n! is defined to be 1.

int Factorial(int n) {

  int result = ;

  for (int i = ; i <= n; i++) {

    result *= i;

  }

  return result;

}

// Returns true iff n is a prime number.

bool IsPrime(int n) {

  // Trivial case 1: small numbers

  if (n <= ) return false;

  // Trivial case 2: even numbers

  if (n %  == ) return n == ;

  // Now, we have that n is odd and n >= 3.

  // Try to divide n by every odd number i, starting from 3

  for (int i = ; ; i += ) {

    // We only have to try i up to the square root of n

    if (i > n/i) break;

    // Now, we have i <= n/i < n.

    // If n is divisible by i, n is not prime.

    if (n % i == ) return false;

  }

  // n has no integer factor in the range (1, n), and thus is prime.

  return true;

}
sample_unittest.c
#include <limits.h>

#include "sample.h"

#include "gtest/gtest.h"

namespace {

TEST(FactorialTest, Negative) {

    // This test is named "Negative", and belongs to the "FactorialTest"

    // test case.

    EXPECT_EQ(, Factorial(-));

    EXPECT_EQ(, Factorial(-));

    EXPECT_GT(Factorial(-), );

}

TEST(FactorialTest, Zero) {

    EXPECT_EQ(, Factorial());

}

TEST(FactorialTest, Positive) {

    EXPECT_EQ(, Factorial());

    EXPECT_EQ(, Factorial());

    EXPECT_EQ(, Factorial());

    EXPECT_EQ(, Factorial());

}

// Tests IsPrime()

TEST(IsPrimeTest, Negative) {

  EXPECT_FALSE(IsPrime(-));

  EXPECT_FALSE(IsPrime(-));

  EXPECT_FALSE(IsPrime(INT_MIN));

}

TEST(IsPrimeTest, Trivial) {

  EXPECT_FALSE(IsPrime());

  EXPECT_FALSE(IsPrime());

  EXPECT_TRUE(IsPrime());

  EXPECT_TRUE(IsPrime());

}

TEST(IsPrimeTest, Positive) {

  EXPECT_FALSE(IsPrime());

  EXPECT_TRUE(IsPrime());

  EXPECT_FALSE(IsPrime());

  EXPECT_TRUE(IsPrime());

}

}  // namespace
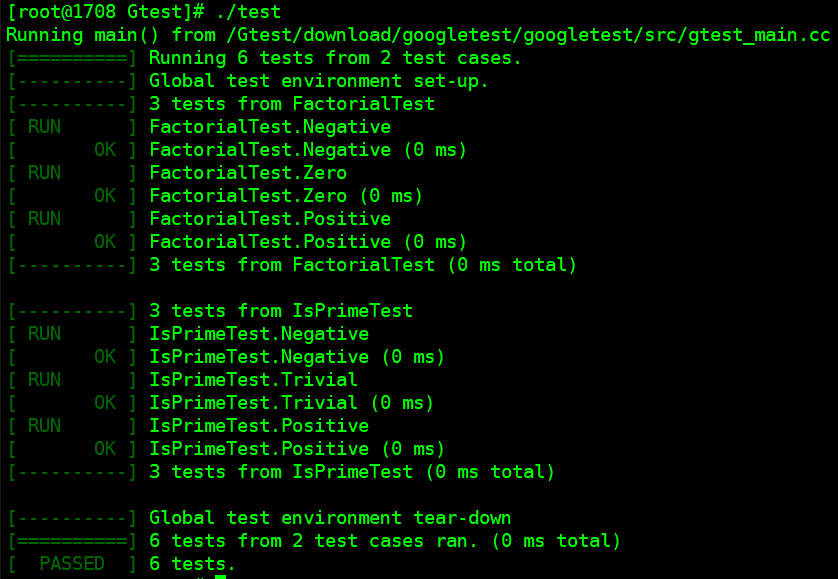
g++ sample.c sample_unittest.c -lgtest -std=c++11 -lgtest_main -lpthread -o test
没有main函数
使用Gtest你可以不提供main函数,libgtest_main.a会为你提供一个。如果没有特殊理由还是建议自己提供main函数
main.c
#include <gtest/gtest.h>

int main(int argc, char** argv){

  ::testing::InitGoogleTest(&argc, argv);

  return RUN_ALL_TESTS();

}
g++ sample.c sample_unittest.c main.c -lgtest -std=c++11 -lpthread -o test
::testing::InitGoogleTest 方法的作用就是对框架进行初始化,必须在调用 RUN_ALL_TESTS 之前调用它。在代码中只能调用 RUN_ALL_TESTS 一次,因为多次调用会与框架的一些高级特性冲突,不支持这种做法。注意,RUN_ALL_TESTS自动地探测并运行用 TEST 宏定义的所有测试。在默认情况下,结果输出到标准输出。
编译、运行结果和上面一样。
Gtest选项
InitGoogleTest 函数接收传递给test infrastructure的参数,下面介绍常用参数
通过在命令行上传递 --gtest_output="xml:report.xml",可以把输出转储为 XML 格式。当然,可以把 report.xml 替换为您喜欢的任何文件名。
某些测试有时候会失败,但是在大多数时候会顺利通过。这是与memory corruption相关的问题的典型特点。如果多次运行测试,就能够提高发现失败的可能性。如果在命令行上传递 --gtest_repeat=2 --gtest_break_on_failure,就重复运行相同的测试两次。如果测试失败,会自动调用调试器。
并不需要每次都运行所有测试,尤其是在修改的代码只影响某几个模块的情况下。为了支持运行一部分测试,Google 提供 --gtest_filter=<test string>。test string 的格式是由冒号 (:) 分隔的一系列通配符模式。例如,--gtest_filter=* 运行所有测试,而 --gtest_filter=SquareRoot* 只运行 SquareRootTest 测试。如果希望只运行 SquareRootTest 中的正数单元测试,应该使用 --gtest_filter=SquareRootTest.*-SquareRootTest.Zero*。注意,SquareRootTest.* 表示属于 SquareRootTest 的所有测试,而 -SquareRootTest.Zero* 表示不运行名称以 Zero 开头的测试。
禁用临时测试
可以临时禁用测试吗?可以,只需在逻辑测试名或单元测试名前面加上 DISABLE_ 前缀,它就不会执行了。
禁用临时测试
#include "gtest/gtest.h"

TEST (DISABLE_SquareRootTest, PositiveNos) {

    EXPECT_EQ (18.0, square-root (324.0));

    EXPECT_EQ (25.4, square-root (645.16));

    EXPECT_EQ (50.3321, square-root (2533.310224));

}

OR

TEST (SquareRootTest, DISABLE_PositiveNos) {

    EXPECT_EQ (18.0, square-root (324.0));

    EXPECT_EQ (25.4, square-root (645.16));

    EXPECT_EQ (50.3321, square-root (2533.310224));

}
注意,如果禁用了任何测试,Google 框架会在测试执行结束时输出警告消息,Google 警告用户在框架中有禁用的测试
 FAILED TEST

  YOU HAVE  DISABLED TEST
如果希望继续运行禁用的测试,那么在命令行上传递 -gtest_also_run_disabled_tests 选项。
Assertions(断言)
演示用于浮点数比较的宏
ASSERT_FLOAT_EQ (expected, actual)

ASSERT_DOUBLE_EQ (expected, actual)

ASSERT_NEAR (expected, actual, absolute_range)

EXPECT_FLOAT_EQ (expected, actual)

EXPECT_DOUBLE_EQ (expected, actual)

EXPECT_NEAR (expected, actual, absolute_range)
为什么需要用单独的宏进行浮点数比较?使用 ASSERT_EQ 不行吗?使用 ASSERT_EQ 和相关的宏可能可以,也可能不行,但是使用专门用于浮点数比较的宏更好。通常,不同的中央处理单元 (CPU) 和操作环境以不同的方式存储浮点数,简单地比较期望值和实际值是无效的。例如,ASSERT_FLOAT_EQ (2.00001, 2.000011) 会顺利通过 — 如果直到小数点后四位都匹配,Google 就不会抛出错误。如果需要更精确的比较,应该使用 ASSERT_NEAR (2.00001, 2.000011, 0.0000001),就会得到 下面所示的错误。
Math.cc(): error: The difference between 2.00001 and 2.000011 is 1e-, which exceeds

0.0000001, where

2.00001 evaluates to 2.00001,

2.000011 evaluates to 2.00001, and

0.0000001 evaluates to 1e-.
断言引发的三种结果
Assertions会引发3种结果:success、Non-Fatal Failure、Fatal Failure
Non-Fatal Failure 和 Fatal Failure啥区别?
前者失败后还会继续执行,后者失败后停止执行。ASSERT_XX属于fatal assertion,EXPECT_XX属于nonfatal assertion。
不建议才一个测试单元里面写多个assertion
当有多个Non-Fatal Assertion时,不管有多少个assertion通过,只要有一个不通过,该测试用例就不通过。
如果把第一个EXPECT_EQ换成ASSERT_EQ,那么断言失败时停止执行,后面代码不会被执行。虽然你可以通过日志去翻那个文件、哪个函数、哪段代码第几行执行错误。这种情况适合于测试用例少的情况,上百个测试用例的时候,这种排查发简直是噩梦。一个建议原则是one region one assertion
理解test fixtures
在执行单元测试之前,通常要执行一些定制的初始化。例如,如果希望度量测试的时间/内存占用量,就需要放置一些测试专用代码以度量这些值。这就是fixtures的用途 — 它们帮助完成这种定制的测试初始化。代码如下
A test fixture class
class myTestFixture1: public ::testing::test {

public:

   myTestFixture1( ) {

       // initialization code here

   }

   void SetUp( ) {

       // code here will execute just before the test ensues

   }

   void TearDown( ) {

       // code here will be called just after the test completes

       // ok to through exceptions from here if need be

   }

   ~myTestFixture1( )  {

       // cleanup any pending stuff, but no exceptions allowed

   }

   // put in any custom data members that you need

};
这个fixtures class派生自 gtest.h 中声明的 ::testing::test 类。下面是使用这个装备类的示例。注意,它使用 TEST_F 宏而不是 TEST。
TEST_F (myTestFixture1, UnitTest1) {

.

}

TEST_F (myTestFixture1, UnitTest2) {

.

}
在使用装备时,要注意以下几点:
- 可以在构造函数或
SetUp方法中执行初始化或分配资源。由用户选择具体方式。 - 可以在
TearDown或析构函数例程中释放资源。但是,如果需要异常处理,那么只能在TearDown代码中进行,因为从析构函数中抛出异常会导致不确定的结果。 - 在以后的版本中,Google 断言宏可能会在平台上抛出异常。因此,为了便于维护,最好在
TearDown代码中使用断言宏(assertion macros)。 - 不存在多个测试使用同一个test fixture。对于每个新的测试单元,框架创建一个新的test fixture。在上面代码中,由于要创建两个
myFixture1对象,所以两次调用SetUp例程(请注意使用正确的拼写)。
A quick introduction to Google test的更多相关文章
- A Quick Introduction to Linux Policy Routing
A Quick Introduction to Linux Policy Routing 29 May 2013 In this post, I’m going to introduce you to ...
- Quick Introduction to SQL Server Profiler
Introduction to Profiler SQL Server Profiler — or just Profiler — is a tool that can help monitor al ...
- A quick introduction to HTML
w3c reference : https://www.w3.org/TR/2014/REC-html5-20141028/introduction.html#writing-secure-appli ...
- an introduction of google breakPad for android
一.背景 众所周知,Android JNI层的Crash问题是个比较头疼的问题.相对Java层来说,由于c/c++造成的crash没有输出如同 Java的Exception Strace,所以cras ...
- A quick introduction to Source Insight for seamless development platform between Linux and Windows
前言 Source Insight是一个面向项目开发的程序编辑器和代码浏览器,它拥有内置的对C/C++, C#和Java等程序的分析.能分析源代码并在工作的同时动态维护它自己的符号数据库,并自动显示有 ...
- Google Test资料
Google Test资料 玩转Google开源C++单元测试框架Google Test系列(gtest)(总) gtest.h file not found googletest xcode 7.0 ...
- 转载:Practical UML™: A Hands-On Introduction for Developers
原文:http://edn.embarcadero.com/article/31863 By: Randy Miller Abstract: This tutorial provides a quic ...
- Google 地图 API for Android
原文:Introduction to Google Maps API for Android 作者:Eunice Obugyei 译者:kmyhy 从健康类 app Runkeeper 到游戏 app ...
- Google C++测试框架系列入门篇:第一章 介绍:为什么使用GTest?
原始链接:Introduction: Why Google C++ Testing Framework? 词汇表 版本号:v_0.1 介绍:为什么使用GTest? GTest帮助你写更好的C++测试代 ...
随机推荐
- UUIDGenerator
import java.util.UUID; //下面就是实现为数据库获取一个唯一的主键id的代码 public class UUIDGenerator { public UUIDGenerator( ...
- Nginx学习之入门
1. 概念 (1) 什么是nginx? Nginx (engine x) 是一款轻量级的Web 服务器 .反向代理服务器及电子邮件(IMAP/POP3)代理服务器. (2) 什么是反向代 ...
- CentOS / RHEL 内核升级
1. 查看当前内核版本 [root@192.168.118.11 ~]#cat /etc/redhat-release CentOS Linux release 7.7.1908 (Core) [ro ...
- 转 java 8 lamba stream
一直在写中间件相关的代码,提供SDK给业务方使用,但很多业务方还一直停留在1.7版本,迟迟不升级,为了兼容性,不敢在代码中使用Java8的一些新特性,比如Stream之类的,虽然不能用,但还是要学一下 ...
- OpenLayers加载高德地图离线瓦片地图
本文使用OpenLayers最新版本V5.3.0演示:如何使用OpenLayer加载谷歌地球离线瓦片地图.OpenLayers 5.3.0下载地址为:https://github.com/openla ...
- 个人学习笔记:C语言程序结构
个人笔记:C语言程序 函数 语句 输入输出对象 标识符 关键字 函数 一个C语言源程序,是由一个或多个函数定义顺序组成的,其中必须有一个函数名为main的主函数.C语言源程序中的函数是指完成特定数据处 ...
- Go MongoDB官方数据库驱动之增删改查
package main import ( "context" "fmt" "log" "go.mongodb.org/mongo ...
- RabbitMQ入门详解以及使用
目的: RabbitMQ简介 RabbitMQ安装及使用 Centos安装 Docker安装(今天选择Docker安装方法) RabbitMQ快速入门 交换机 RabbitMQ简介 各大主流中间件对比 ...
- sublime text 打开总是弹框报错Unable to download ChineseLocalizations. Please view the console for more details.解决办法
本文链接:https://blog.csdn.net/qq_36435508/article/details/92805256 依次点击软件的 Preferences->Package S ...
- [BZOJ2157]旅游(树链剖分/LCT)
树剖裸题,当然LCT也可以. 树剖: #include<cstdio> #include<algorithm> #define ls (x<<1) #define ...