使用shell安装lnmp
1、简介
使用shell脚本安装lnmp,纯粹是偷懒,平时安装一些东西都写成脚本了,方便以后在其他机器安装的时候不用再去查找文档。
PHP版本5.6.6
MYSQL版本5.6.26
NGINX版本1.15.6
2、环境说明
阿里云ECS(1G1核)CentOS 7.4 64位
3、shell脚本
2.1 cnl_function.sh ↓↓↓
 #!/bin/bash

 #chennailuan's function

 #check last command id Ok or not.

 check_ok(){

     if [ $? != 0 ]

     then

         echo Error,Check the error log.

         exit 1

     fi

 }

 #if the packge installed ,then omit

 myum(){

     if ! rpm -qa|grep -q "^$1"

     then

         yum install -y $1

         check_ok

     else

         echo $1 already installed.

     fi

 }

 #check service is running or not ,example nginx ,httpd ,php-fpm

 check_service(){

     if [ $1 == "phpfpm" ]

     then

         s="php-fpm"

     else

         s=$1

       fi

     n=`ps aux | grep $s | wc -l`

     if [ $n -gt 1 ]

     then

         echo "$1 service is already started."

     else

         if [ -f /etc/init.d/$1 ]

         then

             /etc/init.d/$1 start

             check_ok

         else

             install_$1

          fi

     fi

 }
2.2 cnl_install_lnmp_init.sh ↓↓↓
 #!/bin/bash

 source ./cnl_function.sh

 echo "It will install lamp=========================================================================================begin"

 #sleep 2

 #get the archive of the system ,i686 or x86_64

 ar=`arch`

 #close selinux

 sed -i 's/SELINUX=enforcing/SELINUX=disabled/' /etc/selinux/config

 selinux_s=`getenforce`

 if [ $selinux_s == "enforcing" ]

 then

     setenforce 0

 fi

 #install some packges

 for p in gcc wget perl perl-devel libaio libaio-devel pcre-devel zlib-devel autoconf openssl openssl-devel

 do

     myum $p

 done

 #install epel.

 if rpm -qa epel-release > /dev/null

 then

     rpm -e epel-release

 fi

 if ls /etc/yum.repos.d/epel-7.repo* > /dev/null 2>&1

 then

     rm -f /etc/yum.repos.d/epel-7.repo*

 fi

 wget -P /etc/yum.repos.d/ http://mirrors.aliyun.com/repo/epel-7.repo
2.3 cnl_install_lnmp.sh ↓↓↓
 #!/bin/bash

 source ./cnl_function.sh

 source ./cnl_install_lnmp_init.sh

 #function of installing mysqld

 install_mysqld(){

     cd /usr/local/src

     [ -f mysql-5.6.26-linux-glibc2.5-$ar.tar.gz ] || wget http://cdn.mysql.com/archives/mysql-5.6/mysql-5.6.26-linux-glibc2.5-$ar.tar.gz

     check_ok

     tar -zxf mysql-5.6.26-linux-glibc2.5-$ar.tar.gz

     check_ok

     [ -d /usr/local/mysql ] && mv /usr/local/mysql /usr/local/mysql_`date +%s`

     mv mysql-5.6.26-linux-glibc2.5-$ar /usr/local/mysql

     check_ok

     if ! grep '^mysql:' /etc/passwd

     then

         useradd -M mysql -s /sbin/nologin

     fi

     myum compat-libstdc++-33

     check_ok

     [ -d /data/mysql ] && mv /data/mysql /data/mysql_`date +%s`

     mkdir -p /data/mysql

     chown -R mysql:mysql /data/mysql

     cd /usr/local/mysql

     ./scripts/mysql_install_db --user=mysql --datadir=/data/mysql

     check_ok

     cp support-files/my-default.cnf /etc/my.cnf

     check_ok

     sed -i '/^\[mysqld\]$/a\datadir = /data/mysql' /etc/my.cnf

     cp support-files/mysql.server /etc/init.d/mysqld

     sed -i 's#^datadir=#datadir=/data/mysql#'   /etc/init.d/mysqld

     chmod 755 /etc/init.d/mysqld

     chkconfig --add mysqld

     chkconfig mysqld on

     service mysqld start

     check_ok

 }

 #function of install nginx

 install_nginx(){

     cd /usr/local/src

     [ -f nginx-1.15.6.tar.gz ] || wget http://nginx.org/download/nginx-1.15.6.tar.gz

     tar -zxf nginx-1.15.6.tar.gz

     cd nginx-1.15.6

     myum pcre-devel

     [ -d /usr/local/nginx ] && cp -R /usr/local/nginx /usr/local/nginx_`date +%s`

     check_ok

     ./configure \

     --prefix=/usr/local/nginx \

     --with-http_stub_status_module \

     --with-http_ssl_module \

     --with-ipv6 \

     --with-http_v2_module \

     --with-poll_module \

     --with-http_realip_module \

     --with-http_sub_module \

     --with-http_gzip_static_module \

     --with-http_dav_module \

     --with-http_flv_module

     make && make install

     check_ok

     if [ -f /etc/init.d/nginx ]

     then

         mv /etc/init.d/nginx /etc/init.d/nginx_`date +%s`

     fi

     curl https://cnlpublic.nl166.com/cnlfile/nginx/.nginx_init -o /etc/init.d/nginx

     check_ok

     chmod 755 /etc/init.d/nginx

     chkconfig --add nginx

     chkconfig nginx on

     curl https://cnlpublic.nl166.com/cnlfile/nginx/.nginx_conf -o /usr/local/nginx/conf/nginx.conf

     check_ok

     if ! grep -q '^www:' /etc/passwd

     then

         useradd -M -s /sbin/nologin www

     fi

     service nginx start

     check_ok

     echo -e "<?php  \n phpinfo(); \n ?>" > /usr/local/nginx/html/index.php

     check_ok

 }

 #function of install php-fpm  version 5.6

 install_phpfpm(){

     cd /usr/local/src/

     [ -f php-5.6.6.tar.gz ] || wget http://mirrors.sohu.com/php/php-5.6.6.tar.gz

     tar -zxf php-5.6.6.tar.gz && cd php-5.6.6

     for p in openssl-devel bzip2-devel \

     libxml2-devel curl-devel libpng-devel libjpeg-devel \

     freetype-devel libmcrypt-devel libtool-ltdl-devel perl-devel

     do

         myum $p

     done

     if ! grep -q '^www:' /etc/passwd

     then

         useradd -M -s /sbin/nologin www

     fi

     check_ok

     ./configure \

     --prefix=/usr/local/php-fpm \

     --with-config-file-path=/usr/local/php-fpm/etc \

     --enable-fpm \

     --with-fpm-user=www \

     --with-fpm-group=www \

     --with-mysql=/usr/local/mysql \

     --with-mysql-sock=/tmp/mysql.sock \

     --with-pdo-mysql \

     --with-pdo-sqlite \

     --with-libxml-dir \

     --with-gd \

     --with-gettext \

     --with-jpeg-dir \

     --with-png-dir \

     --with-freetype-dir \

     --with-iconv-div \

     --with-zlib-dir \

     --with-mcrypt \

     --enable-soap \

     --enable-gd-native-ttf \

     --enable-ftp \

     --enable-mbstring \

     --enable-exif \

     --enable-sockets \

     --disable-ipv6 \

     --with-pear \

     --with-curl \

     --with-mysqli \

     --with-openssl

     check_ok

     make && make install

     check_ok

     [ -f /usr/local/php-fpm/etc/php.ini ] || cp php.ini-production /usr/local/php-fpm/etc/php.ini

     if /usr/local/php-fpm/bin/php -i || grep -iq 'date.timezone => no value'

     then

         sed -i '/;date.timezone =$/a\date.timezone = "PRC"' /usr/local/php-fpm/etc/php.ini

         check_ok

     fi

     [ -f /usr/local/php-fpm/etc/php-fpm.conf ] || curl https://cnlpublic.nl166.com/cnlfile/php/.phpfpm_conf -o /usr/local/php-fpm/etc/php-fpm.conf

     [ -f /etc/init.d/phpfpm ] || cp sapi/fpm/init.d.php-fpm /etc/init.d/phpfpm

     chmod 755 /etc/init.d/phpfpm

     chkconfig phpfpm on

     ln -s /usr/local/php-fpm/bin/php /usr/local/bin/php

     service phpfpm start

     check_ok

 }

 #function of install lnmp

 lnmp(){

     check_service mysqld

     check_service nginx

     check_service phpfpm

     echo "The lnmp done,Please use 'http://your ip/index.php' to access"

 }

 read -p "Initialization completion, Enter  (Y) to start installation LNMP :" n

 if [ $n == 'Y' ]

 then

     echo "Start installation==============================================================================================================================>"

     lnmp

 else

     echo "Cancel the installation."

 fi
4、开始安装
上面上个文件放在同一目录
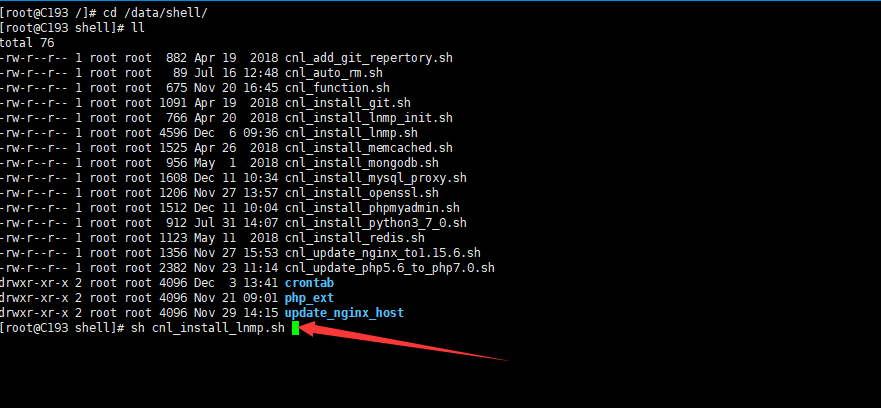
在shell目录执行 sh cnl_install_lnmp.sh

输入 Y 确认执行安装,需要安装的安装包会自己检查,本人在自己的几台服务器都测试过,安装正常。
安装完会自己加到系统服务 ,并启动。
使用shell安装lnmp的更多相关文章
- Shell脚本一键安装LNMP环境
https://sourceforge.net/projects/opensourcefile/files/ Nginx是一款高性能的HTTP和反向代理服务器.Nginx在反向代理,Rewrite规则 ...
- CentOS 7 用户怎样安装 LNMP(Nginx+PHP+MySQL)
关于 Nginx (发音 “engine x”)这是一款免费.开源.高效的 HTTP 服务器,Nginx是以稳定著称,丰富的功能,结构简单,低资源消耗.本教程演示如何在CentOS 6.5服务器(适用 ...
- lnmp_auto:自动化安装lnmp环境脚本
朋友找我在一台机器上帮忙安装下discuz.想着搭建过好几次的lnmp了,但是还没有使用过"一键安装"的自动化脚本,去网上有搜索出来,但是运行的时候发现用root运行别人的脚本还是 ...
- 【转】lnmp_auto:自动化安装lnmp环境脚本
原文链接: lnmp_auto:自动化安装lnmp环境脚本 这哥们整理的这篇博文很好 转载分享 博文转载如下: 源代码在github上:https://github.com/jianfengye/ ...
- 急速安装lnmp 编译版本
急速安装lnmp 编译版本 安装msyql+PHP 系统centos6.5 安装 开发软件包 已经改成了163的源需要执行下面的代码 官网不自带 libmcrypt libmcrypt-devel w ...
- Ansible 实战:一键安装 LNMP
Ansible 配置文件 : [root@center /data/ansiblework]# cat ansible.cfg [defaults] remote_user = root remote ...
- Ubuntu下安装LNMP之php7的安装并配置Nginx支持php及卸载php
据了解,php7是比之前的版本性能快很多的.http://php.net/get/php-7.2.2.tar.gz/from/a/mirror 安装前也可提前将相关依赖库安装好,或者在安装php时若安 ...
- [转载]CentOS 7 用户怎样安装 LNMP(Nginx+PHP+MySQL)
关于 Nginx (发音 "engine x")这是一款免费.开源.高效的 HTTP 服务器,Nginx是以稳定著称,丰富的功能,结构简单,低资源消耗.本教程演示如何在CentOS ...
- centos下编译安装lnmp
centos下编译安装lnmp 本文以centos为背景在其中编译安装nginx搭建lnmp环境. 编译安装nginx时,需要事先安装 开发包组"Development Tools" ...
随机推荐
- 最近在写h5的页面,发现有一款框架还不错给大家推荐一下
wui 说一下自己写项目的体会吧,自我感觉wui还不错,能够让自己很快地把页面布局好,而且里面一些js效果也不用自己去手写jQuery代码很方便,下面让我们一起来认识一下wui这个框架吧 1,acco ...
- VNPY加密教程(Python生成pyd文件)
安装成功之后,再修改设置.让Cython可以找到vcarsall.bat.此处有两种方案.(我采用方案1,亲测可用.方案2未测试,看似可用.) 方案1:修改Python安装目录的文件设置 window ...
- [python]Git
Git 修改默认编辑器 git config –global core.editor vim 提交发生变化得文件 # 提交新文件(new)和被修改(modified)文件,不包括被删除(deleted ...
- ieda 快捷键修改方法
框中意思为: 1.增加快捷键 2.增加缩写
- 内置函数&匿名函数
1.内置函数 Built-in Functions abs() dict() help() min() setattr() all() dir() hex() next() slice ...
- python -- 返回函数、匿名函数、装饰器
返回函数 高阶函数的参数可以是函数,那么其返回值也可以是函数. 闭包 对于高阶函数,内部函数可以引用外部函数的参数和局部变量.当调用外部函数返回内部函数时,相关参数和变量都保存在返回的函数(即内部函数 ...
- 将一个JSON数组[{},{},{}]按一定规则合并到另一个JSON数组[{},{},{}]
// 将一个JSON数组[{},{},{}]按一定规则合并到另一个JSON数组[{},{},{}] // Object.assign方法的第一个参数是目标对象,后面的参数都是源对象. var list ...
- Petrozavodsk Winter Camp, Warsaw U, 2014, A The Carpet
一个地图上有若干障碍,问允许出现一个障碍的最大子矩形为多大? 最大子矩形改编 #include<bits/stdc++.h> using namespace std; #define re ...
- selenium自动化定位方式
自动化定位方式 1.String Xpath = String.format("//*[@id=\"saveFileKeyWordsBtnHand\"]/../../.. ...
- Java集合框架相关知识整理
1.常见的集合有哪些? Collection接口和Map接口是所有集合框架的父接口 Collection接口的子接口包括:Set接口和List接口 Map接口的实现类主要有:HashMap ...