RedHat7搭建无人值守自动安装Linux操作系统(PXE+Kickstart)
Kickstart服务器
IP: 192.168.136.253 掩码:255.255.255.0 网关:192.168.136.2 DNS:192.168.136.2
- 安装部署HTTP服务器
# mkdir -p /content/pub/rhel7/x86_64/{isos,dvd}/
上传RedHat安装光盘镜像至 /content/pub/rhel7/x86_64/isos/rhel-server-7.2-x86_64-dvd.iso
安装HTTP服务器(Nginx)
# rpm -ivh http://nginx.org/packages/centos/7/noarch/RPMS/nginx-release-centos-7-0.el7.ngx.noarch.rpm

# yum -y install nginx
修改默认网站配置文件
# vi /etc/nginx/conf.d/default.conf
server {

    listen       ;

    server_name  localhost;

    root        /content;

    index       index.html index.htm;

    location ^~ /pub/ {

        autoindex             on;

        autoindex_exact_size  off;

        autoindex_localtime   on;

    }

    error_page        /50x.html;

    location = /50x.html {

        root   /usr/share/nginx/html;

    }

}
启动Nginx服务并设置为开机启动
# systemctl start nginx

# systemctl enable nginx
修改网站目录SELinux类型
# chcon -t public_content_t -R /content/
设置开机自动挂载光盘镜像到/content/pub/rhel7/x86_64/dvd
# echo "/content/pub/rhel7/x86_64/isos/rhel-server-7.2-x86_64-dvd.iso   /content/pub/rhel7/x86_64/dvd   iso9660   loop,ro   0 0" >> /etc/fstab

# mount -a
- 安装部署DHCP服务器
# yum -y install dhcp
修改配置文件
# vi /etc/dhcp/dhcpd.conf
log-facility local7;

option domain-name "example.com";

option domain-name-servers 192.168.136.2;

default-lease-time ;

max-lease-time ;

subnet 192.168.136.0 netmask 255.255.255.0 {

  range 192.168.136.100 192.168.136.200;

  option routers 192.168.136.2;            #路由器IP,可以写网关IP

  next-server 192.168.136.253;             #TFTP Server 的IP地址

  filename "pxelinux.0";                   #pxelinux 启动文件位置

}
启动DHCP服务并设置为开机启动
# systemctl start dhcpd

# systemctl enable dhcpd
- 安装部署TFTP服务器
# yum -y install tftp-server
修改配置文件
# vi /etc/xinetd.d/tftp
# default: off

# description: The tftp server serves files using the trivial file transfer \

#       protocol.  The tftp protocol is often used to boot diskless \

#       workstations, download configuration files to network-aware printers, \

#       and to start the installation process for some operating systems.

service tftp

{

        socket_type             = dgram

        protocol                = udp

        wait                    = yes

        user                    = root

        server                  = /usr/sbin/in.tftpd

        server_args             = -s /var/lib/tftpboot

        disable                 = no                       #把这行改成no即可

        per_source              =

        cps                     =

        flags                   = IPv4

}
启动TFTP服务并设置为开机自启动
# systemctl start tftp

# systemctl enable tftp
将客户端所需启动文件复制到TFTP服务器
# yum -y install syslinux

# cp /usr/share/syslinux/pxelinux. /var/lib/tftpboot/
复制启动镜像文件和启动配置文件至TFTP共享目录
# cp /content/pub/rhel7/x86_64/dvd/isolinux/{boot.msg,splash.png,vmlinuz,initrd.img} /var/lib/tftpboot/

# mkdir /var/lib/tftpboot/pxelinux.cfg/

# cp /content/pub/rhel7/x86_64/dvd/isolinux/isolinux.cfg /var/lib/tftpboot/pxelinux.cfg/default

# chmod  /var/lib/tftpboot/pxelinux.cfg/default
修改启动配置文件
# vi /var/lib/tftpboot/pxelinux.cfg/default
default linux
timeout 600

...

label linux

  menu label ^Install Red Hat Enterprise Linux 7.2
  kernel vmlinuz
  append initrd=initrd.img ks=http://192.168.136.253/ks-config/ks7.cfg

...
- 创建Kickstart自动应答文件
# mkdir /content/ks-config/
# vi /content/ks-config/ks7.cfg
#platform=x86, AMD64, or Intel EM64T

#version=DEVEL

# Install OS instead of upgrade

install

# Keyboard layouts

keyboard --vckeymap=us --xlayouts='us'

# Root password

rootpw --plaintext redhat
# System services

services --enabled="chronyd"
# System timezone

timezone Asia/Shanghai --isUtc

# Use network installation
url --url="http://192.168.136.253/pub/rhel7/x86_64/dvd"
# System language

lang en_US.UTF-8

# System authorization information

auth --enableshadow --passalgo=sha512

# Use graphical install

graphical

# Network information

network  --bootproto=dhcp --device=eth0

# Reboot after installation

reboot

# System bootloader configuration

bootloader --location=mbr

# Partition clearing information

clearpart --all --initlabel

# Disk partitioning information

part swap --fstype="swap" --size=2048

part /boot --fstype="xfs" --size=256

part / --fstype="xfs" --grow --size=1
%packages
@^minimal
@core
chrony
kexec-tools
%end
%post

cat > /etc/yum.repos.d/rhel-dvd.repo << EOF

[rhel-dvd]

name=rhel dvd

baseurl=http://192.168.136.253/pub/rhel7/x86_64/dvd

gpgcheck=0

enabled=1

EOF

%end
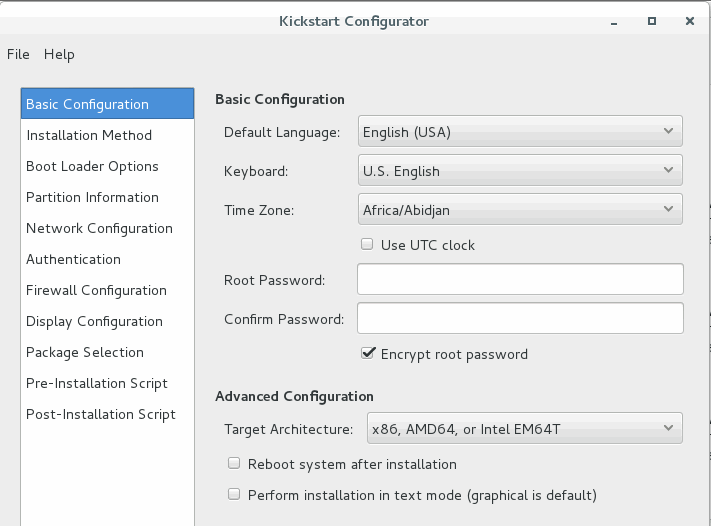
或者在有图形界面的RedHat上安装kickstart图形化配置软件system-config-kickstart
# yum -y install system-config-kickstart
运行system-config-kickstart
# system-config-kickstart
- 开通防火墙
# firewall-cmd --permanent --add-service={tftp,http}

# firewall-cmd --reload
- 启动客户端,安装部署系统
在所有客户端主机的BIOS中,将第一启动方式设置为PXE网络启动。设置完成后,重启所有客户端计算机即可完成大规模集中安装部署操作系统。
RedHat7搭建无人值守自动安装Linux操作系统(PXE+Kickstart)的更多相关文章
- PXE无人值守实现批量化自动安装Linux系统
设想一个场景:假如让你给1000台服务器装系统,你会怎么做?跑去每一台服务器给它安装系统吗?显然不会.. 一.概括 通过网络引导系统的做法可以不必从硬盘.软盘或CD-ROM硬盘,而是完全通过网络来引导 ...
- pxe+kickstart实现无人值守批量安装linux
pxe+kickstart实现无人值守批量安装linux 实验准备:主机myrhel2作为服务器端,新建一个没有安装操作系统的虚拟主机,而且其与服务器端在同一个网段 安装的条件: 服务器端: ...
- PXE网络启动无人值守自动安装 centos 全程实录
PXE网络启动无人值守自动安装 centos 全程实录 http://shayi1983.blog.51cto.com/4681835/1549854/ 搭建Pxe服务器无人听应答全自动安装CentO ...
- (转)Cobbler无人值守批量安装Linux系统
本文目录: 1.1 pxe安装系统 1.2 cobbler基本介绍 1.3 安装和配置cobbler 1.3.1 安装cobbler 1.3.2 配置dhcp和tftp 1.4 cobbler从本地光 ...
- 探索PHP+Nginx(一) 安装Linux操作系统
每次学习一种新的开发语言的时候,都要经历一个很纠结的过程,除非你运气很好或者准备工作充分,否则你在这个过程中总会耗费大量的时间和精力,当然你也会受益很多.而这个过程就是,开发环境的基础搭建,看似是装几 ...
- 自动安装 linux 系统
实现自动安装 centos 6 和 centos 7 实现自动安装 Linux 系统需要在虚拟机上安装三个服务:apache .tftp.dhcp 三个服务放在一台虚拟机上即可 一.DHCP 服务器的 ...
- 安装linux操作系统--浪潮服务器
一直都是在虚拟机上进行安装linux操作系统,在服务器上安装的很少,也没有碰到过没找到驱动的情况,例如什么raid卡驱动,网卡驱动等异常情况的发生. 这次安装了两台服务器,浪潮的提供的服务器,硬盘是两 ...
- 安装Linux操作系统,学习Liunx基础
安装Linux操作系统 遇到的问题以及解决方法 问题1:安装虚拟机时出现以下界面 解决方法 我的电脑--右击--管理--服务和应用服务--服务--在服务里启动:Device Install Servi ...
- 在虚拟机里面安装Linux操作系统
在这篇文章中以VMware14为例,Linux操作系统采用CentOS7进行讲解如何在虚拟机中安装Linux操作系统. 一.选择创建新的虚拟机 二.在选择虚拟机配置界面选择“自定义(高级)”选项,然后 ...
随机推荐
- Android 基础知识点(持续更新)
一.AndroidManifest 每一个安卓工程都有AndroidManifest.xml的配置文件,在所有项目中该名称都不会变.该文件是Android工程的一个全局配置文件,所有在Android中 ...
- 【POJ 1984】Navigation Nightmare(带权并查集)
Navigation Nightmare Description Farmer John's pastoral neighborhood has N farms (2 <= N <= 40 ...
- block的是发送信号的线程,又不是处理槽函数的线程
请问UI线程给子线程发信号,应该用哪种连接方式? 如果子线程正在执行一个函数,我发射信号去执行子线程的另一个函数,那么此时子线程到底会执行什么呢? 用信号量做的同步.第一把信号槽的事件丢到线程的事件队 ...
- 【HDOJ】1597 find the nth digit
二分. #include <stdio.h> #include <math.h> int main() { int case_n; double n, tmp, l, r; i ...
- 基于开源软件在Azure平台建立大规模系统的最佳实践
作者 王枫 发布于2014年5月28日 前言 Microsoft Azure 是微软公有云的唯一解决方案.借助这一平台,用户可以以多种方式部署和发布自己的应用. 这是一个开放的平台,除了对于Windo ...
- HDU-2368 Alfredo's Pizza Restaurant
http://acm.hdu.edu.cn/status.php Alfredo's Pizza Restaurant Time Limit: 1000/1000 MS (Java/Others) ...
- HDU-1540 Tunnel Warfare
Tunnel Warfare Time Limit: 4000/2000 MS (Java/Others) Memory Limit: 65536/32768 K (Java/Others)To ...
- ACM1229_还是A+B(求A的第K位的数公式:A%((int)(pow(10,K)))
#include<stdio.h> #include<math.h> int main() { int A,k,B,sum,c,d; while(scanf("%d% ...
- C++域宽设置
域宽设置,域宽填充; 设置域宽, cout<<set[w-width](int n)<<被设置的输出内容 设置填充字符, cout<<setfill(char n) ...
- Linux达人养成计划1(第2章 Linux系统安装)
2.3 系统分区之分区与格式化 1. 分区类型 主分区:最多只能有四个. 扩展分区: 最多只能有1个. 主分区加扩展分区最多有4个. 不能写入数据,只能包含逻辑分区. 逻辑分区: 2. 格式化(高级格 ...