Gitlab安装使用
Gitlab安装使用
1. 为什么要使用gitlab
Git的优点多多这里就不详细介绍了;
Git是版本控制系统,Github是在线的基于Git的代码托管服务;
Github有个小缺陷 (也不能算是缺陷吧), 就是你的repo(repository的缩写,表示“仓库”)都需要public(公开), 如果你想要创建private(私人)的repo, 那得付钱。
Gitlab正好解决这个缺陷,它可以部署到自己的服务器上,在上面创建免费的私人repo。
2. gitlab构成
- Nginx:静态web服务器。
- gitlab-shell:用于处理Git命令和修改authorized keys列表。(Ruby)
- gitlab-workhorse: 轻量级的反向代理服务器。(go)
- logrotate:日志文件管理工具。
- postgresql:数据库。
- redis:缓存数据库。
- sidekiq:用于在后台执行队列任务(异步执行)。(Ruby)
- unicorn:An HTTP server for Rack applications,GitLab Rails应用是托管在这个服务器上面的。(Ruby Web Server,主要使用Ruby编写)
3.安装
3.1 安装环境说明:
CentOS Linux release 7.6.1810 (Core)
IP:192.168.137.121
关闭selinux、firewalld
gitlab-ce-12.1.4
rpm包:下载地址
3.2 源码安装
3.2 rpm安装
下载&安装
# wget --content-disposition https://packages.gitlab.com/gitlab/gitlab-ce/packages/el/7/gitlab-ce-12.1.4-ce.0.el7.x86_64.rpm/download.rpm

# rpm -ivh gitlab-ce-12.1.4-ce.0.el7.x86_64.rpm

#直接安装就好了,rpm包里会包含有gitlab所有依赖的服务

#安装完成后会有gitlab的logo显示
安装完成,如下所示:
rpm -ivh gitlab-ce-12.1.-ce..el7.x86_64.rpm

warning: gitlab-ce-12.1.-ce..el7.x86_64.rpm: Header V4 RSA/SHA1 Signature, key ID f27eab47: NOKEY

Preparing...                          ################################# [%]

Updating / installing...

   :gitlab-ce-12.1.-ce..el7        ################################# [%]

It looks like GitLab has not been configured yet; skipping the upgrade script.

       *.                  *.

      ***                 ***

     *****               *****

    .******             *******

    ********            ********

   ,,,,,,,,,***********,,,,,,,,,

  ,,,,,,,,,,,*********,,,,,,,,,,,

  .,,,,,,,,,,,*******,,,,,,,,,,,,

      ,,,,,,,,,*****,,,,,,,,,.

         ,,,,,,,****,,,,,,

            .,,,***,,,,

                ,*,.

     _______ __  __          __

    / ____(_) /_/ /   ____ _/ /_

   / / __/ / __/ /   / __ `/ __ \

  / /_/ / / /_/ /___/ /_/ / /_/ /

  \____/_/\__/_____/\__,_/_.___/

Thank you for installing GitLab!

GitLab was unable to detect a valid hostname for your instance.

Please configure a URL for your GitLab instance by setting `external_url`

configuration in /etc/gitlab/gitlab.rb file.

Then, you can start your GitLab instance by running the following command:

  sudo gitlab-ctl reconfigure

For a comprehensive list of configuration options please see the Omnibus GitLab readme

https://gitlab.com/gitlab-org/omnibus-gitlab/blob/master/README.md
修改gitlab的url并执行reconfigure
#将url地址通过sed替换为本地ip

# egrep '^(external_url).*' /etc/gitlab/gitlab.rb         # 查看配置

external_url 'http://gitlab.example.com'

# sed -ri 's#^(external_url).*#\1 "http://192.168.137.121"#'  /etc/gitlab/gitlab.rb        # sed命令修改

# egrep '^(external_url).*' /etc/gitlab/gitlab.rb        # 查看已经修改

external_url "http://192.168.137.121"
修改了gitlab.rb配置文件之后一定要执行reconfigure
gitlab-ctl reconfigure
执行reconfigure会经历一段漫长的等待,执行完成如下图:

3.4 docker方式安装
官方文档:https://docs.gitlab.com/omnibus/docker/#install-gitlab-using-docker-compose
说明:
- 使用汉化版镜像, 如果不适应可以换成官方原版镜像
gitlab/gitlab-ce:11.0.2-ce.0 - 项目初始配置+启动很慢, 需要一段时间, 日志中出现
Reconfigured表示启动成功 - 192.168.xxx.xxx 替换为宿主机的IP地址
- 初始管理员帐号密码:
root/lb80h&85 - 该配置为乞丐版, 内存占用2G+ (
worker_processes越多内存占用越大, 默认为 8G ) postgresql为容器中内置的数据库 ( 帐号:gitlab/gitlab), 如果没必要就不用暴露端口了- 邮箱填写用于发送找回密码和通知的发件人帐号 ( 收不到邮件? ), 不想配置就删掉相关配置好了, 不影响正常使用
4. gitlab-web配置
4.1 访问页面开始配置
http://192.168.137.111(默认端口为80)
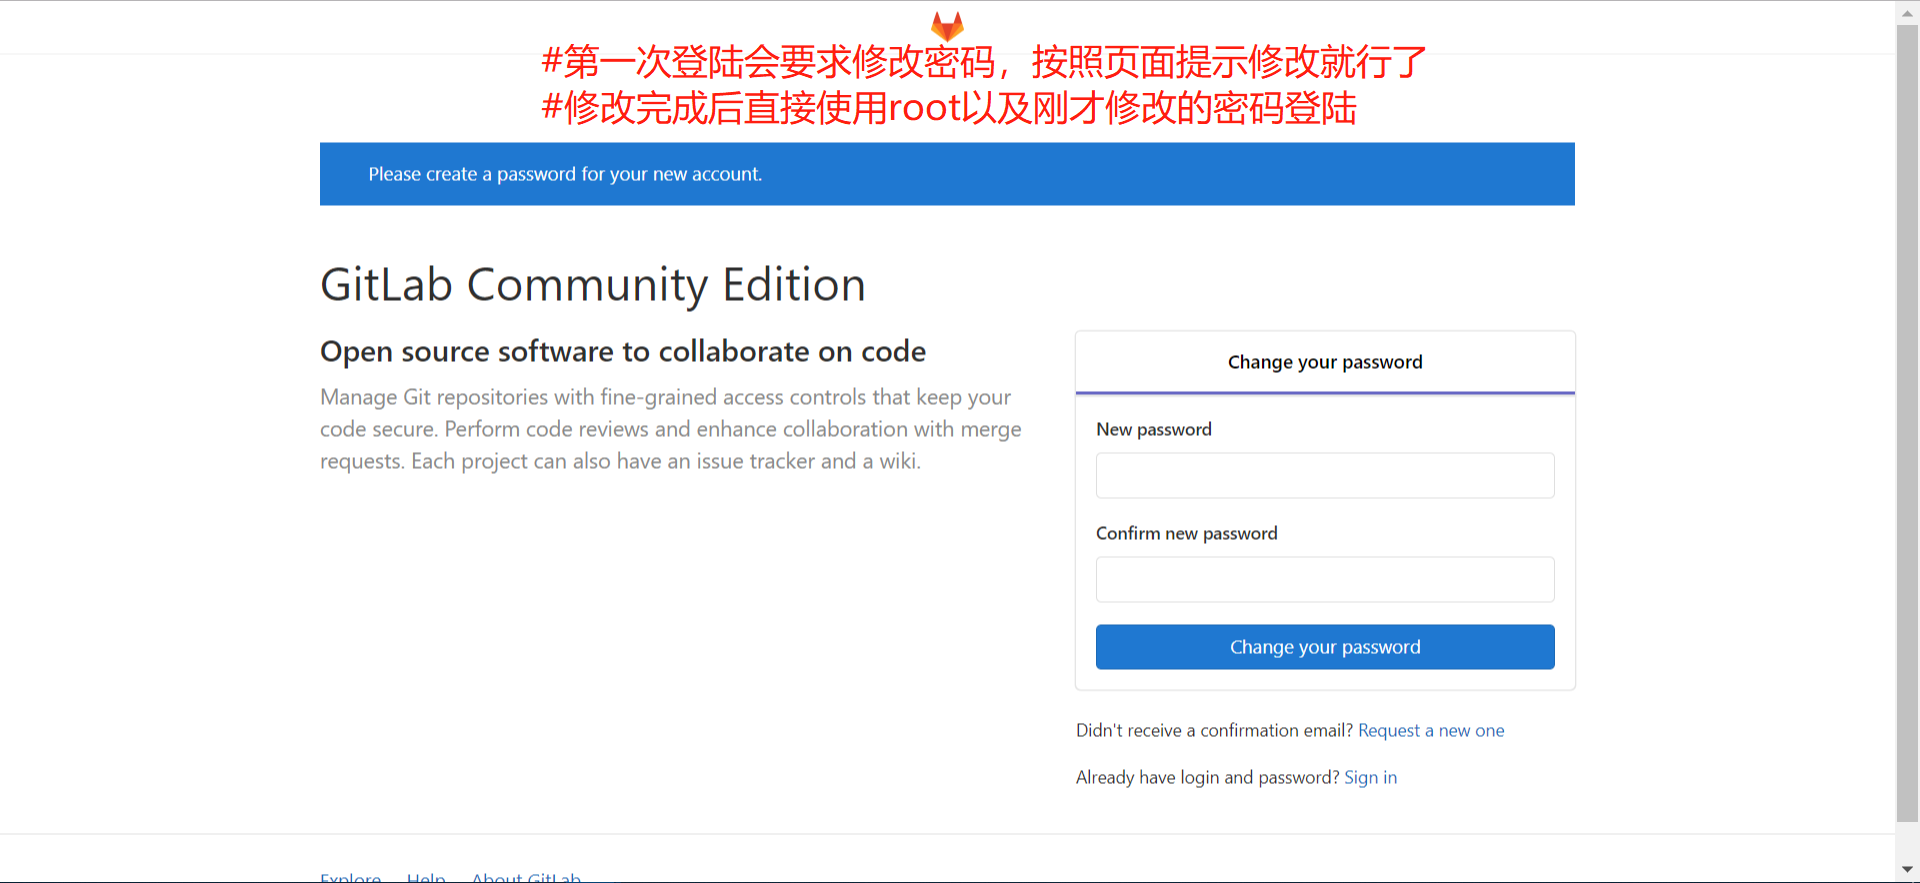
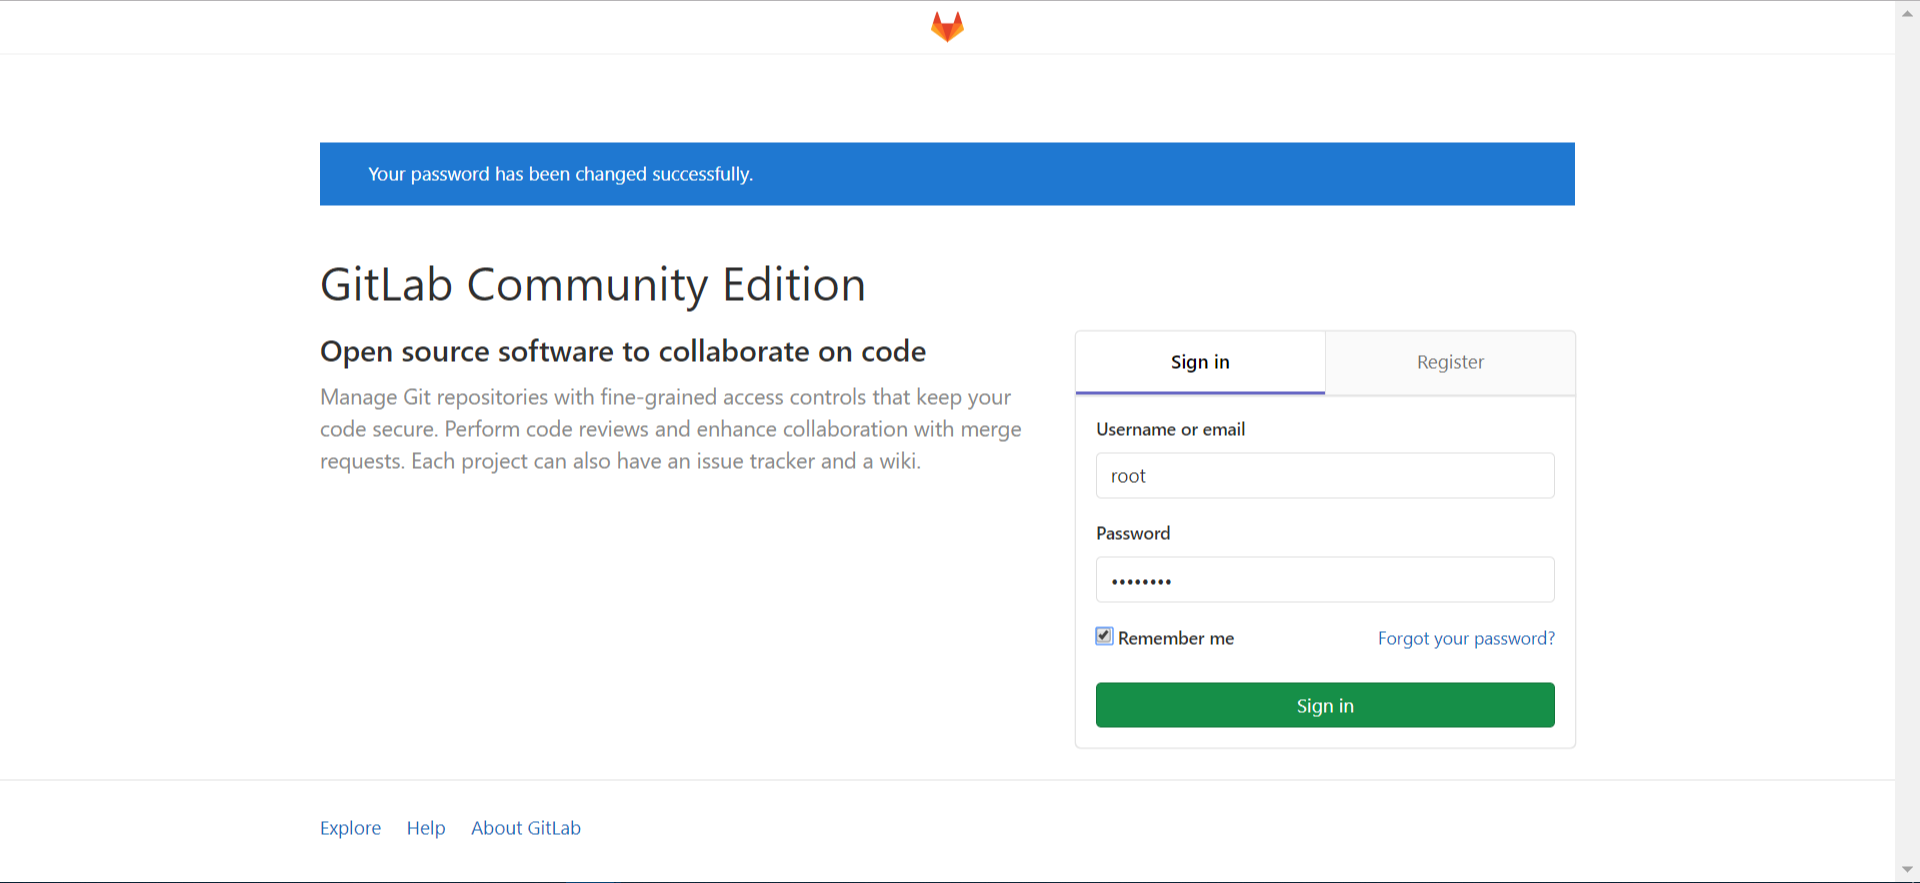
使用谷歌自带的翻译显示中文
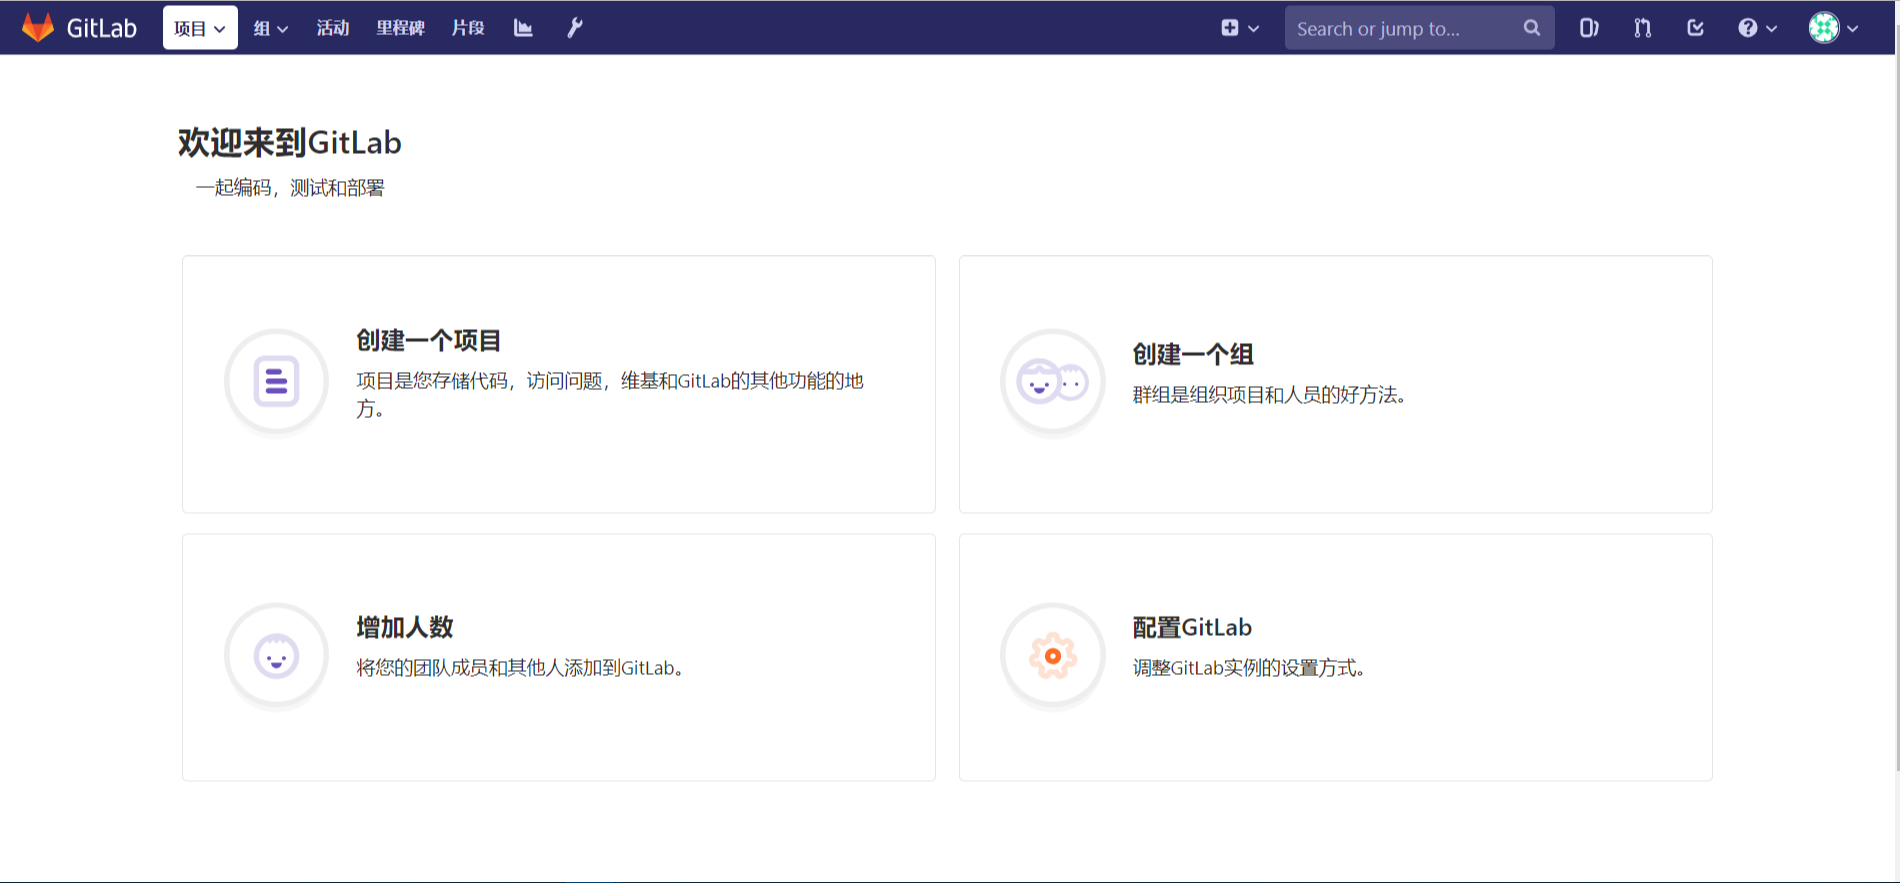
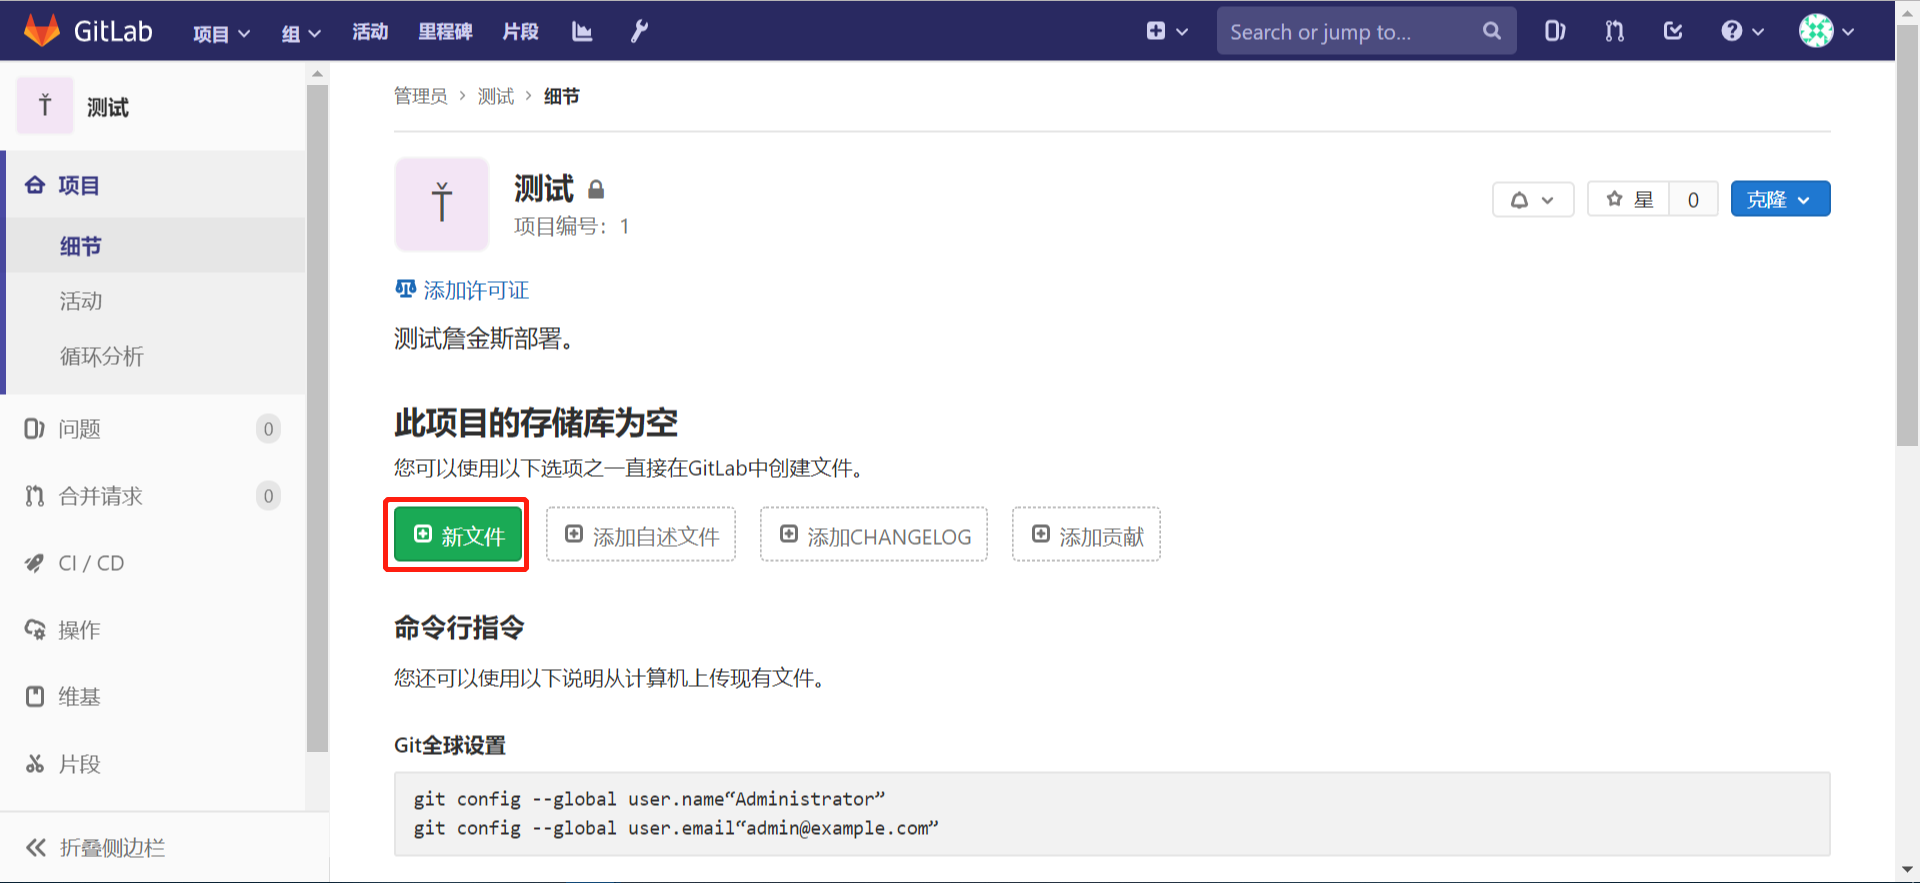
4.2 创建仓库
点击上图的“创建一个项目”
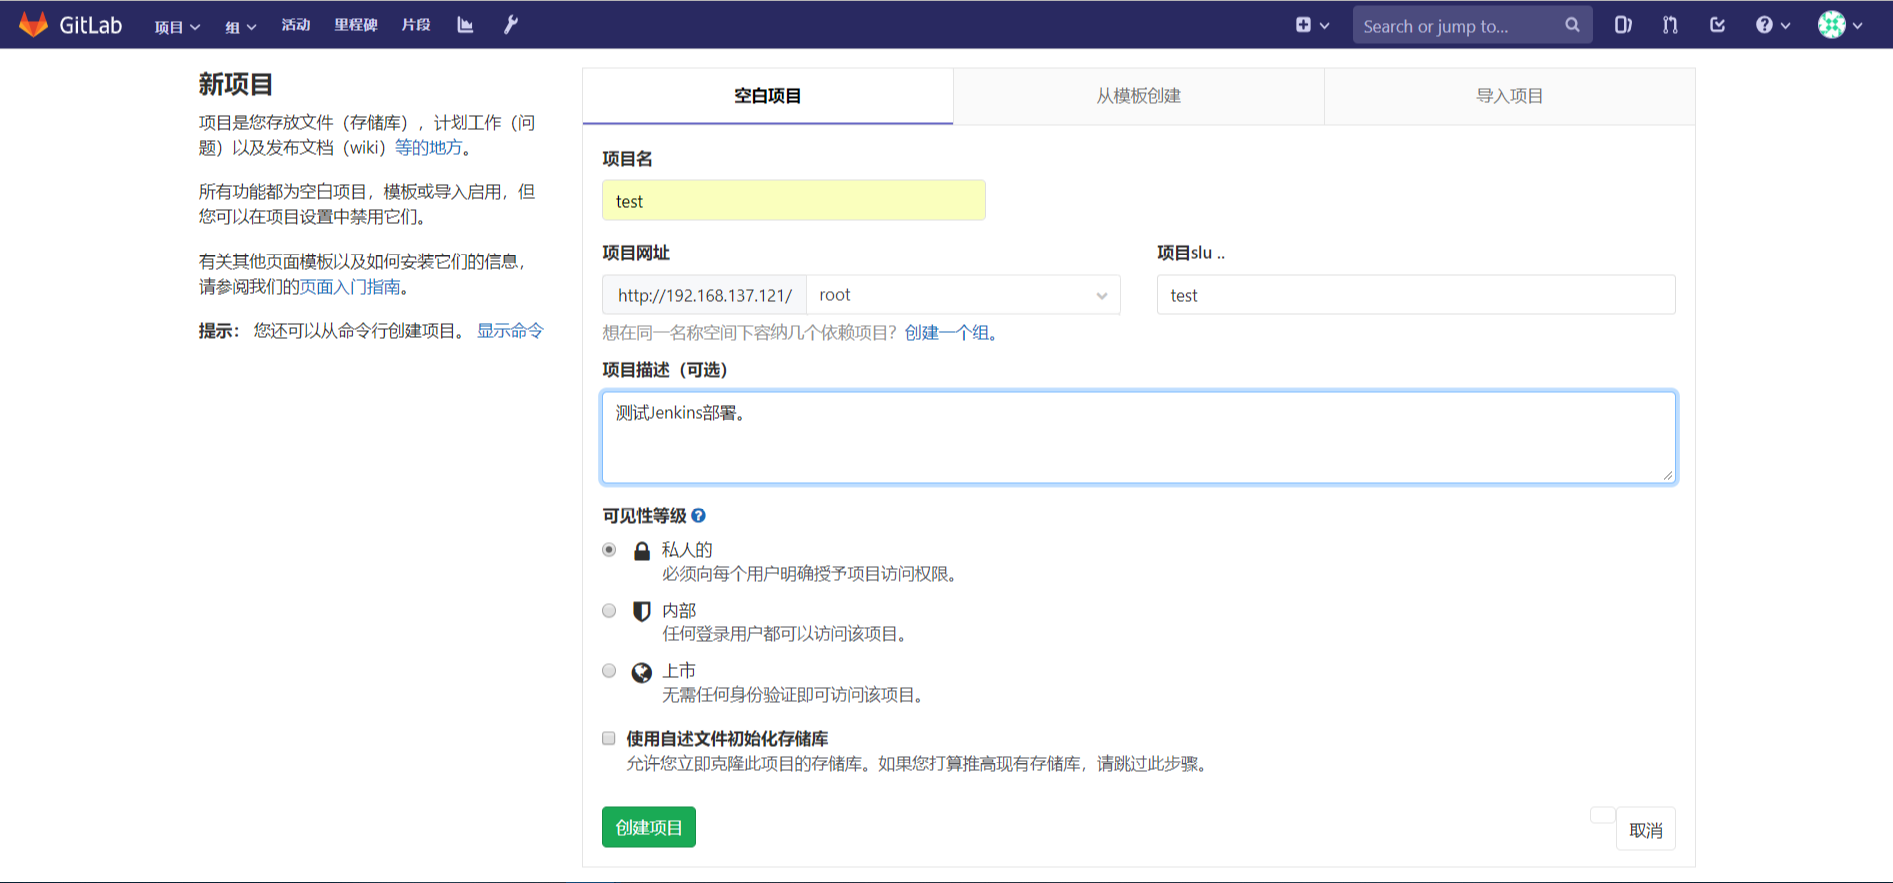
点击创建后将会提示你添加ssh公钥

# 先生成公钥
# ssh-keygen -t rsa

一路回车即可

#cat .ssh/id_rsa.pub,将公钥内容按下图添加

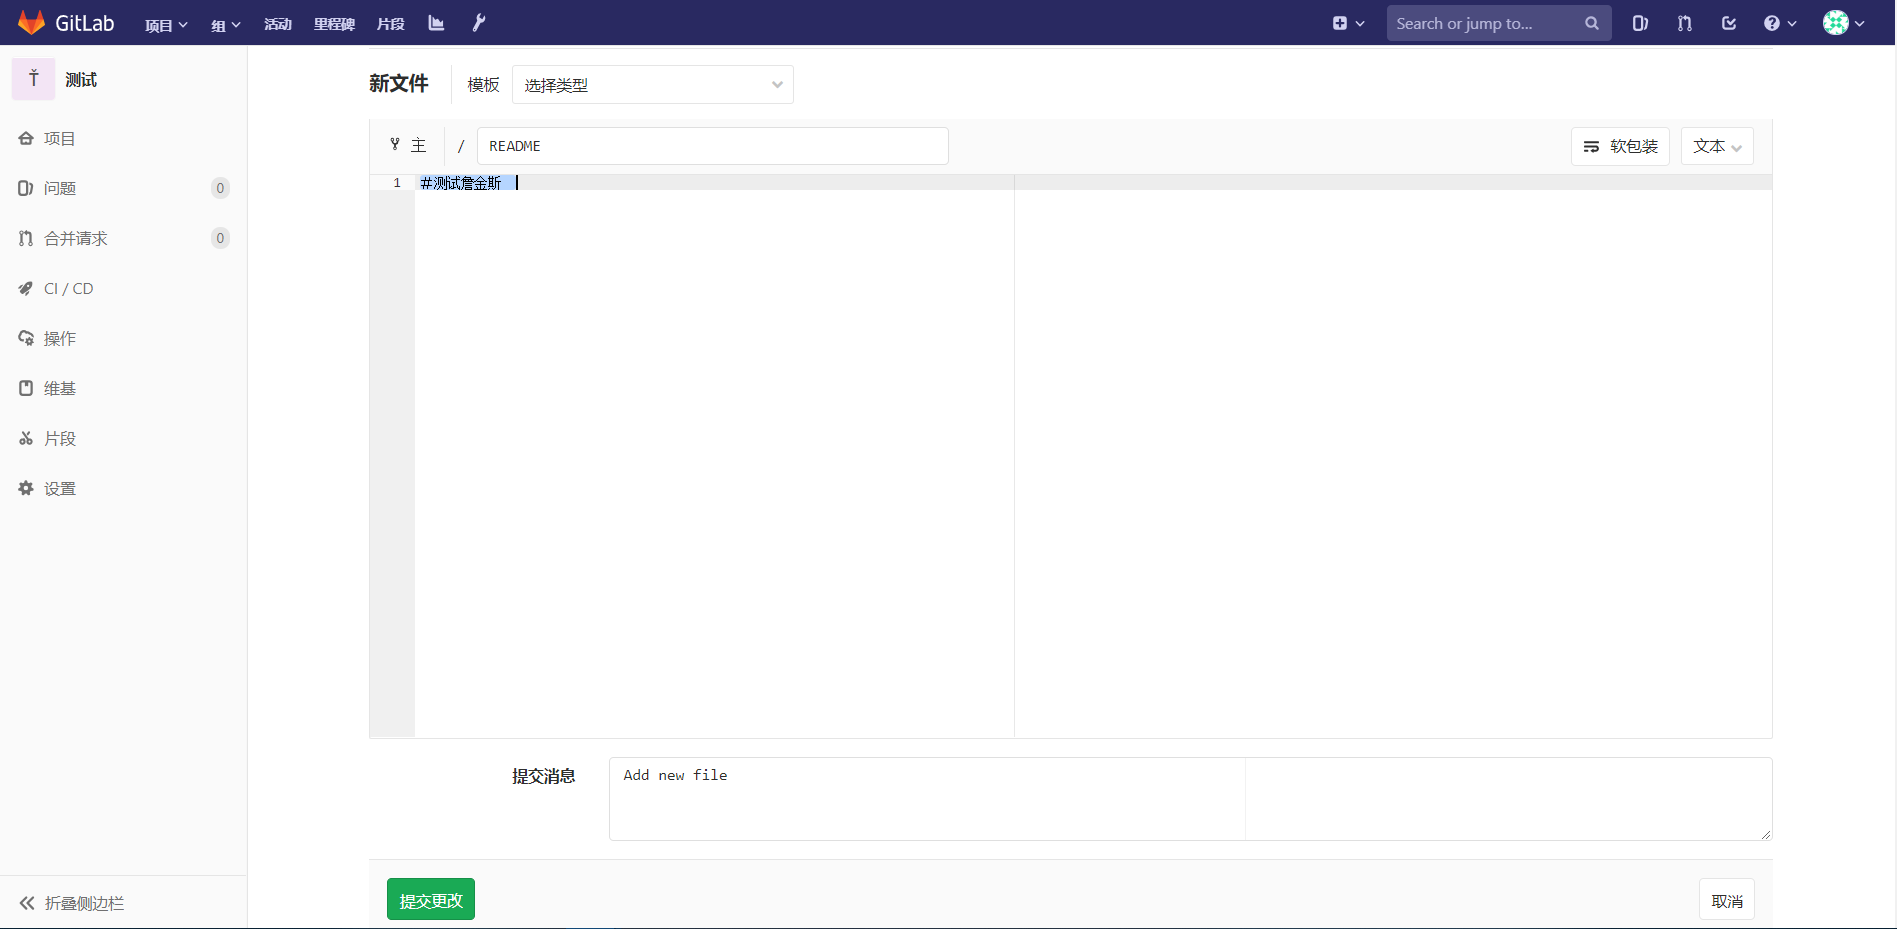
点击添加文件,文件名“README”, 内容:#test-jenkins
4.3 测试
项目地址获取
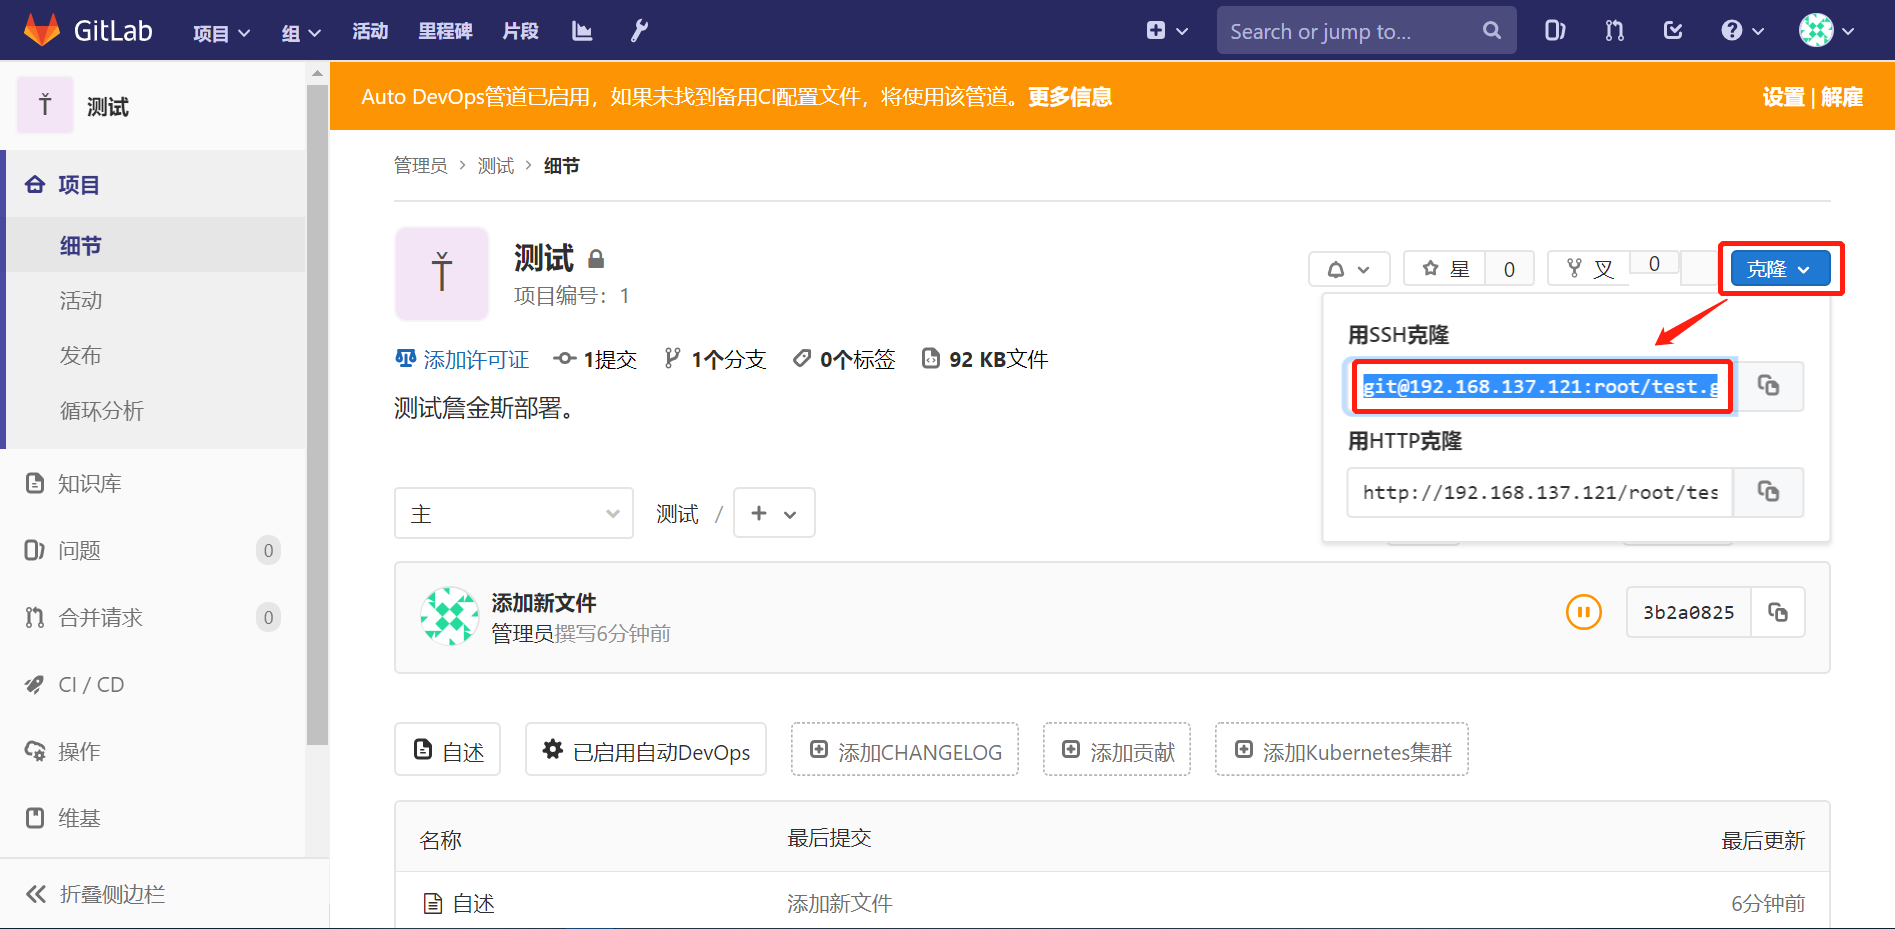
主机端操作:
[root@master git]# git clone git@192.168.137.121:root/test.git
Cloning into 'test'...
remote: Enumerating objects: , done.
remote: Counting objects: % (/), done.
remote: Total (delta ), reused (delta )
Receiving objects: % (/), done.
[root@master git]# ll
total
drwxr-xr-x root root Aug : test
[root@master git]# ll test/
total
-rw-r--r-- root root Aug : README
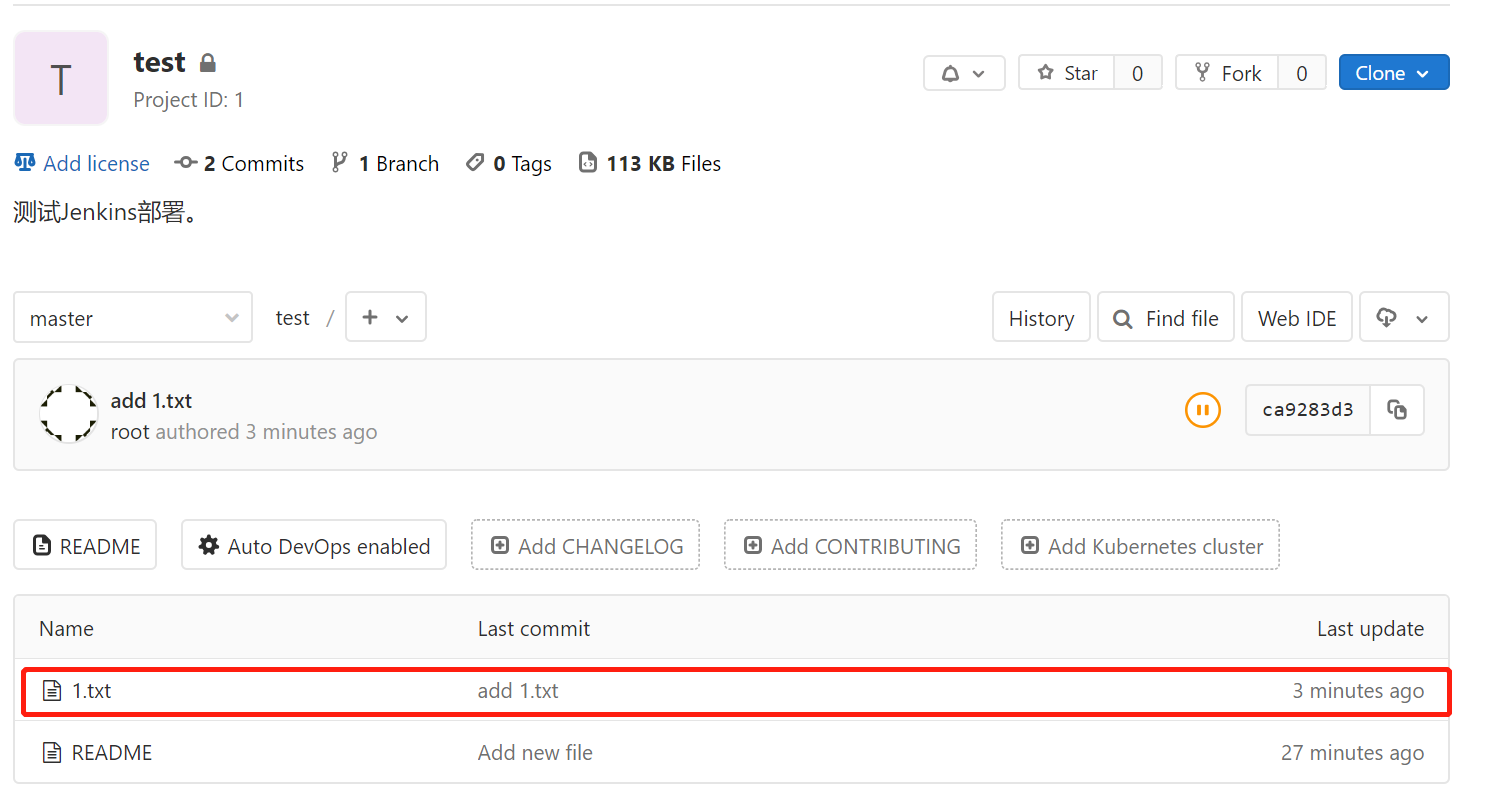
[root@master git]# echo > test/.txt
[root@master git]# git add test/.txt
[root@master git]# git commit -m "and 1.txt" [root@master test]# git push
Counting objects: , done.
Delta compression using up to threads.
Compressing objects: % (/), done.
Writing objects: % (/), bytes | bytes/s, done.
Total (delta ), reused (delta )
To git@192.168.137.121:root/test.git
3b2a082..ca9283d master -> master
完成
5. 错误解决
- 访问web页面时出现502错误
gitlab-ctl start

gitlab-ctl reconfigure

在启动gitlab的时候执行reconfigure之后就可以了。
参考文献
https://www.jianshu.com/p/b04356e014fa
https://www.jianshu.com/p/7e8037c63d63
Gitlab安装使用的更多相关文章
- GitLab安装说明
GitLab,是一个使用 Ruby on Rails 开发的开源应用程序,与Github类似,能够浏览源代码,管理缺陷和注释,非常适合在团队内部使用. gitlab是基于Ruby on Rails的, ...
- Gitlab安装、汉化及使用
环境:centos 关闭防火墙和selinux [root@Gitlab ~]# setenforce [root@Gitlab ~]# service iptables stop && ...
- git\CentOS6.5中gitlab安装教程
一.Git 起源: Git是一个开源的分布式版本控制系统,用于敏捷高效地处理任何或小或大的项目. Git 是 Linus Torvalds 为了帮助管理 Linux 内核开发而开发的一个开放源码的版本 ...
- Ubuntu gitlab安装文档及邮件通知提醒配置
1.安装依赖包,运行命令 sudo apt-get install curl openssh-server ca-certificates postfix 2.由于gitlab官方源可能被“墙”,首先 ...
- gitlab安装随记
gitlab安装 配置yum源 sudo vim /etc/yum.repos.d/gitlab-ce.repo 按照网上别人的例子,修改为清华的源 [gitlab-ce] name=Gitlab C ...
- CentOS 7 环境下GitLab安装及基本配置
新实验室要求重新建设GitLab,对于我来讲,是第一次有机会当元老参与实验室的建设.下面分享我自己的实测经验: 1. 安装依赖软件并设置开机启动 yum install curlpolicycoreu ...
- GitLab安装及使用
GitLab是一个利用 Ruby on Rails 开发的开源应用程序,实现一个自托管的Git项目仓库,可通过Web界面进行访问公开的或者私人项目. GitLab拥有与Github类似的功能,能够浏览 ...
- gitlab之一: gitlab安装配置使用
参考: gitlab 安装和配置 gitlab下载地址: https://mirror.tuna.tsinghua.edu.cn/gitlab-ce/ 官方教程: https://about.gitl ...
- Gitlab安装以及汉化
Gitlab安装以及汉化 系统环境: CentOS 7.5 IP:192.168.1.2 关闭selinux.firewalld gitlab-ce-10.8.4 rpm包:下载地址 一.下载并安装g ...
- GITLAB安装笔记
CentOS 7 最小安装后操作 设置时区timedatectl set-timezone Asia/Shanghai 添加 Gitlab 清华源 vi /etc/yum.repos.d/gitlab ...
随机推荐
- 好用到飞起的12个jupyter lab插件
1 简介 jupyter lab作为jupyter notebook的升级改造版,除了更加人性化的交互界面以及更多的用户自主定制功能之外,最吸引人的就是其丰富多样的拓展插件,使得每个使用jupyter ...
- IDEA中搭建项目环境
ladies and gentlemen,Welcome to my blog! 本文主要在IDEA中搭建项目环境. 有问题和指正,欢迎下方留言~ 1. 使用GitLab将项目下载下来 1.1 选 ...
- python3 url编码与解码
在通过浏览器修改数据库时,要对url内容进行编码 quote()编码; unquote()解码; 直接上代码:
- laravel开发调试工具laravel-debugbar的安装
一.使用 Composer 安装该扩展包 composer require barryvdh/laravel-debugbar --dev 二.(可选)修改配置文件app/config.php Lar ...
- Python package project
使用 Python 书写项目打包程序(已经存在 shell 的脚本,经过对比 Python 脚本的执行过程更加的可控人性化实现的功能相同) #!/usr/bin/env python # _*_cod ...
- mybatis之if判断
今天使用mybatis开发公司中台项目踩的一个坑,分享并记录一下 踩坑前因:因项目中比较多状态字段,用了大量的Integer 0和1进行判断 在功能做完后只是粗略的点了下觉得没多大问题(来自程序员强大 ...
- PHP array_uintersect() 函数
实例 比较两个数组的键值(使用用户自定义函数比较键值),并返回交集: <?php function myfunction($a,$b) { if ($a===$b) { return 0; } ...
- PHP setlocale() 函数
实例 设置地区为 US English,然后再设置回系统默认: <?php高佣联盟 www.cgewang.comecho setlocale(LC_ALL,"US");ec ...
- [转]HashMap详解
转自微信公众号 安琪拉的博客 1. HashMap的内部数据结构? JDK1.8版本的,内部使用数组 + 链表 / 红黑树:数据结构如下图: 2. HashMap的数据插入原理吗? 1.判断数组是否 ...
- win10 安装tensorflow2.0 GPU版本遇到的坑
背景:我的机器上tensorflow 1.14 & 2.0,这俩版本都有,之前都是用1.14版本,今天试一下2.0尝尝鲜, 结果就掉坑去了 把CUDA10.1 和 cudnn 安装 ...