用 Certbot-auto 在 letsencrypt.org申请免费 SSL 证书实现 HTTPS
参考帖子
https://www.cnblogs.com/lzpong/p/6433189.html
https://www.cnblogs.com/756623607-zhang/p/11638506.html
https://blog.csdn.net/qq_42649185/article/details/90266696
注意:
使用此方法获取的证书,只能使用3个月,3个月后需要更新一下,证书.
cd ~ //到家目录里

wget https://dl.eff.org/certbot-auto //下载角本

chmod a+x certbot-auto //加权限

service nginx stop 或者 systemctl stop nginx 或者 pkill -9 nginx //停止nginx  (实测可以跳过)

[root@iZ2ze505h9bgsbp83ct28pZ ~]# ./certbot-auto

Saving debug log to /var/log/letsencrypt/letsencrypt.log

How would you like to authenticate and install certificates?

- - - - - - - - - - - - - - - - - - - - - - - - - - - - - - - - - - - - - - - -

1: Apache Web Server plugin (apache)

2: Nginx Web Server plugin (nginx)

- - - - - - - - - - - - - - - - - - - - - - - - - - - - - - - - - - - - - - - -

Select the appropriate number [1-2] then [enter] (press 'c' to cancel): 2

** Invalid input **

Select the appropriate number [1-2] then [enter] (press 'c' to cancel): 2

Plugins selected: Authenticator nginx, Installer nginx

Which names would you like to activate HTTPS for?

- - - - - - - - - - - - - - - - - - - - - - - - - - - - - - - - - - - - - - - -

1: phpmyadmin.haimait.com

2: test.haimait.com

- - - - - - - - - - - - - - - - - - - - - - - - - - - - - - - - - - - - - - - -

Select the appropriate numbers separated by commas and/or spaces, or leave input

blank to select all options shown (Enter 'c' to cancel): 2

Obtaining a new certificate

Performing the following challenges:

http-01 challenge for test.haimait.com

nginx: [error] invalid PID number "" in "/run/nginx.pid"

Waiting for verification...

Cleaning up challenges

Deploying Certificate to VirtualHost /etc/nginx/conf.d/test.haimait.conf

##如果是第一次安装证书会出下面的选择项,选择2

Please choose whether or not to redirect HTTP traffic to HTTPS, removing HTTP access.

- - - - - - - - - - - - - - - - - - - - - - - - - - - - - - - - - - - - - - - -

1: No redirect - Make no further changes to the webserver configuration.

2: Redirect - Make all requests redirect to secure HTTPS access. Choose this for

new sites, or if you're confident your site works on HTTPS. You can undo this

change by editing your web server's configuration.

- - - - - - - - - - - - - - - - - - - - - - - - - - - - - - - - - - - - - - - -

Select the appropriate number [1-2] then [enter] (press 'c' to cancel): 2

Redirecting all traffic on port 80 to ssl in /etc/nginx/conf.d/test.haimait.conf

- - - - - - - - - - - - - - - - - - - - - - - - - - - - - - - - - - - - - - - -

Congratulations! You have successfully enabled https://test.haimait.com

You should test your configuration at:

https://www.ssllabs.com/ssltest/analyze.html?d=test.haimait.com

- - - - - - - - - - - - - - - - - - - - - - - - - - - - - - - - - - - - - - - -

## 如果是之前安装过,会出下面的更新选择项,选择 2 更新和更换证书

What would you like to do?

- - - - - - - - - - - - - - - - - - - - - - - - - - - - - - - - - - - - - - - -

1: Attempt to reinstall this existing certificate

2: Renew & replace the cert (limit ~5 per 7 days)

- - - - - - - - - - - - - - - - - - - - - - - - - - - - - - - - - - - - - - - -

Select the appropriate number [1-2] then [enter] (press 'c' to cancel): 2

Renewing an existing certificate

Deploying Certificate to VirtualHost /etc/nginx/conf.d/api.ibanana.club.conf

Traffic on port 80 already redirecting to ssl in /etc/nginx/conf.d/api.ibanana.club.conf

- - - - - - - - - - - - - - - - - - - - - - - - - - - - - - - - - - - - - - - -

Your existing certificate has been successfully renewed, and the new certificate

has been installed.

The new certificate covers the following domains: https://api.ibanana.club

You should test your configuration at:

https://www.ssllabs.com/ssltest/analyze.html?d=api.ibanana.club

- - - - - - - - - - - - - - - - - - - - - - - - - - - - - - - - - - - - - - - -

##出现下面的提现就安装或者更新证书成功了

IMPORTANT NOTES:

 - Congratulations! Your certificate and chain have been saved at:

   /etc/letsencrypt/live/test.haimait.com/fullchain.pem

   Your key file has been saved at:

   /etc/letsencrypt/live/test.haimait.com/privkey.pem

   Your cert will expire on 2020-06-03. To obtain a new or tweaked

   version of this certificate in the future, simply run certbot-auto

   again with the "certonly" option. To non-interactively renew *all*

   of your certificates, run "certbot-auto renew"

 - If you like Certbot, please consider supporting our work by:

   Donating to ISRG / Let's Encrypt:   https://letsencrypt.org/donate

   Donating to EFF:                    https://eff.org/donate-le
Couldn’t download https://raw.githubusercontent.com/certbot/certbot/ 问题解决

更新证书时出现报错:Couldn’t download https://raw.githubusercontent.com/certbot/certbot/v1.3.0/letsencrypt-auto-source/letsencrypt-auto.发现是阿里云的ECS访问不到github,估计又是GFW的锅,只能修改hosts
1、使用命令打开etc文件夹下面的hosts文件:
vim /etc/hosts
2.增加内容
199.232.4.133 raw.githubusercontent.com
3.重启网络
service network restart
或者
/etc/init.d/network restart
nginx配置
建立文件 /etc/nginx/conf.d/test.haimait.conf
server {

  listen 80;

  server_name  test.haimait.com;

  access_log  /var/log/nginx/test.haimait.access.log;

  error_log  /var/log/nginx/test.haimait.error.log;

  client_max_body_size 10m;

  location ~/(.well-known/pki-valtidation) {

      root /usr/share/nginx/html;

  }

  location / {

 #     add_header Access-Control-Allow-Origin *;

 #     add_header Access-Control-Allow-Headers "Origin, X-Requested-With, Content-Type, Accept";

 #     add_header Access-Control-Allow-Methods "GET, POST, OPTIONS";

      proxy_pass  http://127.0.0.1:8822;

      proxy_redirect     off;

      proxy_set_header   Host             $host;

      proxy_set_header   X-Real-IP        $remote_addr;

      proxy_set_header   X-Forwarded-For  $proxy_add_x_forwarded_for;

      proxy_next_upstream error timeout invalid_header http_500 http_502 http_503 http_504;

      proxy_max_temp_file_size 0;

      proxy_connect_timeout      90;

      proxy_send_timeout         300;

      proxy_read_timeout         300;

      proxy_buffer_size          4k;

      proxy_buffers              4 32k;

      proxy_busy_buffers_size    64k;

      proxy_temp_file_write_size 64k;

      }

  location ~ ^/lovebook/ {

 #     add_header Access-Control-Allow-Origin *;

 #     add_header Access-Control-Allow-Headers "Origin, X-Requested-With, Content-Type, Accept";

 #     add_header Access-Control-Allow-Methods "GET, POST, OPTIONS";

      proxy_pass  http://127.0.0.1:8833;

      proxy_redirect     off;

      proxy_set_header   Host             $host;

      proxy_set_header   X-Real-IP        $remote_addr;

      proxy_set_header   X-Forwarded-For  $proxy_add_x_forwarded_for;

      proxy_next_upstream error timeout invalid_header http_500 http_502 http_503 http_504;

      proxy_max_temp_file_size 0;

      proxy_connect_timeout      90;

      proxy_send_timeout         300;

      proxy_read_timeout         300;

      proxy_buffer_size          4k;

      proxy_buffers              4 32k;

      proxy_busy_buffers_size    64k;

      proxy_temp_file_write_size 64k;

      }

}

server {

   listen       443 ssl;

   server_name  test.haimait.com;

   ssl_certificate /etc/letsencrypt/live/test.haimait.com/fullchain.pem;

   ssl_certificate_key /etc/letsencrypt/live/test.haimait.com/privkey.pem;

   ssl_protocols TLSv1 TLSv1.1 TLSv1.2;

   ssl_prefer_server_ciphers on;

   ssl_ciphers 'EECDH+AESGCM:EDH+AESGCM:AES256+EECDH:AES256+EDH';

location / {

#      add_header Access-Control-Allow-Origin *;

#      add_header Access-Control-Allow-Headers "Origin, X-Requested-With, Content-Type, Accept";

#      add_header Access-Control-Allow-Methods "GET, POST, OPTIONS";

      proxy_pass  http://127.0.0.1:8822;

      proxy_redirect     off;

      proxy_set_header   Host             $host;

      proxy_set_header   X-Real-IP        $remote_addr;

      proxy_set_header   X-Forwarded-For  $proxy_add_x_forwarded_for;

      proxy_next_upstream error timeout invalid_header http_500 http_502 http_503 http_504;

      proxy_max_temp_file_size 0;

      proxy_connect_timeout      90;

      proxy_send_timeout         300;

      proxy_read_timeout         300;

      proxy_buffer_size          4k;

      proxy_buffers              4 32k;

      proxy_busy_buffers_size    64k;

      proxy_temp_file_write_size 64k;

    }

location ~ ^/lovebook/ {

#     add_header Access-Control-Allow-Origin *;

#     add_header Access-Control-Allow-Headers "Origin, X-Requested-With, Content-Type, Accept";

#     add_header Access-Control-Allow-Methods "GET, POST, OPTIONS";

      proxy_pass  http://127.0.0.1:8833;

      proxy_redirect     off;

      proxy_set_header   Host             $host;

      proxy_set_header   X-Real-IP        $remote_addr;

      proxy_set_header   X-Forwarded-For  $proxy_add_x_forwarded_for;

      proxy_next_upstream error timeout invalid_header http_500 http_502 http_503 http_504;

      proxy_max_temp_file_size 0;

      proxy_connect_timeout      90;

      proxy_send_timeout         300;

      proxy_read_timeout         300;

      proxy_buffer_size          4k;

      proxy_buffers              4 32k;

      proxy_busy_buffers_size    64k;

      proxy_temp_file_write_size 64k;

    }

}
nginx.conf 文件
#   nformation on configuration, see:

#   * Official English Documentation: http://nginx.org/en/docs/

#   * Official Russian Documentation: http://nginx.org/ru/docs/

user root;

worker_processes auto;

error_log /var/log/nginx/error.log;

pid /run/nginx.pid;

# Load dynamic modules. See /usr/share/nginx/README.dynamic.

include /usr/share/nginx/modules/*.conf;

events {

    worker_connections 1024;

}

http {

    log_format  main  '$remote_addr - $remote_user [$time_local] "$request" '

                      '$status $body_bytes_sent "$http_referer" '

                      '"$http_user_agent" "$http_x_forwarded_for"';

    access_log  /var/log/nginx/access.log  main;

    sendfile            on;

    tcp_nopush          on;

    tcp_nodelay         on;

    keepalive_timeout   300;

    types_hash_max_size 2048;

    # 配置nginx上传文件最大限制

    client_max_body_size 50m;

    include             /etc/nginx/mime.types;

    default_type        application/octet-stream;

    # Load modular configuration files from the /etc/nginx/conf.d directory.

    # See http://nginx.org/en/docs/ngx_core_module.html#include

    # for more information.

    include /etc/nginx/conf.d/*.conf;

    server {

        listen       80 default_server;

        listen       [::]:80 default_server;

        server_name  _;

       # root         /usr/share/nginx/html;

        root         /wwwroot;

        # Load configuration files for the default server block.

        include /etc/nginx/default.d/*.conf;

        location / {

        }

        error_page 404 /404.html;

            location = /40x.html {

        }

        error_page 500 502 503 504 /50x.html;

            location = /50x.html {

        }

#	location ~ .php$ {

#  	  root   /wwwroot;

# 	  fastcgi_pass 127.0.0.1:9000;

# 	  fastcgi_index index.php;

#	  fastcgi_param SCRIPT_FILENAME /wwwroot$fastcgi_script_name;

#	  fastcgi_param PHP_INFO $1;

#	  include  fastcgi_params;

#	}

    }

# Settings for a TLS enabled server.

#

#    server {

#        listen       443 ssl http2 default_server;

#        listen       [::]:443 ssl http2 default_server;

#        server_name  _;

#        root         /usr/share/nginx/html;

#

#        ssl_certificate "/etc/pki/nginx/server.crt";

#        ssl_certificate_key "/etc/pki/nginx/private/server.key";

#        ssl_session_cache shared:SSL:1m;

#        ssl_session_timeout  10m;

#        ssl_ciphers HIGH:!aNULL:!MD5;

#        ssl_prefer_server_ciphers on;

#

#        # Load configuration files for the default server block.

#        include /etc/nginx/default.d/*.conf;

#

#        location / {

#        }

#

#        error_page 404 /404.html;

#            location = /40x.html {

#        }

#

#        error_page 500 502 503 504 /50x.html;

#            location = /50x.html {

#        }

#    }

}
service nginx start 或者 systemctl start nginx //启动nginx
systemctl reload nginx
systemctl stop nginx
systemctl reload nginx
netstart -tpln
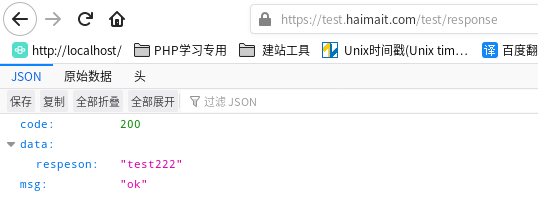
效果:
更新证书
# 更新证书

./certbot-auto renew --dry-run

# 如果不需要返回的信息,可以用静默方式

certbot renew --quiet

#手动更新

./certbot-auto renew -v

#自动更新

./certbot-auto renew --quiet --no-self-upgrade

#定时更新

加入定时任务  crontab -e

0 4 1 */2 *  /usr/bin/certbot-auto  renew --quiet    #每两个月的一号凌晨4点更新一次
用 Certbot-auto 在 letsencrypt.org申请免费 SSL 证书实现 HTTPS的更多相关文章
- 让网站永久拥有HTTPS - 申请免费SSL证书并自动续期 Let’s Encrypt
让网站永久拥有HTTPS - 申请免费SSL证书并自动续期 Let’s Encrypt 为什么要用HTTPS 网站没有使用HTTPS的时候,浏览器一般会报不安全,而且在别人访问这个网站的时候,很有可 ...
- 最新阿里云申请免费SSL证书实现网站HTTPS化(图文教程一)
一.申请免费SSL证书: 1.登录阿里云: 2.领取代金券礼包: https://promotion.aliyun.com/ntms/yunparter/invite.html?userCode=0a ...
- 阿里云申请免费SSL证书,并配置到Tomcat,实现https访问
第一步:阿里云免费https证书安装 https://jingyan.baidu.com/article/fdffd1f8619481f3e98ca196.html 第二步:阿里云申请免费SSL证书 ...
- 最新阿里云服务器免费SSL证书配置HTTPS的两种方法(图文教程二)
在大家学习如何利用免费SSL证书配置网站HTTPS之前,我们先要搞清楚为什么要开启HTTPS,这个绿色的小锁真的有用吗?所谓的HTTPS其实是(安全套接字层超文本传输协议)是以安全为目标的HTTP通道 ...
- windows下 申请免费ssl证书的方法 (letsencrypt)
Let's Encrypt,官网是https://letsencrypt.org/,它是一个由各大公司赞助的公益组织: 有趋势有需求,自然也有免费可用.免费的SSL证书中,首推就是Let's Encr ...
- 物联网架构成长之路(20)-申请免费SSL证书
0.前言 今天域名备案申请下来了,接下来就是申请个SSL证书,现在普通的网站没有SSL都不好意思见人了.可是稍微好点的企业级SSL证书还是比较贵的.不过还好有免费的可以用.只不过要定时去续时间.这个不 ...
- [从零开始搭网站六]为域名申请免费SSL证书(https),并为Tomcat配置https域名所用的多SSL证书
点击下面连接查看从零开始搭网站全系列 从零开始搭网站 由于国内的网络环境比较恶劣,运营商流量劫持的情况比较严重,一般表现为别人打开你的网站的时候会弹一些莫名其妙的广告...更过分的会跳转至别的网站. ...
- Certbot为域名申请免费SSL证书
Certbot(Let's Encrypt)是一个非盈利性认证机构通过运行互联网安全研究小组(ISRG)提供X.509 证书的传输层安全性不收取任何费用(TLS)加密.证书有效期为90天,在此期间可以 ...
- Let's Encrypt申请免费SSL证书
1.https的作用 安全,防止网站被劫持,数据被修改 2.Let's Encrypt是什么 Let's Encrypt是一个证书授权机构(CA),可以从Let's Encrypt获得网站域名的免费证 ...
- 申请免费ssl证书
#安装certbotyum install epel-releaseyum install certbot#配置nginx,到需要申请证书的配置文件里添加location ^~ /.well-know ...
随机推荐
- KingbaseES Json 系列二:Json对象函数
KingbaseES Json 系列二--Json对象函数(JSONB_BUILD_OBJECT,JSONB_OBJECT,JSON_BUILD_OBJECT,JSON_OBJECT) JSON 数据 ...
- archlinux xfce 设置fcitx5中文输入法详细教程
1.安装fcitx5 sudo pacman -S fcitx5-im fcitx5-chinese-addons fcitx5-pinyin-zhwiki fcitx5-im 包含fcitx5的一些 ...
- 性能测试思想(What is performance testing?)
1.什么是性能测试 什么是软件性能? 定义:软件的性能是软件的一种非功能特性,它关注的不是软件是否能够完成特定的功能,而是在完成该功能是展示出来的及时性. 比如:一个登录功能他能实现登录操作,但是登录 ...
- Android---intent和startActivityForResult方法的使用---页面跳转和数据回传
Android页面跳转和数据回传 今天我尝试用两个页面实现数据的传递和回传,出现了一些问题,把问题已经成功的案例总结如下: 具体是这样的: 有两个layout布局,两个activity.MainAct ...
- Spring框架之控制反转IoC(Inversion of Control)的理解
简单理解: 控制反转就是将代码的调用权(控制权)从调用方转移给被调用方(服务提供方). 解释一下: 如果我们需要创建某个类,就需要程序员去修改代码,然后才可以得到想要的类.反转的意思就是不需要程序员去 ...
- Csharp线程
CSharpe线程 目录 CSharpe线程 C#如何操作线程 Thread 1. Thread如何开启一个线程呢? 2. Thread中常见的API 3. thread的扩展封装 threadpoo ...
- 小师妹学JavaIO之:文件编码和字符集Unicode
目录 简介 使用Properties读取文件 乱码初现 字符集和文件编码 解决Properties中的乱码 真.终极解决办法 总结 简介 小师妹一时兴起,使用了一项从来都没用过的新技能,没想却出现了一 ...
- Ubuntu部署Django三:编写相关配置文件及启动服务
1. uwsgi 1.1 项目结构如下,你要知道 uwsgi.ini 放在什么位置 projectName |-- app |-- projectName |-- -- wsgi.py |-- -- ...
- Vim 安装与基础操作指南
0x00 链接 Vim 官网 Vim GitHub Vim 中文文档 0x01 准备 (1)下载与安装 在官网地址找到 Download 标签,在其中根据操作系统选择相应的版本,以下以 Windows ...
- centos 6.4下fdisk分区、格式化、挂载新硬盘
centos 6.4下fdisk分区.格式化.挂载新硬盘 作者: cat 日期: 2013 年 9 月 10 日 发表评论 (0) 查看评论 1.# fdisk -l 查看当前磁盘信息,就会发现最下面 ...