Spring 源码阅读(一)环境搭建
注意事项:
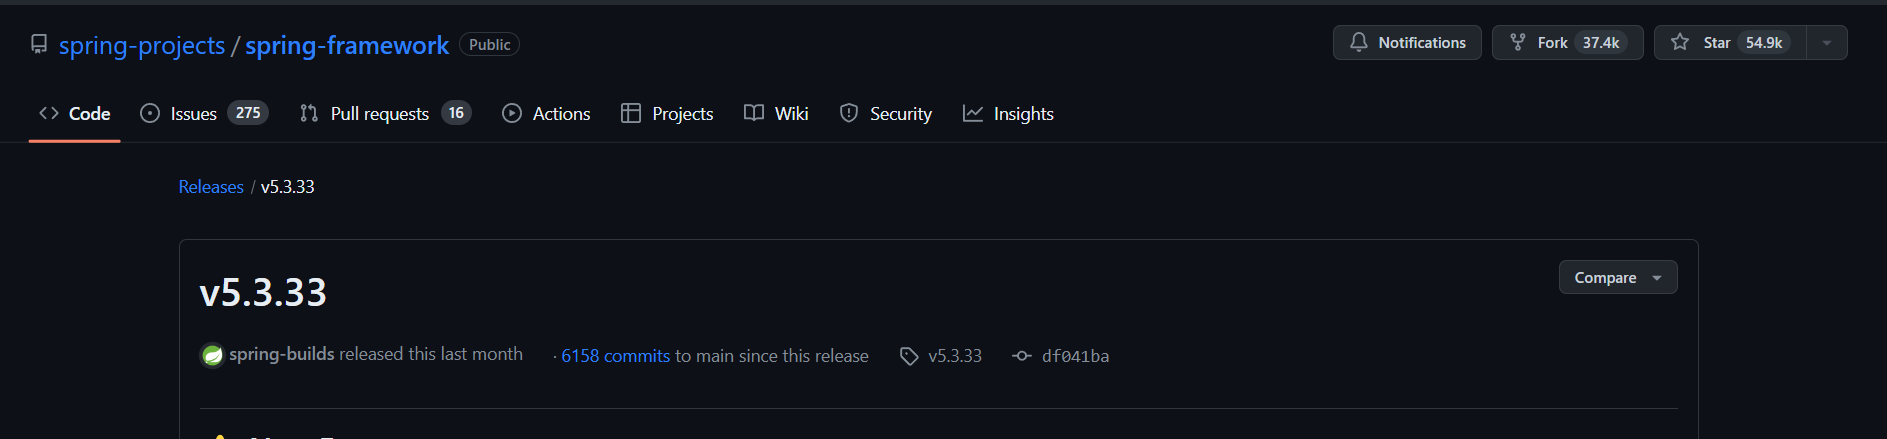
- 使用 2024-03-14 发布的 Spring 5.3.33 版本
- IDE 工具使用了 Intellij IDEA,同时为了简化不必要的内容没单独配置 Gradle 环境
- JDK 版本采用 Eclipse Temurin 1.8/11 均可
下载源码
下载 SpringFramework 源码,本次选择 5.3.33 版本,发布日期 2024-03-14,通过 Intellij IDEA 打开。
Gihub地址: https://github.com/spring-projects/spring-framework/releases/tag/v5.3.33
配置 Gradle 环境
由于国内下载 gradle 比较慢可以考虑使用腾讯云镜像源,在 /gradle/wrapper/gradle-wrapper.properties 中修改 distributionUrl
distributionUrl=https\://mirrors.cloud.tencent.com/gradle/gradle-7.5.1-bin.zip
同时仓库地址可修改为阿里云,在 build.gradle 中配置阿里云镜像
allprojects {

    repositories {

        maven { url 'https://maven.aliyun.com/repository/public/' }

        maven { url 'https://maven.aliyun.com/repository/spring/'}

        maven { url 'https://maven.aliyun.com/repository/jcenter/'}

        maven { url 'https://maven.aliyun.com/repository/gradle-plugin/'}

        mavenLocal()

        mavenCentral()

    }

}
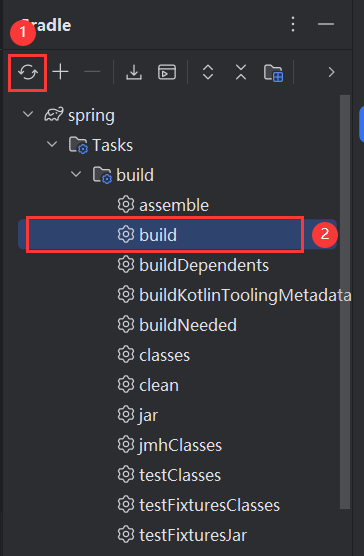
在 Gradle 先 Reload All Gradle Projects,再执行 build 命令进行编译。
期间碰到报错信息,报错详情:
spring-core\src\main\java\org\springframework\core\CoroutinesUtils.java:74: 警告: [deprecation] AccessibleObject中的isAccessible()已过时

if (method.isAccessible() && !KCallablesJvm.isAccessible(function)) {
解决方法:在 org.springframework.core.CoroutinesUtils#invokeSuspendingFunction 加上 @SuppressWarnings("deprecation")
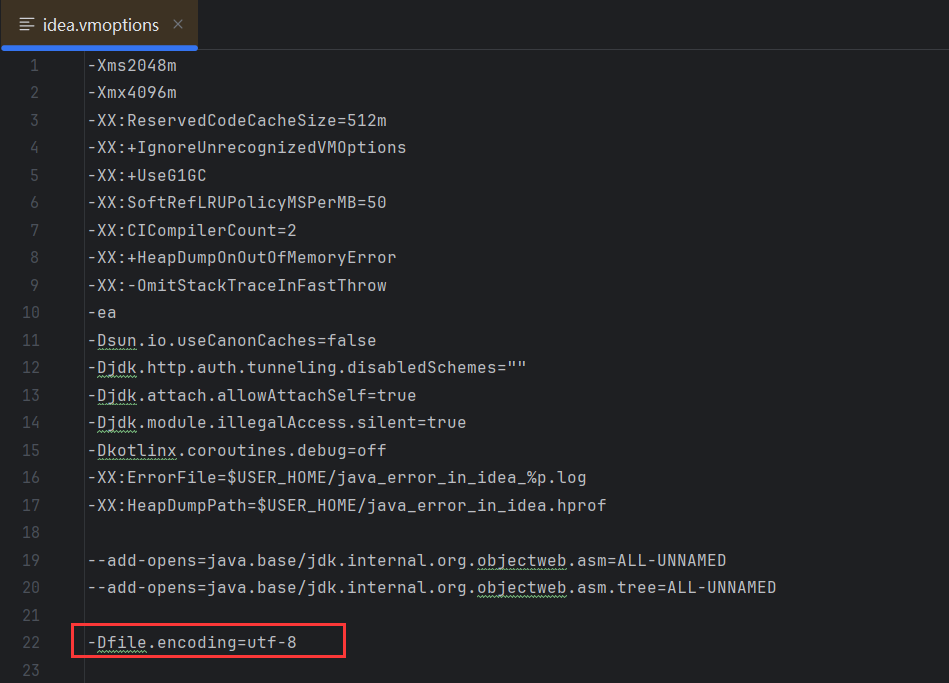
若控制台输出中文乱码,Intellij IDEA 中设置 vm.properties
-Dfile.encoding=UTF-8
新建测试 Module
通过 gradle 新建一个 module,取名为 spring-research

module 新增完成后会自动在 settings.gradle 中引用 spring-research 模块,若没有自动引入可以手动加入
include 'spring-research'
在 spring-research 中的 build.gradle 中引入 spring-context
dependencies {

    testImplementation platform('org.junit:junit-bom:5.10.0')

    testImplementation 'org.junit.jupiter:junit-jupiter'

    // 引入 spring-context 依赖

    api(project(":spring-context"))

}
可选项:此外由于 Spring 源码工程配置了 checkStyle,在做测试类的时候有些方法不能够满足 Spring 的规范要求(由于使用 Intellij IDEA 自动生成或者格式化的代码不满足要求,比如 tab indent,实体类 this 指向,包括 import 隔行等规则),可以通过在 src/checkstyle/checkstyle.xml 中添加过滤规则:
<module name="BeforeExecutionExclusionFileFilter">

    <property name="fileNamePattern" value="^.*\\spring\-research\\.*$"/>

</module>
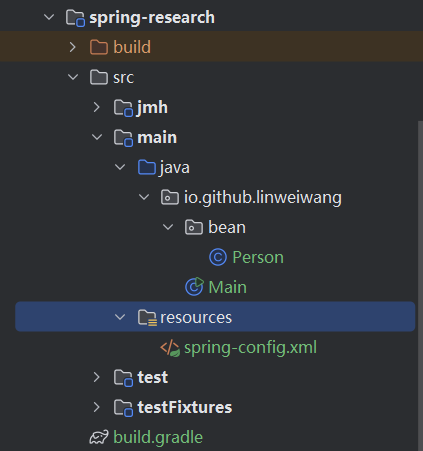
新建实体类 Person
package io.github.linweiwang.bean;

public class Person {

	private String name;

	private int age;

	public String getName() {

		return name;

	}

	public void setName(String name) {

		this.name = name;

	}

	public int getAge() {

		return age;

	}

	public void setAge(int age) {

		this.age = age;

	}

	@Override

	public String toString() {

		return "Person{" +

				"name='" + name + '\'' +

				", age=" + age +

				'}';

	}

}
在 resources.properties 中新建 spring-config.xml
<?xml version="1.0" encoding="UTF-8"?>

<beans xmlns="http://www.springframework.org/schema/beans"

	   xmlns:xsi="http://www.w3.org/2001/XMLSchema-instance"

	   xsi:schemaLocation="http://www.springframework.org/schema/beans http://www.springframework.org/schema/beans/spring-beans.xsd">

	<bean id="person" class="io.github.linweiwang.bean.Person">

		<property name="name" value="王"/>

		<property name="age" value="18"/>

	</bean>

</beans>
在 Main 中调用 SpringContext 获取 Bean 的实例
package io.github.linweiwang;

import io.github.linweiwang.bean.Person;

import org.springframework.context.support.ClassPathXmlApplicationContext;

public class Main {

	public static void main(String[] args) {

		ClassPathXmlApplicationContext context = new ClassPathXmlApplicationContext("spring-config.xml");

		Person person = context.getBean(Person.class);

		System.out.println(person);

	}

}
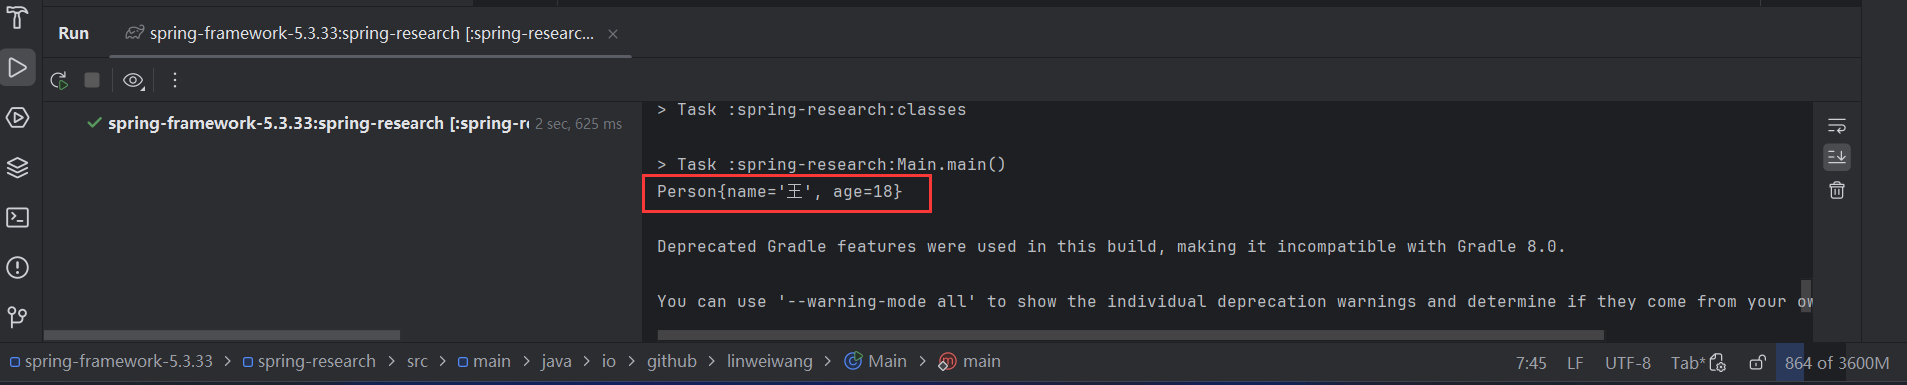
运行成功即环境搭建成功!
Spring 源码阅读(一)环境搭建的更多相关文章
- spring源码解析(一) 环境搭建(各种坑的解决办法)
上次搭建spring源码的环境还是两年前,依稀记得那时候也是一顿折腾,奈何当时没有记录,导致两年后的今天把坑重踩了一遍,还遇到了新的坑,真是欲哭无泪;为了以后类似的事情不再发生,这次写下这篇博文来必坑 ...
- Spring源码分析之环境搭建
写在最前面 最近突然心血来潮,想看看源码,看看大牛都怎么码代码,膜拜下.首选肯定是spring大法,于是说干就干,从GitHub上下载spring-framework源码编译拜读. 环境搭建 安装JD ...
- Spring 源码学习之环境搭建
一.下载Spring 源码 进入 https://github.com/spring-projects/spring-framework/tags 选择下载spring freamework的版本 h ...
- 构建后端第4篇之---spring 源码阅读构建环境
解决 IDEA 创建 Gradle 项目没有src目录问题 in new model named zyt-study root dir there are a build.gradle plug ...
- Spring源码分析——调试环境搭建(可能是最省事的构建方法)
1. 依赖工具 idea git jdk 1.8 + Gradle 2. 获取源码 从github https://github.com/spring-projects/spring-framewor ...
- Spring源码分析——(001)环境搭建
1.官方参考 spring-framework的github链接:https://github.com/spring-projects/spring-framework 源码环境搭建官方参考1:考如何 ...
- Sping学习笔记(一)----Spring源码阅读环境的搭建
idea搭建spring源码阅读环境 安装gradle Github下载Spring源码 新建学习spring源码的项目 idea搭建spring源码阅读环境 安装gradle 在官网中下载gradl ...
- 搭建 Spring 源码阅读环境
前言 有一个Spring源码阅读环境是学习Spring的基础.笔者借鉴了网上很多搭建环境的方法,也尝试了很多,接下来总结两种个人认为比较简便实用的方法.读者可根据自己的需要自行选择. 方法一:搭建基础 ...
- Spring源码阅读笔记01:源码阅读环境准备
1. 写在前面 对于做Java开发的同学来说,Spring就像是一条绕不过去的路,但是大多数也只是停留在对Spring的简单使用层面上,对于其背后的原理所知不多也不愿深究,关于这个问题,我在平时的生活 ...
- Spring源码阅读-ApplicationContext体系结构分析
目录 继承层次图概览 ConfigurableApplicationContext分析 AbstractApplicationContext GenericApplicationContext Gen ...
随机推荐
- 关于vue.js:iview-Bug-5114在iview的Poptip气泡提示内调用DatePicker出现遮挡或同时关闭窗口等冲突问题[转]
转自:https://lequ7.com/guan-yu-vuejsiviewbug5114-zai-iview-de-poptip-qi-pao-ti-shi-nei-diao-yong-datep ...
- electron打包踩过的坑总结 好文
electron打包踩过的坑总结 https://segmentfault.com/a/1190000018533945
- 可穿戴心电ECG监测的技术路径及特点
在传统的医疗设备中,监测心跳速率和心脏活动是经由测量电生理讯号与心电图 (ECG) 来完成的,需要将电极连接到身体来量测心脏组织中所引发电气活动的信号.常见的设备用医院的心电图机,长期监护的动态心电仪 ...
- Android Swtich开关样式调整
原文:Android Swtich开关样式调整 - Stars-One的杂货小窝 接入百度人脸的demo时候,发现了内置的switch开关比较好看,看了下实现方法,原来只是改了下样式,记录一下 效果: ...
- C#异步编程:原理与实践
一.引言 在现代应用程序开发中,尤其是在涉及I/O操作(如网络请求.文件读写等)时,异步编程成为了提高性能和用户体验的关键技术.C#作为.NET框架下的主流开发语言,提供了强大的异步编程支持,通过as ...
- tomcat无法启动的解决方法
一:双击startup.bat但闪退 我们可以用记事本打开startup.bat 在末尾添加一个pause 这样它就会新建一个窗口停在错误的地方 二:根据报错信息改正 这一步如果有乱码可以进入tomc ...
- Error in beforeDestroy hook: “Error: [ElementForm]unpected width “found in
吹水,可忽略 当我尝试吧el-form中labelWidth设为auto时,刷新页面获取到了上面的错误 百思不得其解,我貌似没有在beforeDestroy进行操作,为何会报这个错误 果断各种百度,G ...
- CornerNet-Lite:CornerNet粗暴优化,加速6倍还提点了 | BMVC 2020
论文对CornerNet进行了性能优化,提出了CornerNet-Saccade和CornerNet-Squeeze两个优化的CornerNet变种,优化的手段具有很高的针对性和局限性,不过依然有很多 ...
- KingbaseES V8R3 集群运维系列 -- 修改数据库服务端口
案例说明: KingbaseES V8R3集群数据库服务端口(默认:54321)的配置在数据库及集群多个配置文件中都存在,修改端口需要更改所有的配置文件,本案例详细描述了数据库服务端口修改操作步骤 ...
- 提升系统管理:监控和可观察性在DevOps中的作用
在不断发展的DevOps世界中,深入了解系统行为.诊断问题和提高整体性能的能力是首要任务之一.监控和可观察性是促进这一过程的两个关键概念,为系统的健康和性能提供了宝贵的可见性.虽然这些术语经常可以互换 ...