Tensorflow学习教程------tensorboard网络运行和可视化
tensorboard可以将训练过程中的一些参数可视化,比如我们最关注的loss值和accuracy值,简单来说就是把这些值的变化记录在日志里,然后将日志里的这些数据可视化。
首先运行训练代码

#coding:utf-8

import  tensorflow as tf

from tensorflow.examples.tutorials.mnist import input_data

#载入数据集

mnist = input_data.read_data_sets("MNIST_data", one_hot=True)

#每个批次的大小

batch_size = 100

#计算一共有多少个批次

n_batch =  mnist.train.num_examples // batch_size

#参数概要 传入一个参数可以计算这个参数的各个相关值

def variable_summaries(var):

    with tf.name_scope('summaries'):

        mean = tf.reduce_mean(var)

        tf.summary.scalar('mean', mean)#平均值

        with tf.name_scope('stddev'):

            stddev = tf.sqrt(tf.reduce_mean(tf.square(var - mean)))

        tf.summary.scalar('stddev', stddev)#标准差

        tf.summary.scalar('max', tf.reduce_max(var))#最大值

        tf.summary.scalar('min', tf.reduce_min(var))#最小值

        tf.summary.histogram('histogram', var)#直方图

with tf.name_scope('input'):

#定义两个placeholder

    x = tf.placeholder(tf.float32, [None,784],name='x-input') #输入图像

    y = tf.placeholder(tf.float32, [None,10],name='y-input') #输入标签

#创建一个简单的神经网络 784个像素点对应784个数  因此输入层是784个神经元 输出层是10个神经元 不含隐层

#最后准确率在92%左右

with tf.name_scope('layer'):

    with tf.name_scope('wights'):

        W = tf.Variable(tf.zeros([784,10]),name = 'W') #生成784行 10列的全0矩阵

        variable_summaries(W)

    with tf.name_scope('biases'):

        b = tf.Variable(tf.zeros([1,10]),name='b')

        variable_summaries(b)

    with tf.name_scope('softmax'):

        prediction = tf.nn.softmax(tf.matmul(x,W)+b)

#二次代价函数

#loss = tf.reduce_mean(tf.square(y-prediction))

#交叉熵损失

with tf.name_scope('loss'):

    loss =tf.reduce_mean(tf.nn.softmax_cross_entropy_with_logits(labels =y,logits = prediction))

    tf.summary.scalar('loss',loss)

#使用梯度下降法

#train_step = tf.train.GradientDescentOptimizer(0.2).minimize(loss)

train_step = tf.train.AdamOptimizer(1e-3).minimize(loss) #学习率一般设置比较小 收敛速度快

#初始化变量

init = tf.global_variables_initializer()

#结果存放在布尔型列表中

#argmax能给出某个tensor对象在某一维上的其数据最大值所在的索引值

with tf.name_scope('accuracy'):

    with tf.name_scope('correct_prediction'):

        correct_prediction = tf.equal(tf.argmax(y,1), tf.argmax(prediction,1))

    with tf.name_scope('accuracy'):

        accuracy = tf.reduce_mean(tf.cast(correct_prediction,tf.float32))

        tf.summary.scalar('accuracy',accuracy)

#合并所有的summary

merged = tf.summary.merge_all()

with tf.Session() as sess:

    sess.run(init)

    writer = tf.summary.FileWriter('/home/xxx/logs/',sess.graph) #定义记录日志的位置

    for epoch in range(50):

        for batch in range(n_batch): #

            batch_xs,batch_ys = mnist.train.next_batch(batch_size)

            summary,_ = sess.run([merged,train_step],feed_dict={x:batch_xs,y:batch_ys})

        writer.add_summary(summary,epoch) #将summary epoch 写入到writer

        acc = sess.run(accuracy,feed_dict={x:mnist.test.images, y:mnist.test.labels})

        print ("Iter " + str(epoch) + ",Testing Accuracy " + str(acc))
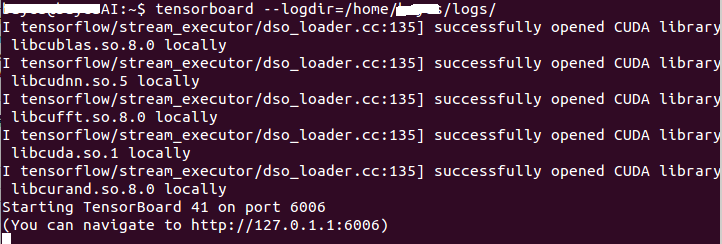
注意我将训练日志保存在 /home/xxx/logs/ 路径下,打开终端,输入以下命令 tensorboard --logdir=/home/xxx/logs/ 如下图所示
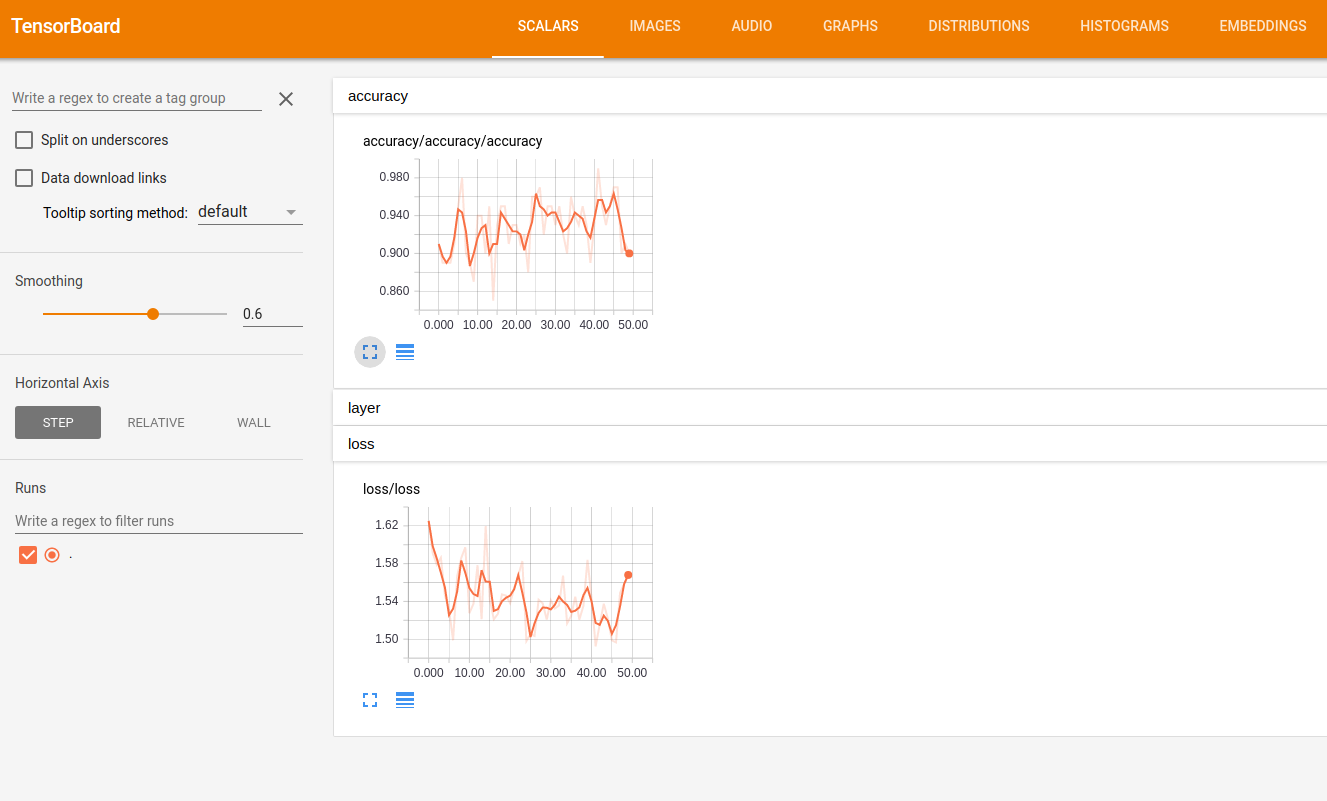
在浏览器中输入127.0.0.1:6006,可以看到可视化效果,如loss和accuracy的变化折线图
Tensorflow学习教程------tensorboard网络运行和可视化的更多相关文章
- Tensorflow学习教程------读取数据、建立网络、训练模型,小巧而完整的代码示例
紧接上篇Tensorflow学习教程------tfrecords数据格式生成与读取,本篇将数据读取.建立网络以及模型训练整理成一个小样例,完整代码如下. #coding:utf-8 import t ...
- Tensorflow学习教程------过拟合
Tensorflow学习教程------过拟合 回归:过拟合情况 / 分类过拟合 防止过拟合的方法有三种: 1 增加数据集 2 添加正则项 3 Dropout,意思就是训练的时候隐层神经元每次随机 ...
- Tensorflow学习教程------代价函数
Tensorflow学习教程------代价函数 二次代价函数(quadratic cost): 其中,C表示代价函数,x表示样本,y表示实际值,a表示输出值,n表示样本的总数.为简单起见,使用一 ...
- tensorflow学习笔记----TensorBoard讲解
TensorBoard简介 TensorBoard是TensorFlow自带的一个强大的可视化工具,也是一个Web应用程序套件.TensorBoard目前支持7种可视化,Scalars,Images, ...
- tensorflow 学习教程
tensorflow 学习手册 tensorflow 学习手册1:https://cloud.tencent.com/developer/section/1475687 tensorflow 学习手册 ...
- Tensorflow学习教程------利用卷积神经网络对mnist数据集进行分类_利用训练好的模型进行分类
#coding:utf-8 import tensorflow as tf from PIL import Image,ImageFilter from tensorflow.examples.tut ...
- Tensorflow学习教程------创建图启动图
Tensorflow作为目前最热门的机器学习框架之一,受到了工业界和学界的热门追捧.以下几章教程将记录本人学习tensorflow的一些过程. 在tensorflow这个框架里,可以讲是若数据类型,也 ...
- Tensorflow学习教程------lenet多标签分类
本文在上篇的基础上利用lenet进行多标签分类.五个分类标准,每个标准分两类.实际来说,本文所介绍的多标签分类属于多任务学习中的联合训练,具体代码如下. #coding:utf-8 import te ...
- Tensorflow学习教程------非线性回归
自己搭建神经网络求解非线性回归系数 代码 #coding:utf-8 import tensorflow as tf import numpy as np import matplotlib.pypl ...
随机推荐
- nodejs配置 https服务
const port = normalizePort(process.env.PORT || '3000'); const path = require('path'); const https = ...
- Vue - 定义使用组件
import Card from './components/Card.vue' Vue.component('m-card',Card) // component是注册全局组件,在实例化VUE前 ...
- wdcp升级php5.8到php7.1.12
php7升级脚本 update_php7.sh #!/bin/bash # PHP update scripts ];then Ver= else Ver=$ fi Debugfile= echo & ...
- 实验吧-web-Once More(php ereg()漏洞)!!!
题目:啊拉?又是php审计.已经想吐了. hint:ereg()函数有漏洞哩:从小老师就说要用科学的方法来算数. 给我们提示:1)ereg()函数漏洞 2)科学计数法 viewsource: < ...
- springboot启动总是启动不起来UnsatisfiedDependencyException异常
采用debug模式启动总是停留在 点击后: 鼠标放在ex上: org.springframework.beans.factory.UnsatisfiedDependencyException: Err ...
- 10 分钟彻底理解 Redis 的持久化和主从复制
在这篇文章,我们继续有关Redis方面知识的学习,一起了解一下其中一个非常重要的内容:Redis的持久化机制. 什么是Redis持久化? Redis作为一个键值对内存数据库(NoSQL),数据都存储在 ...
- M3U8地址在谷歌浏览器中播放
该案例git码云地址:https://gitee.com/kawhileonardfans/hls-player-example 1.下载插件 插件地址:https://files.cnblogs.c ...
- 72.Python中ORM聚合函数详解:Avg,aggregate,annotate
聚合函数: 如果你用原生SQL语句,则可以使用聚合函数提取数据.比如提取某个商品销售的数量,那么就可以使用Count,如果想要知道销售的平均价格,那么就可以使用Avg. 聚合函数是通过aggregat ...
- Python 自动登录哔哩哔哩(2captcha打码平台)
前言 研究爬虫的各位小伙伴都知道,需要登录才能获取信息的网站,是比较难爬的,原因就是在于,现在各大网站为了反爬,都加入了图片验证码,滑动验证码之类的干扰 本篇就针对哔哩哔哩的滑动验证码进行讲解和破解 ...
- ajax异步提交 有时会出现无bug的数据处理异常-----debug没有问题,正常运行却数据处理不正确,极少机会会出现正常的处理结果
ajax 被使用时,常默认的就使用了异步处理. 当遇到后面的代码对同样的数据进行处理 或 要依赖前面ajax处理的结果时,就会导致数据处理结果不正确,未达到预期值. 且,debug时却能正常完成功能 ...