Centos7.4 安装MySQL 5.7.21 (通用二进制包)
1.下载安装包
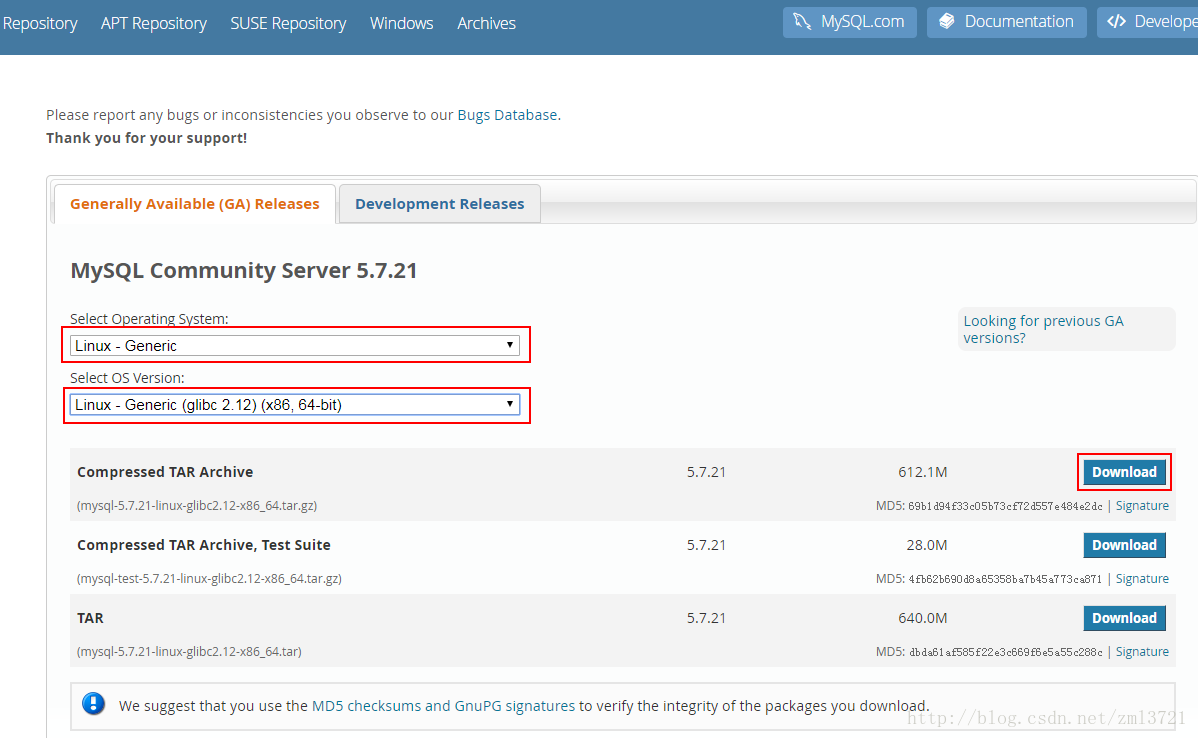
MySQL 官方下载地址:https://dev.mysql.com/downloads/mysql/
MySQL 5.7官方安装文档:https://dev.mysql.com/doc/refman/5.7/en/binary-installation.html
本文完全按照官方步骤配置安装
选择Linux - generic 64位安装包
MySQL 5.7.21 二进制包下载地址:https://dev.mysql.com//Downloads/MySQL-5.7/mysql-5.7.21-linux-glibc2.12-x86_64.tar.gz
wget --no-check-certificate https://dev.mysql.com//Downloads/MySQL-5.7/mysql-5.7.21-linux-glibc2.12-x86_64.tar.gz2.安装依赖包
MySQL依赖于libaio 库。如果这个库没有在本地安装,数据目录初始化和后续的服务器启动步骤将会失败。请使用适当的软件包管理器进行安装。例如,在基于Yum的系统上:
shell> yum search libaio

shell> yum install libaio
注意
SLES 11:从MySQL 5.7.19开始,Linux通用tar包的格式是EL6而不是EL5。以致于MySQL客户端bin / mysql需要libtinfo.so.5。
解决方法是创建软链接,例如64位系统上的ln -s libncurses.so.5.6 /lib64/libtinfo.so.5或32 位系统上的ln -s libncurses.so.5.6 /lib/libtinfo.so.5。
3.创建一个mysql用户和组
shell> groupadd mysql

shell> useradd -r -g mysql -s /bin/false mysql
注意
此用户仅用于运行mysql服务,而不是登录,因此使用useradd -r和-s /bin/false命令选项来创建对服务器主机没有登录权限的用户。
4.解压到指定目录
shell> tar -zxvf mysql-5.7.21-linux-glibc2.12-x86_64.tar.gz -C /opt

shell> cd /opt

shell> mv mysql-5.7.21-linux-glibc2.12-x86_64 mysql-5.7.21
5.配置环境变量
echo "export PATH=$PATH:/opt/mysql-5.7.21/bin" >> /etc/profile

建议进入/etc/profile文件里去添加执行 并有source生效
6.配置数据库目录
数据目录:/opt/mysql-5.7.21/data
参数文件my.cnf:/opt/mysql-5.7.21/etc/my.cnf
错误日志log-error:/opt/mysql-5.7.21/log/mysql_error.log
二进制日志log-bin:/opt/mysql-5.7.21/log/mysql_bin.log
慢查询日志slow_query_log_file:/opt/mysql-5.7.21/log/mysql_slow_query.log
套接字socket文件:/opt/mysql-5.7.21/run/mysql.sock
pid文件:/opt/mysql-5.7.21/run/mysql.pid
创建目录:
shell> mkdir -p /opt/mysql-5.7.21/{data,log,etc,run}

shell> chown -R mysql:mysql /opt/mysql-5.7.21

shell> chmod 750 /opt/mysql-5.7.21/{data,log,etc,run}
7.配置my.cnf文件
在/opt/mysql-5.7.21/etc/下创建my.cnf文件,加入如下参数,其他参数根据需要配置
shell> touch /opt/mysql-5.7.21/etc/my.cnf

shell> chown mysql:mysql /opt/mysql-5.7.21/etc/my.cnf
[client]
port = 3306
socket = /opt/mysql-5.7.21/run/mysql.sock
[mysqld]
port = 3306
socket = /opt/mysql-5.7.21/run/mysql.sock
pid_file = /opt/mysql-5.7.21/run/mysql.pid
datadir = /opt/mysql-5.7.21/data
default_storage_engine = InnoDB
max_allowed_packet = 128M
max_connections = 2048
open_files_limit = 65535
skip-name-resolve
lower_case_table_names=1
character-set-server = utf8mb4
collation-server = utf8mb4_unicode_ci
init_connect='SET NAMES utf8mb4'
innodb_buffer_pool_size = 128M
innodb_log_file_size = 128M
innodb_file_per_table = 1
innodb_flush_log_at_trx_commit = 0
key_buffer_size = 16M
log-error = /opt/mysql-5.7.21/log/mysql_error.log
log-bin = /opt/mysql-5.7.21/log/mysql_bin.log
slow_query_log = 1
slow_query_log_file = /opt/mysql-5.7.21/log/mysql_slow_query.log
long_query_time = 5
tmp_table_size = 16M
max_heap_table_size = 16M
query_cache_type = 0
query_cache_size = 0
server-id=1
8.初始化
shell> mysqld --initialize --user=mysql --basedir=/opt/mysql-5.7.21 --datadir=/opt/mysql-5.7.21/data此时会生成一个临时密码,可以在mysql_error.log文件找到
shell> grep 'temporary password' /opt/mysql-5.7.21/log/mysql_error.log 生成ssl
shell> mysql_ssl_rsa_setup --basedir=/opt/mysql-5.7.21 --datadir=/opt/mysql-5.7.21/data/9.配置服务,使用systemctl管理
shell> cd /usr/lib/systemd/system

shell> touch mysqld.service
文件内容如下
# Copyright (c) 2015, 2016, Oracle and/or its affiliates. All rights reserved.

#

# This program is free software; you can redistribute it and/or modify

# it under the terms of the GNU General Public License as published by

# the Free Software Foundation; version 2 of the License.

#

# This program is distributed in the hope that it will be useful,

# but WITHOUT ANY WARRANTY; without even the implied warranty of

# MERCHANTABILITY or FITNESS FOR A PARTICULAR PURPOSE.  See the

# GNU General Public License for more details.

#

# You should have received a copy of the GNU General Public License

# along with this program; if not, write to the Free Software

# Foundation, Inc., 51 Franklin St, Fifth Floor, Boston, MA  02110-1301 USA

#

# systemd service file for MySQL forking server

#

[Unit]

Description=MySQL Server

Documentation=man:mysqld(8)

Documentation=http://dev.mysql.com/doc/refman/en/using-systemd.html

After=network.target

After=syslog.target

[Install]

WantedBy=multi-user.target

[Service]

User=mysql

Group=mysql

Type=forking

PIDFile=/opt/mysql-5.7.21/run/mysql.pid

# Disable service start and stop timeout logic of systemd for mysqld service.

TimeoutSec=0

# Execute pre and post scripts as root

PermissionsStartOnly=true

# Needed to create system tables

#ExecStartPre=/usr/bin/mysqld_pre_systemd

# Start main service

ExecStart=/opt/mysql-5.7.21/bin/mysqld --daemonize --pid-file=/opt/mysql-5.7.21/run/mysql.pid $MYSQLD_OPTS

# Use this to switch malloc implementation

EnvironmentFile=-/etc/sysconfig/mysql

# Sets open_files_limit

LimitNOFILE = 65535

Restart=on-failure

RestartPreventExitStatus=1

PrivateTmp=false
让systemctl加载配置服务
shell> systemctl daemon-reload

shell> systemctl enable mysqld.service

shell> systemctl is-enabled mysqld
10.启动MySQL服务
shell> systemctl start mysqld.service 11.MySQL用户初始化
重置密码(上一步已经重置过了 这次可以忽略)
删除匿名用户
关闭root用户的远程登录
删除测试数据库
shell> /usr/local/mysql/bin/mysql_secure_installation

Securing the MySQL server deployment.

Enter password for user root:

The existing password for the user account root has expired. Please set a new password.

New password:

Re-enter new password:

VALIDATE PASSWORD PLUGIN can be used to test passwords

and improve security. It checks the strength of password

and allows the users to set only those passwords which are

secure enough. Would you like to setup VALIDATE PASSWORD plugin?

Press y|Y for Yes, any other key for No: Y

There are three levels of password validation policy:

LOW    Length >= 8

MEDIUM Length >= 8, numeric, mixed case, and special characters

STRONG Length >= 8, numeric, mixed case, special characters and dictionary                  file

Please enter 0 = LOW, 1 = MEDIUM and 2 = STRONG: 2

Using existing password for root.

Estimated strength of the password: 100

Change the password for root ? ((Press y|Y for Yes, any other key for No) : N

 ... skipping.

By default, a MySQL installation has an anonymous user,

allowing anyone to log into MySQL without having to have

a user account created for them. This is intended only for

testing, and to make the installation go a bit smoother.

You should remove them before moving into a production

environment.

Remove anonymous users? (Press y|Y for Yes, any other key for No) : Y

Success.

Normally, root should only be allowed to connect from

'localhost'. This ensures that someone cannot guess at

the root password from the network.

Disallow root login remotely? (Press y|Y for Yes, any other key for No) : Y

Success.

By default, MySQL comes with a database named 'test' that

anyone can access. This is also intended only for testing,

and should be removed before moving into a production

environment.

Remove test database and access to it? (Press y|Y for Yes, any other key for No) : Y

 - Dropping test database...

Success.

 - Removing privileges on test database...

Success.

Reloading the privilege tables will ensure that all changes

made so far will take effect immediately.

Reload privilege tables now? (Press y|Y for Yes, any other key for No) : Y

Success.

All done!
12.导入时区(根据实际情况操作)
shell> mysql_tzinfo_to_sql /usr/share/zoneinfo | mysql -u root -p mysql13.验证安装
shell> mysqladmin version -u root -p

-------------------更改密码------------------------
#my.cnf
[root@bogon ~]# cat /usr/local/mysql/etc/my.cnf
[client]
port = 3306
socket = /usr/local/mysql/run/mysql.sock
[mysqld]
#skip-grant-tables
port = 3306
socket = /usr/local/mysql/run/mysql.sock
pid_file = /usr/local/mysql/run/mysql.pid
datadir = /usr/local/mysql/data
default_storage_engine = InnoDB
max_allowed_packet = 128M
max_connections = 2048
open_files_limit = 65535
skip-name-resolve
lower_case_table_names=1
character-set-server = utf8mb4
collation-server = utf8mb4_unicode_ci
init_connect='SET NAMES utf8mb4'
innodb_buffer_pool_size = 128M
innodb_log_file_size = 128M
innodb_file_per_table = 1
innodb_flush_log_at_trx_commit = 0
key_buffer_size = 16M
log-error = /usr/local/mysql/log/mysql_error.log
log-bin = /usr/local/mysql/log/mysql_bin.log
slow_query_log = 1
slow_query_log_file = /usr/local/mysql/log/mysql_slow_query.log
long_query_time = 5
tmp_table_size = 16M
max_heap_table_size = 16M
query_cache_type = 0
query_cache_size = 0
server-id=1
-------
#更改密码
Mysql 5.7版本:
i、mysql> UPDATE user SET authentication_string = password ( 'new-password' ) WHERE User = 'root' ;
Query OK, 0 rows affected (0.00 sec)
ii、将配置文件my.cnf 中 skip-grant-tables 注释掉,重启 mysql
iii、使用第一步设置的密码登录mysql,再次修改密码:
mysql> set password = password('xxxxxxxx'); (新密码必须包含大小写字母,特殊字符,数字)
mysql> flush privileges ;
Query OK, 0 rows affected (0.01 sec)
-------------------更改密码------------------------[root@bogon ~]# ps -ef | grep mysql
mysql 10562 1 0 14:58 ? 00:00:00 /usr/local/mysql/bin/mysqld --daemonize --pid-file=/usr/local/mysql/run/mysql.pid
root 10637 9747 0 15:10 pts/2 00:00:00 grep --color=auto mysql
[root@bogon ~]#
[root@bogon ~]#
[root@bogon ~]# mysql -uroot -p111111
mysql: [Warning] Using a password on the command line interface can be insecure.
Welcome to the MySQL monitor. Commands end with ; or \g.
Your MySQL connection id is 5
Server version: 5.7.22-log MySQL Community Server (GPL)
Copyright (c) 2000, 2018, Oracle and/or its affiliates. All rights reserved.
Oracle is a registered trademark of Oracle Corporation and/or its
affiliates. Other names may be trademarks of their respective
owners.
Type 'help;' or '\h' for help. Type '\c' to clear the current input statement.
mysql>
------------------------------------
Mysql 5.7版本:
i、mysql> UPDATE user SET authentication_string = password ( 'new-password' ) WHERE User = 'root' ;
Query OK, 0 rows affected (0.00 sec)
ii、将配置文件my.cnf 中 skip-grant-tables 注释掉,重启 mysql
iii、使用第一步设置的密码登录mysql,再次修改密码:
mysql> set password = password('xxxxxxxx'); (新密码必须包含大小写字母,特殊字符,数字)
mysql> flush privileges ;
Query OK, 0 rows affected (0.01 sec)
mysql> quit
-参考-
1.https://www.jianshu.com/p/0d628b2f7476
2.https://dev.mysql.com/doc/refman/5.7/en/binary-installation.html
Centos7.4 安装MySQL 5.7.21 (通用二进制包)的更多相关文章
- CentOS7安装MySQL的方法之通用二进制格式
CentOS7安装MySQL的方法之通用二进制格式
- Percona MySQL 5.7 Linux通用二进制包安装(CentOS 6)
Linux 安装 Percona http://blog.itpub.net/26506993/viewspace-2136501/ https://www.cnblogs.com/snowwhite ...
- CentOS7.4安装MySQL踩坑记录
CentOS7.4安装MySQL踩坑记录 time: 2018.3.19 CentOS7.4安装MySQL时网上的文档虽然多但是不靠谱的也多, 可能因为版本与时间的问题, 所以记录下自己踩坑的过程, ...
- CentOS7下安装MySQL并配置远程连接
一.CentOS7下安装MySQL数据库 CentOS7默认的安装包里面已经没有 MySQL-Server安装包了,远程镜像中也没有了. 默认的是MariaDB (MySQL的一个分支,开发这个分支的 ...
- CentOS7 中安装 MySQL
0. 说明 参考 centos7.2安装MySQL CentOS 7 下 Yum 安装 MySQL 5.7 两种方式安装 MySQL 安装 MySQL(yum) & 安装 MySQL(yum) ...
- centos7 yum 安装mysql
介绍在CentOS7上yum安装数据库服务器MySQL Community Server 5.7的方法. 准备 CentOS7默认安装了和MySQL有兼容性的MariaDB数据库,在我们安装MySQL ...
- Mysql 通用二进制包安装
通用二进制包安装 注意:这里有严格的平台问题: 使用时:centos5.5版本 (类似Windows下的绿色包) 下载(mirrors.sohu.com/mysql) 直接使用tar 解压到指 ...
- CentOS7.5 安装MySql教程
CentOS7位安装MySql教程 1.先检查系统是否装有mysql rpm -qa | grep mysql 2.下载mysql的repo源 wget http://repo.mysql.com/m ...
- mysql 5.5.36 通用二进制安装部署
1.创建mysql用户 # useradd -r mysql 2.解压二进制包到指定目录下 # tar xf mysql-5.5.36-linux2.6-x86_64.tar.gz -C /usr/l ...
随机推荐
- 【阅读笔记】Java核心技术卷一 #3.Chapter5
5 继承 5.1 类.超类和子类 5.1.1 定义子类 超类(superclass)和子类(subclass), 基类(base class)和派生类(derived class), 父类(paren ...
- SQL SERVER 按时间计算每天某值的平均值
在报表需求中,有针对求每天按时间分配数据的平均值,在经过查找后,找到一种方法,供参考. 1.新建视图 2.编写语句 SELECT TOP (100) PERCENT AVG(dbo.漕盈日运行.CO ...
- uTools电脑软件快速启动工具
uTools电脑软件快速启动工具 http://www.autoahk.com/archives/16112 https://gitee.com/weiyunw ...
- SQL语句(二)数据排序和单行函数
目录 一.排序查询 1. 基本排序 2. 多条件排序 二.单行函数 调用方法 字符函数 ①LENGTH函数 ②CONCAT函数 ③upper 和 lower ④substr ⑤instr ⑥trim ...
- 获取异常信息里再出异常就找不到日志了,我TM人傻了
本系列是 我TM人傻了 系列第三期[捂脸],往期精彩回顾: 升级到Spring 5.3.x之后,GC次数急剧增加,我TM人傻了 这个大表走索引字段查询的 SQL 怎么就成全扫描了,我TM人傻了 最近组 ...
- time_formatter writeup
攻防世界time_formatter writeup UAF漏洞和命令注入. 前置知识 1.strdup函数 char * __strdup(const char *s) { size_t len = ...
- 【C++】使用 libass,完成 Direct3D 11 下的字幕渲染
前言 前段时间曾经写过一个视频播放器:https://www.cnblogs.com/judgeou/p/14746051.html . 然而这个播放器却无法显示出外挂或者内封的字幕,这里要稍微解释一 ...
- JAVA的一般输入输出 和 快速输入输出 (BufferedReader&BufferedWrite)(转载)
1.JAVA的一般输入输出 和 快速输入输出 (BufferedReader&BufferedWrite) 摘要 本文主要介绍快速输入输出, 文中提到了几个IO类,这里推荐使用Buffered ...
- PostgreSQL 时间转换
背景:最近频繁使用到时间转换相关的操作,特此小记. 1.实时取最近24小时内数据. select now() - interval '24h'; 通过sql获得符合要求的时间段,当做where条件即可 ...
- 【笔记】scikit-learn中的Scaler(归一化)
scikit-learn中的数据归一化 在机器学习使用数据归一化的时候有一个重要的注意事项 我们对训练数据进行均值和方差的处理,得到mean_train以及std_train,但是在对测试数据进行归一 ...