pytest分布式执行(pytest-xdist)
前言
平常我们手工测试用例非常多时,比如有1千条用例,假设每个用例执行需要1分钟。如果一个测试人员执行需要1000分钟才能执行完,当项目非常紧急的时候,
我们会用测试人力成本换取时间成本,这个时候多找个小伙伴把任务分成2部分,于是时间缩减一半。如果是十个人一起执行,1000个用例理论上只需100分钟就能完成,时间缩短到了1/10。大大节省的测试时间,为项目节省了时间成本。
同样道理,当我们测试用例非常多的时候,一条条执行,很显然会比较慢,那么如何让测试用例并行执行呢,这就是我们接下来要讲的pytest分布式执行插件pytest-xdist
pytest-xdist
cmd里面使用pip安装,目前版本号Version: 1.23.2
pip install pytest-xdist
>pip show pytest-xdist
Name: pytest-xdist
Version: 1.23.2
Summary: pytest xdist plugin for distributed testing and loop-on-failing modes
Home-page: https://github.com/pytest-dev/pytest-xdist
Author: holger krekel and contributors
Author-email: pytest-dev@python.org,holger@merlinux.eu
License: MIT
Location: e:\python36\lib\site-packages
Requires: execnet, pytest-forked, six, pytestpytest-xdist官网地址:【Home-page: https://github.com/pytest-dev/pytest-xdist】
该pytest-xdist插件扩展了一些独特的测试执行模式pytest:
测试运行并行化:如果有多个CPU或主机,则可以将它们用于组合测试运行。会加快运行速度
- --looponfail:在子进程中重复运行测试。每次运行之后,pytest会等待,直到项目中的文件发生更改,然后重新运行以前失败的测试。
重复此过程直到所有测试通过,之后再次执行完整运行。 多平台覆盖:您可以指定不同的Python解释器或不同的平台,并在所有平台上并行运行测试。
在远程运行测试之前,pytest有效地将您的程序源代码“rsyncs”到远程位置。报告所有测试结果并显示给您的本地终端。您可以指定不同的Python版本和解释器。
如果您想知道pytest-xdist如何在幕后工作,可以看这里【OVERVIEW】
并行测试
多cpu并行执行用例,直接加个-n参数即可,后面num参数就是并行数量,比如num设置为3
pytest -n 3
运行以下代码,项目结构如下
web_conf_py是项目工程名称
│  conftest.py
│  __init__.py
│
├─baidu
│  │  conftest.py
│  │  test_1_baidu.py
│  │  test_2.py
│  │  __init__.py
│
├─blog
│  │  conftest.py
│  │  test_2_blog.py
│  │  __init__.py
代码参考:
# web_conf_py/conftest.py
import pytest

@pytest.fixture(scope="session")
def start():
    print("\n打开首页")
    return "yoyo"

# web_conf_py/baidu/conftest.py
import pytest

@pytest.fixture(scope="session")
def open_baidu():
    print("打开百度页面_session")

# web_conf_py/baidu/test_1_baidu.py
import pytest
import time

def test_01(start, open_baidu):
    print("测试用例test_01")
    time.sleep(1)
    assert start == "yoyo"

def test_02(start, open_baidu):
    print("测试用例test_02")
    time.sleep(1)
    assert start == "yoyo"

if __name__ == "__main__":
    pytest.main(["-s", "test_1_baidu.py"])

# web_conf_py/baidu/test_2.py
import pytest
import time

def test_06(start, open_baidu):
    print("测试用例test_01")
    time.sleep(1)
    assert start == "yoyo"
def test_07(start, open_baidu):
    print("测试用例test_02")
    time.sleep(1)
    assert start == "yoyo"

if __name__ == "__main__":
    pytest.main(["-s", "test_2.py"])

# web_conf_py/blog/conftest.py
import pytest

@pytest.fixture(scope="function")
def open_blog():
    print("打开blog页面_function")

# web_conf_py/blog/test_2_blog.py

import pytest
import time
def test_03(start, open_blog):
    print("测试用例test_03")
    time.sleep(1)
    assert start == "yoyo"

def test_04(start, open_blog):
    print("测试用例test_04")
    time.sleep(1)
    assert start == "yoyo"

def test_05(start, open_blog):
    '''跨模块调用baidu模块下的conftest'''
    print("测试用例test_05,跨模块调用baidu")
    time.sleep(1)
    assert start == "yoyo"

if __name__ == "__main__":
    pytest.main(["-s", "test_2_blog.py"])
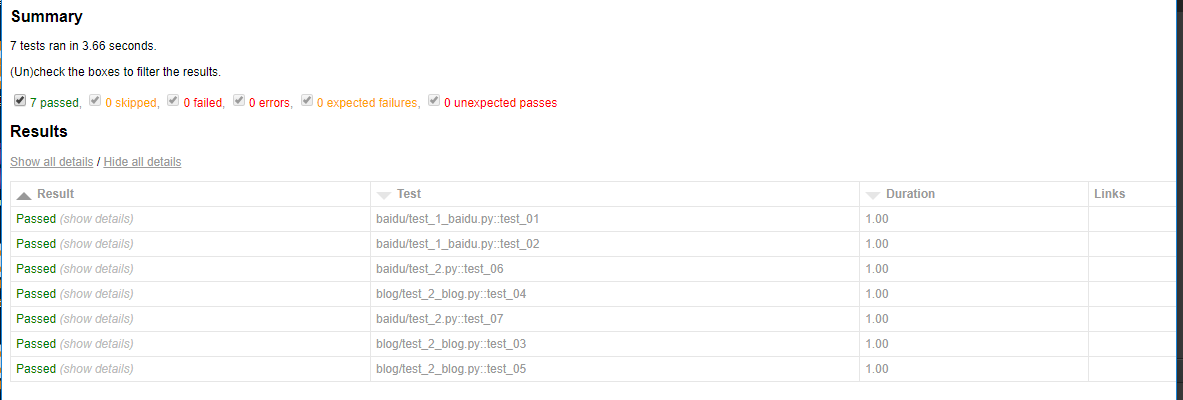
正常运行需要消耗时间:7.12 seconds
E:\YOYO\web_conf_py>pytest
============================= test session starts =============================
platform win32 -- Python 3.6.0, pytest-3.6.3, py-1.5.4, pluggy-0.6.0
rootdir: E:\YOYO\web_conf_py, inifile:
plugins: xdist-1.23.2, metadata-1.7.0, html-1.19.0, forked-0.2
collected 7 items

baidu\test_1_baidu.py ..                                                 [ 28%]
baidu\test_2.py ..                                                       [ 57%]
blog\test_2_blog.py ...                                                  [100%]

========================== 7 passed in 7.12 seconds ===========================
设置并行运行数量为3,消耗时间:3.64 seconds,大大的缩短了用例时间
E:\YOYO\web_conf_py>pytest -n 3
============================= test session starts =============================
platform win32 -- Python 3.6.0, pytest-3.6.3, py-1.5.4, pluggy-0.6.0
rootdir: E:\YOYO\web_conf_py, inifile:
plugins: xdist-1.23.2, metadata-1.7.0, html-1.19.0, forked-0.2
gw0 [7] / gw1 [7] / gw2 [7]
scheduling tests via LoadScheduling
.......                                                                  [100%]
========================== 7 passed in 3.64 seconds ===========================
测试报告
使用pytest-xdist插件也能生成html报告,完美支持pytest-html插件
pytest -n 3 --html=report.html --self-contained-html
pytest分布式执行(pytest-xdist)的更多相关文章
- Pytest(15)pytest分布式执行用例
前言 平常我们功能测试用例非常多时,比如有1千条用例,假设每个用例执行需要1分钟,如果单个测试人员执行需要1000分钟才能跑完 当项目非常紧急时,会需要协调多个测试资源来把任务分成两部分,于是执行时间 ...
- pytest文档27-pytest分布式执行(pytest-xdist)
前言 平常我们手工测试用例非常多时,比如有1千条用例,假设每个用例执行需要1分钟.如果一个测试人员执行需要1000分钟才能执行完,当项目非常紧急的时候, 我们会用测试人力成本换取时间成本,这个时候多找 ...
- pytest-xdist分布式执行测试用例
前言 平常我们手工测试用例非常多时,比如有1千条用例,假设每个用例执行需要1分钟.如果一个测试人员执行需要1000分钟才能执行完,当项目非常紧急的时候,我们会用测试人力成本换取时间成本,这个时候多找个 ...
- pytest的执行方式及搜索原则
pytest的执行方式 Pytest/py.test(终端,命令行,pycharm可配置pytest方式执行) 1. Pytest –v (最高级别信息—verbose) 2. pytest -v - ...
- pytest框架执行自动化测试时使用pycharm正常运行,使用cmd或Terminal报错:Hint: make sure your test modules/packages have valid Python names.
问题描述: 使用pytest框架做接口自动化测试时,在测试用例所在的.py文件下使用pycharm的run功能可以正常跑用例,使用cmd运行窗口或Terminal则报下图中的错误: Hint: mak ...
- App自动化《元素定位方式、元素操作、混合应用、分层设计、代码方式执行Pytest 命令》
坚持原创输出,点击蓝字关注我吧 作者:清菡 博客:oschina.云+社区.知乎等各大平台都有. 目录 一.App 元素定位方式 二.元素操作 三.测试混合应用 四.以代码的方式执行 Pytest 命 ...
- pytest系列(四)- pytest+allure+jenkins - 持续集成平台生成allure报告
pytest是什么 pytest是python的一款测试框架,拥有unittest的功能并比它更丰富. allure是什么 有非常多的优秀的测试框架,但却是有非常少优秀的报告工具可以展示非常清楚的用例 ...
- Pytest单元测试框架-Pytest环境安装
unittest是python自带的单元测试框架,它封装好了一些校验返回的结果方法和一些用例执行前的初始化操作,使得单元测试易于开展,因为它的易用性,很多同学也拿它来做功能测试和接口测试,只需简单开发 ...
- pytest(3):pytest运行参数介绍
前言 pytest 带有很多参数,可以使用 pytest --help 来查看帮助文档,下面介绍几种常用的参数: 无参数 读取路径下所有符合规则的文件,类,方法,函数全部执行.使用方法如下: py ...
随机推荐
- 寻找最美的你(select)
Time Limit:2000ms Memory Limit:128MB 题目描述 这个问题是这样的,如果一个区间[L,R]存在一个数ai,使得这个数是这个区间所有数的约数,那么[L,R]这段区间 ...
- 第十二章 设计用户界面 之 设计自适应的UI布局
1. 概述 随着手机和平板设备的日益普及,使得开发者不得不考虑MVC网站在移动设备上的展示. 本章内容包括:运行在多种设备上的程序(屏幕分辨率,CSS,HTML).设计手机端Web程序. 2. 主要内 ...
- (wp8.1开发)触摸键从推出变返回
---恢复内容开始--- 今天开发wp8.1,遇到这样一个问题,从第一个页面跳到第二个页面,在第二个页面按返回,结果程序退出了.原来是系统把返回键定义成退出了. 解决办法: 在第一个页面加入如下代码 ...
- vue-quill-editor 富文本编辑器插件介绍
Iblog项目中博文的文本编辑器采用了vue-quill-editor插件,本文将简单介绍其使用方法. 引入配置 安装模块 npm install vue-quill-editor --save in ...
- mongodb 原子操作findAndModify
原子操作模型数据findAndModify 推荐的方法,以保持原子将保留所有的相关信息,这些信息经常更新,一个文档中使用嵌入文档.这将确保所有的更新为一个单一文档是原子. 考虑下面的 products ...
- jsp实现账户登录、注册!
jsp连接mysql数据库进行账户登录验证和账户注册 ~jsp: Login.jsp .LoginCl.jsp.Welcome.jsp.Register.jsp.login.css login.css ...
- SnowKiting 2017/1/24
原文 Let's go fly a kite...in the snow Your snowkiting checklist To snowkite safely,you'll need a litt ...
- 洛谷 P2068 统计和
题目描述 给定一个长度为n(n<=100000),初始值都为0的序列,x(x<=10000)次的修改某些位置上的数字,每次加上一个数,然后提出y (y<=10000)个问题,求每段区 ...
- 使用JavaScript调用手机平台上的原生API
我之前曾经写过一篇文章使用Cordova将您的前端JavaScript应用打包成手机原生应用,介绍了如何使用Cordova框架将您的用JavaScript和HTML开发的前端应用打包成某个手机平台(比 ...
- UIButton 左对齐 省略号最右边
//左对齐 [_btn setContentHorizontalAlignment:UIControlContentHorizontalAlignmentLeft]; //省略号靠右侧 _btn.ti ...