我的QML
1、键盘加Text
import QtQuick 2.7

import QtGraphicalEffects 1.0

Rectangle{

    width:;

    height:;

    color:"#C0C0C0";

    focus:true;

    Keys.enabled:true;

    Keys.onEscapePressed:Qt.quit();

    Keys.onBackPressed:Qt.quit();

    Keys.onPressed:{

        switch(event.key){

        case Qt.Key_0:

        case Qt.Key_1:

        case Qt.Key_2:

        case Qt.Key_3:

        case Qt.Key_4:

        case Qt.Key_5:

        case Qt.Key_6:

        case Qt.Key_7:

        case Qt.Key_8:

        case Qt.Key_9:

            event.accepted=true;

            keyView.text = event.key-Qt.Key_0;

            break;

        }

    }

    Text{

        id:keyView;

        font.bold:true;

        font.pixelSize:;

        text:"Waiting";

        anchors.centerIn:parent;

        color:"#FF0000";

    }

    Glow{//光影

        anchors.fill:keyView;

        radius:;

        samples:;

        color:"white";

        source:keyView;

    }

}

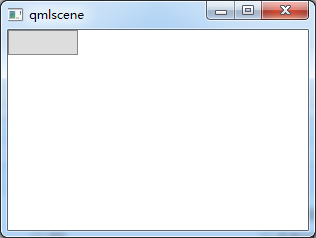
2、按钮+信号
import QtQuick 2.7

import QtQuick.Controls 2.2

Rectangle{

    width:;

    height:;

    color:"gray";

    Button{

        text:"Quit";

        anchors.centerIn:parent;

        onClicked:Qt.quit();

    }

}

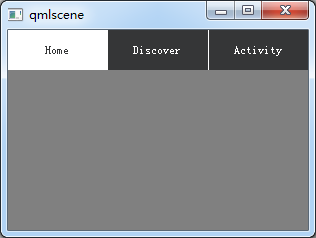
3、TabBar
import QtQuick 2.7

import QtQuick.Controls 2.2

Rectangle{

    width:;

    height:;

    color:"gray";

    TabBar {

      id:bar

      width:parent.width

      TabButton {

        text:qsTr("Home")

      }

      TabButton {

        text:qsTr("Discover")

      }

      TabButton {

        text:qsTr("Activity")

      }

   }
}
4、按钮+Compnent+风格
import QtQuick 2.2

import QtQuick.Controls 1.1

import QtQuick.Controls.Styles 1.4

Rectangle{

    width:;

    height:;

    Component{

    id:btnStyle;

    ButtonStyle{

        background:Rectangle{

            implicitWidth:;

            implicitHeight:;

            color:"#DDDDDD";

            border.width:control.pressed?:;

            border.color:(control.hovered||control.pressed)?"green":"#888888";

            }

        }

    }

    Button{

        style:btnStyle;

    }

}
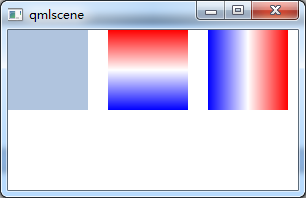
5、矩形+颜色渐变+旋转
转自:https://blog.csdn.net/qq21497936/article/details/78526200
import QtQuick 2.2

import QtQuick.Controls 1.1

Item {

    Rectangle {

        x: ; width: ; height:

        color: "lightsteelblue"

    }

    Rectangle {

        x: ; width: ; height:

        gradient: Gradient {

            GradientStop { position: 0.0; color: "red" }

            GradientStop { position: 0.5; color: "white" }

            GradientStop { position: 1.0; color: "blue" }

        }

    }

    Rectangle {

        x: ; width: ; height:

        rotation:  // 旋转90度

        gradient: Gradient { // 只能从上到下,若需要横向则需要旋转90°

            GradientStop { position: 0.0; color: "red" }

            GradientStop { position: 0.5; color: "white" }

            GradientStop { position: 1.0; color: "blue" }

        }

    }

}
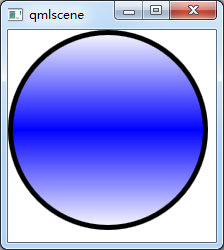
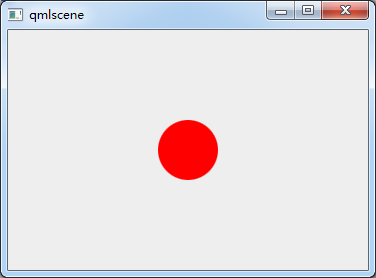
6、通过设置半径来画圆
转自:https://blog.csdn.net/qq21497936/article/details/78526200

import QtQuick 2.2

import QtQuick.Controls 1.1
Item {

    Rectangle {

        id: rect1;

        width: ;

        height: ;

        radius: width/;

        gradient: Gradient {

            GradientStop { position: 0.0; color: "white"; }

            GradientStop { position: 0.5; color: "blue"; }

            GradientStop { position: 1.0; color: "white"; }

        }

        border.width: ;

        border.color: "black";

    }

}
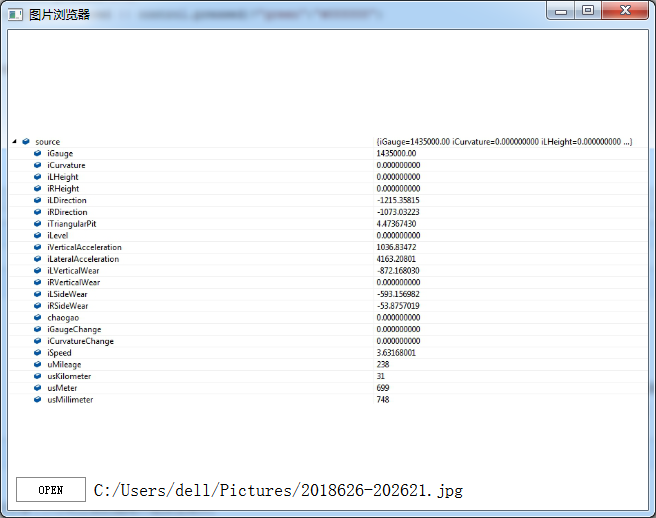
7、简单的图片浏览器
import QtQuick 2.2

import QtQuick.Window 2.1

import QtQuick.Controls 1.2

import QtQuick.Controls.Styles 1.2

import QtQuick.Dialogs 1.1

Window {

    visible: true;

    width: ;

    height: ;

    title: "图片浏览器";

    minimumWidth: ;

    minimumHeight: ;

    BusyIndicator{

        id: busy;

        running: false;

        anchors.centerIn: parent;

        z:;

    }

    Text {

        id: stateLabel;

        visible: false;

        anchors.centerIn: parent;

        z:;

    }

    Image {

        id: iamgeViewr;

        asynchronous: true;

        cache:false;

        anchors.fill: parent;

        fillMode: Image.PreserveAspectFit;

        onStatusChanged: {

            if(iamgeViewr.status===Image.Loading){

                busy.running = true;

                stateLabel.visible = false;

            }

            else if(iamgeViewr.status===Image.Ready){

                busy.running=false;

            }

            else if(iamgeViewr.status===Image.Error)

            {

                busy.running = false;

                stateLabel.visible = true;

                stateLabel.text = "ERROR";

            }

        }

    }

    Text {

        id: imagePath;

        anchors.left: openFileBtn.right;

        anchors.leftMargin: ;

        anchors.verticalCenter: openFileBtn.verticalCenter;

        font.pixelSize: ;

    }

    FileDialog{

        id:fileDialog;

        title: "open a picture";

        nameFilters: ["Image Files(*.jpg *.png *.gif)"];

        onAccepted: {

            iamgeViewr.source = fileDialog.fileUrl;

            var imageFile = String(fileDialog.fileUrl);

            imagePath.text = imageFile.slice();

        }

    }

    Button{

        id:openFileBtn;

        text:"OPEN";

        anchors.left: parent.left;

        anchors.leftMargin: ;

        anchors.bottom: parent.bottom;

        anchors.bottomMargin: ;

        style:ButtonStyle{

            background: Rectangle{

                implicitWidth: ;

                implicitHeight: ;

                color:"#FFFFFF";

                border.width: control.pressed?:;

                border.color: (control.hovered || control.pressed)?"green":"#888888";

            }

        }

        onClicked: fileDialog.open();

        z:;

    }

}
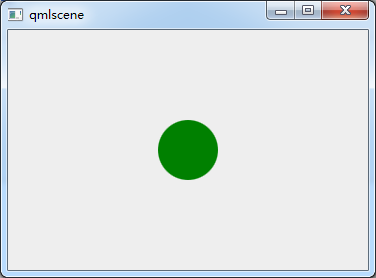
8、颜色动画ColorAnimation
import QtQuick 2.2

Rectangle{

    id: rootItem

    width:

    height:

    color: "#EEEEEE"

    Rectangle{

        id: rect

        width:

        height:

        anchors.centerIn: parent

        radius:

        color: "red"

        MouseArea{

            id: mouseArea

            anchors.fill: parent

            onClicked: ColorAnimation{

                target: rect

                property: "color"

                to: "green"

                duration:

            }

        }

    }

}

9、MouseArea拖动
import QtQuick 2.6

import QtQuick.Window 2.2

import QtQuick.Controls 1.4

Window {

    visible: true

    width:

    height:

    title: qsTr("Hello World")

    Rectangle {

         id: container

         width: ; height:

         Rectangle {

             id: rect

             width: ; height:

             color: "red"

             opacity: (600.0 - rect.x) /

             MouseArea {

                 anchors.fill: rect

                 drag.target: rect

                 drag.axis:Drag.XAndYAxis

                 drag.minimumX:

                 drag.maximumX: container.width - rect.width

                 drag.minimumY:

                 drag.maximumY: container.width - rect.width

             }

         }

     }

}
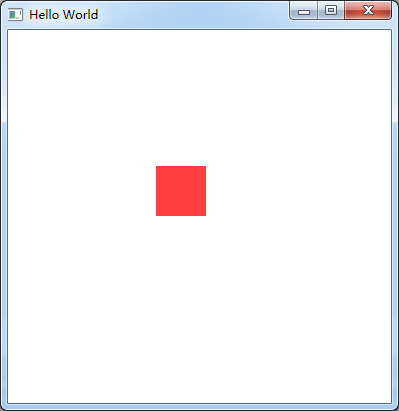
ps:试过给Window或者ApplicationWindow添加MouseArea来移动整个窗口,但是失败了。
分析:MouseArea只能移动有父类的Item
10、Keys
import QtQuick 2.6

import QtQuick.Window 2.2

import QtQuick.Controls 1.4

Window {

    id:main;

    visible: true

    width:

    height:

    Rectangle{

        width: ;

        height: ;

        anchors.fill: parent;

        focus:true;//获取焦点

        Keys.enabled: true;//使能按键

        Keys.forwardTo: text;//将按键事件传递到text对象

        Rectangle {

            id: text;

            width: ;

            height: ;

            color: "red";

            Keys.enabled: true;

            Keys.onPressed: {

                switch(event.key){

                case Qt.Key_Left:

                    x-=;

                    break;

                case Qt.Key_Right:

                    x+=;

                    break;

                case Qt.Key_Down:

                    y+=;

                    break;

                case Qt.Key_Up:

                    y-=;

                    break;

                default:

                    break;

                }

                event.accepted = true;//在这里把按键事件吃了,不再向下传递

            }

        }

    }

}
我的QML的更多相关文章
- QML 从无到有 3 (自动更新)
新的需求出来啦,需要自动更新功能,不怕程序升级了. 自动更新,QML不好写,需要c++来辅助,这里就涉及QML中调用c++功能(这里就不写了,百度一下,很多). 思路:获取版本>下载程序> ...
- QML 从无到有 2 (移动适配)
随着项目深入,需要移植到安卓上,问题来了,QML安卓适配! 幸好PC端程序和手机屏幕长宽比例相似.虽然单位像素,尺寸不同,通过比例缩放,可以实现组件PC和安卓通用代码. 第一步:定义全局的转换函数(3 ...
- QML 从无到有 (基础)
小公司,没办法,什么都得自己亲自来. 服务端是MVC,现在需要可PC客户端和移动APP. 考虑到网页应用有很多界面框架,可以做出很漂亮的界面来,就尝试着使用nwjs来实现,可是在使用了2天的nwjs后 ...
- QML杂记
1.QML编写可视化元素,运行后程序窗口上无显示.检查电脑的显卡是否支持OpenGL,如果支持请更新显卡驱动. 2.加载图片显示QML Image: Cannot open.解决在qml.qrc右击添 ...
- Qml 写的弹出层控件
QML弹出窗口组件,灯箱效果.动画效果,可拖拽 核心思路:一个mask层,一个最顶层,都用rectangle,禁止事件穿透 使用 Popup { id: popup width: 200; heigh ...
- Qt qml 单例模式
Qt qml 单例模式,没什么好说的,看代码吧.单例模式很适合做全局的配置文件. [示例下载] http://download.csdn.net/detail/surfsky/8539313 [以下是 ...
- Qt qml listview 列表视图控件(下拉刷新、上拉分页、滚动轴)
Qt qml listview下拉刷新和上拉分页主要根据contentY来判断.但要加上顶部下拉指示器.滚动条,并封装成可简单调用的组件,着实花了我不少精力:) [先看效果] [功能] 下拉刷新 ...
- Qt qml treeview 树控件
qml并没有提供树控件,只能自己写了.model仍然用ListModel对象,弄成层级的就行.delegate必须用loader动态的增加子控件,如此而已. [先看效果] [下载] http://do ...
- qt qml qchart 图表组件
qt qml qchart 图表组件 * Author: Julien Wintz * Created: Thu Feb 13 23:41:59 2014 (+0100) 这玩意是从chart.js迁 ...
- qt qml fuzzyPanel 毛玻璃效果
毛玻璃效果,用qml来写代码真是简短,大爱qml:) [下载地址]http://download.csdn.net/detail/surfsky/8426641 [核心代码] Rectangle{ c ...
随机推荐
- 记录一则RMAN恢复到历史备份(多个incarnation)
环境: OEL 5.7 + Oracle 11.2.0.4 1.直接restore到想要恢复的时间点报错: RMAN> sql "alter session set nls_date_ ...
- whu 643 Soul Artist(二维BIT 区间更新,单点查询)
Soul Artis [题目链接]Soul Artis [题目类型]二维BIT &题解: 二维区间更新和一维相比,要容斥一下,更新一块区间就是更新4个点. 还有这个我先是写了2*n^2logn ...
- VS编译后直接复制DLL库文件到其他目录下
项目目录:SourceCode\公共组件\KApiClient\ 要复制的目的目录: SourceCode\公共组件\DllLibrary\ApiClient 则在项目 KApiClient下添加如下 ...
- html utf-8 中文乱码
刚才用ajax从记事本中读文档的时候,发现在页面上显示是乱码. 页面编码:<meta charset="utf-8"> 搞半天最后发现是记事本编码格式的问题,记事本默认 ...
- [C#]Socket通信BeginReceive异步接收数据何时回调Callback
原文地址:http://www.cnblogs.com/wangtonghui/p/3277303.html 最近在做服务器压力测试程序. 接触了一段时间Socket异步通讯,发现自己对BeginRe ...
- 20155228 2017-5-31 课堂测试:编写MyOD.java
20155228 2017-5-31 课堂测试:编写MyOD.java 题目和要求 编写MyOD.java:用java MyOD XXX实现Linux下od -tx -tc XXX的功能 提交测试代码 ...
- .net 缓存
缓存有很多实现方法,所有这些可以被分为两类,基于内存的缓存和基于磁盘的缓存: 1. 内存驻留缓存——包含在内存中临时存储数据的所有实现方法,通常在以下情况下使用: a) 应用程序频繁使用 ...
- python编程快速上手第7章习题20
20.如何写一个正则表达式,匹配每 3 位就有一个逗号的数字?它必须匹配以下数字:'42''1,234''6,368,745'但不会匹配: '12,34,567' (逗号之间只有两位数字) '1234 ...
- Gibbs Sampling深入理解
二维Gibbs Sampling算法 Gibbs Sampling是高维概率分布的MCMC采样方法.二维场景下,状态(x, y)转移到(x’, y’),可以分为三种场景 (1)平行于y轴转移,如上图中 ...
- 利用sqoop将hive数据导入导出数据到mysql
一.导入导出数据库常用命令语句 1)列出mysql数据库中的所有数据库命令 # sqoop list-databases --connect jdbc:mysql://localhost:3306 ...