实验四 Android程序设计
20155224 实验四 Android程序设计 实验报告
实验报告封面:
课程:Java程序设计  班级:1652班  姓名:王高源 学号:20165225

指导教师:娄嘉鹏 实验日期:2018年5月14日

实验时间:3:35 - 5:15 实验序号:实验4

实验名称:Android程序设计

实验内容:

实验要求

1.Android Stuidio的安装测试:参考《Java和Android开发学习指南(第二版)(EPUBIT,Java for Android 2nd)》第二十四章:

2.参考http://www.cnblogs.com/rocedu/p/6371315.html#SECANDROID,安装 Android Stuidio

3.完成Hello World, 要求修改res目录中的内容,Hello World后要显示自己的学号,自己学号前后一名同学的学号,提交代码运行截图和码云Git链接,截图没有学号要扣分

4.学习Android Stuidio调试应用程序

实验要求:

- 没有Linux基础的同学建议先学习《Linux基础入门(新版)》《Vim编辑器》 课程

- 完成实验、撰写实验报告,实验报告以博客方式发表在博客园,注意实验报告重点是运行结果,遇到的问题(工具查找,安装,使用,程序的编辑,调试,运行等)、解决办法(空洞的方法如“查网络”、“问同学”、“看书”等一律得0分)以及分析(从中可以得到什么启示,有什么收获,教训等)。报告可以参考范飞龙老师的指导

严禁抄袭,有该行为者实验成绩归零,并附加其他惩罚措施。
实验步骤:
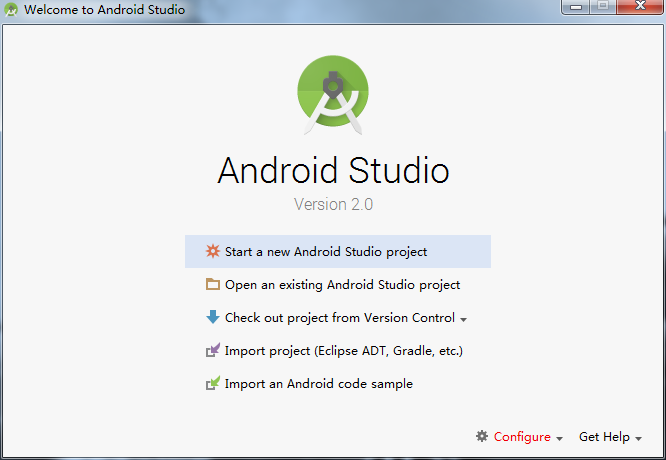
Android Studio的安装与运行:
Android Studio的安装与运行
Android Studio的安装包并进行安装。
需要安装Android的SDK,就像java里面的JDK一样。
由于要在虚拟的手机上显示,自然还需要虚拟机。

- 接着按照老师的博客给出的步骤完成jdk配置(第一次安这个都要配)
- 这样选就可以安好了

任务一:
完成Hello World, 要求修改res目录中的内容,Hello World后要显示自己的学号。
根据老师的博客运行了Android Stuidio,然后运行了Helloworld进行设备测试并修改了xml文件。
<?xml version="1.0" encoding="utf-8"?>

<android.support.constraint.ConstraintLayout xmlns:android="http://schemas.android.com/apk/res/android"

        xmlns:app="http://schemas.android.com/apk/res-auto"

        xmlns:tools="http://schemas.android.com/tools"

        android:layout_width="match_parent"

        android:layout_height="match_parent"

        tools:context="com.example.a1.helloworld.MainActivity">

<TextView

        android:layout_width="wrap_content"

                android:layout_height="wrap_content"

                android:text="Hello World!Hello World!20155329 20165225 20165331"

                app:layout_constraintBottom_toBottomOf="parent"

                app:layout_constraintLeft_toLeftOf="parent"

                app:layout_constraintRight_toRightOf="parent"

                app:layout_constraintTop_toTopOf="parent" />

</android.support.constraint.ConstraintLayout>
- 运行截图:

任务二:
创建 ThirdActivity, 在ThirdActivity中显示自己的学号,修改代码让MainActivity启动ThirdActivity
在这个任务中,我们需要调用ThirdActivity,所以在AndroidManifest.xml中再添加一个activity...>。并且每一个控制文件的Activity都需要有对应的启动程序文件(.java),和相应的布局文件(.xml)。
在这个任务中,要求让MainActivity启动ThirdActivity,所以还需要修改MainActivity。MainActivity.java
package com.example.Calpernia.helloworld;

import android.support.v7.app.AppCompatActivity;

import android.os.Bundle;

public class MainActivity extends AppCompatActivity {

    @Override

    protected void onCreate(Bundle savedInstanceState) {

        super.onCreate(savedInstanceState);

        // setContentView(R.layout.activity_main);

        setContentView(R.layout.activity_third);

    }

}
- thirdactivity_main.xml
<?xml version="1.0" encoding="utf-8"?>

<android.support.constraint.ConstraintLayout xmlns:android="http://schemas.android.com/apk/res/android"

    xmlns:app="http://schemas.android.com/apk/res-auto"

    xmlns:tools="http://schemas.android.com/tools"

    android:layout_width="match_parent"

    android:layout_height="match_parent"

    tools:context=".ThirdActivity">

    <TextView

        android:layout_width="wrap_content"

        android:layout_height="wrap_content"

        android:text="20165225王高源" />

</android.support.constraint.ConstraintLayout>
- 运行截图:

任务三:
修改代码让Toast消息中显示自己的学号信息
只需要在这个任务需要在mainActivity中添加代码:
Button btnshow1 = (Button) findViewById(R.id.btn1);

    btnshow1.setOnClickListener(new View.OnClickListener() {

        @Override

        public void onClick(View v) {

            Toast toast = Toast.makeText(MainActivity.this, "20155225王高源", Toast.LENGTH_LONG);

            toast.show();

        }

    });
- MainActivity.java
package com.example.Calpernia.toast;

import android.support.v7.app.AppCompatActivity;

import android.os.Bundle;

import android.view.View;

import android.widget.Button;

import android.widget.Toast;

public class MainActivity extends AppCompatActivity {

    @Override

    protected void onCreate(Bundle savedInstanceState) {

        super.onCreate(savedInstanceState);

        setContentView(R.layout.activity_main);

        Button button = (Button) findViewById(R.id.button);

        button.setOnClickListener(new View.OnClickListener()

        {

            @Override

            public void onClick(View v){

                Toast toast = Toast.makeText(MainActivity.this,"20155225王高源", Toast.LENGTH_LONG);

                toast.show();

            }

        });

    }

}
- 运行截图:

任务四:
修改布局让P290页的界面与教材不同
activity_main.xml
<?xml version="1.0" encoding="utf-8"?>

<android.support.constraint.ConstraintLayout xmlns:android="http://schemas.android.com/apk/res/android"

        xmlns:app="http://schemas.android.com/apk/res-auto"

        xmlns:tools="http://schemas.android.com/tools"

        android:layout_width="match_parent"

        android:layout_height="match_parent"

        tools:context="com.example.a1.relativelayout.MainActivity">

<Button

        android:id="@+id/button"

                android:layout_width="wrap_content"

                android:layout_height="wrap_content"

                android:text="Cancel"

                app:layout_constraintLeft_toLeftOf="parent"

                android:layout_marginLeft="8dp"

                android:layout_marginRight="8dp"

                app:layout_constraintRight_toRightOf="parent"

                app:layout_constraintTop_toTopOf="parent"

                android:layout_marginTop="16dp"

                app:layout_constraintHorizontal_bias="0.932" />

<Button

        android:id="@+id/button2"

                android:layout_width="wrap_content"

                android:layout_height="wrap_content"

                android:text="Save"

                android:layout_marginRight="8dp"

                android:layout_marginLeft="8dp"

                app:layout_constraintLeft_toLeftOf="parent"

                app:layout_constraintRight_toLeftOf="@+id/button"

                app:layout_constraintTop_toTopOf="parent"

                android:layout_marginTop="16dp"

                app:layout_constraintHorizontal_bias="0.151" />

<ImageView

        android:id="@+id/imageView"

                android:layout_width="96dp"

                android:layout_height="84dp"

                app:srcCompat="@android:drawable/presence_audio_online"

                android:layout_marginRight="8dp"

                app:layout_constraintRight_toRightOf="parent"

                android:layout_marginLeft="8dp"

                app:layout_constraintLeft_toLeftOf="parent"

                app:layout_constraintBottom_toBottomOf="parent"

                android:layout_marginBottom="46dp" />

<Button

        android:id="@+id/button3"

                android:layout_width="wrap_content"

                android:layout_height="wrap_content"

                android:text="Share"

                android:layout_marginBottom="8dp"

                app:layout_constraintBottom_toTopOf="@+id/imageView"

                app:layout_constraintTop_toTopOf="parent"

                android:layout_marginTop="8dp"

                android:layout_marginRight="8dp"

                app:layout_constraintVertical_bias="0.501"

                app:layout_constraintRight_toRightOf="parent"

                android:layout_marginLeft="8dp"

                app:layout_constraintLeft_toLeftOf="parent" />

<Button

        android:id="@+id/button4"

                android:layout_width="wrap_content"

                android:layout_height="wrap_content"

                android:text="Delete"

                app:layout_constraintRight_toLeftOf="@+id/button5"

                android:layout_marginRight="8dp"

                android:layout_marginLeft="8dp"

                app:layout_constraintLeft_toLeftOf="parent"

                app:layout_constraintHorizontal_bias="0.139"

                android:layout_marginTop="55dp"

                app:layout_constraintTop_toBottomOf="@+id/button2"

                app:layout_constraintBottom_toBottomOf="parent"

                android:layout_marginBottom="8dp" />

<Button

        android:id="@+id/button5"

                android:layout_width="wrap_content"

                android:layout_height="wrap_content"

                android:text="Filter"

                android:layout_marginRight="27dp"

                app:layout_constraintRight_toRightOf="parent"

                android:layout_marginTop="55dp"

                app:layout_constraintTop_toBottomOf="@+id/button"

                app:layout_constraintBottom_toBottomOf="parent"

                android:layout_marginBottom="8dp" />

</android.support.constraint.ConstraintLayout>
- 运行截图:

任务五:
运行教材本章相关代码并截图
MainActivity.java
package com.example.a1.multicolorclock;

import android.os.Bundle;

import android.app.Activity;

import android.view.Menu;

import android.view.View;

import android.graphics.Color;

public class MainActivity extends Activity  {

    int counter = 0;

    int[] colors = { Color.BLACK, Color.BLUE, Color.CYAN,

            Color.DKGRAY, Color.GRAY, Color.GREEN, Color.LTGRAY,

            Color.MAGENTA, Color.RED, Color.WHITE, Color.YELLOW };

    @Override

    protected void onCreate(Bundle savedInstanceState) {

        super.onCreate(savedInstanceState);

        setContentView(R.layout.activity_main);

    }

    @Override

    public boolean onCreateOptionsMenu(Menu menu) {

        getMenuInflater().inflate(R.menu.menu_main, menu);

        return true;

    }

    public void changeColor(View view) {

        if (counter == colors.length) {

            counter = 0;

        }

        view.setBackgroundColor(colors[counter++]);

    }

}
运行截图:

PSP(Personal Software Process)时间:
| 步骤 | 耗时 | 百分比 |
|---|---|---|
| 功能实现 | 55min | 12.5% |
| 测试 | 25min | 15.6% |
| 分析总结 | 20min | 12.5% |
实验四 Android程序设计的更多相关文章
- 实验四 Android程序设计 实验报告
实验四 Android程序设计 实验报告 目录 代码托管地址 Android程序设计-1 Android程序设计-2 Android程序设计-3 Android程序设计-4 Android程序设计-5 ...
- 第十四周实验报告:实验四 Android程序设计
20162317袁逸灏 第十四周实验报告:实验四 Android程序设计 实验内容 Android Studio 实验要求 学会使用Android Studio 学习 活动 以及相关知识内容 学习 U ...
- 20165235实验四 Android程序设计
20165235实验四 Android程序设计 实验课程:JAVA编程设计 实验名称:Android开发 姓名:祁瑛 学号:20165235 实验时间:2018.05.16 指导老师:娄家鹏 Andr ...
- 20165220Java实验四 Android程序设计
一.实验报告封面 课程:Java程序设计 班级:1652班 姓名:葛宇豪 学号:20165220 指导教师:娄嘉鹏 实验日期:2018年5月14日 实验时间:13:45 - 15:25 实验序号:实验 ...
- 20172328《程序设计与数据结构》实验四 Android程序设计报告
20172328<程序设计与数据结构>实验四 Android程序设计报告 课程:<程序设计与数据结构> 班级: 1723 姓名: 李馨雨 学号:20172328 实验教师:王志 ...
- 20172302《程序设计与数据结构》实验四Android程序设计实验报告
课程:<程序设计与数据结构> 班级: 1723 姓名: 侯泽洋 学号:20172302 实验教师:王志强老师 实验日期:2018年5月30日 必修/选修: 必修 1.实验内容 (1)And ...
- 20165236 实验四 Android程序设计
20165236 实验四 Android程序设计 一.实验报告 课程:Java程序设计 班级:1652班 姓名:郭金涛 学号:20165236 指导教师:娄嘉鹏 实验 ...
- 20165205 2017-2018-2 《Java程序设计》实验四 Android程序设计
20165205 2017-2018-2 <Java程序设计>实验四 Android程序设计 实验内容 实验四 Android程序设计-1 Android Stuidio的安装测试: 参考 ...
- 20155205 《Java程序设计》实验四 Android程序设计
20155205 <Java程序设计>实验四 Android程序设计 一.实验内容及步骤 (一) Android Stuidio的安装测试 参考<Java和Android开发学习指南 ...
随机推荐
- masscan
masscan是一个快速的端口扫描工具 大概说一下它的使用方法,既有原创也有翻译 欢迎补充 扫描10.x.x.x的网络:masscan 10.0.0.0/8 -p80 程序将自动探测网络的接口和适配器 ...
- CefSharp 封装自己的简单H5浏览器 详细配置
下载了最新的CefSharp源码,发现在自己机器可以运行,到普通的WIN7系统 报了 System.IO.FileNotFoundException: Could not load file or ...
- Why you should use async tasks in .NET 4.5 and Entity Framework 6
Improve response times and handle more users with parallel processing Building a web application usi ...
- CFA一级知识点总结
更多来自: www.vipcoursea.com Ethics 部分 Objective of codes and standard:永远是为了maintain public trust in ...
- Cisco DHCP Snooping + IPSG 功能实现
什么是DHCP? DHCP(Dynamic Host Configuration Protocol,动态主机配置协议)是一个局域网的网络协议,前身是BOOTP协议, 使用UDP协议工作,常用的2个端口 ...
- laravel项目composer安装
1.下载 Composer (https://pkg.phpcomposer.com/#how-to-install-composer) 安装前请务必确保已经正确安装了 PHP.打开命令行窗口并执行 ...
- webpack + vue 项目 自定义 插件 解决 前端 JS 版本 更新 问题
Webpack 是一个前端资源加载/打包工具.它将根据模块的依赖关系进行静态分析,然后将这些模块按照指定的规则生成对应的静态资源. 它的异步加载原理是,事先将编译好后的静态文件,通过js对象映射,硬编 ...
- ASP.NET MVC 4 (十二) Web API
Web API属于ASP.NET核心平台的一部分,它利用MVC框架的底层功能方便我们快速的开发部署WEB服务.我们可以在常规MVC应用通过添加API控制器来创建web api服务,普通MVC应用程序控 ...
- 解决Error:All flavors must now belong to a named flavor dimension. Learn more at https://d.android.com
主app的build.gradle里面的 defaultConfig { targetSdkVersion:*** minSdkVersion :*** versionCode:*** version ...
- js - 移动端的超出滚动功能,附带滚动条,可解决弹层中滚动穿透问题。
背景: 弹层里边有可滚动区域时,在移动端的坑我就不多说了. 找了很多解决滚动穿透的方案,最终都不能完美解决. 一气之下自己js撸了一个. 效果图: 原理: 1.解决滚动穿透:通过给弹层绑定touchm ...