Spring动态代理及Spring Bean的生命周期
数组添加值
public class DiTest {

    /**

     * 数组

     */

    private String [] arrays;

    /**

     * List:集合

     */

    private List<Integer> lists;

    /**

     * Set:   无序集合

     */

    private Set<String> sets;

    /**

     * Map

     */

    private Map<String,Object> maps;

    /**

     * 配置

     */

    private Properties properties;
首先先编写一个applicationContextList.xml大配置文件
然后在到大配置里面配置实体类名
<bean id="diTest" class="com.wdkseft.entity.DiTest">
数组(arrays)
<!--数组-->

<property name="arrays">

    <array>

        <value>呵呵</value>

        <value>啦啦</value>

    </array>

</property>
List
<!--list-->

<property name="lists">

    <list>

        <value>18</value>

        <value>19</value>

    </list>

</property>
Set
<!--set-->

<property name="sets">

    <set>

        <value>ashdads</value>

        <value>ajfiasdj</value>

    </set>

</property>
Map
<!--Map-->

<property name="maps">

    <map>

        <entry key="name" value="lll"></entry>

        <entry key="age" value="18"></entry>

    </map>

</property>
properties
<!--properties-->

<property name="properties">

    <props>

        <prop key="jdbc.drver">com.mysql.jdbc.Driver</prop>

        <prop key="jdbc.username">root</prop>

    </props>

</property>
单步执行
@Test

public void List(){

    ApplicationContext ctx = new ClassPathXmlApplicationContext("applicationContextList.xml");

    DiTest diTest = (DiTest) ctx.getBean("diTest");

    System.out.println(diTest.toString());

}
静态代理
首先先声明一个主题
/**

 * 抽象主题:真实业务接口

 */

public interface Subject {

    void doSome();

}
然后声明一个真实的主题 生成真实主题的方法
//真实主题

private Subject subject=new RealSubject();
public class ProxySubject implements Subject {
//真实主题
private Subject subject=new RealSubject();
@Override
public void doSome() {
//aop思想:增强
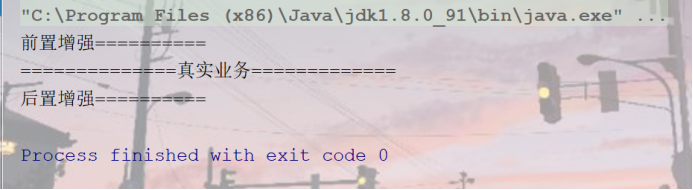
System.out.println("前置增强==========");
subject.doSome();
System.out.println("后置增强==========");
}
}
5.使用多种方式实现AOP
Spring AOP实现原理:动态代理
5.1 JDK动态代理
JDK动态代理所用到的代理类在程序调用到代理类对象时才由JVM真正创建,JVM根据传进来的 业务实现类对象 以及 方法名 ,动态地创建了一个代理类的class文件并被字节码引擎执行,然后通过该代理类对象进行方法调用。
/**

 * 真实主题:将雨业务代码封装到这里

 */

public class RealSubject implements Subject {

    @Override

    public void doSome() {

        System.out.println("==============真实业务=============");

    }

}
2. 调用接口
public class ProxySubject implements Subject {

    //真实主题

    private Subject subject=new RealSubject();

    @Override

    public void doSome() {

        //aop思想:增强

        System.out.println("前置增强==========");

        subject.doSome();

        System.out.println("后置增强==========");

    }

}
单步执行
@Test

public void Spring(){

    ProxySubject proxySubject = new ProxySubject();

    proxySubject.doSome();

}
5.2 CGLIB动态代理
CGLIB是针对类来实现代理的,原理是对指定的业务类生成一个子类,并覆盖其中业务方法实现代理。因为采用的是继承,所以不能对final修饰的类进行代理。在JDK动态代理的基础之上新建新的代理工厂Bean
/**

 * 业务类

 */

public class IService {

    public void doSome(){

        System.out.println("我是实现业务的方法");

    }

}
编写测试类
public static void main(String[] args) {

    //CGLIB动态代理(当前项目必须有CGLIB的支持)

    //步骤一:目标对象

    final IService iService=new IService();

    //步骤二:通过CGLIB提供的Enhancer类生成代理

    Enhancer enhancer=new Enhancer();

    //步骤三:指定需要代理的目标对象模板(将目标对象放入到代理工厂当中,生成代理对象)

    enhancer.setSuperclass(iService.getClass());

    //步骤四:实现增强的处理操作

    enhancer.setCallback(new MethodInterceptor() {

        /**

         *

         * @param o             目标对象

         * @param method        目标对象的方法

         * @param objects       目标对象方法内的参数

         * @param methodProxy   代理目标对象方法

         * @return

         * @throws Throwable

         */

        @Override

        public Object intercept(Object o, Method method, Object[] objects, MethodProxy methodProxy) throws Throwable {

            System.out.println("前置");

            Object invoke = methodProxy.invoke(iService, objects);

            System.out.println("后置");

            return invoke;

        }

    });

//最后一步:创建代理

IService iServiceProxy = (IService)enhancer.create();

iServiceProxy.doSome();
6.Spring Bean的生命周期
6.1生命周期流程图:
Spring Bean的完整生命周期从创建Spring容器开始,直到最终Spring容器销毁Bean,这其中包含了一系列关键点。

若容器注册了以上各种接口,程序那么将会按照以上的流程进行。下面将仔细讲解各接口作用。
6.2各种接口方法分类
Bean的完整生命周期经历了各种方法调用,这些方法可以划分为以下几类:
1、Bean自身的方法:这个包括了Bean本身调用的方法和通过配置文件中<bean>的init-method和destroy-method指定的方法
2、Bean级生命周期接口方法:这个包括了BeanNameAware、BeanFactoryAware、InitializingBean和DiposableBean这些接口的方法
3、容器级生命周期接口方法:这个包括了InstantiationAwareBeanPostProcessor 和 BeanPostProcessor 这两个接口实现,一般称它们的实现类为“后处理器”。
4、工厂后处理器接口方法:这个包括了AspectJWeavingEnabler, ConfigurationClassPostProcessor, CustomAutowireConfigurer等等非常有用的工厂后处理器 接口的方法。工厂后处理器也是容器级的。在应用上下文装配配置文件之后立即调用。
6.3演示
1、首先是一个简单的Spring Bean,调用Bean自身的方法和Bean级生命周期接口方法,为了方便演示,它实现了BeanNameAware、BeanFactoryAware、InitializingBean和DiposableBean这4个接口,同时有2个方法,对应配置文件中<bean>的init-method和destroy-method。如下:
/**

 * @author qsk

 */

public class Person implements BeanFactoryAware, BeanNameAware,

        InitializingBean, DisposableBean {

    private String name;

    private String address;

    private int phone;

    private BeanFactory beanFactory;

    private String beanName;

    public Person() {

        System.out.println("【构造器】调用Person的构造器实例化");

    }

    public String getName() {

        return name;

    }

    public void setName(String name) {

        System.out.println("【注入属性】注入属性name");

        this.name = name;

    }

    public String getAddress() {

        return address;

    }

    public void setAddress(String address) {

        System.out.println("【注入属性】注入属性address");

        this.address = address;

    }

    public int getPhone() {

        return phone;

    }

    public void setPhone(int phone) {

        System.out.println("【注入属性】注入属性phone");

        this.phone = phone;

    }

    @Override

    public String toString() {

        return "Person [address=" + address + ", name=" + name + ", phone="+ phone + "]";

    }

    // 这是BeanFactoryAware接口方法

    @Override

    public void setBeanFactory(BeanFactory arg0) throws BeansException {

        System.out.println("【BeanFactoryAware接口】调用BeanFactoryAware.setBeanFactory()");

        this.beanFactory = arg0;

    }

    // 这是BeanNameAware接口方法

    @Override

    public void setBeanName(String arg0) {

        System.out.println("【BeanNameAware接口】调用BeanNameAware.setBeanName()");

        this.beanName = arg0;

    }

    // 这是InitializingBean接口方法

    @Override

    public void afterPropertiesSet() throws Exception {

        System.out

                .println("【InitializingBean接口】调用InitializingBean.afterPropertiesSet()");

    }

    // 这是DiposibleBean接口方法

    @Override

    public void destroy() throws Exception {

        System.out.println("【DiposibleBean接口】调用DiposibleBean.destory()");

    }

    // 通过<bean>的init-method属性指定的初始化方法

    public void myInit() {

        System.out.println("【init-method】调用<bean>的init-method属性指定的初始化方法");

    }

    // 通过<bean>的destroy-method属性指定的初始化方法

    public void myDestory() {

        System.out.println("【destroy-method】调用<bean>的destroy-method属性指定的初始化方法");

    }

}
2、接下来是演示BeanPostProcessor接口的方法,如下:
package springBeanTest;

import org.springframework.beans.BeansException;

import org.springframework.beans.factory.config.BeanPostProcessor;

public class MyBeanPostProcessor implements BeanPostProcessor {

    public MyBeanPostProcessor() {

        super();

        System.out.println("这是BeanPostProcessor实现类构造器!!");

        // TODO Auto-generated constructor stub

    }

    @Override

    public Object postProcessAfterInitialization(Object arg0, String arg1)

            throws BeansException {

        System.out

        .println("BeanPostProcessor接口方法postProcessAfterInitialization对属性进行更改!");

        return arg0;

    }

    @Override

    public Object postProcessBeforeInitialization(Object arg0, String arg1)

            throws BeansException {

        System.out

        .println("BeanPostProcessor接口方法postProcessBeforeInitialization对属性进行更改!");

        return arg0;

    }

}
如上,BeanPostProcessor接口包括2个方法postProcessAfterInitialization和postProcessBeforeInitialization,这两个方法的第一个参数都是要处理的Bean对象,第二个参数都是Bean的name。返回值也都是要处理的Bean对象。这里要注意
3、InstantiationAwareBeanPostProcessor 接口本质是BeanPostProcessor的子接口,一般我们继承Spring为其提供的适配器类InstantiationAwareBeanPostProcessor Adapter来使用它,如下:
package springBeanTest;

import java.beans.PropertyDescriptor;

import org.springframework.beans.BeansException;

import org.springframework.beans.PropertyValues;

import org.springframework.beans.factory.config.InstantiationAwareBeanPostProcessorAdapter;

public class MyInstantiationAwareBeanPostProcessor extends

        InstantiationAwareBeanPostProcessorAdapter {

    public MyInstantiationAwareBeanPostProcessor() {

        super();

        System.out

                .println("这是InstantiationAwareBeanPostProcessorAdapter实现类构造器!!");

    }

    // 接口方法、实例化Bean之前调用

    @Override

    public Object postProcessBeforeInstantiation(Class beanClass,

            String beanName) throws BeansException {

        System.out

                .println("InstantiationAwareBeanPostProcessor调用postProcessBeforeInstantiation方法");

        return null;

    }

    // 接口方法、实例化Bean之后调用

    @Override

    public Object postProcessAfterInitialization(Object bean, String beanName)

            throws BeansException {

        System.out

                .println("InstantiationAwareBeanPostProcessor调用postProcessAfterInitialization方法");

        return bean;

    }

    // 接口方法、设置某个属性时调用

    @Override

    public PropertyValues postProcessPropertyValues(PropertyValues pvs,

            PropertyDescriptor[] pds, Object bean, String beanName)

            throws BeansException {

        System.out

                .println("InstantiationAwareBeanPostProcessor调用postProcessPropertyValues方法");

        return pvs;

    }

}
这个有3个方法,其中第二个方法postProcessAfterInitialization就是重写了BeanPostProcessor的方法。第三个方法postProcessPropertyValues用来操作属性,返回值也应该是PropertyValues对象。
package springBeanTest;

import org.springframework.beans.BeansException;

import org.springframework.beans.factory.config.BeanDefinition;

import org.springframework.beans.factory.config.BeanFactoryPostProcessor;

import org.springframework.beans.factory.config.ConfigurableListableBeanFactory;

public class MyBeanFactoryPostProcessor implements BeanFactoryPostProcessor {

    public MyBeanFactoryPostProcessor() {

        super();

        System.out.println("这是BeanFactoryPostProcessor实现类构造器!!");

    }

    @Override

    public void postProcessBeanFactory(ConfigurableListableBeanFactory arg0)

            throws BeansException {

        System.out

                .println("BeanFactoryPostProcessor调用postProcessBeanFactory方法");

        BeanDefinition bd = arg0.getBeanDefinition("person");

        bd.getPropertyValues().addPropertyValue("phone", "110");

    }

}
5、配置文件如下beans.xml,很简单,使用ApplicationContext,处理器不用手动注册:
<?xml version="1.0" encoding="UTF-8"?>

<beans xmlns="http://www.springframework.org/schema/beans"

    xmlns:xsi="http://www.w3.org/2001/XMLSchema-instance" xmlns:p="http://www.springframework.org/schema/p"

    xmlns:aop="http://www.springframework.org/schema/aop" xmlns:tx="http://www.springframework.org/schema/tx"

    xsi:schemaLocation="

            http://www.springframework.org/schema/beans

            http://www.springframework.org/schema/beans/spring-beans-3.2.xsd">

    <bean id="beanPostProcessor" class="springBeanTest.MyBeanPostProcessor">

    </bean>

    <bean id="instantiationAwareBeanPostProcessor" class="springBeanTest.MyInstantiationAwareBeanPostProcessor">

    </bean>

    <bean id="beanFactoryPostProcessor" class="springBeanTest.MyBeanFactoryPostProcessor">

    </bean>

    <bean id="person" class="springBeanTest.Person" init-method="myInit"

        destroy-method="myDestory" scope="singleton" p:name="张三" p:address="广州"

        p:phone="15900000000" />

</beans>
6、下面测试一下:
package springBeanTest;

import org.springframework.context.ApplicationContext;

import org.springframework.context.support.ClassPathXmlApplicationContext;

public class BeanLifeCycle {

    public static void main(String[] args) {

        System.out.println("现在开始初始化容器");

        ApplicationContext factory = new ClassPathXmlApplicationContext("springBeanTest/beans.xml");

        System.out.println("容器初始化成功");

        //得到Preson,并使用

        Person person = factory.getBean("person",Person.class);

        System.out.println(person);

        System.out.println("现在开始关闭容器!");

        ((ClassPathXmlApplicationContext)factory).registerShutdownHook();

    }

}
关闭容器使用的是实际是AbstractApplicationContext的钩子方法。
我们来看一下结果:
现在开始初始化容器

2014-5-18 15:46:20 org.springframework.context.support.AbstractApplicationContext prepareRefresh

信息: Refreshing org.springframework.context.support.ClassPathXmlApplicationContext@19a0c7c: startup date [Sun May 18 15:46:20 CST 2014]; root of context hierarchy

2014-5-18 15:46:20 org.springframework.beans.factory.xml.XmlBeanDefinitionReader loadBeanDefinitions

信息: Loading XML bean definitions from class path resource [springBeanTest/beans.xml]

这是BeanFactoryPostProcessor实现类构造器!!

BeanFactoryPostProcessor调用postProcessBeanFactory方法

这是BeanPostProcessor实现类构造器!!

这是InstantiationAwareBeanPostProcessorAdapter实现类构造器!!

2014-5-18 15:46:20 org.springframework.beans.factory.support.DefaultListableBeanFactory preInstantiateSingletons

信息: Pre-instantiating singletons in org.springframework.beans.factory.support.DefaultListableBeanFactory@9934d4: defining beans [beanPostProcessor,instantiationAwareBeanPostProcessor,beanFactoryPostProcessor,person]; root of factory hierarchy

InstantiationAwareBeanPostProcessor调用postProcessBeforeInstantiation方法

【构造器】调用Person的构造器实例化

InstantiationAwareBeanPostProcessor调用postProcessPropertyValues方法

【注入属性】注入属性address

【注入属性】注入属性name

【注入属性】注入属性phone

【BeanNameAware接口】调用BeanNameAware.setBeanName()

【BeanFactoryAware接口】调用BeanFactoryAware.setBeanFactory()

BeanPostProcessor接口方法postProcessBeforeInitialization对属性进行更改!

【InitializingBean接口】调用InitializingBean.afterPropertiesSet()

【init-method】调用<bean>的init-method属性指定的初始化方法

BeanPostProcessor接口方法postProcessAfterInitialization对属性进行更改!

InstantiationAwareBeanPostProcessor调用postProcessAfterInitialization方法

容器初始化成功

Person [address=广州, name=张三, phone=110]

现在开始关闭容器!

【DiposibleBean接口】调用DiposibleBean.destory()
@Test
public void Spring(){
ProxySubject proxySubject = new ProxySubject();
proxySubject.doSome();
}
后几种动态代理
前置增强
首先需要主题对象
public interface IdomSomeService {

    void doSome();

}
/**

 * 原始对象

 */

public class IdoSomeServiceImpl implements IdomSomeService {

    @Override

    public void doSome() {

        System.out.println("=========真实事物=========");

    }

}
工厂代理类(实现了MethodBeforeAdvice):
public class MyBeforeAdvice implements MethodBeforeAdvice {

    @Override

    public void before(Method method, Object[] objects, Object o) throws Throwable {

        System.out.println("=============前置增强=============");

    }

}
创建applicationContext.xml大配置文件进行增强操作
<?xml version="1.0" encoding="UTF-8"?>

<beans xmlns="http://www.springframework.org/schema/beans"

       xmlns:xsi="http://www.w3.org/2001/XMLSchema-instance"

       xmlns:aop="http://www.springframework.org/schema/aop"

       xsi:schemaLocation="http://www.springframework.org/schema/beans

       http://www.springframework.org/schema/beans/spring-beans.xsd

        http://www.springframework.org/schema/aop

        http://www.springframework.org/schema/aop/spring-aop.xsd">

<!--注入业务Bean-->

    <bean id="idomSomeService" class="cn.cglib.IdoSomeServiceImpl"></bean>

    <!--增强:切面-->

    <bean id="myBeforeAdvice" class="cn.cglib.MyBeforeAdvice"></bean>

    <!--使用代理工厂实现增强   -->

    <bean id="proxyFactory" class="org.springframework.aop.framework.ProxyFactoryBean">

        <!--ProxyFactoryBean    将增强和业务织到一起-->

        <property name="target" ref="idomSomeService"></property>

        <!--拦截增强类-->

        <property name="interceptorNames" value="myBeforeAdvice"></property>

        <!--更换代理方式

        proxyTargetClass默认值为false默认 是jdk动态代理,

        但是当目标对象没有接口时,自动改为cglib-->

        <property name="proxyTargetClass" value="true"></property>

    </bean>

</beans>
实现类
public void cglib(){

        ApplicationContext ctx = new ClassPathXmlApplicationContext("applicationContext.xml");

        IdoSomeServiceImpl idoSomeService = (IdoSomeServiceImpl)ctx.getBean("proxyFactory");

        idoSomeService.doSome();

    }

环绕式增强
public interface IdomSomeService {

    void doSome();

}
/**

 * 原始对象

 */

public class IdoSomeServiceImpl implements IdomSomeService {

    @Override

    public void doSome() {

        System.out.println("=========真实事物=========");

    }

}
创建工厂类 实现了MethodInterceptor接口
public class MyBeforeAdvice implements MethodInterceptor {

    @Override

    public Object invoke(MethodInvocation invocation) throws Throwable {

        System.out.println("========环绕前========");

        //调用核心业务方法     也可以获取方法内的参数    也可以获取目标对象

        Object proceed = invocation.proceed();

        Object aThis = invocation.getThis();

        System.out.println(aThis);

        System.out.println("========环绕后========");

        return proceed;

    }

}
创建applicationContextHuan.xml大配置文件进行增强操作:
<?xml version="1.0" encoding="UTF-8"?>

<beans xmlns="http://www.springframework.org/schema/beans"

       xmlns:xsi="http://www.w3.org/2001/XMLSchema-instance"

       xmlns:aop="http://www.springframework.org/schema/aop"

       xsi:schemaLocation="http://www.springframework.org/schema/beans

       http://www.springframework.org/schema/beans/spring-beans.xsd

        http://www.springframework.org/schema/aop

        http://www.springframework.org/schema/aop/spring-aop.xsd">

<!--注入业务Bean-->

    <bean id="idomSomeService" class="cn.cglib_huan.IdoSomeServiceImpl"></bean>

    <!--增强:切面-->

    <bean id="myBeforeAdvice" class="cn.cglib_huan.MyBeforeAdvice"></bean>

    <!--使用代理工厂实现增强   -->

    <bean id="proxyFactory" class="org.springframework.aop.framework.ProxyFactoryBean">

        <!--ProxyFactoryBean    将增强和业务织到一起-->

        <property name="target" ref="idomSomeService"></property>

        <!--拦截增强类-->

        <property name="interceptorNames" value="myBeforeAdvice"></property>

        <!--更换代理方式

        proxyTargetClass默认值为false默认 是jdk动态代理,

        但是当目标对象没有接口时,自动改为cglib-->

        <property name="proxyTargetClass" value="true"></property>

    </bean>

</beans>
实现类与实现结果
@Test

public void cglibHuan(){

    ApplicationContext ctx = new ClassPathXmlApplicationContext("applicationContextHuan.xml");

    IdoSomeServiceImpl idoSomeService = (IdoSomeServiceImpl)ctx.getBean("proxyFactory");

    idoSomeService.doSome();

}

异常增强
public interface IdomSomeService {

    void doSome() throws Exception;

}
/**
* 原始对象
*/
public class IdoSomeServiceImpl implements IdomSomeService {
@Override
public void doSome() throws Exception {
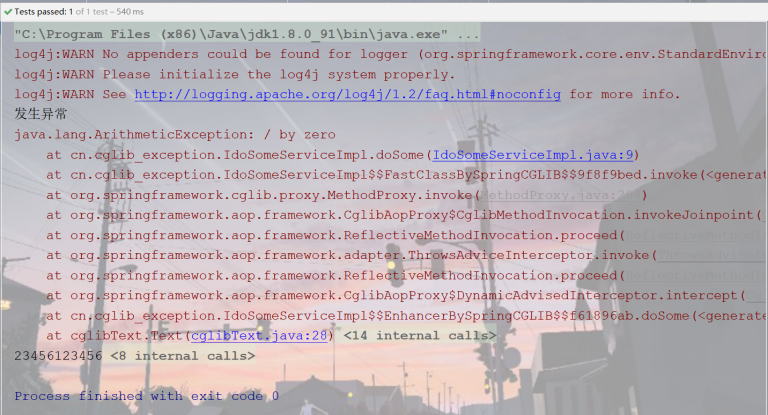
int i =5/0;
System.out.println("=========真实事物=========");
}
}
创建工厂类 实现ThrowsAdvice接口
public class MyBeforeAdvice implements ThrowsAdvice {

    public void afterThrowing(Exception ex){

        System.out.println("发生异常");

    }

}
创建applicationContextExection.xml大配置文件进行增强操作:
<?xml version="1.0" encoding="UTF-8"?>

<beans xmlns="http://www.springframework.org/schema/beans"

       xmlns:xsi="http://www.w3.org/2001/XMLSchema-instance"

       xmlns:aop="http://www.springframework.org/schema/aop"

       xsi:schemaLocation="http://www.springframework.org/schema/beans

       http://www.springframework.org/schema/beans/spring-beans.xsd

        http://www.springframework.org/schema/aop

        http://www.springframework.org/schema/aop/spring-aop.xsd">

<!--注入业务Bean-->

    <bean id="idomSomeService" class="cn.cglib_exception.IdoSomeServiceImpl"></bean>

    <!--增强:切面-->

    <bean id="myBeforeAdvice" class="cn.cglib_exception.MyBeforeAdvice"></bean>

    <!--使用代理工厂实现增强   -->

    <bean id="proxyFactory" class="org.springframework.aop.framework.ProxyFactoryBean">

        <!--ProxyFactoryBean    将增强和业务织到一起-->

        <property name="target" ref="idomSomeService"></property>

        <!--拦截增强类-->

        <property name="interceptorNames" value="myBeforeAdvice"></property>

        <!--更换代理方式

        proxyTargetClass默认值为false默认 是jdk动态代理,

        但是当目标对象没有接口时,自动改为cglib-->

        <property name="proxyTargetClass" value="true"></property>

    </bean>

</beans>
相当于把异常抛出去,让代码继续执行
执行类
@Test

    public void Text() {

       ApplicationContext ctx = new ClassPathXmlApplicationContext("applicationContextEx.xml");

       IdoSomeServiceImpl proxyFactory = (IdoSomeServiceImpl)ctx.getBean("proxyFactory");

       try {

           proxyFactory.doSome();

       } catch (Exception e) {

           e.printStackTrace();

       }

       System.out.println("23456123456");

   }
Spring动态代理及Spring Bean的生命周期的更多相关文章
- Spring学习-- IOC 容器中 bean 的生命周期
Spring IOC 容器可以管理 bean 的生命周期 , Spring 允许在 bean 声明周期的特定点执行定制的任务. Spring IOC 容器对 bean 的生命周期进行管理的过程: 通过 ...
- spring BeanFactory及ApplicationContext中Bean的生命周期
spring bean 的生命周期 spring BeanFactory及ApplicationContext在读取配置文件后.实例化bean前后.设置bean的属性前后这些点都可以通过实现接口添加我 ...
- Spring重点—— IOC 容器中 Bean 的生命周期
一.理解 Bean 的生命周期,对学习 Spring 的整个运行流程有极大的帮助. 二.在 IOC 容器中,Bean 的生命周期由 Spring IOC 容器进行管理. 三.在没有添加后置处理器的情况 ...
- Spring 框架基础(02):Bean的生命周期,作用域,装配总结
本文源码:GitHub·点这里 || GitEE·点这里 一.装配方式 Bean的概念:Spring框架管理的应用程序中,由Spring容器负责创建,装配,设置属性,进而管理整个生命周期的对象,称为B ...
- Spring的Bean的生命周期以及Bean的后置处理器
Bean的生命周期: Spring IOC 容器可以管理 Bean 的生命周期, Spring 允许在 Bean 生命周期的特定点执行定制的任务. Spring IOC 容器对 Bean 的生命周期进 ...
- 10.Spring Bean的生命周期
Spring IOC容器可以管理Bean的生命周期,允许在Bean声明周期的特定点执行定制的任务. Spring IOC容器对Bean的生命周期进行管理的过程. 1.通过构造器或工厂方法创建Bean实 ...
- BeanFactory中Bean的生命周期
Bean的生命周期图解 集体过程如下: 当调用者通过getBean(beanName)向容器请求某一个Bean时,如果容器注册了org.springframework.beans.factory.co ...
- IOC容器中bean的生命周期
一.Bean的生命周期 Spring IOC容器可以管理Bean的生命周期,允许在Bean生命周期的特定点执行定制的任务. Spring IOC容器对Bean的生命周期进行管理的过程如下: (1).通 ...
- 使用外部属性文件配置Bean以及Bean的生命周期方法
1.使用外部属性文件配置Bean 在配置文件里配置 Bean 时, 有时需要在 Bean 的配置里混入系统部署的细节信息(例如: 文件路径, 数据源配置信息等). 而这些部署细节实际上需要和 Bean ...
随机推荐
- 2019.10.16&17小结
话说也蛮久没写小结了,主要这两次考试失分严重,还是总结下吧. 10.16 T1 小奇挖矿2 100/0 [题目背景] 小奇飞船的钻头开启了无限耐久+精准采集模式!这次它要将原矿运到泛光之源的矿石交易市 ...
- Python02之continue,break语句
Python中的break和continue用法基本一样 break和continue都是用在while和for循环中,而不是跳出if...elif..else的判断语句中,跳出是直接跳出语句所在的w ...
- python 之 面向对象基础(继承与派生,经典类与新式类)
7.2 继承与派生 7.21继承 1.什么是继承? 继承是一种新建类的的方式,在python中支持一个子类继承多个父类.新建的类称为子类或者派生类,父类又可以称为基类或者超类,子类会”遗传“父类的属性 ...
- Django基础之django分页
一.Django的内置分页器(paginator) view from django.shortcuts import render,HttpResponse # Create your views ...
- Python内存加载shellcode
生成 首先生成一个测试的msf shellcode msfvenom -p windows/x64/exec CMD=calc.exe -f python 把其中的shellcode复制出来留待待会使 ...
- SpinWait 第二篇
SpinWait 提供了两个方法和两个只读属性. 方法: SpinWait.Reset() : 重置自旋计数器,将计数器置 0.效果就好像没调用过SpinOnce一样.SpinWait.Once() ...
- C# List 转 Tree 公共方法
# 用C# 写了个List数据结构转树形数据结构的公共扩展方法 /// <summary> /// 将列表转换为树形结构 /// </summary> /// <type ...
- 基于NetCore+SqlSugar+Layui开发出来的开源框架项目FytSoaCms问题处理
最近刚好在学习NetCore框架所以就在网上搜索了一下相关的开源框架项目,正好在Github上找到了一个不错的开源框架所以推荐给大家看看哈哈哈. 1:项目相关技术 运行NetCore SDK版本为2. ...
- Dijkstra算法正确性证明
问题:求图中点1到其他各点的最短距离 策略: 1.把起点1放入初始集合Set中,从剩余的点中,选取到Set(此时Set中只有1个点)距离最近的点,并入集合Set中, 2.从剩余的点中,找经过集合Set ...
- robot framework 如何处理循环条件下面的变量自增
下面举了一个基础栗子,可以运行的.${num}就是我需要的自增变量.有人也许会问为什么不用${i},不是我不想用,而是我${i}有其他用处,必须另外定义一个变量,需要注意的是定义变量的时候,应该在循环 ...