nginx实现动静分离的负载均衡集群
实战:
一、源码编译安装nginx
[root@tiandong63 ~]#yum groupinstall "Development Tools" "Development Libraries" -y 安装开发包
[root@tiandong63 ~]#yum install gcc gcc-c++ autoconf automake zlib zlib-devel openssl openssl-devel pcre* -y 安装依赖包
[root@tiandong63 ~]#tar -zxvf nginx-1.9.4.tar.gz -C /usr/local/src/
[root@tiandong63 ~]#cd /usr/local/src/
[root@tiandong63 src]#cd nginx-1.9.4/
[root@tiandong63 nginx-1.9.4]#./configure --prefix=/usr/local/nginx --with-http_dav_module --with-http_stub_status_module --with-http_addition_module --with-http_sub_module --with-http_flv_module --with-http_mp4_module
参数:--with-http_dav_module 启用ngx_http_dav_module支持(增加PUT,DELETE,MKCOL:创建集合,COPY和MOVE方法)默认情况下为关闭,需编译开启--with-http_stub_status_module 启用ngx_http_stub_status_module支持(获取nginx自上次启动以来的工作状态)--with-http_addition_module 启用ngx_http_addition_module支持(作为一个输出过滤器,支持不完全缓冲,分部分响应请求)--with-http_sub_module 启用ngx_http_sub_module支持(允许用一些其他文本替换nginx响应中的一些文本)--with-http_flv_module 启用ngx_http_flv_module支持(提供寻求内存使用基于时间的偏移量文件)--with-http_mp4_module 启用对mp4文件支持(提供寻求内存使用基于时间的偏移量文件
[root@tiandong63 nginx-1.9.4]#make && make install
[root@tiandong63 nginx-1.9.4]#useradd -M -u 8001 -s /sbin/nologin nginx
[root@tiandong63 ~]# /usr/local/nginx/sbin/nginx 启动nginx
[root@tiandong63 ~]# netstat -antup|grep nginx
tcp 0 0 0.0.0.0:80 0.0.0.0:* LISTEN 42350/nginx
测试nginx

二、nginx服务器日常操作:
配置nginx为分发器实现动静分离
vim /usr/local/nginx/conf/nginx.conf
2 user nginx nginx;
43 location / {
44 root html;
45 index index.html index.htm;
46 if ($request_uri ~* \.html$){
47 proxy_pass http://htmlservers;
48 }
49 if ($request_uri ~* \.php$){
50 proxy_pass http://phpservers;
51 }
52 proxy_pass http://picservers;
53 }
123 upstream htmlservers { #定义负载均衡服务器组名称
124 server 192.168.199.4:80;
125 server 192.168.199.5:80;
126 }
127 upstream phpservers{
128 server 192.168.199.4:80;
129 server 192.168.199.5:80;
130 }
131 upstream picservers {
132 server 192.168.199.4:80;
133 server 192.168.199.5:80;
134 }
135 }
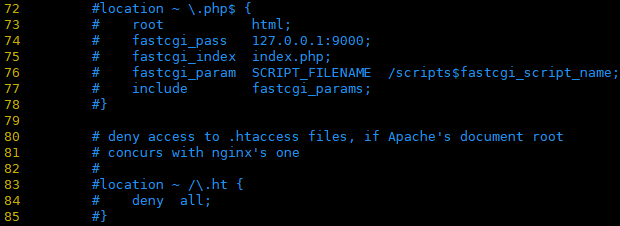
把一下文件注释了,否组php文件直接在nginx服务器上解析了,不在解析给后端的服务器。
[root@tiandong63 ~]# ln -s /usr/local/nginx/sbin/* /usr/bin/
[root@tiandong63 ~]# nginx -t
nginx: the configuration file /usr/local/nginx/conf/nginx.conf syntax is ok
nginx: configuration file /usr/local/nginx/conf/nginx.conf test is successful
[root@tiandong63 ~]# nginx -s reload
三、配置后端服务器(tiandong64和tiandong65上面配置一样):
[root@tiandong64 ~]# yum install php httpd -y
[root@tiandong65 ~]# yum -y install php httpd -y
[root@tiandong64 ~]# cd /var/www/html/
[root@tiandong64 html]# more index.html
192.168.199.4
[root@tiandong64 html]# more test.php
192.168.199.4
<?php
phpinfo();
?>
[root@tiandong64 html]#
[root@tiandong64 html]# ll
total 12
-rw-r--r-- 1 root root 14 Mar 20 00:24 index.html
-rw-r--r-- 1 root root 790 Dec 24 2018 pic.PNG
-rw-r--r-- 1 root root 35 Mar 20 00:25 test.php
重启Apache服务:
[root@tiandong64 ~]# /etc/init.d/httpd restart
[root@tiandong65 ~]# /etc/init.d/httpd restart
四、测试:
测试html页面:
[root@tiandong66 ~]# curl 192.168.199.3
192.168.199.5
[root@tiandong66 ~]# curl 192.168.199.3
192.168.199.4
[root@tiandong66 ~]# curl 192.168.199.3
192.168.199.5
[root@tiandong66 ~]# curl 192.168.199.3
192.168.199.4
测试php页面:

测试服务器性能:
[root@tiandong66 ~]# ab -n 1000 -c 1000 http://192.168.199.3/index.html 运行正常
[root@tiandong66 ~]# ab -n 2000 -c 2000 http://192.168.199.3/index.html 运行报错
This is ApacheBench, Version 2.3 <$Revision: 1430300 $>
Copyright 1996 Adam Twiss, Zeus Technology Ltd, http://www.zeustech.net/
Licensed to The Apache Software Foundation, http://www.apache.org/
Benchmarking 192.168.199.3 (be patient)
socket: Too many open files (24) #测试时,一次打开的socket文件太多。系统默认的一次打开的最多问1024个
[root@tiandong66 ~]# ulimit -n 10240
[root@tiandong63 ~]# ulimit -n 10240
五、nginx负载的五中策略设置方法:
1、轮询(默认)
upstream htmlservers { #定义负载均衡服务器组名称
server 192.168.199.4:80;
server 192.168.199.5:80;
}
2、指定权重(指定轮询几率,weight和访问比例成正比,用户后端服务器性能不均的情况)
upstream htmlservers { #定义负载均衡服务器组名称
server 192.168.199.4:80 weight=1;
server 192.168.199.5:80 weight=2;
}
3、IP绑定 ip_hash
每个请求按访问ip的hash结果分配,这样每个访客固定访问一个后端服务器,可以解决session的问题。
upstream backserver {
ip_hash;
server 192.168.199.4:80;
server 192.168.199.5:80;
}
4、fair(第三方)
按后端服务器的响应时间来分配请求,响应时间短的优先分配。
upstream backserver {
server server1;
server server2;
fair;
}
5、url_hash(第三方)
按访问url的hash结果来分配请求,使每个url定向到同一个后端服务器,后端服务器为缓存时比较有效。
upstream backserver {
server squid1:3128;
server squid2:3128;
hash $request_uri;
hash_method crc32;
}
六、故障演练
当其中一台Apache宕机
[root@tiandong64 ~]# /etc/init.d/httpd stop
Stopping httpd: [ OK ]
[root@tiandong66 ~]# curl 192.168.199.3
192.168.199.4
[root@tiandong66 ~]# curl 192.168.199.3
192.168.199.5
[root@tiandong66 ~]# curl 192.168.199.3
192.168.199.4
[root@tiandong66 ~]# curl 192.168.199.3
192.168.199.5
[root@tiandong66 ~]# curl 192.168.199.3
192.168.199.5
[root@tiandong66 ~]# curl 192.168.199.3
192.168.199.5
[root@tiandong66 ~]# curl 192.168.199.3
192.168.199.5
一直访问的是另外一台机器
故障恢复:
[root@tiandong66 ~]# curl 192.168.199.3
192.168.199.5
[root@tiandong66 ~]# curl 192.168.199.3
192.168.199.4
[root@tiandong66 ~]# curl 192.168.199.3
192.168.199.5
[root@tiandong66 ~]# curl 192.168.199.3
192.168.199.4
[root@tiandong66 ~]# curl 192.168.199.3
192.168.199.5
OK!!!!
nginx实现动静分离的负载均衡集群的更多相关文章
- 使用nginx实现动静分离的负载均衡集群
一.概述: LB负载均衡集群分两类: LVS (四层)和 nginx或haproxy (七层) 客户端通过访问分发器的VIP来访问网站 |现在应用更复杂,比如现在网站页面有: .php .html . ...
- Nginx + Tomcat 动静分离实现负载均衡(转)
0.前期准备 使用Debian环境.安装Nginx(默认安装),一个web项目,安装tomcat(默认安装)等. 1.一份Nginx.conf配置文件 # 定义Nginx运行的用户 和 用户组 如果对 ...
- Nginx + Tomcat 动静分离实现负载均衡
0.前期准备 使用Debian环境.安装Nginx(默认安装),一个web项目,安装tomcat(默认安装)等. 1.一份Nginx.conf配置文件 # 定义Nginx运行的用户 和 用户组 如果对 ...
- 【转载】Nginx+Tomcat 动静分离实现负载均衡
0.前期准备 使用Debian环境.安装Nginx(默认安装),一个web项目,安装tomcat(默认安装)等. 1.一份Nginx.conf配置文件 1 # 定义Nginx运行的用户 和 用户组 如 ...
- 负载均衡 | Nginx+Tomcat 动静分离实现负载均衡
0.前期准备 使用Debian环境.安装Nginx(默认安装),一个web项目,安装tomcat(默认安装)等. 1.一份Nginx.conf配置文件 基本配置这个文件,就可以实现负载了.但是里面的各 ...
- Nginx+Keepalived搭建高可用负载均衡集群
本文的重点是Keepalived的配置,Nginx的配置就简略带过.软件:CentOS 7.2 / Nginx 1.12.2 / Keepalived 1.3.9 ha-01:192.168.1.97 ...
- Nginx 动静分离与负载均衡的实现
一.前提 企业中,随着用户的增长,数据量也几乎成几何增长,数据越来越大,随之也就出现了各种应用的瓶颈问题. 问题出现了,我们就得想办法解决,一般网站环境,均会使用LAMP或者LNMP,而我们对于网站环 ...
- Keepalived+Nginx实现高可用负载均衡集群
一 环境介绍 1.操作系统CentOS Linux release 7.2.1511 (Core) 2.服务keepalived+nginx双主高可用负载均衡集群及LAMP应用keepalived-1 ...
- Apache和Nginx负载均衡集群及测试分析
一.应用场景介绍 本文主要是介绍Apache和Tomcat在Linux环境下的安装讲解以及AJP协议动静分离负载均衡的实现,以及与Nginx负载性能比较.联网安装较为简单,故此处只说脱机的Linux环 ...
随机推荐
- 怎样通过id属性值获取元素节点
方法1: 使用document.getElementById(); 方法2: 使用document.querySelector(); document.getElementById("app ...
- oracle导入时IMP-00010: 不是有效的导出文件, 头部验证失败
头部验证失败是由于版本号不同所致,经试验可以通过如下方法进行修改:用notepad++工具打开dmp文件,可以看到头部信息 --TEXPORT:V11.01.00,即为源数据库的版本号,将其修改为目的 ...
- ThreadPoolExecutor的runState和workCount变量怎么存储?
在阅读Java线程池ThreadPoolExecutor源码的时候,发现它很巧妙地把线程池状态runState和线程数workCount两个变量存放在了一个int型变量里面. 我们先看一个数值,如下是 ...
- BFC渲染机制
BFC(block formatting context):块级格式化上下文(实际就是一个隔离罩) W3C CSS2.1 规范中的一个概念.它是页面中的一块渲染区域,并且有一套渲染规则,它决定了其子元 ...
- 14.JdbcUtils框架
1.编写自己的JdbcUtils 框架 2.使用 dbUtils 框架 1.视频中自己编写的JdbcUtils框架差不多就是dbUtils框架 2.使用 使用dbutils框架完成curd,以及批处理 ...
- 二、MySQL介绍
目录 一.MySQL背景 二.MySQL的优点 三.MySQL安装 四.MySQL服务的启动和停止 五.MySQL登录和退出 六.MySQL常用命令 (一)常用命令 (二)语法规范 (三)SQL语言细 ...
- DB2 alter 新增/删除/修改列
SQL语句 增加列.修改列.删除列 1 添加字段 语法 : alter table 表名称 add 字段名称 类型 demo: alter table tableName add columnName ...
- 《浏览器工作原理与实践》<03>HTTP请求流程:为什么很多站点第二次打开速度会很快?
一个 TCP 连接过程包括了建立连接.传输数据和断开连接三个阶段. 而 HTTP 协议,正是建立在 TCP 连接基础之上的.HTTP 是一种允许浏览器向服务器获取资源的协议,是 Web 的基础,通常由 ...
- C#DataGrid列值出现E形式的小数,将DataGrid表格上的数据保存至数据库表时会因格式转换不正确导致报错
问题描述:在DataGridView中调整金额一列,当输入小数0.000001后会显示1E-6,此时进行保存操作时报错,提示无法将string类型转换成Decimal 原因分析:由于列调整金额为1E- ...
- shell脚本基础编写
shell脚本的格式 名称:Shell 脚本文件的名称可以任意,但为了避免被误以为是普通文件,建议将 .sh 后缀加上,以表示是一个脚本文件. shell 脚本中一般会出现三种不同的元素: 第一行的脚 ...