Spring Boot 静态资源映射与上传文件路由配置
默认静态资源映射目录
默认映射路径
在平常的 web 开发中,避免不了需要访问静态资源,如常规的样式,JS,图片,上传文件等;Spring Boot 默认配置对静态资源映射提供了如下路径的映射 /static (or /public or /resources or /META-INF/resources) ,如下:
/META-INF/resources/

classpath:/resources/

classpath:/static/

classpath:/public/
可以在源码中可以查看到
private static final String[] CLASSPATH_RESOURCE_LOCATIONS = { "classpath:/META-INF/resources/", "classpath:/resources/", "classpath:/static/", "classpath:/public/" };
当然可以通过配置的方式自定义静态资源的路径,但是会覆盖默认约定的映射目录(默认的配置不可用)
# Locations of static resources.

spring.resources.static-locations=classpath:/META-INF/resources/,classpath:/resources/,classpath:/static/,classpath:/public/
一般情况没有特殊需求不建议自定义配置,使用默认的就好,约定大于配置嘛。也就是在 resources 目录下 public、resources、static(新建项目自带) 三个目录。
默认访问路由
静态资源的默认路由匹配 /** , 路由会从这三个目录中寻找静态资源,如果有则返回,当然可以配置改变默认的路由,如下:
spring.mvc.static-path-pattern=/resources/**
OK,我新建了一个项目,结构目录如下:
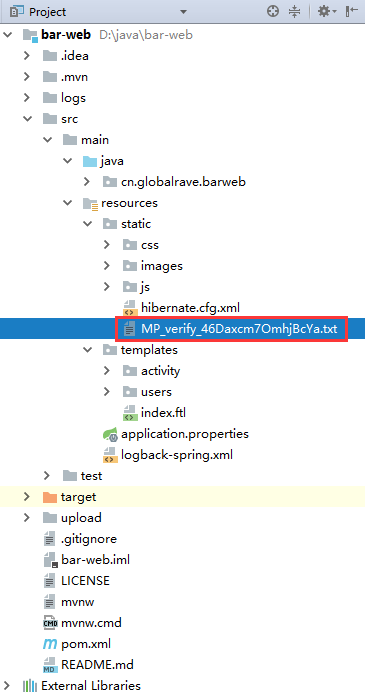
比如在 static 目录下新增一个 MP_verify_46Daxcm7OmhjBcYa.txt 文本文件,浏览器访问 http://localhost:8080/MP_verify_46Daxcm7OmhjBcYa.txt 即可,引用 css,js ,图片等资源也不需要再加 static 目录了。
自定义静态资源映射目录
自定义静态资源映射目录可以通过上述配置的方式配置,当然也可以通过编码的方式实现
WebConfig
@Configuration

public class WebConfig extends WebMvcConfigurerAdapter {

    @Override

    public void addResourceHandlers(ResourceHandlerRegistry registry) {

        //将访问/static/** 的路由映射到classpath:/static/ 目录下

        registry.addResourceHandler("/static/**").addResourceLocations("classpath:/static/");

    }

    @Override

    public void addViewControllers(ViewControllerRegistry registry) {

        registry.addViewController("/").setViewName("index");

        registry.addViewController("/groovy").setViewName("hello");

        registry.addViewController("/app").setViewName("app");

    }

}
上传文件映射路径配置
默认 Spring Boot 是内置了 Tomcat 以单个 Jar 包的运行(当然也可以使用 war 包的方式运行在容器里),Spring Boot 项目启动的时候会跟根据约定把静态文件加载到 classpath 目录下,如果要上传文件或写文件日志的话,必须把访问的路由映射到服务器的文件目录。
FileUploadControllerprivate final ResourceLoader resourceLoader; @Autowired
public UploadController(ResourceLoader resourceLoader) {
this.resourceLoader = resourceLoader;
} /**
* 上传文件
* @param file
* @param model
* @param request
* @return
*/
@RequestMapping(method = RequestMethod.POST, value = "/")
public String upload(@RequestParam("file") MultipartFile file, Model model, HttpServletRequest request) {
if (!file.isEmpty()) {
try {
Files.copy(file.getInputStream(), Paths.get("/upload", file.getOriginalFilename()));
model.addAttribute("message", "You successfully uploaded " + file.getOriginalFilename() + "!");
} catch (IOException|RuntimeException e) {
model.addAttribute("message", "Failued to upload " + file.getOriginalFilename() + " => " + e.getMessage());
}
} else {
model.addAttribute("message", "Failed to upload " + file.getOriginalFilename() + " because it was empty");
}
return "redirect:/";
}
}
/**
* 绑定微信用户 (头像图片编码base64)
* @param weixinBindRequest
* @param session
* @return
*/
@ResponseBody
@RequestMapping(value = "/uploadImgbase64",method= RequestMethod.POST)
public WeixinBindResponse uploadImgbase64(@RequestBody WeixinBindRequest weixinBindRequest, HttpSession session) {
//logger.info("weixinbind req: " + JSON.toJSONString(weixinBindRequest));
WeixinBindResponse response= new WeixinBindResponse();
logger.info("weixinbind openId: "+weixinBindRequest.getOpenid());
//保存用户头像
for (int i=0;i<weixinBindRequest.getImgs().length;i++){
String dataPrix = "";
String data = "";
String suffix = "";
String [] d = weixinBindRequest.getImgs()[i].split("base64,");
if(d != null && d.length == 2){
dataPrix = d[0];
data = d[1];
}
if("data:image/jpeg;".equalsIgnoreCase(dataPrix)){//data:image/jpeg;base64,base64编码的jpeg图片数据
suffix = ".jpg";
} else if("data:image/x-icon;".equalsIgnoreCase(dataPrix)){//data:image/x-icon;base64,base64编码的icon图片数据
suffix = ".ico";
} else if("data:image/gif;".equalsIgnoreCase(dataPrix)){//data:image/gif;base64,base64编码的gif图片数据
suffix = ".gif";
} else if("data:image/png;".equalsIgnoreCase(dataPrix)){//data:image/png;base64,base64编码的png图片数据
suffix = ".png";
}
String fileName = weixinBindRequest.getOpenid() +"_"+i + suffix;
try{
// request.getSession().getServletContext().getRealPath("upload");
// String path = String.valueOf(Paths.get("upload", weixinBindRequest.getOpenid()));
FileUtils.writeByteArrayToFile(new File("upload", fileName), Base64Utils.decodeFromString(data));
}catch(Exception ee){ }
}
//微信绑定用户信息
boolean flag = this.userSerice.bindWeixinUser(weixinBindRequest);
if(!flag){
response.setIsError(true);
response.setErrorCode(500);
response.setErrorMsg("微信绑定用户信息失败!!!");
return response;
}
response.setIsError(false);
response.setErrorCode(200);
response.setErrorMsg("微信绑定用户信息成功!!!");
return response;
} /**
* 显示图片
* @param filename
* @return
*/
@RequestMapping(method = RequestMethod.GET, value = "/{filename:.+}")
@ResponseBody
public ResponseEntity<?> getFile(@PathVariable String filename) {
try {
return ResponseEntity.ok(resourceLoader.getResource("file:" + Paths.get("upload", filename).toString()));
} catch (Exception e) {
return ResponseEntity.notFound().build();
}
}
上传文件的路径会项目根目录上创建,所以不能被直接访问到 ,Spring 提供了 ResourceLoader ,利于这个类可以加载非应用目录的里文件然后返回,具体看官方的列子吧:
https://spring.io/guides/gs/uploading-files/
https://github.com/spring-guides/gs-uploading-files.git
上传文件大小限制
最后别忘了配置文件大小的限制
spring.http.multipart.max-file-size=128KB

spring.http.multipart.max-request-size=128KB
遇到的问题:
如果使用了 nginx 代理提示如下错误:
Troubleshooting “Request Entity Too Large” (HTTP 413) error message returned to browser
nginx 中配置 client_max_body_size 允许的大小
client_max_body_size       100m;

client_body_buffer_size    128k;
配置附录:
# SPRING RESOURCES HANDLING (ResourceProperties)
spring.resources.add-mappings=true # Enable default resource handling.
spring.resources.cache-period= # Cache period for the resources served by the resource handler, in seconds.
spring.resources.chain.cache=true # Enable caching in the Resource chain.
spring.resources.chain.enabled= # Enable the Spring Resource Handling chain. Disabled by default unless at least one strategy has been enabled.
spring.resources.chain.gzipped=false # Enable resolution of already gzipped resources.
spring.resources.chain.html-application-cache=false # Enable HTML5 application cache manifest rewriting.
spring.resources.chain.strategy.content.enabled=false # Enable the content Version Strategy.
spring.resources.chain.strategy.content.paths=/** # Comma-separated list of patterns to apply to the Version Strategy.
spring.resources.chain.strategy.fixed.enabled=false # Enable the fixed Version Strategy.
spring.resources.chain.strategy.fixed.paths=/** # Comma-separated list of patterns to apply to the Version Strategy.
spring.resources.chain.strategy.fixed.version= # Version string to use for the Version Strategy.
spring.resources.static-locations=classpath:/META-INF/resources/,classpath:/resources/,classpath:/static/,classpath:/public/ # Locations of static resources.
REFER:
https://spring.io/blog/2014/07/24/spring-framework-4-1-handling-static-web-resources
https://docs.spring.io/spring-boot/docs/current-SNAPSHOT/reference/htmlsingle/#boot-features-spring-mvc-static-content
Spring Boot 静态资源映射与上传文件路由配置的更多相关文章
- 从零开始的Spring Boot(3、Spring Boot静态资源和文件上传)
Spring Boot静态资源和文件上传 写在前面 从零开始的Spring Boot(2.在Spring Boot中整合Servlet.Filter.Listener的方式) https://www. ...
- Spring Boot静态资源处理
Spring Boot静态资源处理 8.8 Spring Boot静态资源处理 当使用Spring Boot来开发一个完整的系统时,我们往往需要用到前端页面,这就不可或缺地需要访问到静态资源,比如图片 ...
- Spring Boot 静态资源处理
spring Boot 默认的处理方式就已经足够了,默认情况下Spring Boot 使用WebMvcAutoConfiguration中配置的各种属性. 建议使用Spring Boot 默认处理方式 ...
- Spring Boot 静态资源处理(转)
Spring Boot 静态资源处理 Spring Boot 系列 Spring Boot 入门 Spring Boot 属性配置和使用 Spring Boot 集成MyBatis Spring Bo ...
- spring boot下MultipartHttpServletRequest如何提高上传文件大小的默认值
前言: 上传下载功能算是一个非常常见的功能,如果使用MultipartHttpServletRequest来做上传功能. 不配置上传大小的话,默认是2M.在有些场景,这个肯定不能满足条件. 上传代码: ...
- 十二、 Spring Boot 静态资源处理
spring Boot 默认为我们提供了静态资源处理,使用 WebMvcAutoConfiguration 中的配置各种属性. 建议大家使用Spring Boot的默认配置方式,如果需要特殊处理的再通 ...
- Spring Boot 静态资源路径分析
最近在接触一个看公司的java后台项目(采用的耶鲁大学开源的一个cas单点登录系统),用的是框架是Spring Boot,用的模板是Thymeleaf,于是我生成一个Spring Boot的项目,并且 ...
- Spring Boot 静态资源处理,妙!
作者:liuxiaopeng https://www.cnblogs.com/paddix/p/8301331.html 做web开发的时候,我们往往会有很多静态资源,如html.图片.css等.那如 ...
- Spring Boot静态资源
1.4 SpringBoot静态资源 1.4.1 默认静态资源映射 Spring Boot 对静态资源映射提供了默认配置 Spring Boot 默认将 /** 所有访问映射到以下目录: classp ...
随机推荐
- BZOJ 1444 [Jsoi2009]有趣的游戏 (AC自动机 + 概率DP + Gauss)
1444: [Jsoi2009]有趣的游戏 Time Limit: 10 Sec Memory Limit: 64 MBSubmit: 1382 Solved: 498[Submit][Statu ...
- T-SQL查询的逻辑处理过程
对于一个查询SQL而言,通常将其逻辑处理过程分成7个大的阶段 分别是: 1.FROM 2.WHERE 3.GROUP BY 4.HAVING 5.SELECT 6.ORDER BY 7.TOP/OFF ...
- VSCode的终端修改
快速打开VSCode的快捷键是:Ctrl + `(反引号) 转自:https://blog.csdn.net/u013517122/article/details/82776607 因本人实在忍受不了 ...
- js基础学习笔记(二)
2.1 输出内容(document.write) document.write() 可用于直接向 HTML 输出流写内容.简单的说就是直接在网页中输出内容. 第一种:输出内容用“”括起,直接输出&q ...
- 正则表达式Regular expressions
根据某种匹配模式来寻找strings中的某些单词 举例:如果我们想要找到字符串The dog chased the cat中单词 the,我们可以使用下面的正则表达式: /the/gi 我们可以把这个 ...
- redis状态监控可视化工具RedisLive使用
首先,别人写的工具,赞一下 github地址 https://github.com/nkrode/RedisLive 然后,fork一下,自己加点功能 gui介绍(直接copy的github图片) ...
- Codeforces Round #540 (Div. 3)--1118D2 - Coffee and Coursework (Hard Version)
https://codeforces.com/contest/1118/problem/D2 和easy version的主要区别是,数据增加了. easy version采用的是线性查找,效率低 在 ...
- VS IDE 中Visual C++ 中的项目属性配置
VS IDE 中Visual C++ 中的项目属性配置 一. Visual C++ 项目系统基于 MSBuild. 虽然可以直接在命令行上编辑 XML 项目文件和属性表,我们仍建议你使用 VS IDE ...
- VS2010与VS2013中的多字节编码与Unicode编码问题
1. 多字节字符与单字节字符 char与wchar_t 我们知道C++基本数据类型中表示字符的有两种:char.wchar_t. char叫多字节字符,一个char占一个字节,之所以叫多字节字符是因 ...
- 再论hibernatetemplate
自动生成hibernate配置文件的时候,会在dao层用到getSession()方法来操作数据库记录,但是他还有个方法getHibernateTemplate(),这两个方法究竟有什么区别呢? 1. ...