
React Native开发之expo中camera的基本使用
之前做RN项目没调用过本地摄像头,今天下班早,做了一个简单的小demo:主要实现的功能:点击拍照按钮进入拍照界面,点击flip进行前后摄像头转换,点击开始拍照实现拍照功能(没写保存到本地的功能,大家可以自主开发),代码是参照expo官网的Camera写的一个小demo,大家可以结合的expo官网来看,该加注释的地方都在代码中加了,希望能对你有所帮助。
import React from 'react'

import {

    View,

    Text,

    TouchableOpacity,

    Button,

    Image

} from 'react-native'

import { Camera, Permissions } from 'expo';

interface Props{

}

//定义Camera的两个属性

interface State{

    hasCameraPermission?:any,

    type?:any,

    isShowCamera: Boolean,

    uri:string

}

export default class componentName extends React.Component<Props,State> {

    public camera:any              //定义一个camera来拿到Camera节点

    constructor(props:Props) {

        super(props)

        this.state = {

            hasCameraPermission: null,              //照相机权限

            type: Camera.Constants.Type.back,       //照相机类型

            isShowCamera: false,                    //是否开启照相机

            uri: ''

        }

    }

    async componentWillMount() {

        const { status } = await Permissions.askAsync(Permissions.CAMERA);

        this.setState({ hasCameraPermission: status === 'granted' });

    }

    //把官网里面的render粘过来

    render() {

        const { hasCameraPermission } = this.state;

        if (hasCameraPermission === null) {

          return <View />;

        } else if (hasCameraPermission === false) {

          return <Text>没有权限打开照相机</Text>;

        } else {

          return (

            <View style={{ flex: 1, paddingTop: 20 }}>

              {

                  !this.state.isShowCamera ?

                  <View>

                      <View>

                          <Image source={{uri:this.state.uri}} style={{width: 200, height: 200}}></Image>

                      </View>

                      <Button

                        onPress={this.takePicture.bind(this)}

                        title='拍照'

                    ></Button>

                  </View>:

                  <Camera

                    style={{ flex: 1 }}

                    type={this.state.type}

                    ref={(el:any)=>this.camera=el}      //参照官网的Methods

                  >

                    <View

                        style={{

                            flex: 1,

                            backgroundColor: 'transparent',

                            flexDirection: 'row',

                        }}>

                        <TouchableOpacity

                            style={{

                            flex: 1,

                            alignSelf: 'flex-end',

                            alignItems: 'center',

                            }}

                            onPress={() => {

                            this.setState({

                                type: this.state.type === Camera.Constants.Type.back

                                ? Camera.Constants.Type.front

                                : Camera.Constants.Type.back,

                            });

                            }}>

                            <Text

                            style={{ fontSize: 18, marginBottom: 10, color: 'white' }}>

                            {' '}Flip{' '}

                            </Text>

                        </TouchableOpacity>

                        {/* 复制一个开始拍照的点击按钮 */}

                        <TouchableOpacity

                            style={{

                            flex: 1,                    //flex为0.1改成flex为1

                            alignSelf: 'flex-end',

                            alignItems: 'center',

                            }}

                            //参照官网的Methods

                            onPress={async () => {

                                if (this.camera) {

                                    let photo = await this.camera.takePictureAsync();

                                    console.log(photo)

                                    this.setState({

                                        isShowCamera: false,

                                        uri: photo.uri

                                    })

                                }

                            }}>

                            <Text

                            style={{ fontSize: 18, marginBottom: 10, color: 'white' }}>

                            {' '}开始拍照{' '}

                            </Text>

                        </TouchableOpacity>

                    </View>

                </Camera>

              }

            </View>

          );

        }

    }

    takePicture(){

        this.setState({

            isShowCamera: true

        })

    }

}
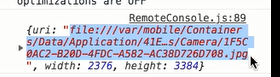
控制台打印的photo结果:
React Native开发之expo中camera的基本使用的更多相关文章
- React Native开发之npm start加速
在Windows下好不容易安装好React Native环境之后,运行npm start,结果就是无限被等待,快的话160秒(将近3分钟啊....) 而Mac下因为有watchman所以是飞一样的速度 ...
- 转 : React Native 开发之 IDE 选型和配置
转:https://mp.weixin.qq.com/s?__biz=MzA3ODg4MDk0Ng==&mid=2651112392&idx=1&sn=135e29ddde30 ...
- React Native开发之IDE(Atom+Nuclide)安装,运行,调试
版权声明:本文为博主原创文章,如需转载请注明出处 目录(?)[-] 前言 MacWindowsLinux 准备工作 安装Atom 安装Nuclide 新建一个工程 自动补全 类型标注 语法检查 跳 ...
- React—Native开发之 Could not connect to development server(Android)解决方法
作为初学者昨天还好好能跑的项目今天就会遇到突然爆红出错是经常的事,让我们来看下是什么错吧 先来翻译: 连接不到开发的服务器. 请按照以下的步骤来修复此问题: 确保包服务器在运行确保你的设备或者模拟器连 ...
- Android安全开发之WebView中的地雷
Android安全开发之WebView中的地雷 0X01 About WebView 在Android开发中,经常会使用WebView来实现WEB页面的展示,在Activiry中启动自己的浏览器,或者 ...
- JavaEE开发之Spring中Bean的作用域、Init和Destroy方法以及Spring-EL表达式
上篇博客我们聊了<JavaEE开发之Spring中的依赖注入以及AOP>,本篇博客我们就来聊一下Spring框架中的Bean的作用域以及Bean的Init和Destroy方法,然后在聊一下 ...
- JavaEE开发之Spring中的多线程编程以及任务定时器详解
上篇博客我们详细的聊了Spring中的事件的发送和监听,也就是常说的广播或者通知一类的东西,详情请移步于<JavaEE开发之Spring中的事件发送与监听以及使用@Profile进行环境切换&g ...
- JavaEE开发之Spring中的条件注解组合注解与元注解
上篇博客我们详细的聊了<JavaEE开发之Spring中的多线程编程以及任务定时器详解>,本篇博客我们就来聊聊条件注解@Conditional以及组合条件.条件注解说简单点就是根据特定的条 ...
- JavaEE开发之SpringMVC中的自定义拦截器及异常处理
上篇博客我们聊了<JavaEE开发之SpringMVC中的路由配置及参数传递详解>,本篇博客我们就聊一下自定义拦截器的实现.以及使用ModelAndView对象将Controller的值加 ...
随机推荐
- js 生成md5
原理比较复杂,不过人类区别与其他动物是因为会用工具,所以,把下面代码复制保存一下就好了. <script> var hex_chr = "0123456789abcdef&quo ...
- JDK/bin下工具列表说明
JDK/bin下工具列表说明 appletviewer.exe:一种执行HTML文件上的Java小程序类的Java浏览器 apt.exe:注解处理工具(Annotation Processing To ...
- Linux入门-2 VIM基础
启动与退出 模式 进入插入模式 命令 删除.复制.粘贴 光标控制 查找与替换 EX模式 启动与退出 vim只启动vim vim <filename>打开文件,如果不存在则新建 模式 Nor ...
- 使用qt的hostInfo类,查看本机的IP和设备
创建NetWorkInformation类,main.cpp直接生成. #include "networkinformation.h" #include <QApplicat ...
- Debian/Kali 安装原生Firefox
出于种种原因,有很多人信仰原装纯净:就像debian下的iceweasel,有人总想换成firefox.好吧,正好最近29版发布了,我们无视掉这两者哥两好的关系,尝试在Debian/Kali 下安装F ...
- c++中左值的含义
<<cpp primer plus 6th edition>>中的原文(Chapter 8 Adventures in Functions): What is an lvalu ...
- 用画小狗的方法来解释Java中的值传递
在开始看我画小狗之前,咱们先来看道很简单的题目: 下面程序的输出是什么? Dog myDog = new Dog("旺财"); changeName(myDog); System. ...
- Oracle表空间、段、区和块简述
本文转载自:http://blog.itpub.net/17203031/viewspace-682003/ 在Oracle学习过程中,存储结构,表段区块可能是每个初学者都要涉及到的概念.表空间.段. ...
- JPA注解实现联合主键
当表中一个主键不能唯一标识一条记录的时候,就需要使用联合主键了,下面是使用JPA注解实现联合主键的代码 1 首先需要建立一个复合主键类,用来存放需要生产联合主键的属性,该类需要实现序列化. packa ...
- BZOJ5301:[CQOI2018]异或序列(莫队)
Description 已知一个长度为 n 的整数数列 a[1],a[2],…,a[n] ,给定查询参数 l.r ,问在 [l,r] 区间内,有多少连续子 序列满足异或和等于 k . 也就是说,对于所 ...