CentOS7——gitlab本地git仓库搭建 以及web hook配置
整个搭建用的都是各种默认设置,所以没有用到高深的的东西,比较简单,比较傻瓜式,这篇也仅仅是一个入门。
另外本文具有时效性,浏览本文请注意发表时间,为防止过时产生误导,本文尽量把 “如何得知应该这样做” 之类的内容放进去。
1、安装GitLab
从官网获得安装步骤,并执行(不去官网也可以,本文已经把所有用到的命令放进来了,往下看吧)。
官网:https://about.gitlab.com/installation/

选择CentOS7
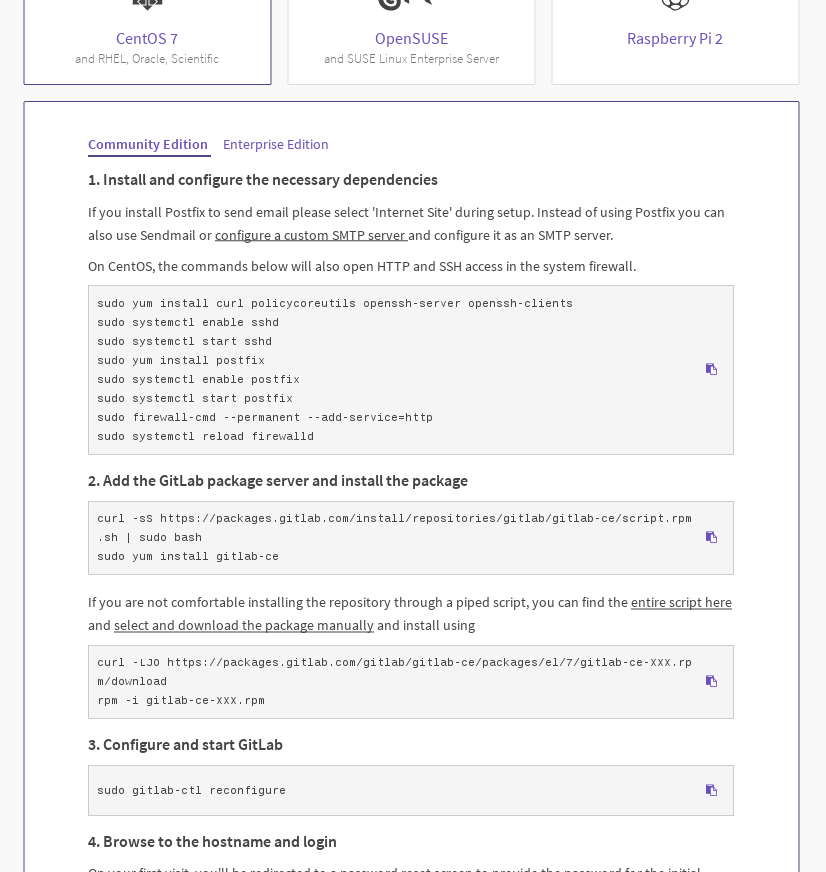
进入了社区版的安装步骤说明,gitlab分为社区版(免费)和企业版(收费),社区版目前已经满足我们的需求,直接照着里面的命令敲一遍即可,中间有个命令要下载三百多兆的文件,这里把命令贴出来,省的再去官网了。
命令如下,加粗标下划线的:
 . Install and configure the necessary dependencies

If you install Postfix to send email please select 'Internet Site' during setup. Instead of using Postfix you can also use Sendmail or configure a custom SMTP server and configure it as an SMTP server.

On CentOS, the commands below will also open HTTP and SSH access in the system firewall.

sudo yum install curl policycoreutils openssh-server openssh-clients

sudo systemctl enable sshd

sudo systemctl start sshd

sudo yum install postfix

sudo systemctl enable postfix

sudo systemctl start postfix

sudo firewall-cmd --permanent --add-service=http

sudo systemctl reload firewalld

. Add the GitLab package server and install the package

curl -sS https://packages.gitlab.com/install/repositories/gitlab/gitlab-ce/script.rpm.sh | sudo bash

sudo yum install gitlab-ce

If you are not comfortable installing the repository through a piped script, you can find the entire script here and select and download the package manually and install using

curl -LJO https://packages.gitlab.com/gitlab/gitlab-ce/packages/el/7/gitlab-ce-XXX.rpm/download

rpm -i gitlab-ce-XXX.rpm

. Configure and start GitLab

sudo gitlab-ctl reconfigure

. Browse to the hostname and login

On your first visit, you'll be redirected to a password reset screen to provide the password for the initial administrator account. Enter your desired password and you'll be redirected back to the login screen.

The default account's username is root. Provide the password you created earlier and login. After login you can change the username if you wish.
第四条是说你安装完成后的首次登陆会被重定向到一个密码帐号设置页,默认gitlab是跑在80端口的,以上步骤执行完后直接从本地访问localhost,或者用其他机器访问,然后设置密码即可。
2、登陆gitlab并创建一个仓库
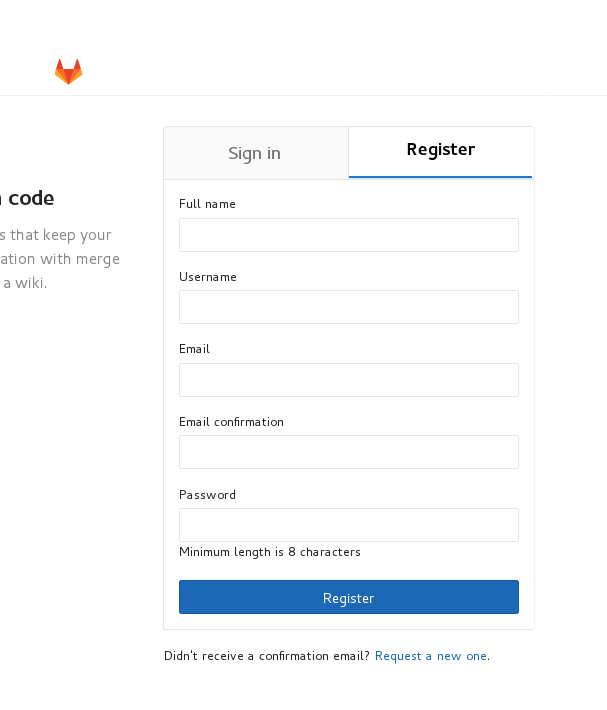
默认用户是root,密码是你刚才设置的密码,不建议使用该用户登陆,建议注册一个
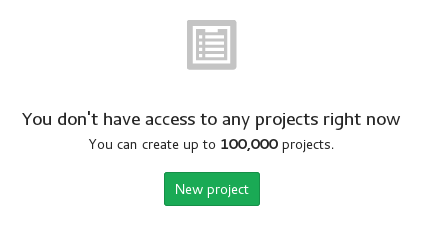
用新用户登陆,点击New project,创建一个项目
填写项目名,选择private可设为私有项目,这样你不添加协作者,他们是没法搞你的项目的,这里选择private
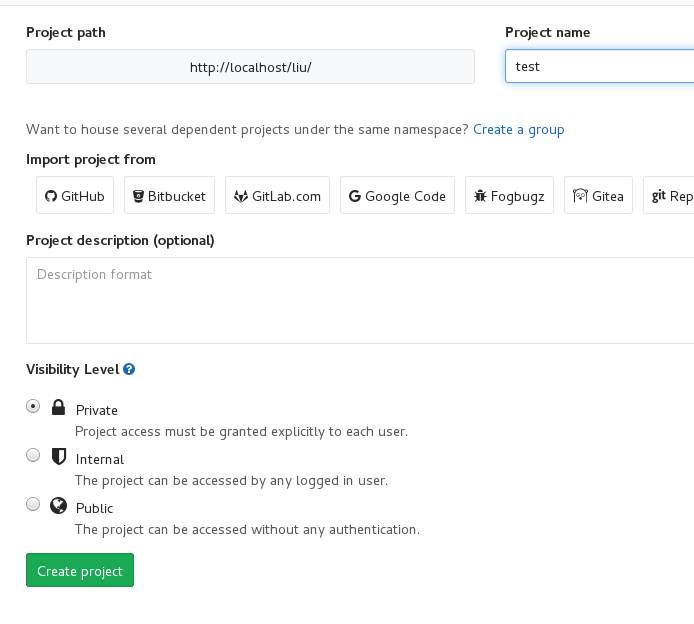
创建完成后
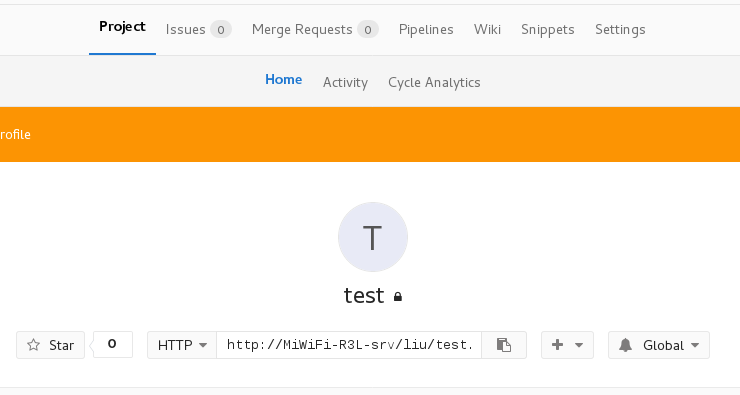
中间的地址就是访问地址,至此仓库创建完毕。如何在客户端使用不是本文 讨论范畴,不再赘述,下面我们来看看web hook怎么添加。
3、创建web hook
web hook 功能:
gitlab服务器可以在 用户推送代码到服务器、推送注释到服务器等用户事件发生的时候,将该事件的细节上报给你指定的web url。
你只需要告诉gitlab服务器,你想让它访问的url和在什么事件产生时访问该url即可。
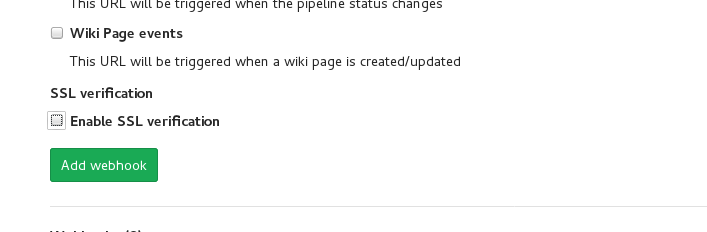
新版本的web hook设置的位置稍有改变,在上图所示的页面上,点击右上角的Settings,再选择Integrations,就可以进入web hook创建界面,界面截图如下:

其中URL就是各种事件的推送地址,Secret Token则可以用来作为验证字符串,这里不填,下边的Trigger则罗列了各种可以选择的事件。填完保存
保存完后,这条web hook就会出现在这个按钮的下方
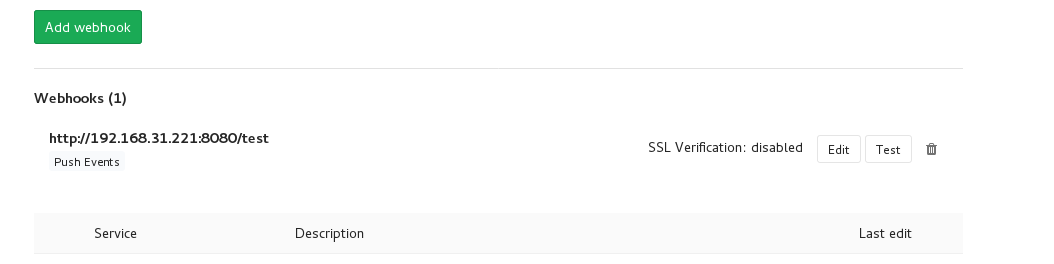
这里可以点Test来测试一下该地址。
这里配置的地址是http://192.168.31.221:8080/test,选择的事件是Push Events,
那么一旦有人提交代码到这个仓库,服务器就会访问http://192.168.31.221:8080/test,并把细节作为报文内容发送过去,一般会发送以下内容:
{

  "object_kind": "push",

  "before": "95790bf891e76fee5e1747ab589903a6a1f80f22",

  "after": "da1560886d4f094c3e6c9ef40349f7d38b5d27d7",

  "ref": "refs/heads/master",

  "checkout_sha": "da1560886d4f094c3e6c9ef40349f7d38b5d27d7",

  "user_id": ,

  "user_name": "John Smith",

  "user_username": "jsmith",

  "user_email": "john@example.com",

  "user_avatar": "https://s.gravatar.com/avatar/d4c74594d841139328695756648b6bd6?s=8://s.gravatar.com/avatar/d4c74594d841139328695756648b6bd6?s=80",

  "project_id": ,

  "project":{

    "name":"Diaspora",

    "description":"",

    "web_url":"http://example.com/mike/diaspora",

    "avatar_url":null,

    "git_ssh_url":"git@example.com:mike/diaspora.git",

    "git_http_url":"http://example.com/mike/diaspora.git",

    "namespace":"Mike",

    "visibility_level":,

    "path_with_namespace":"mike/diaspora",

    "default_branch":"master",

    "homepage":"http://example.com/mike/diaspora",

    "url":"git@example.com:mike/diaspora.git",

    "ssh_url":"git@example.com:mike/diaspora.git",

    "http_url":"http://example.com/mike/diaspora.git"

  },

  "repository":{

    "name": "Diaspora",

    "url": "git@example.com:mike/diaspora.git",

    "description": "",

    "homepage": "http://example.com/mike/diaspora",

    "git_http_url":"http://example.com/mike/diaspora.git",

    "git_ssh_url":"git@example.com:mike/diaspora.git",

    "visibility_level":

  },

  "commits": [

    {

      "id": "b6568db1bc1dcd7f8b4d5a946b0b91f9dacd7327",

      "message": "Update Catalan translation to e38cb41.",

      "timestamp": "2011-12-12T14:27:31+02:00",

      "url": "http://example.com/mike/diaspora/commit/b6568db1bc1dcd7f8b4d5a946b0b91f9dacd7327",

      "author": {

        "name": "Jordi Mallach",

        "email": "jordi@softcatala.org"

      },

      "added": ["CHANGELOG"],

      "modified": ["app/controller/application.rb"],

      "removed": []

    },

    {

      "id": "da1560886d4f094c3e6c9ef40349f7d38b5d27d7",

      "message": "fixed readme",

      "timestamp": "2012-01-03T23:36:29+02:00",

      "url": "http://example.com/mike/diaspora/commit/da1560886d4f094c3e6c9ef40349f7d38b5d27d7",

      "author": {

        "name": "GitLab dev user",

        "email": "gitlabdev@dv6700.(none)"

      },

      "added": ["CHANGELOG"],

      "modified": ["app/controller/application.rb"],

      "removed": []

    }

  ],

  "total_commits_count":

}
各种事件发送的报文内容略有不同,具体可以访问你github服务器上的:
http://localhost/help/user/project/integrations/webhooks
地址来查看。
有了这样一种设置,我们可以自己实现一些功能,比如如果推送了一个符合自己约定规则的标签,那么就自动获取最新代码并发布到某个服务器上,当然,我描述的这个功能Jenkins已经帮我们实现了,这个也不在本文中讨论了。
2019年7月2日补充:
如果想修改gitlab端口,修改位置如下:
/var/opt/gitlab/nginx/conf/nginx.conf 其中包含的文件——/var/opt/gitlab/nginx/conf/gitlab-http.conf
以上,希望能对别人有所帮助,完毕。
CentOS7——gitlab本地git仓库搭建 以及web hook配置的更多相关文章
- 使用centos7构建本地git服务器
git的安装非常简单 直接yum install git -y即可 大概看一下我的执行步骤吧 首先在服务器上执行以下操作,完成创建仓库 mkdir -p /data/test/bp.git #创建仓库 ...
- gitlab本地部署方法(ubuntu16.04+gitlab9.5.5)
Gitlab本地部署方法 1 前期准备 电脑配置:windows7 ,内存8GB以上(因为有4GB左右要分配给虚拟机中的ubuntu) 虚拟机:VMware Linux系统:ubuntu16.04 ...
- Git客户端的安装与配置入门
GitLab与Git客户端的安装与配置入门,每次配置完一段时间,就忘记配置过程了,为了自己和同学们以后有所参照,特记录了本次下载和配置,其实Git就是一个版本控制系统,类似于SVN,CVS等 下载:W ...
- 本地git部署web连接azure的git存储库
本地git部署web 创建本地存储仓库 输入以下命令创建git本地仓库(会在当前目录下生产一个.git的目录) git init 然后提交内容 在git仓库所在的目录下存放好需要的网页文件 将文 ...
- 本地Git连接GitLab(服务器)远程仓库
1.简介 远程仓库是指托管在网络上的项目仓库,现在互联网上有很多项目托管平台,比如github.gitlab等.为了不公开自己项目代码,可以在自己的服务器上搭建自己的项目仓库,最常见的是搭建GitLa ...
- 本地Git连接远程Gitlab
本地端安装https://www.cnblogs.com/wei9593/p/11698204.html 1.打开本地git bash,使用如下命令生成ssh公钥和私钥 ssh-keygen -t r ...
- 本地Git仓库与GitHub/GitLab仓库同步
本地仓库即为在你的电脑上的项目文件,远程仓库即为服务器仓库,如GitHub.GitLab或其他等.此处以GitHub介绍本地仓库与远程仓库的同步.可先创建本地仓库,也可先创建GitHub仓库,但都需要 ...
- gitlab & gerrit & git & repo & jenkins
Omnibus GitLab documentation(中文安装说明) 在自己的服务器上部署 GitLab 社区版->较为全面 GIT & REPO & GERRIT (三) ...
- github与gitlab与git三个基佬的故事
我们了解了git是以个人为中心,但是人人都得数据交互呀..python程序员每天都忙着进行py交易 交互数据的方式 使用github或者码云等公有代码仓库,托管代码的地方,谁都可以看 公司内部使用gi ...
随机推荐
- 【8.31校内测试】【找规律二分】【DP】【背包+spfa】
打表出奇迹!表打出来发现了神奇的规律: 1 1 2 2 3 4 4 4 5 6 6 7 8 8 8 8 9 10 10 11 12 12 12 13 14 14 15 16 16 16 16 16.. ...
- linux基础命令学习 (十一)系统管理命令
stat 显示指定文件的详细信息,比ls更详细 who 显示在线登陆用户 whoami 显示当前操作用户 hostname ...
- 简单破解 Sencha Architect 2.2 (ExtJs Designer)
Sencha Architect 2是ExtJS和Sencha Touch的官方可视化IDE工具.最新版本是2.2,说是破解,其实是修改License来实现无限试用而已. 1.先下载安装官方软件,大约 ...
- 升/降压转换器 (Buck-boost)
升/降压转换器 (Buck-boost) 当输入电压是变动的,有时比输出电压高.有时却比较低时(例如放电中的电池),升/降压转换器 (Buck-boost) 是最佳的电源解决方案. 升/降压转换器 ( ...
- NFC TI TRF7970A Breakout Board for BusPirate or other HW
http://dangerousprototypes.com/forum/viewtopic.php?f=19&t=3187 Just a news about a new Hardware ...
- Windows Server 2008 Standard Enterprise Datacenter各个版本区别
-- Windows Server 2008 Standard 包含1个虚拟实例许可,5个客户端访问授权,售价999美元. -- Windows Server 2008 Enterprise 包含4个 ...
- ASP.NET Core 1.0 基础之配置
来源https://docs.asp.net/en/latest/fundamentals/configuration.html ASP.NET Core 1.0支持不同的配置选项.应用配置数据可以是 ...
- pytest文档9-参数化parametrize
前言 pytest.mark.parametrize装饰器可以实现测试用例参数化. parametrizing 1.这里是一个实现检查一定的输入和期望输出测试功能的典型例子 # content of ...
- node最简单的升级
1.安装n插件 npm install -g n //全局安装 2.升级 n stable //升级 3.packjson升级 npm i -g npm-upgrade 4.升级 npm-upgrad ...
- 代码规范审查 -Sonar环境搭建
Sonar概述 Sonar 是一个用于代码质量管理的开放平台,可以进行代码质量的持续跟踪审查,支持的语言包含C#.java.PHP.C等.可以通过UI一睹Sonar的强大之处. Sonar安装 ...