相关ubuntu有几个细节有用的工具系列
前言
于Linux制,FTPserver有许多软件,我们已经成熟,像vsftpd, wu-ftp, Pure-FTPd等一下。不过该软件的安装一切,配置比较麻烦,建立个人FTPserver,仍是Proftpd相对简单。
文件夹
- Proftpd介绍
- Proftpd安装
- Proftpd配置文件
- Proftpd使用场景
- client訪问
1. Proftpd介绍
Proftpd是一款开放源代码的FTPserver软件,它是原来世界范围使用最广泛的wu-ftpd的改进版,它修正了wu-ftpd的很多缺陷,在很多方面进行了重大的改进,当中一个重要变化就是它学习了Apache 的配置方式,使proftpd的配置和管理更加简单易懂。
有两种执行方式,独立server与超级server的子server。
不管从安全性和稳定性,还是可配置性来说都是很好的选择。
2. Proftpd安装
系统环境
- Linux Ubuntu 12.04.2 LTS 64bit server
安装Proftpd
~ sudo apt-get install proftpd
<h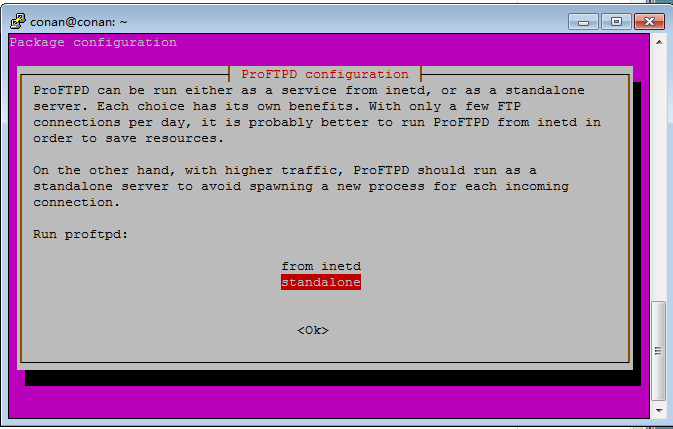
选择“standalone”
查看proftpd状态
~ sudo /etc/init.d/proftpd status

ProFTPD is started in standalone mode, currently running.

~ ps -aux|grep ftp

proftpd   6674  0.0  0.1  94648  2092 ?        Ss   16:05   0:00 proftpd: (accepting connections)

#启动port21

~ netstat -nltp|grep 21

tcp6       0      0 :::21                   :::*                    LISTEN      -
3. Proftpd配置文件
配置文件:/etc/proftpd/proftpd.conf
#配置server名

ServerName			""blog.fens.me FTP Server"

#设置server执行模式,独立服务,或者被监管

ServerType			standalone

#设置为默认server

DefaultServer			on

#设置server进程执行使用的用户

User				proftpd

#设置server进程执行使用的组

Group			        nogroup

#设置关闭IPv6支持

UseIPv6			        off

#设置server接受请求的port

Port				21

#设置被动模式使用的port范围

PassivePorts 			60000 65535

#设置用户上传文件的权限掩码

Umask				022

#设置用户被chroot锁定到的各自的Home文件夹

DefaultRoot			/ftp

#关闭欢迎信息显示

DeferWelcome			off

#假设显示欢迎信息,则指定显示的文件

DisplayLogin			welcome.msg

#指定切换文件夹时,显示的欢迎信息

DisplayChdir			.message

#设置日志

SystemLog                       /var/log/proftp.log

TransferLog                     /var/log/proftp-transfer.log
#限定操作
<Limit SITE_CHMOD>

DenyAll

</Limit>
#设置匿名用户资源
<Anonymous "/ftp/c">

...

</Anonymous>
#配置存储文件夹权限
<Directory "/ftp/a/" >

<Limit ALL>

AllowUser x

AllowUser a1

DenyAll

</Limit>

<Limit CWD READ RETR DIRS>

AllowAll

</Limit>

</Directory>
Limit权限说明:
- CWD : Change Working Directory 进入该文件夹
- MKD : Make Directory 创建文件夹
- RNFR : Rename from 更名
- DELE : Delete 删除文件
- RMD : Remove Directory 删除文件夹
- READ : 可读
- WRITE: 可写
- STOR : 可上传
- RETR : 可下载
- DIRS : 同意列出文件夹
- LOGIN: 同意登录
- ALL : 所有
4. Proftpd使用场景
场景描写叙述:某公司建立统一的FTPserver(/ftp)。公司有a部门(/ftp/a),b两个部门(/ftp/b)。有独立的存储空间。
a1为a部门经理有对(/ftp/a)操作权限,a2为a部门员工仅仅能读文件。
b1为b部门经理有对(/ftp/b)操作权限,b2为b部门员工仅仅能读文件。
x为公司总经理,有对(/ftp)操作权限。
操作权限:
/ftp    -- x全部操作

/ftp/a  -- a1全部操作, a2仅仅读

/ftp/b  -- b1全部操作, b2仅仅读
命令操作:
# 创建FTP文件夹

sudo mkdir /ftp

sudo mkdir /ftp/a

sudo mkdir /ftp/b

# 创建用户组

sudo groupadd a

sudo groupadd b
Ubuntu系统配置nologin,与其它Linux稍有不同
~  sudo vi /etc/shells

# /etc/shells: valid login shells

/bin/sh

/bin/dash

/bin/bash

/bin/rbash

/usr/bin/tmux

/usr/bin/screen

/usr/sbin/nologin
最后一行添加/usr/sbin/nologin
创建用户并设置nologin, 禁止FTP账户登陆
sudo useradd a1 -g a -s /usr/sbin/nologin

sudo useradd a2 -g a -s /usr/sbin/nologin

sudo useradd b1 -g b -s /usr/sbin/nologin

sudo useradd b2 -g b -s /usr/sbin/nologin

sudo useradd x -G a,b -s /usr/sbin/nologin

#设置账户password

echo -e "a1:123" | sudo chpasswd

echo -e "a2:123" | sudo chpasswd

echo -e "b1:123" | sudo chpasswd

echo -e "b1:123" | sudo chpasswd

echo -e "x:123" | sudo chpasswd

#设置文件夹权限

sudo chown x /ftp

sudo chown a1:a /ftp/a

sudo chmod 770 /ftp/a

sudo chmod g+s /ftp/a

sudo chown b1:b /ftp/b

sudo chmod 770 /ftp/b

sudo chmod g+s /ftp/b
改动配置文件:/etc/proftpd/proftpd.conf
~ sudo vi /etc/proftpd/proftpd.conf

ServerName "blog.fens.me FTP Server"

ServerType standalone

DefaultServer on

Port 21

Umask 022

MaxInstances 30

User proftpd

Group nogroup

DefaultRoot /ftp

AllowOverwrite on

SystemLog /var/log/proftp.log

TransferLog /var/log/proftp-transfer.log

<Directory "/ftp/*">

<Limit CWD READ>

AllowAll

</Limit>

</Directory>

<Directory "/ftp/a/" >

<Limit ALL>

AllowUser x

AllowUser a1

DenyAll

</Limit>

<Limit CWD READ RETR DIRS>

AllowAll

</Limit>

</Directory>

<Directory "/ftp/b/" >

<Limit ALL>

AllowUser x

AllowUser b1

DenyAll

</Limit>

<Limit CWD READ RETR DIRS>

AllowAll

</Limit>

</Directory>

<Limit SITE_CHMOD>

DenyAll

</Limit>
又一次server
~ sudo /etc/init.d/proftpd restart

 * Stopping ftp server proftpd        [ OK ]

 * Starting ftp server proftpd
5. client訪问
client命令行:Win7 64bit Command
模拟a1用户登陆:
~ ftp

#建立连接

ftp> open 192.168.1.201

连接到 192.168.1.201。

220 ProFTPD 1.3.4a Server (blog.fens.me FTP Server) [::ffff:192.168.1.201]

用户(192.168.1.201:(none)): a1

331 Password required for a1

password:

230 User a1 logged in

#查看文件夹

ftp> dir

200 PORT command successful

150 Opening ASCII mode data connection for file list

drwxrws---   2 a1       a            4096 Nov  3 12:59 a

drwxrws---   2 b1       b            4096 Nov  3 12:25 b

226 Transfer complete

ftp: 收到 116 字节,用时 0.00秒 58.00千字节/秒。

ftp> cd a

250 CWD command successful

ftp> pwd

257 "/a" is the current directory

ftp> dir

200 PORT command successful

150 Opening ASCII mode data connection for file list

-rw-r--r--   1 a2       a           55723 Nov  3 12:56 36kryunjiasu.docx

-rw-r--r--   1 a1       a               4 Nov  3 12:24 test.txt

226 Transfer complete

ftp: 收到 139 字节,用时 0.00秒 69.50千字节/秒。

#上传文件

ftp> put c:\22.log

200 PORT command successful

150 Opening ASCII mode data connection for 22.log

226 Transfer complete

ftp: 发送 120 字节,用时 0.06秒 2.18千字节/秒。

#下载文件

ftp> get test.txt

200 PORT command successful

150 Opening ASCII mode data connection for test.txt (4 bytes)

226 Transfer complete

ftp: 收到 5 字节,用时 0.00秒 5000.00千字节/秒。

#尝试訪问B文件夹,出错

ftp> cd ../b

550 ../b: No such file or directory

#退出

ftp> bye

221 Goodbye.
模拟a2用户登陆:
~ ftp

#建立连接

ftp> open 192.168.1.201

连接到 192.168.1.201。

220 ProFTPD 1.3.4a Server (blog.fens.me FTP Server) [::ffff:192.168.1.201]

用户(192.168.1.201:(none)): a2

331 Password required for a2

password:

230 User a2 logged in

#查看文件夹

ftp> dir

200 PORT command successful

150 Opening ASCII mode data connection for file list

drwxrws---   2 a1       a            4096 Nov  3 13:09 a

drwxrws---   2 b1       b            4096 Nov  3 12:25 b

226 Transfer complete

ftp: 收到 116 字节,用时 0.00秒 116.00千字节/秒。

#上传文件,出错

ftp> put c:\11.log

200 PORT command successful

550 11.log: Operation not permitted

#下载文件

ftp> get 22.log

200 PORT command successful

150 Opening ASCII mode data connection for 22.log (114 bytes)

226 Transfer complete

ftp: 收到 120 字节,用时 0.00秒 120000.00千字节/秒。
用Proftpd我们一个高速内部的建立FTPserver。比wu-ftpd为了方便。
版权声明:本文博主原创文章,博客,未经同意不得转载。
相关ubuntu有几个细节有用的工具系列的更多相关文章
- 一些有用的工具,iftop,iotop,htop,glances
一些有用的工具: yum install glances -y资源监控工具GLANCESglances 可以为 Unix 和 Linux 性能专家提供监视和分析性能数据的功能,其中包括:CPU 使用率 ...
- 【跟着子迟品 underscore】常用类型判断以及一些有用的工具方法
Why underscore 最近开始看 underscore.js 源码,并将 underscore.js 源码解读 放在了我的 2016 计划中. 阅读一些著名框架类库的源码,就好像和一个个大师对 ...
- ubuntu下使用反编译apk,工具dex2jar和jd-gui
ubuntu下使用反编译apk, 工具 1:通过apk-tool反编译出资源文件: http://code.google.com/p/android-apktool/ 2.首先使用dex2jar反编译 ...
- Underscore.js 常用类型判断以及一些有用的工具方法
1. 常用类型判断以及一些有用的工具方法 underscore.js 中一些 JavaScript 常用类型检查方法,以及一些工具类的判断方法. 首先我们先来谈一谈数组类型的判断.先贴出我自己封装好的 ...
- Ubuntu系统---进行C++项目开发的工具
Ubuntu系统---进行C++项目开发的工具 在Ubuntu系统下进行C++工作任务,还没接触过.像 Windows + vs 一样,Ubuntu应该也有自己的C++开发工具.网上搜罗了一圈,发现有 ...
- Linux Ubuntu 开发环境配置 ——最具生产力工具一览
Why Linux and Why exactly Ubuntu 首先这里就不做Mac,Linux,Windows三者之争了.只从个人角度分析下: Mac 不差钱(其实Mac作为超级本性价还行),不喜 ...
- Ubuntu 14.04 中安装 VMware10 Tools工具
Run: apt-get install dkms linux-headers-$(uname -r) build-essential psmisc2 - Run: git clone https:/ ...
- 【转】 Ubuntu下配置USB转串口及串口工具配置--不错
原文网址:http://blog.csdn.net/dreambegin/article/details/6985028 注意:默认情况下ubuntu已经安装了USB转串口驱动(pl2303).我的是 ...
- Ubuntu 16.10 安装KolourPaint 4画图工具
KolourPaint 4画图工具简单实用,可以绘画.视频处理和图标编辑: • 绘画:绘制图表和“手绘” • 视频处理:编辑截图和照片;应用特效 • 图标编辑:绘画剪贴和标识透明化 1.在Ubuntu ...
随机推荐
- 【Codeforces Round #433 (Div. 2) C】Planning
[链接]h在这里写链接 [题意] 让你确定ti,使得∑(ti-i)*gi最小,其中ti∈[k+1..k+n],且每个ti都不能一样. 且ti>=i必须成立. [题解] 分解一下成为∑ti*gi ...
- java和 javaw 以及 javaws的区别
http://blog.csdn.net/topwqp/article/details/8595936
- 仿oschina 主界面的实现(二) -------Toolbar + DrawerLayout
watermark/2/text/aHR0cDovL2Jsb2cuY3Nkbi5uZXQv/font/5a6L5L2T/fontsize/400/fill/I0JBQkFCMA==/dissolve/ ...
- Redis学习笔记(六)---List
1.ArrayList与LinkList的区别 ArrayList的使用数组存入的方式,所以根据索引查询数据速度快,而增删元素是比较慢的,它需要将数据一位一位的移动,知道达到要求. LinkList使 ...
- JSONP的使用示例(以及jquery版jsonp)超简单
前言: 平时工作中很少跨域,很少用到jsonp,但是几乎每次面试都会被问到这个问题.很崩溃. 菜鸟教程上的jsonp教程就很好.这里做个笔记,自己捋一遍. Jsonp(JSON with Paddin ...
- Ansible 部署
环境: vim /etc/hosts 192.168.199.61 Ansible 192.168.199.60 Nginx1192.168.199.62 Nginx2192.168.199.63 H ...
- 点滴记录——学习Redis笔记
转载请说明出处:http://blog.csdn.net/cywosp/article/details/39701409 Redis 默认port6379 Redis适用场景 1. 取最新N个数据的操 ...
- linux中内存泄漏的检測(一)最简单的方法
什么是内存泄漏 内存泄漏是指程序动态申请的内存在使用完后没有释放,导致这段内存不能被操作系统回收再利用. 比如这段程序,申请了4个字节的空间但没有释放,有4个字节的内存泄漏. #include < ...
- MySQLDump在使用之前一定要想到的事情
MySQLDump经常用于迁移数据和备份. 下面创建实验数据,两个数据库和若干表create database db1 ;use db1;create table t1(id int primary ...
- <LeetCode OJ> 62. / 63. Unique Paths(I / II)
62. Unique Paths My Submissions Question Total Accepted: 75227 Total Submissions: 214539 Difficulty: ...