Qt Qwdget 汽车仪表知识点拆解3 进度条编写
先贴上效果图,注意,没有写逻辑,都是乱动的

这篇我来说说左侧的这个进度条的实现原理,其实更简单,哈哈哈
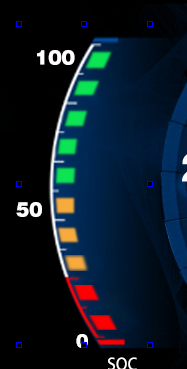
有一个大的widget,根据素材,我放了10个label
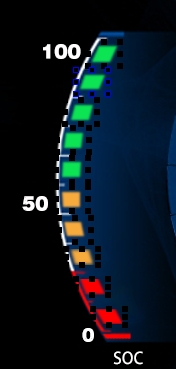
剩下的就是写一个函数,根据数据的不同,实时控制这10个label的显示,
实现代码
void Widget::show_Lline(int num)

{

    switch (num) {

    case 0:

    {

        ui->label_lline_1->hide();

        ui->label_lline_2->hide();

        ui->label_lline_3->hide();

        ui->label_lline_4->hide();

        ui->label_lline_5->hide();

        ui->label_lline_6->hide();

        ui->label_lline_7->hide();

        ui->label_lline_8->hide();

        ui->label_lline_9->hide();

        ui->label_lline_10->hide();

        break;

    }

    case 1:

    {

        ui->label_lline_1->show();

        ui->label_lline_2->hide();

        ui->label_lline_3->hide();

        ui->label_lline_4->hide();

        ui->label_lline_5->hide();

        ui->label_lline_6->hide();

        ui->label_lline_7->hide();

        ui->label_lline_8->hide();

        ui->label_lline_9->hide();

        ui->label_lline_10->hide();

        break;

    }

    case 2:

    {

        ui->label_lline_1->show();

        ui->label_lline_2->show();

        ui->label_lline_3->hide();

        ui->label_lline_4->hide();

        ui->label_lline_5->hide();

        ui->label_lline_6->hide();

        ui->label_lline_7->hide();

        ui->label_lline_8->hide();

        ui->label_lline_9->hide();

        ui->label_lline_10->hide();

        break;

    }

    case 3:

    {

        ui->label_lline_1->show();

        ui->label_lline_2->show();

        ui->label_lline_3->show();

        ui->label_lline_4->hide();

        ui->label_lline_5->hide();

        ui->label_lline_6->hide();

        ui->label_lline_7->hide();

        ui->label_lline_8->hide();

        ui->label_lline_9->hide();

        ui->label_lline_10->hide();

        break;

    }

    case 4:

    {

        ui->label_lline_1->show();

        ui->label_lline_2->show();

        ui->label_lline_3->show();

        ui->label_lline_4->show();

        ui->label_lline_5->hide();

        ui->label_lline_6->hide();

        ui->label_lline_7->hide();

        ui->label_lline_8->hide();

        ui->label_lline_9->hide();

        ui->label_lline_10->hide();

        break;

    }

    case 5:

    {

        ui->label_lline_1->show();

        ui->label_lline_2->show();

        ui->label_lline_3->show();

        ui->label_lline_4->show();

        ui->label_lline_5->show();

        ui->label_lline_6->hide();

        ui->label_lline_7->hide();

        ui->label_lline_8->hide();

        ui->label_lline_9->hide();

        ui->label_lline_10->hide();

        break;

    }

    case 6:

    {

        ui->label_lline_1->show();

        ui->label_lline_2->show();

        ui->label_lline_3->show();

        ui->label_lline_4->show();

        ui->label_lline_5->show();

        ui->label_lline_6->show();

        ui->label_lline_7->hide();

        ui->label_lline_8->hide();

        ui->label_lline_9->hide();

        ui->label_lline_10->hide();

        break;

    }

    case 7:

    {

        ui->label_lline_1->show();

        ui->label_lline_2->show();

        ui->label_lline_3->show();

        ui->label_lline_4->show();

        ui->label_lline_5->show();

        ui->label_lline_6->show();

        ui->label_lline_7->show();

        ui->label_lline_8->hide();

        ui->label_lline_9->hide();

        ui->label_lline_10->hide();

        break;

    }

    case 8:

    {

        ui->label_lline_1->show();

        ui->label_lline_2->show();

        ui->label_lline_3->show();

        ui->label_lline_4->show();

        ui->label_lline_5->show();

        ui->label_lline_6->show();

        ui->label_lline_7->show();

        ui->label_lline_8->show();

        ui->label_lline_9->hide();

        ui->label_lline_10->hide();

        break;

    }

    case 9:

    {

        ui->label_lline_1->show();

        ui->label_lline_2->show();

        ui->label_lline_3->show();

        ui->label_lline_4->show();

        ui->label_lline_5->show();

        ui->label_lline_6->show();

        ui->label_lline_7->show();

        ui->label_lline_8->show();

        ui->label_lline_9->show();

        ui->label_lline_10->hide();

        break;

    }

    case 10:

    {

        ui->label_lline_1->show();

        ui->label_lline_2->show();

        ui->label_lline_3->show();

        ui->label_lline_4->show();

        ui->label_lline_5->show();

        ui->label_lline_6->show();

        ui->label_lline_7->show();

        ui->label_lline_8->show();

        ui->label_lline_9->show();

        ui->label_lline_10->show();

        break;

    }

    default:

        break;

    }

}
这样,就可以了

Qt Qwdget 汽车仪表知识点拆解3 进度条编写的更多相关文章
- Qt Qwdget 汽车仪表知识点拆解4 另类进度条实现
先贴上效果图,注意,没有写逻辑,都是乱动的 注意看一下,右面的这两个进度条,有瑕疵,就是我没有把图片处理干净,这里犹豫我不知道这个具体的弧度,也没法绘制,就偷懒了 现在上面放一个UI,把两个进度条抠空 ...
- Qt Qwdget 汽车仪表知识点拆解6 自定义控件
先贴上效果图,注意,没有写逻辑,都是乱动的 这里说一下控件自定义 图中标出的部分都是自定义的控件 这里如果我们有批量类似的功能,就可以使用自定义控件的方式,这里我已下面的自定义控件说一下,上面的在上一 ...
- Qt Qwdget 汽车仪表知识点拆解2 图像放大
先贴上效果图,注意,没有写逻辑,都是乱动的 这里讲下 这个小汽车的进入过程,其实这个说白了就没有技术含量了,本来应该趁着这个机会学习一下Qt的动画机制,不过随机一想,这个自己写也累不到那里去 下面说下 ...
- Qt Qwdget 汽车仪表知识点拆解8 淡入效果
先贴上效果图,注意,没有写逻辑,都是乱动的 看下面的开始,开始的时候有一个带入的效果,这里有一个坑, 网上大部分都是调用下面这个函数 setWindowOpacity(); 但是,你会发现,在你的子窗 ...
- Qt Qwdget 汽车仪表知识点拆解7 图像绘制,旋转
先贴上效果图,注意,没有写逻辑,都是乱动的 看下最中心的指针旋转,这里使用的QPainter的绘制函数 要显示复杂的效果,需要分层 void Widget::draw_number_pointer() ...
- Qt Qwdget 汽车仪表知识点拆解5 标题栏图标闪烁
先贴上效果图,注意,没有写逻辑,都是乱动的 看下最上面的部分,有一些仪表图标在闪烁,如果一个一个写,也是可以实现的,不过感觉要累死的节奏 这里我写了一个我自己的Label,完了把把这些QLabel提升 ...
- Qt Qwdget 汽车仪表知识点拆解1 速度表示
先贴上效果图,注意,没有写逻辑,所以这些都是乱动的 这里线主要说一下中间显示速度的显示制作的方式,在这里,自己专门写了一个数字的仪表 考虑的一般的汽车是没有办法把瞬时速度提升到四位数的,所以我这里就放 ...
- MFC控件编程进度条编写
MFC控件编程进度条编写 一丶进度条编程需要用到的方法 进度条MFC已经帮我们封装好类了. 叫做 CProgressCtrl 进度条编程也很简单. 封装的方法也就那个那几个. GetPos() 获 ...
- Qt之模型/视图(自定义进度条)
简述 在之前的章节中分享过关于QHeaderView表头排序.添加复选框等内容,相信大家模型/视图.自定义风格有了一定的了解,下面我们来分享一个更常用的内容-自定义进度条. 实现方式: 从QAbstr ...
随机推荐
- Docker官方文档翻译2
转载请标明出处: https://blog.csdn.net/forezp/article/details/80158062 本文出自方志朋的博客 容器 准备工作 安装Docker,版本为1.13或者 ...
- Gitlab简单使用指南
原文链接 一.在gitlab的网站创建一个project 定一个项目名,选定相关的项目设置,private,public等 项目创建成功后,得到项目git@XXX.git的地址,可用于将project ...
- #leetcode刷题之路2-两数相加
给出两个 非空 的链表用来表示两个非负的整数.其中,它们各自的位数是按照 逆序 的方式存储的,并且它们的每个节点只能存储 一位 数字. 如果,我们将这两个数相加起来,则会返回一个新的链表来表示它们的和 ...
- VMware ESXi-6.7——使用
1: 上传ISO文件 1.1:创建一个新目录,上传ISO 1.2: 在新建虚拟机时,点击DVD,选择数据ISO文件,选择要安装的ISO文件.并把连接打钩. 2:新建虚拟机 按照需求填写 硬盘的三种置备 ...
- Percona-Toolkit工具包之pt-archiver
Preface There's a common case that we neet to archive amount of records in some tables to a ...
- pip安装拓展包--网络超时/Read timed out问题
pip安装拓展包--网络超时/Read timed out问题 解决方案:切换镜像源(墙皮太厚) 在后面加上: -i https://pypi.douban.com/simple example: p ...
- xpath技术解析xm文件(php)
1.结合php dom技术的学习,得出一个结论:php dom技术可以跨层取出节点,但是不能保持层次关系,使用xpath可以很好地解决问题. *** xpath技术的核心思想:迅速简洁的定位你需要查找 ...
- virtual box 故障修复
vmware ,virtual box等虚拟化环境为一台系统同时允许运行多台系统成为可能准备了技术支持. 通过软件化的平台虚构出硬件设备的驱动,可谓虚拟化技术应用非常广泛. 在平常的虚拟机启动过程中经 ...
- Linux之redis主从复制
redis集群中的数据库复制就是通过主从同步实现的 主节点Master把数据分发给节点Salve 主从同步的好处在高可用, redis节点有冗余设计 redis主从同步的原理 1. 从服务器向主服务器 ...
- mtools使用-1
mtools是什么? mtools 是一组非常好用的 MongoDB 日志分析工具 ,由MongoDB Inc 官方工程师所写. 组成部分 mlogfilter :按时间切片日志文件,合并日志文件,过 ...