spring @Async 线程池使用
最近公司项目正逐渐从dubbo向springCloud转型,在本次新开发的需求中,全部使用springcloud进行,在使用时线程池,考虑使用spring封装的线程池,现将本次使用心得及内容记录下来
一、线程池常规使用方式
之前使用线程池的方式,都是自己定义线程池,然后写多线程类,用线程池去调用,如下:
package cn.leadeon.message.client;

import cn.leadeon.comm.log.Log;

import cn.leadeon.message.req.MessageProducerReq;

import lombok.Data;

import java.util.concurrent.ExecutorService;

import java.util.concurrent.Executors;

/**

 * 流量消息发送类,线程池调用

 *

 * @author LiJunJun

 * @since 2018/9/30

 */

@Data

public class MessageClientSendMsg {

    /**

     * 日志记录器

     */

    private static final Log LOGGER = new Log(MessageClientSendMsg.class);

    /**

     * 线程池

     */

    private static ExecutorService threadPool;

    /**

     * trace

     */

    private String trace;

    /**

     * 手机号

     */

    private String cellNum;

    /**

     * 消息实体

     */

    private MessageProducerReq messageProducerReq;

    static {

        threadPool = Executors.newFixedThreadPool(10);

    }

    /**

     * 构造函数

     *

     * @param trace 请求流水

     * @param cellNum 电话号码

     * @param messageProducerReq 消息实体

     */

    public MessageClientSendMsg(String trace, String cellNum, MessageProducerReq messageProducerReq) {

        this.trace = trace;

        this.cellNum = cellNum;

        this.messageProducerReq = messageProducerReq;

    }

    /**

     * 消息发送

     */

    public void sendMsg() {

        SendMsgRunable sendMsgRunable = new SendMsgRunable();

        threadPool.execute(sendMsgRunable);

    }

    /**

     * 发送消息内部类并处理异常,不能影响主线程的业务

     */

    class SendMsgRunable implements Runnable {

        @Override

        public void run() {

            try {

                MessageClientProducer msgClintProducer = new MessageClientProducer();

                msgClintProducer.sendAsyncWithPartition(trace, cellNum, messageProducerReq);

            } catch (Exception e) {

                LOGGER.error("消息发送失败!,trace:" + trace);

            }

        }

    }

}
二、使用spring的线程池
- 线程池的启用
有两种方式,配置文件或者注解
注解:使用@EnableAsync标注启用spring线程池,@Async将方法标注为异步方法,spring扫描到后,执行该方法时,会另起新线程去执行,非常简单
package cn.leadeon.message.test;

import org.springframework.scheduling.annotation.Async;

import org.springframework.scheduling.annotation.EnableAsync;

import org.springframework.stereotype.Component;

/**

 * @author LiJunJun

 * @since 2018/10/11

 */

@Component

@EnableAsync

public class AsyncTest {

    @Async

    public void test1() {

        System.out.println("异步执行test1!!!");

        System.out.println("线程id:" + Thread.currentThread().getId());

        System.out.println("线程名称:" + Thread.currentThread().getName());

    }

    @Async

    public void test2() {

        System.out.println("异步执行test2!!!");

        System.out.println("线程id:" + Thread.currentThread().getId());

        System.out.println("线程名称:" + Thread.currentThread().getName());

    }

    @Async

    public void test3() {

        System.out.println("异步执行test3!!!");

        System.out.println("线程id:" + Thread.currentThread().getId());

        System.out.println("线程名称:" + Thread.currentThread().getName());

    }

}
配置文件:新增spring的配置文件spring-threadpool.xml
<?xml version="1.0" encoding="UTF-8"?>

<beans xmlns="http://www.springframework.org/schema/beans"

       xmlns:xsi="http://www.w3.org/2001/XMLSchema-instance" xmlns:aop="http://www.springframework.org/schema/aop"

       xmlns:tx="http://www.springframework.org/schema/tx" xmlns:jdbc="http://www.springframework.org/schema/jdbc"

       xmlns:context="http://www.springframework.org/schema/context"

       xmlns:mvc="http://www.springframework.org/schema/mvc" xmlns:task="http://www.springframework.org/schema/task"

       xsi:schemaLocation="http://www.springframework.org/schema/context http://www.springframework.org/schema/context/spring-context-3.1.xsd

     http://www.springframework.org/schema/beans http://www.springframework.org/schema/beans/spring-beans-3.1.xsd

     http://www.springframework.org/schema/jdbc http://www.springframework.org/schema/jdbc/spring-jdbc-3.1.xsd

     http://www.springframework.org/schema/tx http://www.springframework.org/schema/tx/spring-tx-3.1.xsd

     http://www.springframework.org/schema/aop http://www.springframework.org/schema/aop/spring-aop-3.1.xsd http://www.springframework.org/schema/task http://www.springframework.org/schema/task/spring-task.xsd"

       default-autowire="byName">

    <description>流量消息spring线程池配置</description>

    <!-- 缺省的异步任务线程池 -->

    <task:annotation-driven executor="messageExecutor"/>

    <task:executor id="asyncExecutor" pool-size="100-10000" queue-capacity="10"/>

    <!-- 处理message的线程池 -->

    <task:executor id="messageExecutor" pool-size="15-50" queue-capacity="100" keep-alive="60"

                   rejection-policy="CALLER_RUNS"/>

</beans>
使用注解引入配置文件或者在自己的spring配置文件中import即可
package cn.leadeon.message.test;

import org.springframework.context.annotation.ImportResource;

import org.springframework.scheduling.annotation.Async;

import org.springframework.stereotype.Component;

/**

 * @author LiJunJun

 * @since 2018/10/11

 */

@Component

@ImportResource("classpath:/config/spring-threadpool.xml")

public class AsyncTest {

    @Async

    public void test1() {

        System.out.println("异步执行test1!!!");

        System.out.println("线程id:" + Thread.currentThread().getId());

        System.out.println("线程名称:" + Thread.currentThread().getName());

    }

    @Async

    public void test2() {

        System.out.println("异步执行test2!!!");

        System.out.println("线程id:" + Thread.currentThread().getId());

        System.out.println("线程名称:" + Thread.currentThread().getName());

    }

    @Async

    public void test3() {

        System.out.println("异步执行test3!!!");

        System.out.println("线程id:" + Thread.currentThread().getId());

        System.out.println("线程名称:" + Thread.currentThread().getName());

    }

}
配置文件可以自己配置线程池的相关参数,自己可以配置多个线程池,使用时,用@Async(value="beanId")区分即可
注意点:
@EnableAsync注解与<task:annotation-driven executor="messageExecutor"/>等价,两者只能使用其一,不然启动会报错
- java编程方式配置自定义线程池,如下:
package cn.leadeon.message.base.threadpool;

import org.springframework.beans.factory.annotation.Value;

import org.springframework.context.annotation.Bean;

import org.springframework.context.annotation.Configuration;

import org.springframework.scheduling.concurrent.ThreadPoolTaskExecutor;

import java.util.concurrent.Executor;

import java.util.concurrent.ThreadPoolExecutor;

/**

 * 流量消息线程池配置

 *

 * @author LiJunJun

 * @since 2018/10/10

 */

@Configuration

public class ThreadPoolConfiguration {

    /**

     * 核心线程数:线程池创建时候初始化的线程数

     */

    @Value("${executor.core.pool.size}")

    private int corePoolSize;

    /**

     * 最大线程数:线程池最大的线程数,只有在缓冲队列满了之后才会申请超过核心线程数的线程

     */

    @Value("${executor.max.pool.size}")

    private int maxPoolSize;

    /**

     * 缓冲队列200:用来缓冲执行任务的队列

     */

    @Value("${executor.queue.capacity}")

    private int queueCapacity;

    /**

     * 允许线程的空闲时间(单位:秒):当超过了核心线程出之外的线程在空闲时间到达之后会被销毁

     */

    @Value("${executor.keepalive.Seconds}")

    private int keepAliveSeconds;

    /**

     * 线程池名的前缀:设置好了之后可以方便我们定位处理任务所在的线程池

     */

    @Value("${executor.thread.name.prefix}")

    private String threadNamePrefix;

    @Bean

    public Executor MessageExecutor() {

        ThreadPoolTaskExecutor executor = new ThreadPoolTaskExecutor();

        executor.setCorePoolSize(corePoolSize);

        executor.setMaxPoolSize(maxPoolSize);

        executor.setQueueCapacity(queueCapacity);

        executor.setKeepAliveSeconds(keepAliveSeconds);

        executor.setThreadNamePrefix(threadNamePrefix);

        // 线程池对拒绝任务的处理策略:这里采用了CallerRunsPolicy策略,当线程池没有处理能力的时候,该策略会直接在 execute 方法的调用线程中运行被拒绝的任务;如果执行程序已关闭,则会丢弃该任务

        executor.setRejectedExecutionHandler(new ThreadPoolExecutor.CallerRunsPolicy());

        executor.initialize();

        return executor;

    }

}
- 测试
package cn.leadeon.message.test; import org.junit.Test;
import org.springframework.beans.factory.annotation.Autowired; /**
* spring线程池单元测试
*
* @author LiJunJun
* @since 2018/10/11
*/
public class TestSpringThreadPool extends JunitTestBase { @Autowired
private AsyncTest asyncTest; /**
* spring线程池单元测试
*/
@Test
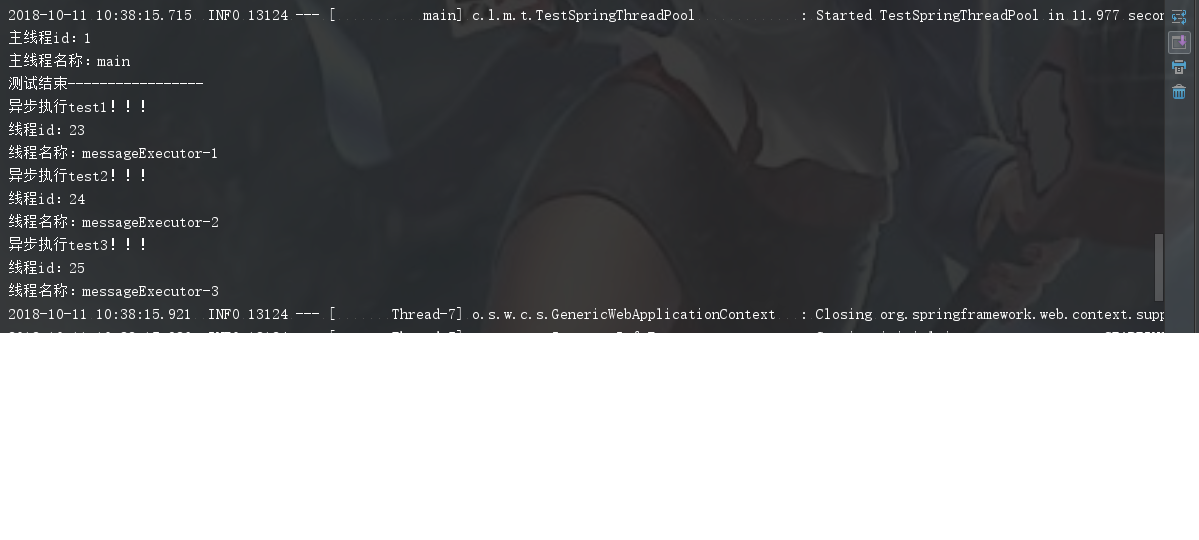
public void testThreadPool() { System.out.println("主线程id:" + Thread.currentThread().getId());
System.out.println("主线程名称:" + Thread.currentThread().getName());
asyncTest.test1();
asyncTest.test2();
asyncTest.test3(); }
}
测试结果:主线程和异步方法分别使用了不同的线程去调用,测试完成
spring @Async 线程池使用的更多相关文章
- Spring Boot 线程池
参考 SpringBoot 线程池 程序猿DD-Spring Boot使用@Async实现异步调用:自定义线程池 如何优雅的使用和理解线程池 Spring Boot线程池的使用心得 博客园-Sprin ...
- Spring集成线程池
自己在程序中手动New很容易造成线程滥用,创建线程也是比较消耗资源的操作,所以建议如果有此需求,将线程池统一交给Spring框架进行管理. 如下: <!--Spring 集成线程池,不允许自己开 ...
- spring boot: 线程池ThreadPoolTaskExecutor, 多线程
由于项目里需要用到线程池来提高处理速度,记录一下spring的taskExecutor执行器来实现线程池. ThreadPoolTaskExecutor的配置在网上找了很多解释没找到,看了下Threa ...
- Spring的线程池ThreadPoolTaskExecutor使用案例
1.Sping配置文件 <!-- 线程池配置 --> <bean id="threadPool" class="org.springframework. ...
- java多线程、线程池及Spring配置线程池详解
1.java中为什么要使用多线程使用多线程,可以把一些大任务分解成多个小任务来执行,多个小任务之间互不影像,同时进行,这样,充分利用了cpu资源.2.java中简单的实现多线程的方式 继承Thread ...
- spring 配置 线程池并使用 springtest 进行测试
在 applicationContext.xml 中配置spring线程池: <!-- 包路径扫描 --> <context:component-scan base-package= ...
- Spring中线程池的应用
多线程并发处理起来通常比较麻烦,如果你使用spring容器来管理业务bean,事情就好办了多了.spring封装了Java的多线程的实现,你只需要关注于并发事物的流程以及一些并发负载量等特性,具体来说 ...
- spring boot 线程池配置
1.配置类 package cn.com.bonc.util; import java.util.concurrent.Executor; import java.util.concurrent.Th ...
- spring定时任务.线程池,自定义多线程配置
定时任务及多线程配置xml <?xml version="1.0" encoding="UTF-8"?> <beans xmlns=" ...
随机推荐
- Java-Runoob:Java 运算符
ylbtech-Java-Runoob:Java 运算符 1.返回顶部 1. Java 运算符 计算机的最基本用途之一就是执行数学运算,作为一门计算机语言,Java也提供了一套丰富的运算符来操纵变量. ...
- mongdb与mysql的联系和区别
与关系型数据库相比,MongoDB的优点:①弱一致性(最终一致),更能保证用户的访问速度举例来说,在传统的关系型数据库中,一个COUNT类型的操作会锁定数据集,这样可以保证得到“当前”情况下的精确值. ...
- Android BindService中遇到的一个小问题
今天在使用BindService的时候遇到个小问题,我希望通过Bindservice获取到这个服务,然后执行服务内的某个自定义方法,如下: if(bindService==null){ Intent ...
- oracle自动创建表分区
创建一个table,记录哪些表需要创建表分区 create table STAT_TABLE ( tablename VARCHAR2(), pre_partition_name VARCHAR2() ...
- 什么是AJAX?AJAX的原理
AJAX即“Asynchronous Javascript And XML”(异步JavaScript和XML)通过在后台与服务器进行少量数据交换,AJAX 可以使网页实现异步更新.这意味着可以在不重 ...
- fiddler代理hosts配置
1 需求背景 fidder开启后,C:\Windows\System32\drivers\etc\hosts配置失效问题:fiddler本身代理hosts配置表,修改后,可以省去在手机等代理使用者的系 ...
- day2-心得
模块sys和os #!/usr/bin/env python # -*- coding: utf-8 -*- import sys sys.path #打印环境变量 print(sys.argv) # ...
- SEO网站title应该怎么写
第一:具有独特性 在你的网站中,也许有成千上万的页面,首页-分类-无数的文章页面,这些都有固定的标题,他们的标题最好不要相同.有的时候也许不是`站长们故意的,但是在使用编辑软件的时候,经常 会出现很多 ...
- nat123软件windows版
转自:http://www.nat123.com/pages_8_565.jsp 同时支持内网和公网IP.只要可以上网,即可将所有应用发布外网. >>nat123客户端windows版本软 ...
- 使用jq.lazyload.js,解决设置loading图片的问题
最近在使用lazyload的时候,遇上一个问题.当对img做宽100%时,就是placeholder的loading图片也会100%宽,这样一般来说loading图片就会变得很大.实在是不能应用到项目 ...