Oracle 12c(12.1.0.5)OEM server agent 安装配置
注意:
此文档为生产上操作文档,省略了IP,oracle用户server,agent 端至少需要sudo,ping,ssh,创建目录权限。
一、安装要求
1.1. 系统情况一览
|
IP |
数据库 |
OEM |
操作系统 |
数据库版本 |
|
XX1 |
单机 |
service(12.1.0.5) |
Linux 6.7 |
oracle11.2.0.4 |
|
XX2 |
RAC |
agent |
Linux 6.7 |
Oracle11.2.0.4 |
|
XX3 |
RAC |
agent |
Linux 6.7 |
Oracle11.2.0.4 |
注意:OEM管理RAC数据库需要先添加主机,集群高可用服务,后添加数据库;单机先添加主机(不用添加集群高可用服务),后添加数据库。
1.2. 操作系统要求
安装Enterprise Manager Cloud Control 12c的硬件要求如以下列表,要求至少4G内存,
Linux 6.X 需要的依赖包如下:
yum -y install make binutils gcc libaio glibc-common libstdc++ sysstat glibc-devel glibc-devel
linux 5.X的依赖包如下:
yum -y install make binutils gcc libaio glibc-common libstdc setarch sysstat rng-utils libXtst xorg-x11-utils
注意: server和agent端都需要安装依赖包
1.3. 软件要求
需要的软件包:
em12105_linux64_disk1
em12105_linux64_disk2
em12105_linux64_disk3
下载地址:
http://www.oracle.com/technetwork/oem/grid-control/downloads/linuxx8664soft-085949.html
1.4. 数据库要求
如果数据库配置了dbcontrol,使用如下命令将其删除:
SYSMAN_PWD: Password for SYSMAN user
SYS_PWD: Password for SYS user
$ emca -deconfig dbcontrol db -repos drop -SYS_PWD -SYSMAN_PWD
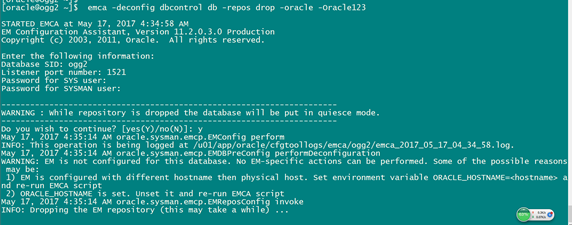
删除EM案例:
$ emca -deconfig dbcontrol db -repos drop -oracle -Oracle123
创建目录
mkdir -p /u01/app/oracle/Middleware/
mkdir -p /u01/app/oracle/agent
chown -R oracle:oinstall /u01/app/oracle/Middleware
chown -R oracle:oinstall /u01/app/oracle/agent
解压文件(同一个目录解压)
unzip em12105_linux64_disk1
unzip em12105_linux64_disk2
unzip em12105_linux64_disk3
二、开始安装Oracle 12c OEM
2.1. 安装Oracle 12c OEM server
注意:确保安装目录空间至少14G
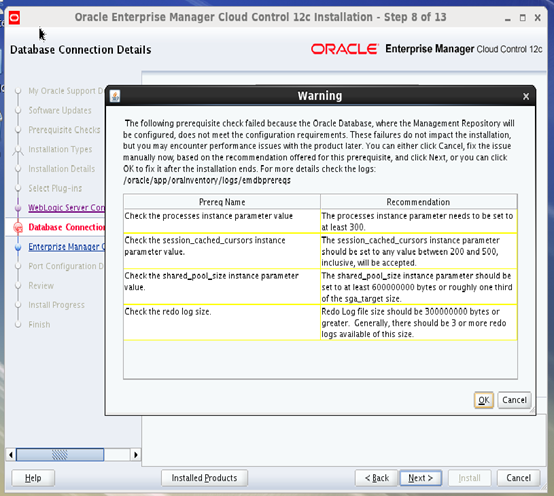
修改一下参数:

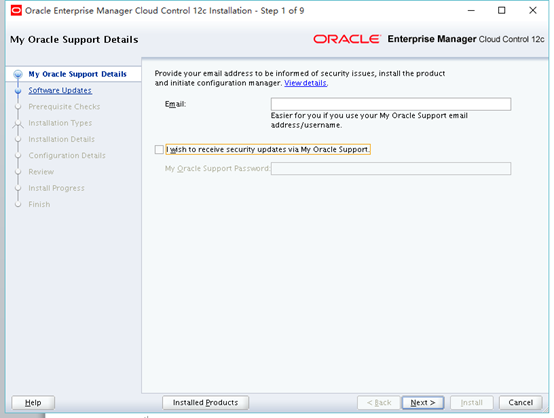
oracle用户进入解压目录,运行./runInstaller
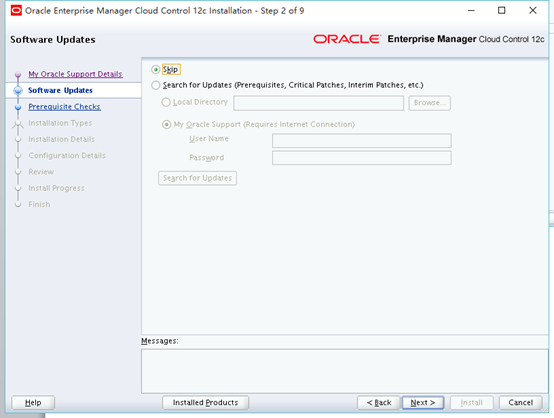
选择”Skip”跳过更新,点击NEXT
Prerequisite checks安装检测,如遇报错,请根据提示修改(或者忽略),点击NEXT

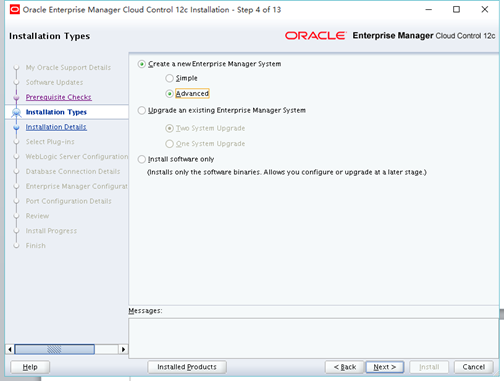
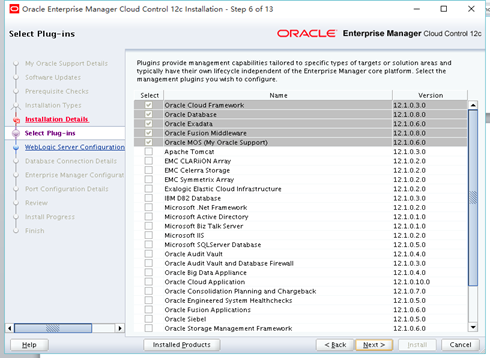
定制版本:
安装目录选择,middleware HOME目录一定要为空
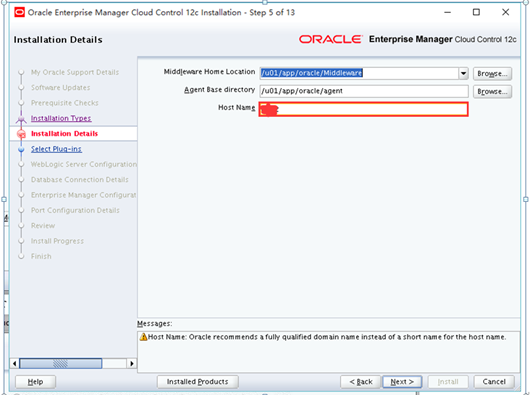
Host name 可以不为域名格式
用户名密码设置:
weblogic/XXX
sysman/XXX
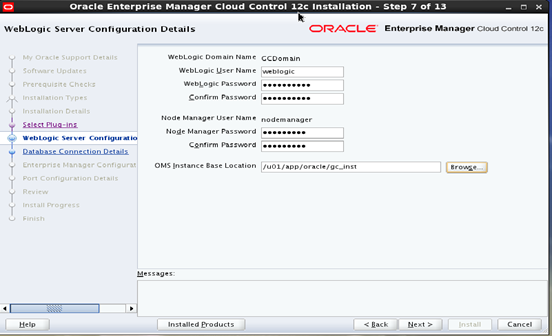
配置oem服务用户名和密码:
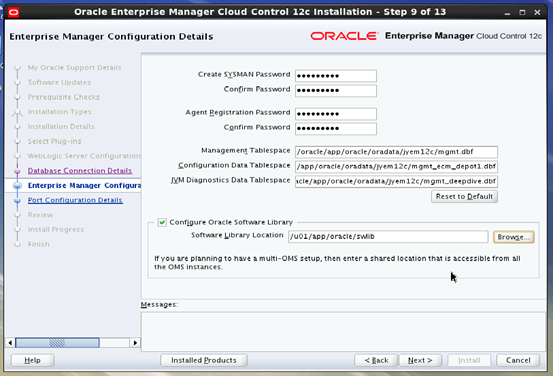
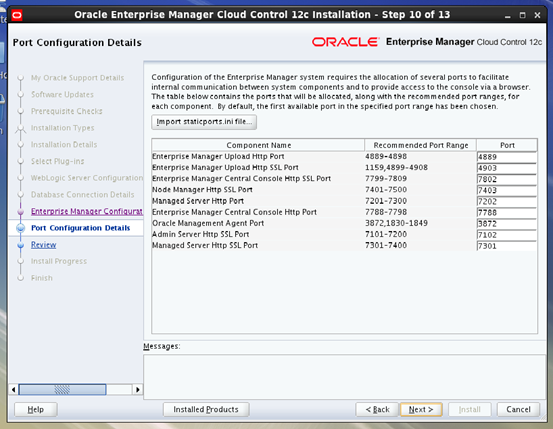
服务端口号设置:默认即可:
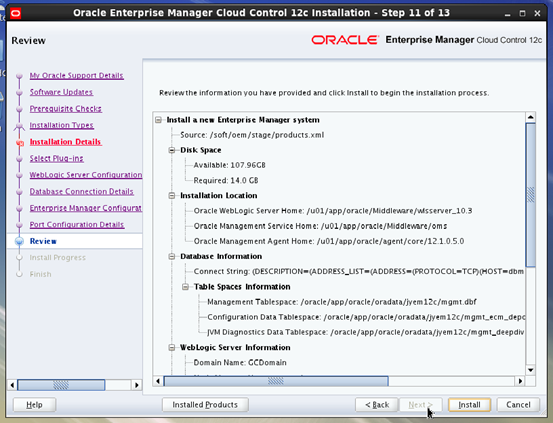
下一步:

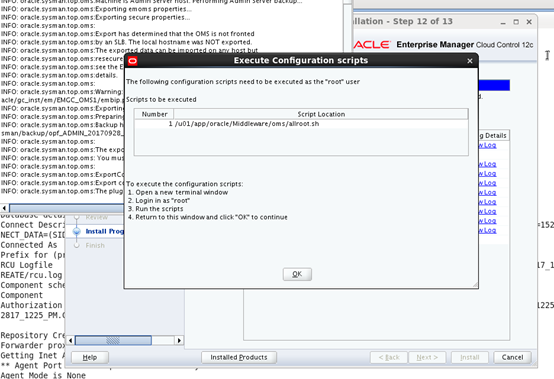
执行脚本:

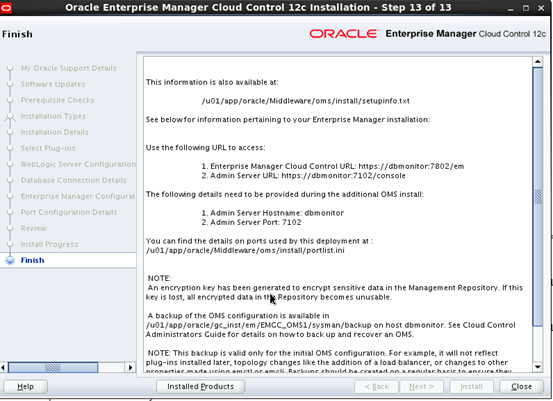
查看服务器端的OEM 状态:
/u01/app/oracle/Middleware/oms/bin/emctl status oms

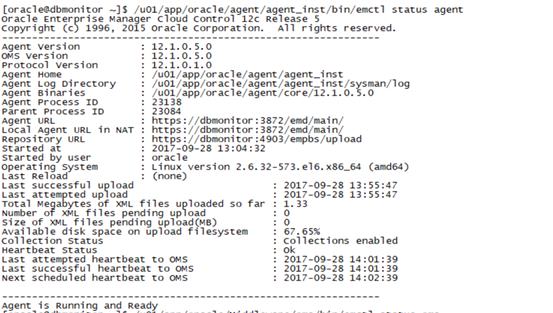
查看服务器端agent状态:
/u01/app/oracle/agent/agent_inst/bin/emctl status agent
控制台地址:
启动OEM时,需要先启动所在oms服务器的数据库,以及中间件控制台,最后启动OMS(安装完成后,默认已启动),启动中间件管理台(默认服务器重启会自动启动):
Root:
nohup /u01/app/oracle/gc_inst/user_projects/domains/GCDomain/bin/startWebLogic.sh &
控制台地址:
https:// IP:7102/console
启动oms:
Oracle:
/u01/app/oracle/Middleware/oms/bin/emctl start oms -all
启动客户端:
/u01/app/oracle/agent/agent_inst/bin/emctl start agent
2.2. 服务端配置
vi /etc/hosts
IP hostname
[root@bpmDBmonitor agent]# ln -s /usr/bin/sudo /usr/local/bin/sudo
[root@bpmDBmonitor agent]# ls -lh /usr/local/bin/sudo
lrwxrwxrwx. 1 root root 13 Oct 9 11:08 /usr/local/bin/sudo -> /usr/bin/sudo
[root@bpmDBmonitor agent]# ls -lh /usr/bin/sudo
---s--x--x. 1 root root 121K May 6 2015 /usr/bin/sudo
[root@bpmDBmonitor agent]# ls -l /etc/sudoers
-r--r-----. 1 root root 4002 Mar 2 2012 /etc/sudoers
[root@bpmDBmonitor agent]# vi /etc/sudoers
打开/etc/sudoers 将以下三处修改
修改前:
Defaults requiretty
修改后:
Defaults:oracle !requiretty
修改前:
Defaults !visiblepw
修改后:
Defaults visiblepw
修改前:
##
## Allow root to run any commands anywhere
root ALL=(ALL) ALL
修改后
##
## Allow root to run any commands anywhere
root ALL=(ALL) ALL
oracle ALL=(ALL) ALL --这里加一行
以上三处修改完成后,save 文件
测试 oracle 能否正常 sudo
[oracle@bpmDBmonitor ~]$ ls -lh /root/
ls: cannot open directory /root/: Permission denied
[oracle@bpmDBmonitor ~]$ sudo ls -l /root
We trust you have received the usual lecture from the local System
Administrator. It usually boils down to these three things:
#1) Respect the privacy of others.
#2) Think before you type.
#3) With great power comes great responsibility.
[sudo] password for oracle:
total 104
-rw-------. 1 root root 1554 Sep 27 17:04 anaconda-ks.cfg
drwxr-xr-x. 2 root root 4096 Sep 27 17:06 Desktop
drwxr-xr-x. 2 root root 4096 Sep 27 17:06 Documents
drwxr-xr-x. 2 root root 4096 Sep 27 17:06 Downloads
-rw-r--r--. 1 root root 51940 Sep 27 17:04 install.log
-rw-r--r--. 1 root root 10259 Sep 27 17:02 install.log.syslog
drwxr-xr-x. 2 root root 4096 Sep 27 17:06 Music
drwxr-xr-x. 2 root root 4096 Sep 27 17:06 Pictures
drwxr-xr-x. 2 root root 4096 Sep 27 17:06 Public
drwxr-xr-x. 2 root root 4096 Sep 27 17:06 Templates
drwxr-xr-x. 2 root root 4096 Sep 27 17:06 Videos
2.3. 安装agent
2.3.1.前期环境准备
mkdir -p /u01/agent/
chmod oracle.oinstall /u01/agent
注意:
1./u01/agent/ 一定要为空。
2.所有监控服务器/etc/hosts 配置域名解析
3.所有服务器做以下sudo文件配置:
确保/usr/local/bin/sudo 这个符号链接存在
ROOT:
ln -s /usr/bin/sudo /usr/local/bin/sudo
ls -l /etc/sudoers
-r--r----- 1 root root 3407 Oct 18 19:30 /etc/sudoers
cp /etc/sudoers /etc/sudoers.bak
打开/etc/sudoers 将以下三处修改
修改前:
Defaults requiretty
修改后:
Defaults:oracle !requiretty
修改前:
Defaults !visiblepw
修改后:
Defaults visiblepw
修改前:
##
## Allow root to run any commands anywhere
root ALL=(ALL) ALL
修改后
##
## Allow root to run any commands anywhere
root ALL=(ALL) ALL
oracle ALL=(ALL) ALL --这里加一行
以上三处修改完成后,save 文件
测试 oracle 能否正常 sudo
su - oracle
ls -l /root
ls: /root: Permission denied
sudo ls -l /root
[sudo] password for oracle:
total 88
-rw------- 1 root root 1832 Aug 11 05:26 anaconda-ks.cfg
drwxr-xr-x 2 root root 4096 Aug 10 21:31 Desktop
-rw-r--r-- 1 root root 56307 Aug 11 05:26 install.log
-rw-r--r-- 1 root root 4136 Aug 11 05:26 install.log.syslog
同理设置其他被管理端(agent):(bpmexrac1)为例:
[root@bpmexrac1 u01]# mkdir -p /app/u01/agent/
[root@bpmexrac1 u01]# chown -R oracle:oinstall /app/u01/agent
[root@bpmexrac1 u01]# cat /etc/hosts
IP hostname
[root@bpmexrac1 u01]# ls -lh /usr/bin/sudo
---s--x--x. 1 root root 121K May 6 2015 /usr/bin/sudo
[root@bpmexrac1 u01]# ls -l /etc/sudoers
-r--r-----. 1 root root 4002 Mar 2 2012 /etc/sudoers
[root@bpmexrac1 u01]# ls -lh /usr/local/bin/sudo
ls: cannot access /usr/local/bin/sudo: No such file or directory
[root@bpmexrac1 u01]# ln -s /usr/bin/sudo /usr/local/bin/sudo
[root@bpmexrac1 u01]# ls -lh /usr/local/bin/sudo
lrwxrwxrwx 1 root root 13 Oct 9 11:27 /usr/local/bin/sudo -> /usr/bin/sudo
[root@bpmexrac1 u01]# cp /etc/sudoers /etc/sudoers.bak
[root@bpmexrac1 u01]# chmod 755 /etc/sudoers
打开/etc/sudoers 将以下三处修改
修改前:
Defaults requiretty
修改后:
Defaults:oracle !requiretty
修改前:
Defaults !visiblepw
修改后:
Defaults visiblepw
修改前:
##
## Allow root to run any commands anywhere
root ALL=(ALL) ALL
修改后
##
## Allow root to run any commands anywhere
root ALL=(ALL) ALL
oracle ALL=(ALL) ALL --这里加一行
以上三处修改完成后,save 文件
测试 oracle 能否正常 sudo
[root@bpmexrac1 u01]# su - oracle
[oracle@bpmexrac1 ~]$ ls -lh /root/
ls: cannot open directory /root/: Permission denied
[oracle@bpmexrac1 ~]$ sudo ls -lh /root/
We trust you have received the usual lecture from the local System
Administrator. It usually boils down to these three things:
#1) Respect the privacy of others.
#2) Think before you type.
#3) With great power comes great responsibility.
[sudo] password for oracle:
total 84K
-rw-------. 1 root root 1.7K Aug 1 08:07 anaconda-ks.cfg
drwxr-xr-x 2 root root 4.0K Aug 7 06:38 Desktop
drwxr-xr-x 2 root root 4.0K Aug 7 06:38 Documents
drwxr-xr-x 2 root root 4.0K Aug 7 06:38 Downloads
-rw-r--r--. 1 root root 29K Aug 1 08:07 install.log
-rw-r--r--. 1 root root 8.5K Aug 1 08:06 install.log.syslog
drwxr-xr-x 2 root root 4.0K Aug 7 06:38 Music
drwxr-xr-x 2 root root 4.0K Aug 7 06:38 Pictures
drwxr-xr-x 2 root root 4.0K Aug 7 06:38 Public
-rw-r--r--. 1 root root 358 Aug 1 08:07 redhat.repo_bak
drwxr-xr-x 2 root root 4.0K Aug 7 06:38 Templates
drwxr-xr-x 2 root root 4.0K Aug 7 06:38 Videos
mkdir -p /agent
chown -R oracle:oinstall /agent
其他:
说明:由于主机做了ssh 远程限制,需要修改监控服务器以及所有被监控主机以下参数文件:
vi /etc/ssh/sshd_config
添加以下:
Ciphers aes128-cbc,aes192-cbc,aes256-cbc,aes128-ctr,aes192-ctr,aes256-ctr,3des-cbc,arcfour128,arcfour256,arcfour,blowfish-cbc,cast128-cbc
MACs hmac-md5,hmac-sha1,umac-64@openssh.com,hmac-ripemd160,hmac-sha1-96,hmac-md5-96
KexAlgorithms diffie-hellman-group1-sha1,diffie-hellman-group14-sha1,diffie-hellman-group-exchange-sha1,diffie-hellman-group-exchange-sha256,ecdh-sha2-nistp256,ecdh-sha2-nistp384,ecdh-sha2-nistp521,diffie-hellman-group1-sha1,curve25519-sha256@libssh.org
重启sshd 服务:service sshd restart
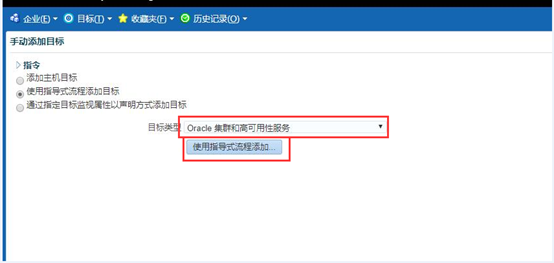
2.3.2.安装agent
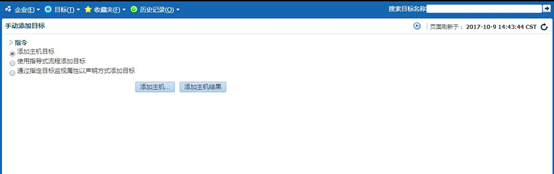
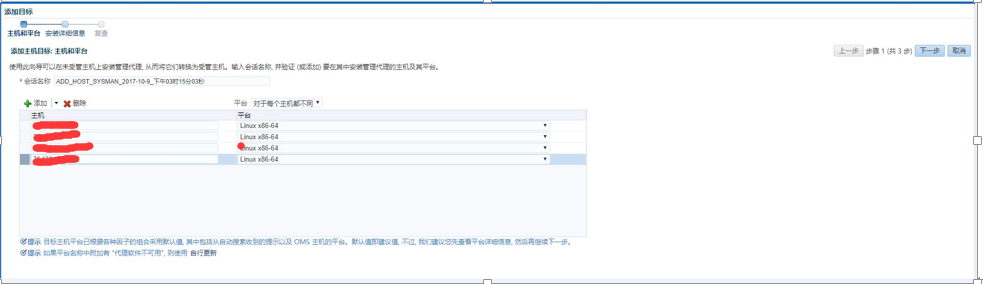
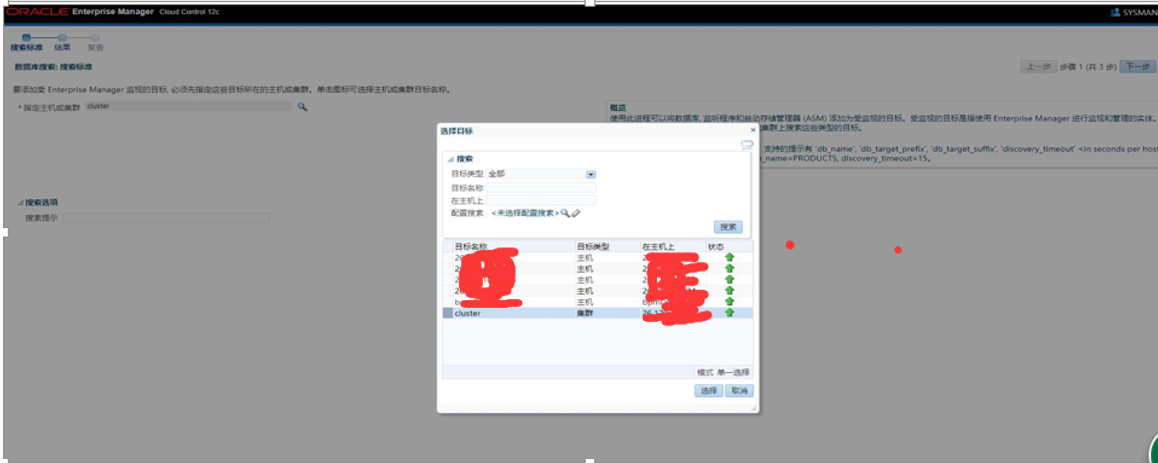
设置 -> 添加目标 ->手动添加目标

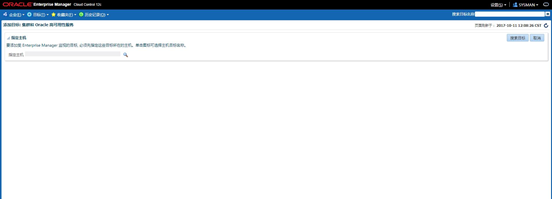
添加需要监控的数据库:
next:
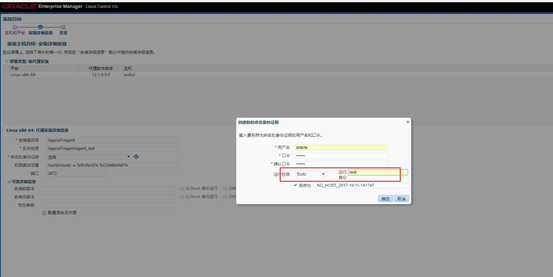
点击OK,然后next 出现以下,注意红色图,填完配置:
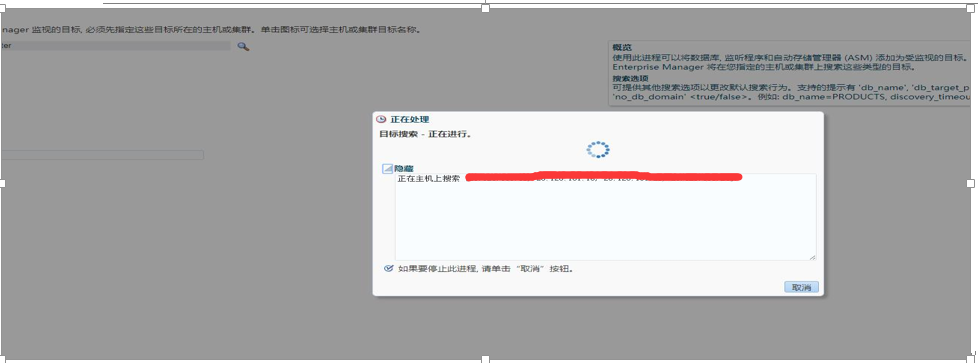
下一步部署agent:
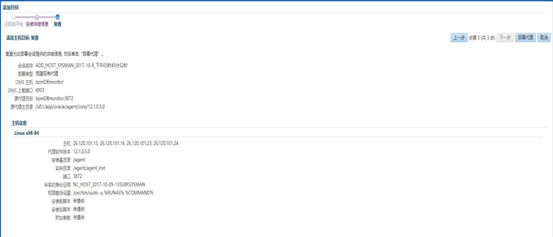
下一步:
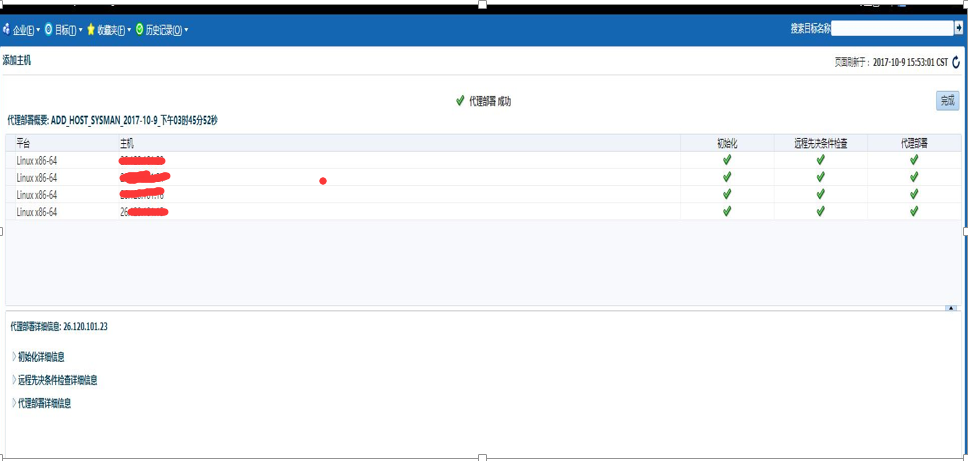
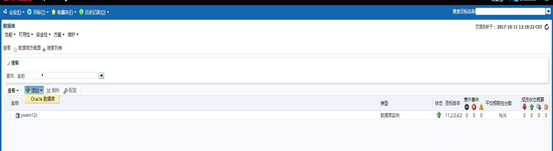
添加成功
2.4. 添加集群服务
下一步:
下一步:
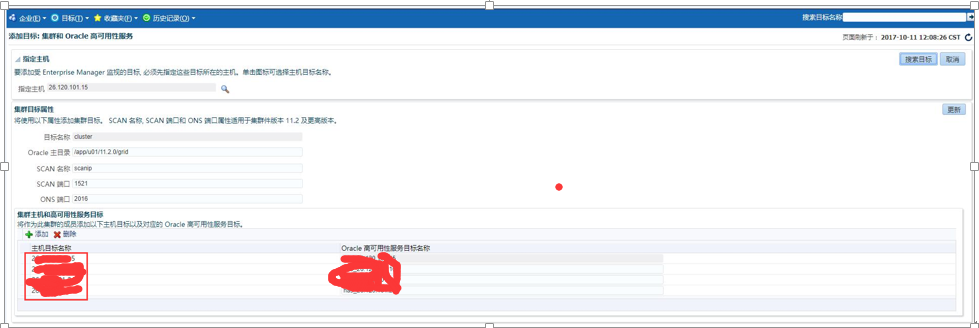
进行保存(已添加过可以更新)
上图可以根据选择添加主机的集群高可用服务。
2.5. 添加管理的数据库
点击 Target -> Database -> add 添加数据库配置信息:(注意,如果有多套cluster 数据库添加,建议用不用这种这种办法添加,后续有帖子发出)
Next
Next:
注意以下图需要配置1,2,3:
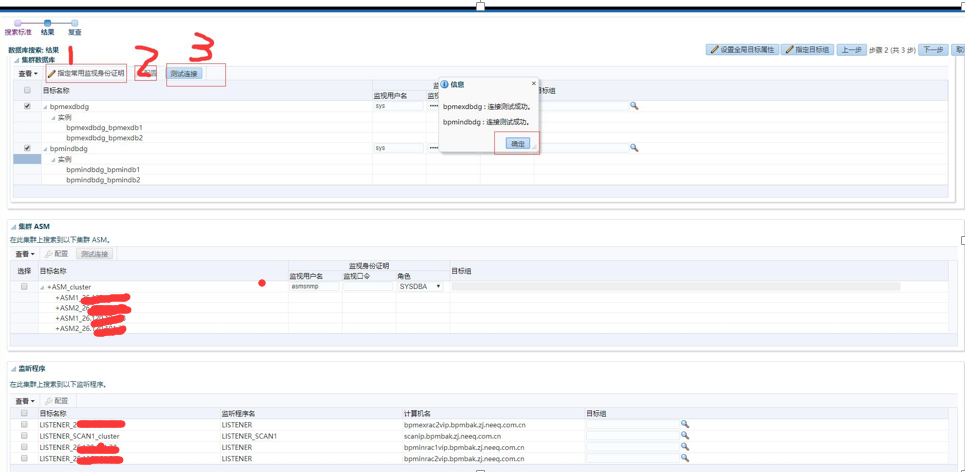
依次配置1,2,3;配置2的时候,设置实例->监听程序计算机名,需要设置IP,最好不要写成域名。
Next:
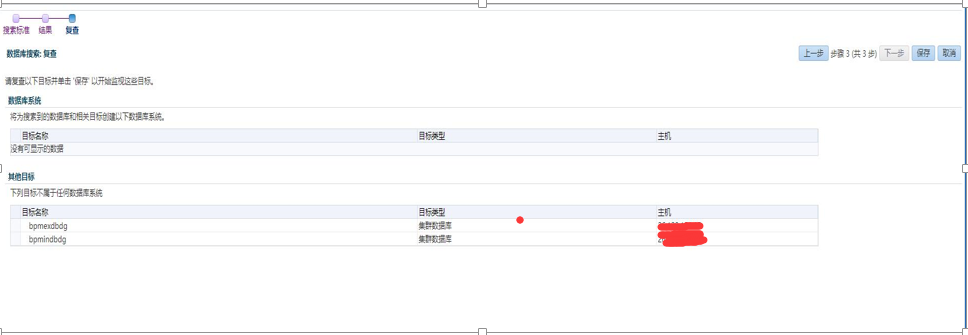
看添加成功的数据库:
目标->数据库
Oracle 12c(12.1.0.5)OEM server agent 安装配置的更多相关文章
- Oracle 12c(12.1.0.5) oem agent silent install(静默安装agent)
注释: 文章自oracle support 文档 ID 1360083.1,静默安装agent采用的是把OMS服务端(即oem server端)的agent用压缩包download,远程传到agent ...
- oracle 12c 12.1.0.2.0 BUG 22562145
Wed May 23 17:46:14 2018TT01: Standby redo logfile selected for thread 1 sequence 42251 for destinat ...
- 【翻译自mos文章】在RHEL7/OL7上安装Oracle 12.1.0.2的server端或者client时,报须要"compat-libstdc++"包
在RHEL7/OL7上安装Oracle 12.1.0.2的server端或者client时,报须要"compat-libstdc++"包 来源于: Installation of ...
- oracle之 12.1.0.1.0 C 在 linux 7 上安装报错处理
环境说明:-- os[root@host-172-16-3-132 ~]# cat /etc/redhat-release CentOS Linux release 7.2.1511 (Core) - ...
- 分布式文件系统 FastDFS 5.0.5 & Linux CentOS 7 安装配置(单点安装)——第一篇
分布式文件系统 FastDFS 5.0.5 & Linux CentOS 7 安装配置(单点安装)--第一篇 简介 首先简单了解一下基础概念,FastDFS是一个开源的轻量级分布式文件系统,由 ...
- zabbix3.0 agent安装配置
zabbix3.0 agent安装配置wget http://repo.zabbix.com/zabbix/3.0/rhel/6/x86_64/zabbix-agent-3.0.0-2.el6.x86 ...
- IIS5.1、IIS6.0、IIS7.5中安装配置MVC 3
本文主要介绍在IIS5.1.IIS6.0.IIS7.5中安装配置MVC 3的具体办法! 正文: IIS5.1 1. 安装Microsoft .net FrameWork 4.0安装包; 2. 安装AS ...
- SQL Server 2012安装配置(Part4 )
SQL Server 2012安装配置(Part1) SQL Server 2012安装配置(Part2) SQL Server 2012安装配置(Part3 ) SQL Server 2012安装配 ...
- SQL Server 2012安装配置(Part3 )
SQL Server 2012安装配置(Part1 ) SQL Server 2012安装配置(Part2 ) SQL Server 2012安装配置(Part3 ) 3 客户端安装 3.1 安装客户 ...
随机推荐
- xp+WinDBG+VMware调试内核
呵呵,搞点突兀的标题而已.其实说的还是如何使用WinDBG和VMware来搭建调试内核的环境而已,这些网上已经有数不清的教程了,不过我喜欢自己亲手写一下.第一,把这个过程写一遍能加深印象,就算以后忘记 ...
- STM32F4 输入输出(GPIO)模式理解
stm32的GPIO的配置模式有好几种,包括: 1. 模拟输入: 2. 浮空输入: 3. 上拉输入: 4. 下拉输入: 5. 开漏输出: 6. 推挽输出: 7. 复用开漏输出: 8. 复用推挽输出 ...
- eclipse中的System.getProperty("user.dir")
eclipse中的System.getProperty("user.dir") 1.在Java Application中,上述中的获取的是Java项目的路径 (1)运行源码 /** ...
- org.apache.commons.fileupload.FileUploadBase$InvalidContentTypeException
1.错误原因 org.apache.commons.fileupload.FileUploadBase$InvalidContentTypeException: the request doesn't ...
- 【转】Nginx的启动、停止与重启
Nginx的启动.停止与重启 启动 启动代码格式:nginx安装目录地址 -c nginx配置文件地址 例如: [root@LinuxServer sbin]# /usr/local/nginx/sb ...
- I2C总线通讯协议
I2C总线通讯协议 1. I2C总线简介 I2C是Inter-Integrated Circuit的简称,读作:I-squared-C.由飞利浦公司于1980年代提出,为了让主板.嵌入式系统或手机用以 ...
- 从零一起学Spring Boot之LayIM项目长成记(三) 数据库的简单设计和JPA的简单使用。
前言 今天是第三篇了,上一篇简单模拟了数据,实现了LayIM页面的数据加载.那么今天呢就要用数据库的数据了.闲言少叙,书归正传,让我们开始吧. 数据库 之前有好多小伙伴问我数据库是怎么设计的.我个人用 ...
- Linux命令top 详解
top命令是Linux下常用的性能分析工具,能够实时显示系统中各个进程的资源占用状况,类似于Windows的任务管理器.下面详细介绍它的使用方法. top - 01:06:48 up 1:22, 1 ...
- Struts2【配置】知识要点
前言 上篇Struts博文已经讲解了Struts的开发步骤以及执行流程了.....对Struts的配置文件有了了解.....本博文继续讲解Struts在配置的时候一些值得要学习的细节... 通配符 为 ...
- JavaScript中的this的指代对象详解
在javascript里面,this是一个特殊的对象,它不像其他编程语言那样,是存储在实例中的值,直接指向此实例. 而是作为一个单独的指针,在不同的情况之下,指向不同的位置,这也是为什么我们会将它搞混 ...