android中实现简单的聊天功能
这个例子只是简单的实现了单机版的聊天功能,自己跟自己聊,啦啦~~
主要还是展示RecyclerView控件的使用吧~
参考我之前写的文章:
1、先添加一个关于聊天内容的Chat.java类:
package com.example.chenrui.common;

public class Chat {

    private String targetUser;

    private String content;

    public Chat(String targetUser, String content) {

        this.targetUser = targetUser;

        this.content = content;

    }

    public String getTargetUser() {

        return targetUser;

    }

    public void setTargetUser(String targetUser) {

        this.targetUser = targetUser;

    }

    public String getContent() {

        return content;

    }

    public void setContent(String content) {

        this.content = content;

    }

}
Chat.java这个类有两个属性:聊天对象和聊天内容
2、添加一个RecyclerView控件子项chat_item.xml,这个是实现了聊天内容项的展示:
<?xml version="1.0" encoding="utf-8"?>

<LinearLayout xmlns:android="http://schemas.android.com/apk/res/android"

    android:layout_width="match_parent"

    android:layout_height="wrap_content"

    android:orientation="vertical">

    <TextView

        android:id="@+id/chatText"

        android:layout_width="wrap_content"

        android:layout_height="wrap_content"

        android:background="@drawable/chat"

        android:gravity="center_vertical"

        android:text="TextView" />

</LinearLayout>
3、添加RecyclerView控件的适配器ChatAdapter.java类:
package com.example.chenrui.app1;

import android.support.annotation.NonNull;

import android.support.v7.widget.RecyclerView;

import android.util.Log;

import android.view.Gravity;

import android.view.LayoutInflater;

import android.view.View;

import android.view.ViewGroup;

import android.widget.LinearLayout;

import android.widget.TextView;

import com.example.chenrui.common.Chat;

import java.util.List;

public class ChatAdapter extends RecyclerView.Adapter<ChatAdapter.ViewHolder> {

    private List<Chat> chatList;

    public ChatAdapter(List<Chat> chatList) {

        this.chatList = chatList;

    }

    @NonNull

    @Override

    public ViewHolder onCreateViewHolder(@NonNull ViewGroup viewGroup, int i) {

        View view = LayoutInflater.from(viewGroup.getContext()).inflate(R.layout.chat_item,viewGroup,false);

        ViewHolder viewHolder = new ViewHolder(view);

        return viewHolder;

    }

    @Override

    public void onBindViewHolder(@NonNull ViewHolder viewHolder, int i) {

        Chat chat = chatList.get(i);

        viewHolder.chatText.setText(chat.getContent());

        LinearLayout.LayoutParams params = new LinearLayout.LayoutParams(viewHolder.chatText.getLayoutParams());

        if(chat.getTargetUser().equals("张三")) {

            params.gravity = Gravity.LEFT;

        } else {

            params.gravity = Gravity.RIGHT;

        }

        viewHolder.chatText.setLayoutParams(params);

    }

    @Override

    public int getItemCount() {

        return chatList.size();

    }

    static  class ViewHolder extends  RecyclerView.ViewHolder {

        TextView chatText;

        public ViewHolder(@NonNull View itemView) {

            super(itemView);

            chatText = itemView.findViewById(R.id.chatText);

        }

    }

}
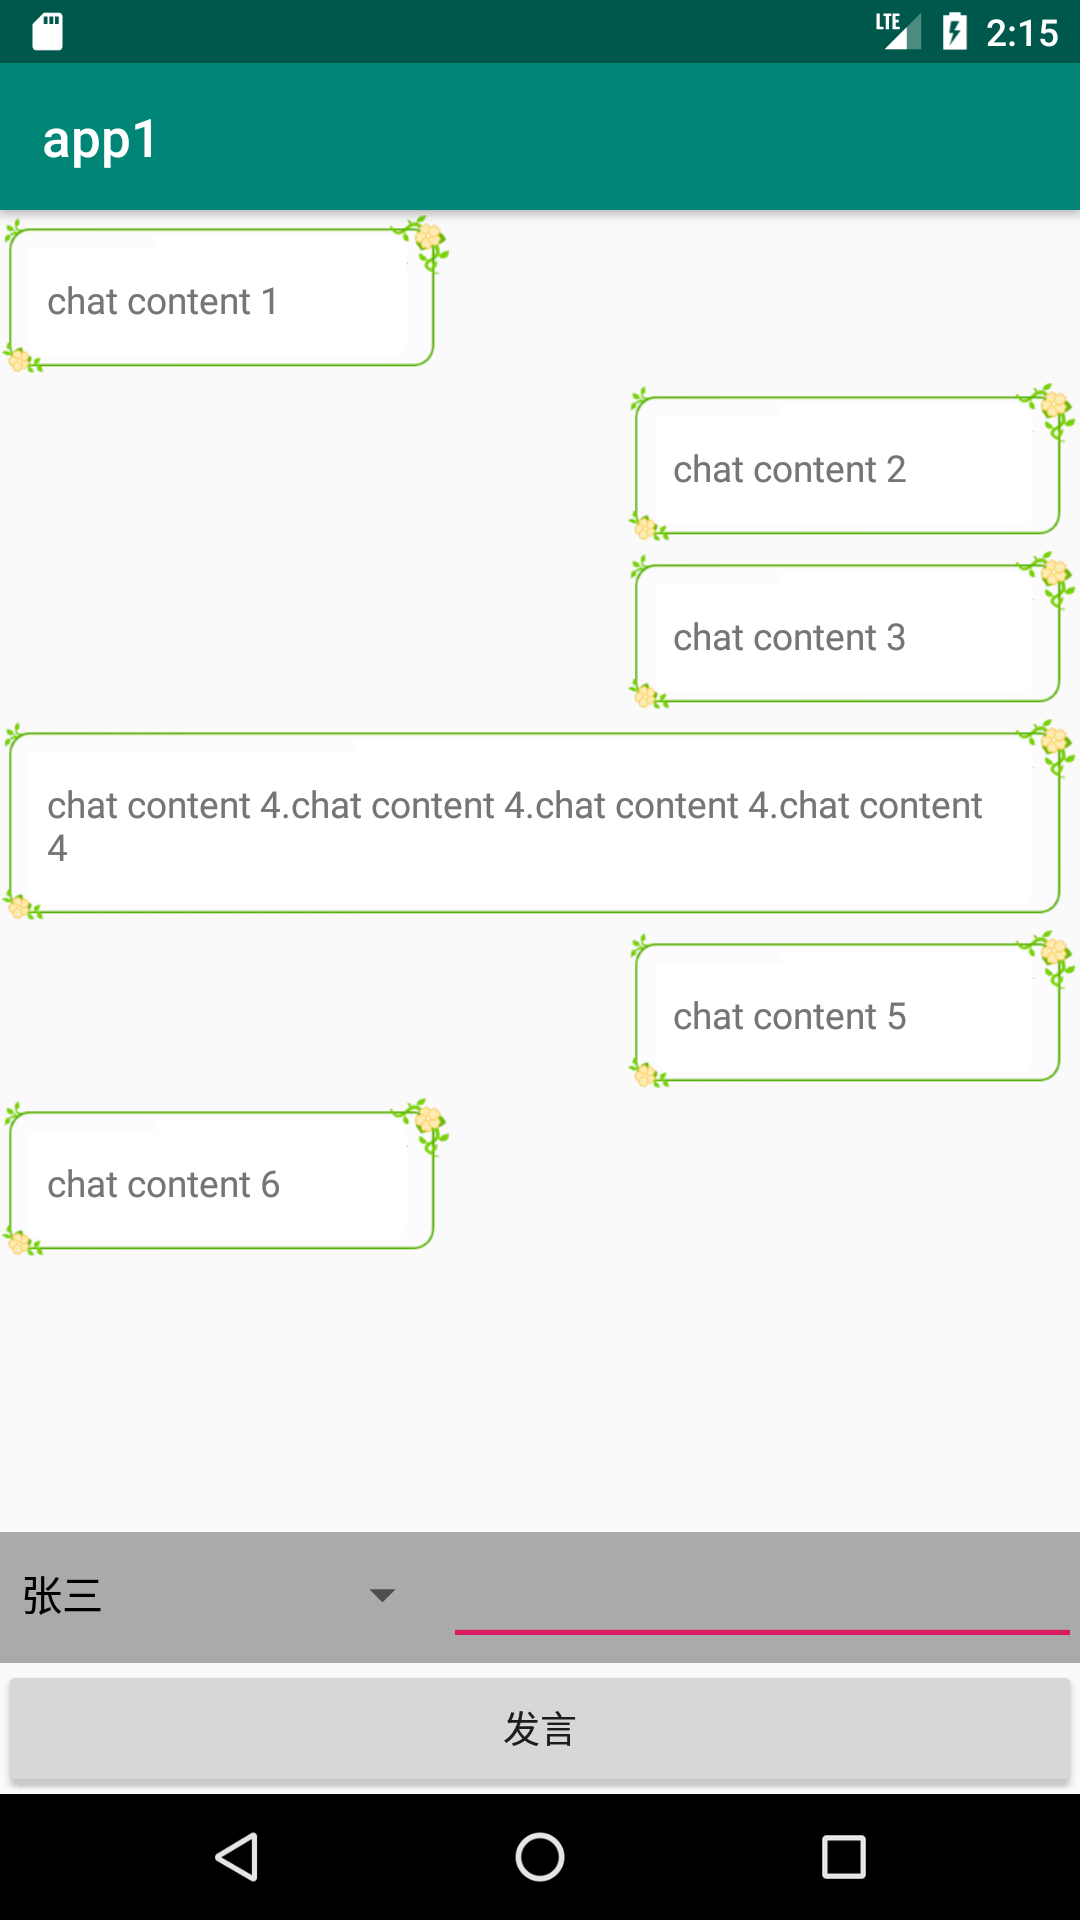
上面的代码,设置的是,如果聊天对象是张三,就把聊天内容显示在列表的左侧,否则就显示在列表的右侧。这个是模拟自己和别人对话的展示效果
4、最后就是主Activity了
activity_main.xml
<?xml version="1.0" encoding="utf-8"?>

<android.support.constraint.ConstraintLayout xmlns:android="http://schemas.android.com/apk/res/android"

    xmlns:app="http://schemas.android.com/apk/res-auto"

    xmlns:tools="http://schemas.android.com/tools"

    android:layout_width="match_parent"

    android:layout_height="match_parent"

    tools:context=".MainActivity">

    <android.support.v7.widget.RecyclerView

        android:id="@+id/chatList"

        android:layout_width="match_parent"

        android:layout_height="0dp"

        app:layout_constraintBottom_toTopOf="@+id/linearLayout3"

        app:layout_constraintTop_toTopOf="parent" />

    <LinearLayout

        android:id="@+id/linearLayout3"

        android:layout_width="match_parent"

        android:layout_height="50dp"

        android:background="@android:color/darker_gray"

        android:orientation="horizontal"

        app:layout_constraintBottom_toTopOf="@+id/linearLayout4">

        <Spinner

            android:id="@+id/targetUser"

            android:layout_width="wrap_content"

            android:layout_height="wrap_content"

            android:layout_weight="1" />

        <EditText

            android:id="@+id/chatContent"

            android:layout_width="wrap_content"

            android:layout_height="wrap_content"

            android:layout_weight="3"

            android:inputType="textPersonName" />

    </LinearLayout>

    <LinearLayout

        android:id="@+id/linearLayout4"

        android:layout_width="match_parent"

        android:layout_height="50dp"

        android:orientation="horizontal"

        app:layout_constraintBottom_toBottomOf="parent">

        <Button

            android:id="@+id/chatSubmit"

            android:layout_width="wrap_content"

            android:layout_height="match_parent"

            android:layout_weight="1"

            android:text="发言" />

    </LinearLayout>

</android.support.constraint.ConstraintLayout>
MainActivity.java
package com.example.chenrui.app1;

import android.os.Bundle;

import android.support.v7.app.AppCompatActivity;

import android.support.v7.widget.LinearLayoutManager;

import android.support.v7.widget.RecyclerView;

import android.view.View;

import android.widget.ArrayAdapter;

import android.widget.Button;

import android.widget.EditText;

import android.widget.Spinner;

import com.example.chenrui.common.Chat;

import java.util.ArrayList;

import java.util.List;

public class MainActivity extends AppCompatActivity {

    @Override

    protected void onCreate(Bundle savedInstanceState) {

        super.onCreate(savedInstanceState);

        setContentView(R.layout.activity_main);

        final RecyclerView chatList = findViewById(R.id.chatList);

        final List<Chat> chatData = new ArrayList<Chat>();

        final ChatAdapter chatAdapter = new ChatAdapter(chatData);

        chatList.setAdapter(chatAdapter);

        LinearLayoutManager layoutManager = new LinearLayoutManager(this);

        chatList.setLayoutManager(layoutManager);

        final Spinner targetUser = findViewById(R.id.targetUser);

        String[] data = {"张三","李四"};

        ArrayAdapter<String> adapter = new ArrayAdapter<String> (this,R.layout.support_simple_spinner_dropdown_item,data);

        targetUser.setAdapter(adapter);

        final EditText chatContent = findViewById(R.id.chatContent);

        Button chatSubmit = findViewById(R.id.chatSubmit);

        chatSubmit.setOnClickListener(new View.OnClickListener() {

            @Override

            public void onClick(View v) {

                if(!chatContent.getText().toString().equals("")) {

                    String user = targetUser.getSelectedItem().toString();

                    chatData.add(new Chat(user, chatContent.getText().toString()));

                    chatAdapter.notifyItemInserted(chatData.size() - 1);

                    chatList.scrollToPosition(chatData.size() - 1);

                    chatContent.setText("");

                }

            }

        });

    }

}
显示效果:
android中实现简单的聊天功能的更多相关文章
- Spring 学习——基于Spring WebSocket 和STOMP实现简单的聊天功能
本篇主要讲解如何使用Spring websocket 和STOMP搭建一个简单的聊天功能项目,里面使用到的技术,如websocket和STOMP等会简单介绍,不会太深,如果对相关介绍不是很了解的,请自 ...
- MVP架构在xamarin android中的简单使用
好几个月没写文章了,使用xamarin android也快接近两年,还有一个月职业生涯就到两个年了,从刚出来啥也不会了,到现在回头看这个项目,真jb操蛋(真辛苦了实施的人了,无数次吐槽怎么这么丑),怪 ...
- 采用tcp协议和UDP协议实现简单的聊天功能
Date: 2019-06-19 Author: Sun 一. Python3输出带颜色字体 实现过程: 终端的字符颜色是用转义序列控制的,是文本模式下的系统显示功能,和具体的语言无关. 转义 ...
- EventBus在Android中的简单使用
EventBus是一个方便与Android中各组件通信的开源框架,开源地址;https://github.com/greenrobot/EventBus.EventBus功能非常强大 ,今天在做一个功 ...
- Android中禁止SlidingPaneLayout的侧滑功能
Android中使用android.support.v4.widget.SlidingPaneLayout实现侧滑功能的时候,可能出现滑动屏幕时与SlidingPaneLayout的侧滑发生冲突,查看 ...
- Gradle在Android中的简单使用
Gradle在Android中简单的使用 还望支持个人博客站:http://www.enjoytoday.cn Android Studio 使用gradle进行工程构建,为了更好的了解整个andro ...
- Java中使用UDP实现简单的聊天功能
通过DatagramSocket类来实现.此类表示用来发送和接收数据报包的套接字. 发送端代码如下: import java.io.IOException; import java.net.*; im ...
- Android中使用ShareSDK集成分享功能
引言 现在APP开发集成分享功能已经是非常普遍的需求了.其他集成分享技术我没有使用过,今天我就来介绍下使用ShareSDK来进行分享功能开发的一些基本步骤和注意点,帮助朋友们避免一些坑.好了 ...
- android 中Log - 简单使用
例如,我们可以使用'Log.d'进行Debug,在java代码中输入Log.d(String tag, String message),tag为自己命名的tag,message为待输出的信息.然后打开 ...
随机推荐
- JavaScript中0和""的比较问题
今天在公司的时候发现了一个很奇怪的Js的问题,以前也没有注意到,我从数据库中取出某一个字段的值,而这个字段值刚好是0,然后我在判断这个值是不是等于""时,就出现了如下的问题: 就是 ...
- 移植Python2到TQ2440
环境 Python:2.7.13 开发板: TQ2440 工具链: arm-none-linux-gnueabi-gcc 4.8.3 概述 前面已经把Python3移植到TQ2440上面的,现在我们移 ...
- 得到WAV文件的长度
long getVideoLength (char *fileName){ MCI_OPEN_PARMS mciOpenParms; MCI_STATUS_PARMS mciStatusPar ...
- tms web core pwa让你的WEB APP离线可用
tms web core pwa让你的WEB APP离线可用 tms web core允许创建渐进式Web应用程序(PWA).渐进式Web应用程序是为适应在线/离线情况,各种设备类型,最重要的是,让自 ...
- C#学习笔记:预处理指令
C#和C/C++一样,也支持预处理指令,下面我们来看看C#中的预处理指令. #region 代码折叠功能,配合#endregion使用,如下: 点击后如下: 条件预处理 条件预处理可以根据给出的条件决 ...
- 波吉亚家族第一季/全集The Borgias 1迅雷下载
波吉亚家族 第一季 The Borgias Season 1 (2011)本季看点:<波吉亚家族>是一个非常复杂的故事,是现代人描绘这个臭名昭著的王朝家族过往历史的一副有趣又坦率的肖像画. ...
- ubuntu php 安装
---apache2sudo apt-get install apache2 ---phpsudo apt-get install libapache2-mod-php5 php5 php5-gd p ...
- IP地址和CIDR
IP地址(IPV4) IPV4的地址是一个32位的二进制数,由网络ID和主机ID两部分组成,用来在网络中唯一的标识一台计算机.IP地址通常用四组3位的十进制数表示,中间用.分割,例如:192.168. ...
- django的权限认证:登录和退出。auth模块和@login_required装饰器
在settings.py中配置LOGIN_URL参数: # 用户访问带有(@login_required)标签的页面(view)时,如果没有登录,就会跳转到LOGIN_URL(即登陆url). LOG ...
- SSI(Server Side Include)简单介绍
Server-side include(server端包含) Server-side include(server端包含)是浏览器向server请求您的文档时并入您的文档的一个文件. 当訪问者浏览器请 ...