springmvc整合mybatis详细教程
需求:整合springmvc和mybatis
整合的目标是:控制层采用springmvc,持久层使用mybatis
整合思想
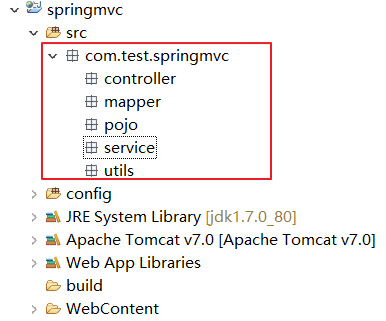
dao层:
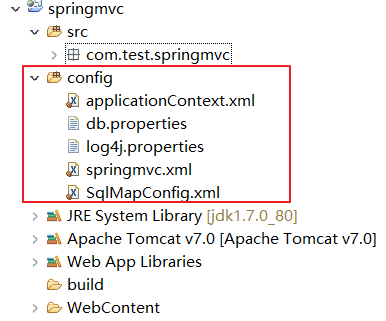
1、SqlMapConfig.xml.空文件即可。但是需要头文件。使用逆向工程的时候可以不配置别名。
2、applicationContext.xml
1)数据库连接池
2)SqlSessionFactory对象
3)配置mapper文件扫描器
4)事务管理
5)开启注解事务
3、db.properties 存放数据库的配置信息
controller层:
springmvc.xml
1)包扫描器
2)配置注解驱动
3)配置视图解析器
web.xml
1)配置spring
2)配置前端控制器
其它可选配置
log4j.properties
整合步骤
1 创建动态web工程
2 导入所需的jar

3 SqlMapConfgi.xml
如果使用逆向工程的话,可以不需要配置别名,空文件即可,但是需要头文件。
<?xml version="1.0" encoding="UTF-8"?>

<!DOCTYPE configuration

PUBLIC "-//mybatis.org//DTD Config 3.0//EN"

"http://mybatis.org/dtd/mybatis-3-config.dtd">

<configuration>

    <!-- 设置别名 -->

    <typeAliases>

        <!-- 2. 指定扫描包,会把包内所有的类都设置别名,别名的名称就是类名,大小写不敏感 -->

        <package name="com.test.springmvc.pojo" />

    </typeAliases>

</configuration>
4 applicationContext.xml
1.数据库连接池
2.SqlSessionFactory对象,需要spring和mybatis整合包下的
3.配置mapper文件扫描器
4.配置事务管理
5.开启注解
<?xml version="1.0" encoding="UTF-8"?>

<beans xmlns:xsi="http://www.w3.org/2001/XMLSchema-instance"

       xmlns="http://www.springframework.org/schema/beans"

       xmlns:context="http://www.springframework.org/schema/context"

       xmlns:aop="http://www.springframework.org/schema/aop"

       xmlns:tx="http://www.springframework.org/schema/tx"

       xmlns:p="http://www.springframework.org/schema/p"

       xsi:schemaLocation="http://www.springframework.org/schema/beans

                           http://www.springframework.org/schema/beans/spring-beans-4.0.xsd

                           http://www.springframework.org/schema/context

                           http://www.springframework.org/schema/context/spring-context-4.0.xsd

                           http://www.springframework.org/schema/aop

                           http://www.springframework.org/schema/aop/spring-aop-4.0.xsd

                           http://www.springframework.org/schema/tx

                           http://www.springframework.org/schema/tx/spring-tx-4.0.xsd

                           http://www.springframework.org/schema/util

                           http://www.springframework.org/schema/util/spring-util-4.0.xsd">

    <!-- 1加载配置文件 -->

    <context:property-placeholder location="classpath:db.properties" />

    <!-- 2配置连接池 -->

    <bean name="dataSource" class="org.apache.commons.dbcp.BasicDataSource">

        <property name="driverClassName" value="${jdbc.driver}" />

        <property name="url" value="${jdbc.url}" />

        <property name="username" value="${jdbc.username}" />

        <property name="password" value="${jdbc.password}" />

        <property name="maxActive" value="10" />

        <property name="maxIdle" value="5" />

    </bean>

    <!--3 配置SqlSessionFactory  -->

    <bean id="sqlSessionFactory" class="org.mybatis.spring.SqlSessionFactoryBean">

        <!-- 配置mybatis核心配置文件 -->

        <property name="configLocation" value="classpath:SqlMapConfig.xml" />

        <!-- 配置数据源 -->

        <property name="dataSource" ref="dataSource" />

    </bean>

    <!--4 Mapper代理开发   扫描  -->

    <bean class="org.mybatis.spring.mapper.MapperScannerConfigurer">

        <property name="basePackage" value="com.test.springmvc.mapper"></property>

    </bean>

    <!--5 配置事务管理器 -->

    <bean name="transactionManager" class="org.springframework.jdbc.datasource.DataSourceTransactionManager">

        <property name="dataSource" ref="dataSource"></property>

    </bean>

    <!--6 开启注解 -->

    <tx:annotation-driven transaction-manager="transactionManager"/>

</beans>
5 db.properties
jdbc.driver=com.mysql.jdbc.Driver

jdbc.url=jdbc:mysql://39.105.94.154:3306/springmvc?characterEncoding=utf-8

jdbc.username=tom

jdbc.password=tom
6 springmvc.xml
1包扫描器
2配置处理器映射器和处理器适配器(或者直接配置注解驱动就可以了)
3配置视图解析器
<?xml version="1.0" encoding="UTF-8"?>

<beans xmlns="http://www.springframework.org/schema/beans"

       xmlns:xsi="http://www.w3.org/2001/XMLSchema-instance"

       xmlns:p="http://www.springframework.org/schema/p"

       xmlns:context="http://www.springframework.org/schema/context"

       xmlns:mvc="http://www.springframework.org/schema/mvc"

       xsi:schemaLocation="http://www.springframework.org/schema/beans

                           http://www.springframework.org/schema/beans/spring-beans-4.0.xsd

                           http://www.springframework.org/schema/mvc

                           http://www.springframework.org/schema/mvc/spring-mvc-4.0.xsd

                           http://www.springframework.org/schema/context

                           http://www.springframework.org/schema/context/spring-context-4.0.xsd">

    <!-- 配置扫描组件 ,扫描@Controller,@Service等-->

    <context:component-scan base-package="com.test.springmvc" />

    <!-- 配置注解驱动,如果配置此标签可以不用配置处理器映射器和适配器 -->

    <mvc:annotation-driven />

    <!-- 配置视图解析器 -->

    <bean class="org.springframework.web.servlet.view.InternalResourceViewResolver">

        <!-- 配置逻辑视图的前缀 -->

        <property name="prefix" value="/WEB-INF/jsp/"></property>

        <!-- 配置逻辑视图的后缀 -->

        <property name="suffix" value=".jsp"></property>

    </bean>

</beans>
7 web.xml
- 配置spring监听器
- 配置前端控制器
<?xml version="1.0" encoding="UTF-8"?>

<web-app xmlns:xsi="http://www.w3.org/2001/XMLSchema-instance" xmlns="http://java.sun.com/xml/ns/javaee" xsi:schemaLocation="http://java.sun.com/xml/ns/javaee http://java.sun.com/xml/ns/javaee/web-app_2_5.xsd" id="WebApp_ID" version="2.5">

  <display-name>springmvc</display-name>

  <welcome-file-list>

    <welcome-file>index.html</welcome-file>

    <welcome-file>index.htm</welcome-file>

    <welcome-file>index.jsp</welcome-file>

    <welcome-file>default.html</welcome-file>

    <welcome-file>default.htm</welcome-file>

    <welcome-file>default.jsp</welcome-file>

  </welcome-file-list>

    <!-- 配置spring -->

    <context-param>

        <param-name>contextConfigLocation</param-name>

        <param-value>classpath:applicationContext.xml</param-value>

    </context-param>

    <!-- 使用监听器加载Spring配置文件 -->

    <listener>

          <listener-class>org.springframework.web.context.ContextLoaderListener</listener-class>

    </listener>

    <!-- 配置过滤器,解决post的乱码问题 -->

    <filter>

        <filter-name>encoding</filter-name>

    <filter-class>org.springframework.web.filter.CharacterEncodingFilter</filter-class>

        <init-param>

            <param-name>encoding</param-name>

            <param-value>UTF-8</param-value>

        </init-param>

    </filter>

    <filter-mapping>

        <filter-name>encoding</filter-name>

        <url-pattern>/*</url-pattern>

    </filter-mapping>

    <!-- 配置SrpingMVC的前端控制器 -->

    <servlet>

        <servlet-name>springmvc-web</servlet-name>

        <servlet-class>org.springframework.web.servlet.DispatcherServlet</servlet-class>

        <init-param>

            <param-name>contextConfigLocation</param-name>

            <param-value>classpath:springmvc.xml</param-value>

        </init-param>

        <!-- 配置springmvc什么时候启动,参数必须为整数 -->

        <!-- 如果为0或者大于0,则springMVC随着容器启动而启动 -->

        <!-- 如果小于0,则在第一次请求进来的时候启动 -->

        <load-on-startup>1</load-on-startup>

    </servlet>

    <servlet-mapping>

        <servlet-name>springmvc-web</servlet-name>

        <!-- 配置所有以action结尾的请求进入SpringMVC -->

        <url-pattern>*.action</url-pattern>

    </servlet-mapping>

</web-app>
8 log4j.properties
### direct log messages to stdout ###

log4j.appender.stdout=org.apache.log4j.ConsoleAppender

log4j.appender.stdout.Target=System.err

log4j.appender.stdout.layout=org.apache.log4j.PatternLayout

log4j.appender.stdout.layout.ConversionPattern=%d{ABSOLUTE} %5p %c{1}:%L - %m%n

### direct messages to file mylog.log ###

log4j.appender.file=org.apache.log4j.FileAppender

log4j.appender.file.File=d:\\mylog.log

log4j.appender.file.layout=org.apache.log4j.PatternLayout

log4j.appender.file.layout.ConversionPattern=%d{ABSOLUTE} %5p %c{1}:%L - %m%n

### set log levels - for more verbose logging change 'info' to 'debug' ###

### fatal error warn info debug trace \u5982\u679C\u4E0D\u60F3\u8981\u8F93\u51FA\uFF1B log4j.rootLogger=off, stdout

log4j.rootLogger=debug, stdout
9 配置完成后的效果
简单测试
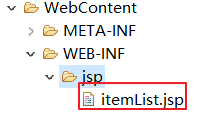
1 准备一个jsp页面
代码内容:
<%@ page language="java" contentType="text/html; charset=UTF-8"

    pageEncoding="UTF-8"%>

<%@ taglib uri="http://java.sun.com/jsp/jstl/core" prefix="c" %>

<%@ taglib uri="http://java.sun.com/jsp/jstl/fmt"  prefix="fmt"%>

<!DOCTYPE html PUBLIC "-//W3C//DTD HTML 4.01 Transitional//EN" "http://www.w3.org/TR/html4/loose.dtd">

<html>

<head>

<meta http-equiv="Content-Type" content="text/html; charset=UTF-8">

<title>查询商品列表</title>

</head>

<body>

<form action="${pageContext.request.contextPath }/item/queryitem.action" method="post">

查询条件:

<table width="100%" border=1>

<tr>

<td><input type="submit" value="查询"/></td>

</tr>

</table>

商品列表:

<table width="100%" border=1>

<tr>

    <td>商品名称</td>

    <td>商品价格</td>

    <td>生产日期</td>

    <td>商品描述</td>

    <td>操作</td>

</tr>

<c:forEach items="${itemList }" var="item">

<tr>

    <td>${item.name }</td>

    <td>${item.price }</td>

    <td><fmt:formatDate value="${item.createtime}" pattern="yyyy-MM-dd HH:mm:ss"/></td>

    <td>${item.detail }</td>

    <td><a href="${pageContext.request.contextPath }/itemEdit.action?id=${item.id}">修改</a></td>

</tr>

</c:forEach>

</table>

</form>

</body>

</html>
2 准备一个Items类
package com.test.springmvc.pojo;

import java.util.Date;

public class Items {

    private Integer id;

    private String name;

    private Float price;

    private String pic;

    private Date createtime;

    private String detail;

    public Items(Integer id, String name, Float price, Date createtime, String detail) {

        super();

        this.id = id;

        this.name = name;

        this.price = price;

        this.createtime = createtime;

        this.detail = detail;

    }

    public Integer getId() {

        return id;

    }

    public void setId(Integer id) {

        this.id = id;

    }

    public String getName() {

        return name;

    }

    public void setName(String name) {

        this.name = name == null ? null : name.trim();

    }

    public Float getPrice() {

        return price;

    }

    public void setPrice(Float price) {

        this.price = price;

    }

    public String getPic() {

        return pic;

    }

    public void setPic(String pic) {

        this.pic = pic == null ? null : pic.trim();

    }

    public Date getCreatetime() {

        return createtime;

    }

    public void setCreatetime(Date createtime) {

        this.createtime = createtime;

    }

    public String getDetail() {

        return detail;

    }

    public void setDetail(String detail) {

        this.detail = detail == null ? null : detail.trim();

    }

}
3 编写ItemsController
package com.test.springmvc.controller; import java.util.ArrayList;
import java.util.Date;
import java.util.List; import org.springframework.stereotype.Controller;
import org.springframework.web.bind.annotation.RequestMapping;
import org.springframework.web.servlet.ModelAndView; import com.test.springmvc.pojo.Items; @Controller
public class ItemController {
// @RequestMapping:里面放的是请求的url,和用户请求的url进行匹配
// action可以写也可以不写
@RequestMapping("/item/itemList.action")
public ModelAndView queryItemList(){ // 创建页面需要显示的商品数据
List<Items> list = new ArrayList<>();
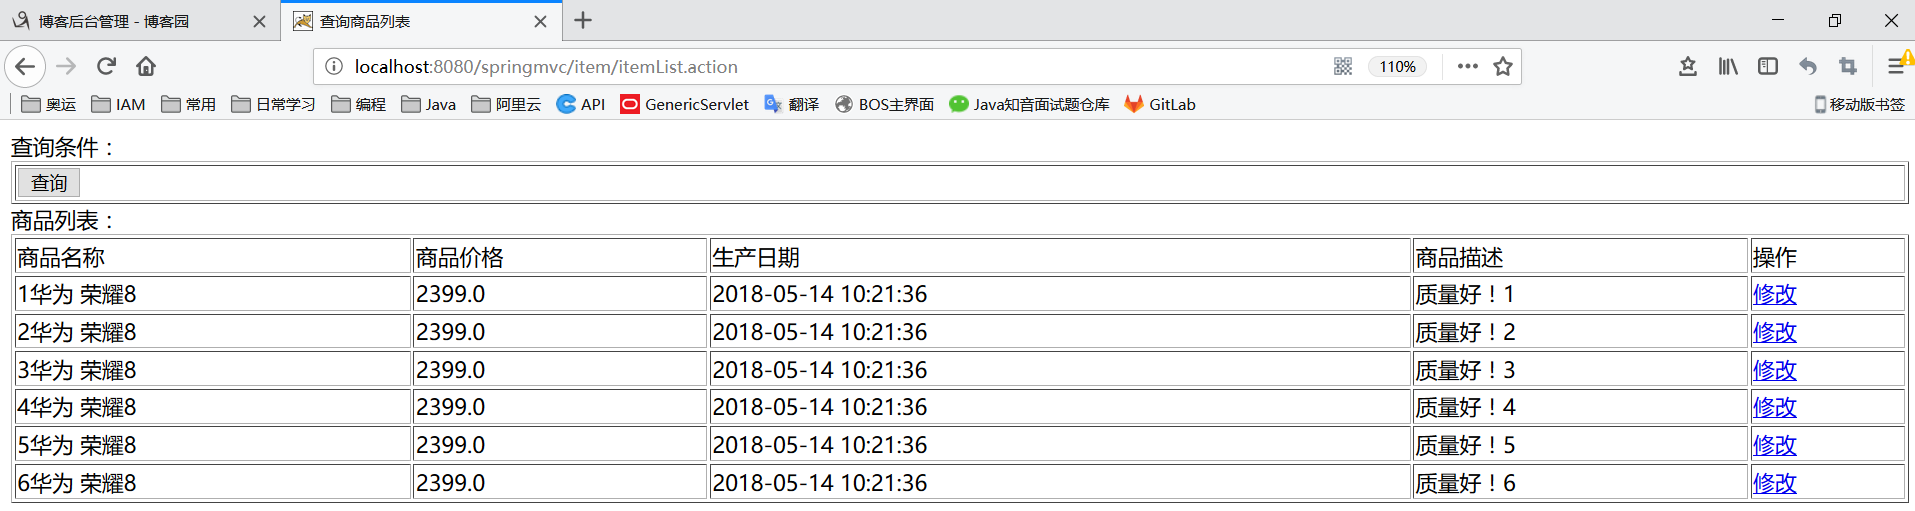
list.add(new Items(1, "1华为 荣耀8", 2399f, new Date(), "质量好!1"));
list.add(new Items(2, "2华为 荣耀8", 2399f, new Date(), "质量好!2"));
list.add(new Items(3, "3华为 荣耀8", 2399f, new Date(), "质量好!3"));
list.add(new Items(4, "4华为 荣耀8", 2399f, new Date(), "质量好!4"));
list.add(new Items(5, "5华为 荣耀8", 2399f, new Date(), "质量好!5"));
list.add(new Items(6, "6华为 荣耀8", 2399f, new Date(), "质量好!6")); // 创建ModelAndView,用来存放数据和视图
ModelAndView modelAndView = new ModelAndView(); // 设置视图jsp,需要设置视图的物理地址
modelAndView.setViewName("itemList"); // 设置数据到模型中
modelAndView.addObject("itemList", list); return modelAndView;
}
}
4 启动项目
输入网址:http://localhost:8080/springmvc/item/itemList.action
效果如下:
乱码问题解决
1 post提交乱码问题解决
在web.xml中加入:
    <!-- 解决post乱码问题 -->

    <filter>

        <filter-name>encoding</filter-name>

        <filter-class>org.springframework.web.filter.CharacterEncodingFilter</filter-class>

        <!-- 设置编码参是UTF8 -->

        <init-param>

            <param-name>encoding</param-name>

            <param-value>UTF-8</param-value>

        </init-param>

    </filter>

    <filter-mapping>

        <filter-name>encoding</filter-name>

        <url-pattern>/*</url-pattern>

    </filter-mapping>
2 get提交乱码问题解决
对于get请求中文参数出现乱码解决方法有两个:
修改tomcat配置文件添加编码与工程编码一致,如下:

另外一种方法对参数进行重新编码:

ISO8859-1是tomcat默认编码,需要将tomcat编码后的内容按utf-8编码
springmvc整合mybatis详细教程的更多相关文章
- Maven 搭建SpringMvc+Spring+Mybatis详细记录
总觉得,看比人写的总是那么好,每次搭建框架时都会找博客,找教程来跟着一步一步走,虽然很快搭建成功了,但是经常情况是我并不知道我干了什么,也不记得具体步骤,到底为什么要这么做,今天我详细记录了一下自己搭 ...
- JAVAEE——SpringMVC第一天:介绍、入门程序、架构讲解、SpringMVC整合MyBatis、参数绑定、SpringMVC和Struts2的区别
1. 学习计划 第一天 1.SpringMVC介绍 2.入门程序 3.SpringMVC架构讲解 a) 框架结构 b) 组件说明 4.SpringMVC整合MyBatis 5.参数绑定 a) Sp ...
- eclipse 创建maven 项目 动态web工程完整示例 maven 整合springmvc整合mybatis
接上一篇: eclipse 创建maven 项目 动态web工程完整示例 eclipse maven工程自动添加依赖设置 maven工程可以在线搜索依赖的jar包,还是非常方便的 但是有的时候可能还需 ...
- Struts2+Spring4+Hibernate4整合超详细教程
Struts2.Spring4.Hibernate4整合 超详细教程 Struts2.Spring4.Hibernate4整合实例-下载 项目目的: 整合使用最新版本的三大框架(即Struts2.Sp ...
- Maven SpringMVC整合Mybatis
关于Spring的核心理念和Mybatis的优点网上已经有很多文档做了说明.这篇博客,只记录springmvc整合mybatis时常见的知识点,以及注意事项,它只有最精简的几个模块,以帮助初学者迅速搭 ...
- SpringMVC整合Mybatis的流程
前提:如何要整合SpringMVC 与Mybatis,首先要会配置SpringMVC 第一部分:配置SpringMVC 第一步:导入jar包 第二步:构建一个请求 <%@ page langua ...
- Mybatis整合spring详细教程(适合小白童鞋)
目录 1.整合思路 2.整合需要的jar包 3.整合的步骤 4.Dao的开发的两种实现方式 6.Dao的开发的实现方式总结图 @ Mybatis整合spring其实就是SSM框架中SM的整合集成. 1 ...
- (八) SpringBoot起飞之路-整合Shiro详细教程(MyBatis、Thymeleaf)
兴趣的朋友可以去了解一下前几篇,你的赞就是对我最大的支持,感谢大家! (一) SpringBoot起飞之路-HelloWorld (二) SpringBoot起飞之路-入门原理分析 (三) Sprin ...
- springmvc整合mybatis 配置文件
使用SSM(Spring.SpringMVC和Mybatis)已经有三个多月了,项目在技术上已经没有什么难点了,基于现有的技术就可以实现想要的功能,当然肯定有很多可以改进的地方.之前没有记录SSM整合 ...
随机推荐
- 安装并使用PICT,生成测试用例
一.PICT简介 PICT工具是在微软公司内部使用的一款承兑组合的命令行生成工具,现在已经对外提供,可以在 http://download.microsoft.com/download/f/5/5/f ...
- 查看Linux系统是32位的还是64位的
方法1: getconf LONG_BIT 上面显示我先用的是32位的系统. 方法2: .uanme -a .uname -m 显示i686或x86就是32位的系统,显示x86_64就是64位系统. ...
- CentOS下安装PHP的AMQP扩展方法和步骤
AMQP,即Advanced Message Queuing Protocol,一个提供统一消息服务的应用层标准高级消息队列协议,是应用层协议的一个开放标准,为面向消息的中间件设计.基于此协议的客户端 ...
- Acrobat_8_Pro_SC 激活老是提示你输入的授权码无效
假如安装了Adobe Acrobat Professional 8 的时候无法激活, 或在恢复安装时 Adobe Acrobat Professional 8 需要重新激活, 激活的时候,总是提示你输 ...
- 解决安装VC6.0后出现MSDEV.EXE错误,无法用打开工程解决方法
问题:安装VC6.0后,在打开项目或添加文件时,出现如下错误: 可能导致原因:由于Ms安装软件的兼容性问题,导致VC6.0安装不完全, 解决方法:--网上打sp6补丁的方法貌似不可用,所以可以采用另一 ...
- 在JS中,将text框中数据格式化,根据不同的小数位数,格式化成对应的XXX,XXX,XXX.XX(2位小数) 或者XXX,XXX,XXX(0位小数)
//在JS中,将text框中数据格式化,根据不同的小数位数,格式化成对应的XXX,XXX,XXX.XX(2位小数) 或者XXX,XXX,XXX(0位小数) function formatNum(num ...
- .Net Core配置与自动更新
.Net Core 将之前Web.Config中的配置迁移到了appsettings.json文件中,并使用ConfigurationBuilder来读取这个配置文件.并可设置在配置文件变化以后,自动 ...
- GRPC .netcore
GRPC是Google发布的一个开源.高性能.通用RPC(Remote Procedure Call)框架.提供跨语言.跨平台支持.以下以一个.NET Core Console项目演示如何使用GRPC ...
- mysql into outfile 和 load data local备份还原
在 my.ini 的 [mysqld] 节点增加如下配置: secure-file-priv="D:/mysql_secure_file" max_allowed_packet= ...
- “全栈2019”Java第八十一章:外部类能否访问嵌套接口里的成员?
难度 初级 学习时间 10分钟 适合人群 零基础 开发语言 Java 开发环境 JDK v11 IntelliJ IDEA v2018.3 文章原文链接 "全栈2019"Java第 ...