vue+element-ui小笔记
1.图片加载失败,给默认图,两种解决方法:
方法一:
给img标签加 onerror指令,然后在data中给 errorGoodsImg 赋值,根据自己所需图片路径赋值
<img :src="imgSrc+scope.row.fileId" id="avatarImg" v-if="scope.row.fileId" :onerror="errorGoodsImg">
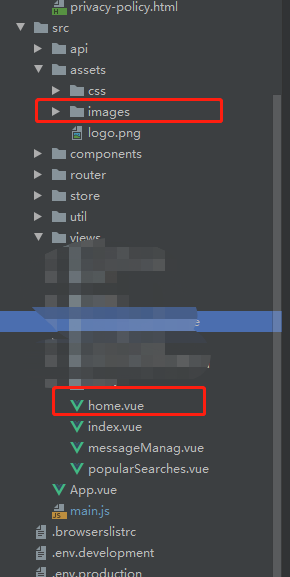
小颖的目录:
data中,errorGoodsImg的值如下:
errorGoodsImg: 'this.src="' + require('../assets/images/new.jpg') + '"',
方法二:
调用 element-ui 中的 <el-image> 标签,可通过slot = error可自定义加载失败内容
eg:
<el-image v-if="userInfo.credentialsFileId" style="width: 75px; height: 115px" :src="imgSrc+userInfo.credentialsFileId" :preview-src-list="srcList">

     <div slot="error" class="image-slot">

          <i class="el-icon-picture-outline"></i>

     </div>

</el-image>
2.form表单中,输入框加回车事件,页面刷新,如何解决?
解决方法就是在form中添加:@submit.native.prevent
示例:
html代码:
<template>

    <div class="ceshi-form-tem right-content-tem">

        <el-form ref="form" :model="userInfo" label-width="100px" class="userInfo-form" @submit.native.prevent>

            <el-row>

                <el-col :span="12">

                    <p class="form-title-tem">基本信息</p>

                </el-col>

                <el-col :span="12" class="txt-right">

                    <el-form-item>

                        <el-button type="primary" @click="onSubmit('form')" :loading="btnUserLoading">

                            保存

                        </el-button>

                    </el-form-item>

                </el-col>

            </el-row>

            <el-form-item label="头像">

                <el-upload

                        style="width: 30%"

                        action="https://jsonplaceholder.typicode.com/posts/"

                        accept=".jpg,.png"

                        :on-remove="handleRemoveAvatar"

                        :beforeUpload="beforeAvatarUpload"

                        :on-error="onError"

                        :on-success="onSuccess"

                        :limit="1">

                    <img v-if="userInfo.avatar" :src="userInfo.avatar" :onerror="errorGoodsImg"

                         class="userInfo-avatar">

                    <img v-else src="../assets/img/tu4.png" class="userInfo-avatar">

                </el-upload>

            </el-form-item>

            <el-form-item

                    label="昵称"

                    prop="nickname">

                <p v-if="!userInfoEdit.nickname">{{userInfo.nickname}}

                    <i class="el-icon-edit" @click="showInput('nickname')"></i>

                </p>

                <el-input ref="customerInput" v-else maxlength="6" placeholder="请输入昵称" v-model="userInfo.nickname"

                          @keyup.enter.native="handleInputConfirm('nickname')"

                          @blur="handleInputConfirm('nickname')"></el-input>

            </el-form-item>

            <el-form-item label="姓名">

                <p>{{userInfo.username}}</p>

            </el-form-item>

            <el-form-item label="性别">

                <el-radio-group v-model="userInfo.sex" @change="changeSex">

                    <el-radio :label="1">男</el-radio>

                    <el-radio :label="0">女</el-radio>

                </el-radio-group>

            </el-form-item>

            <!--普通用户-->

            <el-form-item label="所属机构">

                <p v-if="!userInfoEdit.organizationName">{{userInfo.organizationName}}<i class="el-icon-edit" @click="showInput('organizationName')"></i></p>

                <el-input ref="customerInput" v-if="userInfoEdit.organizationName" maxlength="6" placeholder="请输入所属机构"

                          v-model="userInfo.organizationName"

                          @keyup.enter.native="handleInputConfirm('organizationName')"

                          @blur="handleInputConfirm('organizationName')"></el-input>

            </el-form-item>

        </el-form>

    </div>

</template>
js代码:
<script>

    export default {

        name: "formCeshi",

        data(){

            return {

                btnUserLoading: false,

                errorGoodsImg: 'this.src="' + require('../assets/img/tu4.png') + '"',

                userInfo: {

                    avatar: '',

                    nickname: 'v',

                    username: '测试',

                    sex: 1,

                    organizationName: '杀杀杀'

                },

                userInfoEdit: {

                    nickname: false,

                    organizationName: false

                },

                haveChange: false

            }

        },

        mounted() {

            this.haveChange = false

        },

        methods: {

            onSubmit(formName) {

                const that = this

                if (!that.haveChange) {

                    that.$message({

                        message: '当前没有任何修改',

                        type: 'warning'

                    });

                    return

                }

                that.btnUserLoading = true

                that.$refs[formName].validate((valid) => {

                    if (valid) {

                        that.btnUserLoading = false

                    //    调接口

                    } else {

                        that.btnUserLoading = false

                        return false;

                    }

                });

            },

            showInput(key) {

                switch (key) {

                    case'nickname':

                        this.userInfoEdit.nickname = true;

                        break

                    case'organizationName':

                        this.userInfoEdit.organizationName = true;

                        break

                }

                this.$nextTick(function () {

                    this.$refs.customerInput.$el.querySelector('input').focus();

                });

            },

            handleInputConfirm(key) {

                this.haveChange = true

                switch (key) {

                    case'nickname':

                        this.userInfoEdit.nickname = false;

                        break

                    case'organizationName':

                        this.userInfoEdit.organizationName = false;

                        break

                }

            },

            handleRemoveAvatar(file, fileList) {

                this.userInfo.avatar = ''

            },

            beforeAvatarUpload(file) {

                let fileend = file.name.substring(file.name.lastIndexOf("."))

                //jpg、png、bmp

                const isZip = (fileend === '.jpg' || file.type === 'jpg') || (fileend === '.png' || file.type === 'png')

                if (!isZip) {

                    this.$message.error('您只能上传jpg、png格式的图片!')

                }

                const isLt2G = file.size / 1024 / 1024 < 1;

                if (!isLt2G) {

                    this.$message.error('上传的图片大小必须小于1MB!')

                }

                return isZip && isLt2G

            },

            onSuccess(file, res, fileList) {

                if (res.response.code != 200) {

                    this.$message.error('上传头像失败');

                } else {

                    this.haveChange = true

                    this.userInfo.avatar = URL.createObjectURL(file.raw);

                }

            },

            onError(err, file, fileList) {

                const errMsg = JSON.parse(err.message)

                this.$message.error(errMsg.msg ? errMsg.msg : '上传头像失败');

            },//修改性别

            changeSex() {

                this.haveChange = true

            }

        }

    }

</script>
css
<style scoped>

    form.userInfo-form {

        width: 400px;

        margin: 40px auto 0 auto;

    }

    img.userInfo-avatar {

        width: 48px;

        height: 48px;

        border-radius: 50%;

    }

</style>
3.使用在线主题生成工具,修改element自定义主题色
打开在线主题编辑器,在该页面中根据自己的需求,更改颜色,修改完后,下载主题包,然后在项目中引入就可以了。

持续更新.......................................
秀两张我家仔仔的盛世美颜:


vue+element-ui小笔记的更多相关文章
- vue + element ui 实现实现动态渲染表格
前言:之前需要做一个页面,能够通过表名动态渲染出不同的表格,这里记录一下.转载请注明出处:https://www.cnblogs.com/yuxiaole/p/9786326.html 网站地址:我的 ...
- vue + element ui 表格自定义表头,提供线上demo
前言:工作中用到 vue+element ui 的前端框架,需要使用自定义表头,需要使用 re.转载请注明出处:https://www.cnblogs.com/yuxiaole/p/9710826.h ...
- vue+element ui 的表格列使用组件
前言:工作中用到 vue+element ui 的前端框架,有这个场景:很多表格的列有许多一样的,所以考虑将列封装为组件.转载请注明出处:https://www.cnblogs.com/yuxiaol ...
- Vue+element ui table 导出到excel
需求: Vue+element UI table下的根据搜索条件导出当前所有数据 参考: https://blog.csdn.net/u010427666/article/details/792081 ...
- 基于vue(element ui) + ssm + shiro 的权限框架
zhcc 基于vue(element ui) + ssm + shiro 的权限框架 引言 心声 现在的Java世界,各种资源很丰富,不得不说,从分布式,服务化,orm,再到前端控制,权限等等玲琅满目 ...
- 分享一个自搭的框架,使用Spring boot+Vue+Element UI
废弃,新的:https://www.cnblogs.com/hackyo/p/10453243.html 特点:前后端分离,可遵循restful 框架:后端使用Spring boot,整合了aop.a ...
- Vue + Element UI 实现权限管理系统
Vue + Element UI 实现权限管理系统 前端篇(一):搭建开发环境 https://www.cnblogs.com/xifengxiaoma/p/9533018.html
- vue+element ui 的上传文件使用组件
前言:工作中用到 vue+element ui 的前端框架,使用到上传文件,则想着封装为组件,达到复用,可扩展.转载请注明出处:https://www.cnblogs.com/yuxiaole/p/9 ...
- vue+element ui 的tab 动态增减,切换时提示用户是否切换
前言:工作中用到 vue+element ui 的前端框架,动态添加 Tab,删除 Tab,切换 Tab 时提示用户是否切换等,发现 element ui 有一个 bug,这里记录一下如何实现.转载 ...
- 基于 vue+element ui 的cdn网站(多页面,都是各种demo)
前言:这个网站持续更新中...,有网上预览,github上也有源码,喜欢记得star哦,欢迎留言讨论. 网站地址:我的个人vue+element ui demo网站 github地址:yuleGH g ...
随机推荐
- 调试linux内核(1): 环境准备和原理介绍
开篇 现在流行的开源项目经历了长时间的开发, 积累了大量的代码, 想要一行一行地阅读代码去学习开源项目, 需要的时间成本是巨大的. 所以, 我们也需要用一种高效的方式去"阅读"代码 ...
- 让 GPT-4 给开源项目 GoPool Review 社区贡献者的 PR - 每天5分钟玩转 GPT 编程系列(5)
目录 1. 嘚瑟一下 2. 言归正传 2.1 GoPool 的第一个 PR 2.2 祭出 GPT-4 2.3 问问 GPT-4 怎么看这个 PR 2.4 让 GPT-4 重构代码 3. 打完收工 1. ...
- 想了解API接口,这一篇就够了
API(Application Programming Interface)接口,对于大多数人来说可能还比较陌生,但实际上我们每天都在与它打交道.无论是使用手机上的应用程序,还是在网上购物,都少不了A ...
- Verilog实现定点乘法器
实验目的 理解定点乘法的不同实现算法的原理,掌握基本实现算法. 熟悉并运用 Verilog 语言进行电路设计. 为后续设计 CPU 的实验打下基础. 实验内容 定点乘法器有多种实现,实验要求实现迭代乘 ...
- 「loj - 3022」「cqoi 2017」老 C 的方块
link. good题,考虑像 国家集训队 - happiness 一样在棋盘上搞染色,我毛张 @shadowice1987 的图给你看啊 你像这样奇数层以 red -> blue -> ...
- package.json指南
一.属性 name 定义项目的名称,不能以"."和"_"开头,不能包含大写字母 version 定义项目的版本号,格式为:大版本号.次版本号.修订号 descr ...
- C语言指针函数和函数指针区别(转)
C语言函数指针和指针函数的区别C和C++中经常会用到指针,和数据项一样,函数也是有地址的,函数的地址是存储其机器语言代码的内存的开始地址. 指针函数和函数指针经常会混淆,一个是返回指针的函数,另一个是 ...
- Spring-Boot-Starter 学习笔记(1)
Spring-Boot-Starter 1. 准备配置类和 Bean 对象 Spring Boot 提供了两个注解: @Configuration:Spring 提供的配置类注解,作用在类上,代表整个 ...
- TIPTOP GP ERP二次开发规范说明
TIPTOP GP ERP二次开发规范说明 TIPTOP ERP共分三大区:topstd(标准区) + toppord(正式区) + toptest(测试区) 标准区 ...
- 如何用ppt打印9张一面,并且去除边距?
如何用ppt打印9张一面,并且去除边距? 方法其实很简单,答主不要在ppt软件的打印选项里设置[每页打印9张幻灯片],而是使用默认的[每页打印1张幻灯片]. 然后去[打印机属性]里设置,我是 ...