
微服务(入门学习五):identityServer4+ocelot+consul实现简单客户端模式
简介
主要是采用identity Server4 和ocelot 加上consul 实现简单的客户端模式
开发准备
环境准备
- 下载并安装Consul具体请参考前几篇的内容
项目介绍
- 创建ocelotServerTest项目
- 创建IdentityServer4Test项目
- 创建consulServer项目(API项目)
1.创建Consulserver项目
参考该地址进行创建:微服务(入门二):netcore通过consul注册服务
2.创建identityServer项目
参考该地址进行创建:微服务(入门四):identityServer的简单使用(客户端授权)
3.创建ocelotServerTest项目
3.1创建一个webAPI项目

3.2 修改startUP配置,添加authentication认证
using System;

using System.Collections.Generic;

using System.Linq;

using System.Threading.Tasks;

using IdentityServer4.AccessTokenValidation;

using Microsoft.AspNetCore.Authentication.JwtBearer;

using Microsoft.AspNetCore.Builder;

using Microsoft.AspNetCore.Hosting;

using Microsoft.AspNetCore.HttpsPolicy;

using Microsoft.AspNetCore.Mvc;

using Microsoft.Extensions.Configuration;

using Microsoft.Extensions.DependencyInjection;

using Microsoft.Extensions.Logging;

using Microsoft.Extensions.Options;

using netCore;

using Ocelot.DependencyInjection;

using Ocelot.Middleware;

using Ocelot.Provider.Consul;

using Ocelot.Provider.Polly;

namespace IdentityServer4Test

{

    public class Startup

    {

        public Startup(IConfiguration configuration)

        {

            Configuration = configuration;

        }

        public IConfiguration Configuration { get; }

        // This method gets called by the runtime. Use this method to add services to the container.

        public void ConfigureServices(IServiceCollection services)

        {

            services.AddMvc().SetCompatibilityVersion(CompatibilityVersion.Version_2_1);

            services

                .AddAuthentication(JwtBearerDefaults.AuthenticationScheme)//添加认证

                .AddIdentityServerAuthentication("TestKey", o =>

                {

                    o.Authority = "http://127.0.0.1:3322";//要认证的服务器地址

                    o.RequireHttpsMetadata = false;//不启用https

                    o.ApiName = "api1";//要认证的服务名称

                });

            services.AddOcelot(Configuration).AddConsul().AddPolly();

        }

        // This method gets called by the runtime. Use this method to configure the HTTP request pipeline.

        public void Configure(IApplicationBuilder app, IHostingEnvironment env)

        {

            if (env.IsDevelopment())

            {

                app.UseDeveloperExceptionPage();

            }

            else

            {

                app.UseHsts();

            }

            app.UseMvc();

            app.UseOcelot().Wait();

            app.UseAuthentication();

        }

    }

}
3.3创建ocelot.json文件并且添加AuthenticationOptions
 "AuthenticationOptions": {

        "AuthenticationProviderKey": "TestKey",

        "AllowedScopes": []

      }
{

  "ReRoutes": [

    {

      //下游路由模板,真实请求的路径

      "DownstreamPathTemplate": "/api/{everything}",

      //请求的方式,例如:http,https

      "DownstreamScheme": "http",

      //服务器名称

      "ServiceName": "zyz1",

      //启用consul服务

      "UseServiceDiscovery": true,

      //服务熔断

      "QoSOptions": {

        "ExceptionsAllowedBeforeBreaking": , //允许多少次异常请求

        "DurationOfBreak": , //熔断时间,单位为秒

        "TimeoutValue":  //如果下游请求的处理时间超过多少则自动设置超时

      },

      //"RateLimitOptions": {

      //  "ClientWhitelist": [ "admin" ], // 白名单

      //  "EnableRateLimiting": true, // 是否启用限流

      //  "Period": "1m", // 统计时间段:1s, 5m, 1h, 1d

      //  "PeriodTimespan": 15, // 多少秒之后客户端可以重试

      //  "Limit": 5 // 在统计时间段内允许的最大请求数量

      //},//负载均衡:

      //RoundRobin轮流发送;

      //LeastConnection – 将请求发往最空闲的那个服务器

      //NoLoadBalance – 总是发往第一个请求或者是服务发现

      "LoadBalancerOptions": {

        "Type": "RoundRobin"

      },

      //上游地址配置

      "UpstreamPathTemplate": "/test/{everything}",

      //上游支持的请求类型

      "UpstreamHttpMethod": [ "GET", "POST" ],

      "AuthenticationOptions": {

        "AuthenticationProviderKey": "TestKey",

        "AllowedScopes": []

      }

    },

    {

      "DownstreamPathTemplate": "/api/Token",

      "DownstreamScheme": "http",

      "DownstreamHostAndPorts": [

        {

          "Host": "127.0.0.1",

          "Port":

        }

      ],

      "UpstreamPathTemplate": "/GetToken",

      "UpstreamHttpMethod": [ "Get" ]

    }

  ],

  "GlobalConfiguration": {

    "BaseUrl": "https://localhost:8596",

    //consul服务器地址和ip

    "ServiceDiscoveryProvider": {

      "Host": "localhost",

      "Port":

    }

  }

}
3.4 修改program文件,添加访问地址,以及ocelot的配置文件
using System;

using System.Collections.Generic;

using System.IO;

using System.Linq;

using System.Threading.Tasks;

using Microsoft.AspNetCore;

using Microsoft.AspNetCore.Hosting;

using Microsoft.Extensions.Configuration;

using Microsoft.Extensions.Logging;

namespace IdentityServer4Test

{

    public class Program

    {

        public static void Main(string[] args)

        {

            CreateWebHostBuilder(args).Build().Run();

        }

        public static IWebHostBuilder CreateWebHostBuilder(string[] args) =>

            WebHost.CreateDefaultBuilder(args)

            .UseUrls("http://localhost:8596")

            .ConfigureAppConfiguration(conf =>

            {

                conf.AddJsonFile("ocelot.json", optional: false, reloadOnChange: true);

            })

           .UseStartup<Startup>();

    }

}
测试
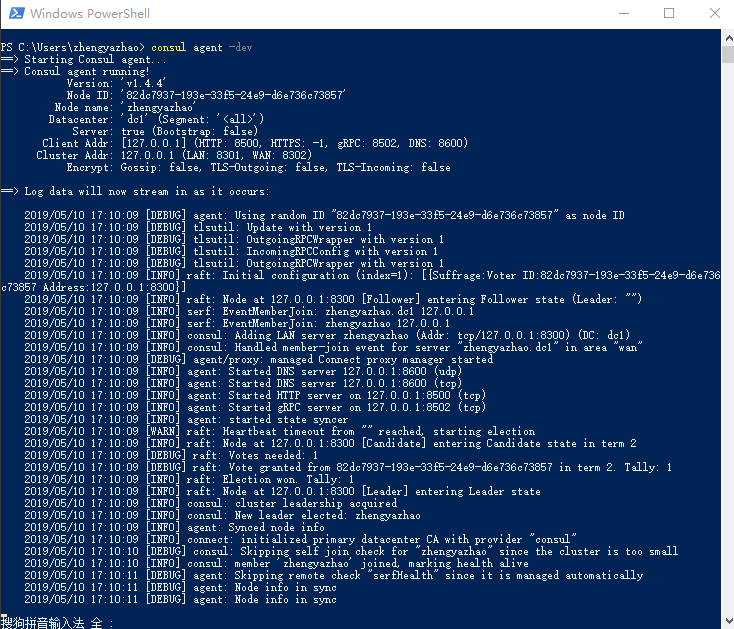
1.首先开启consul服务
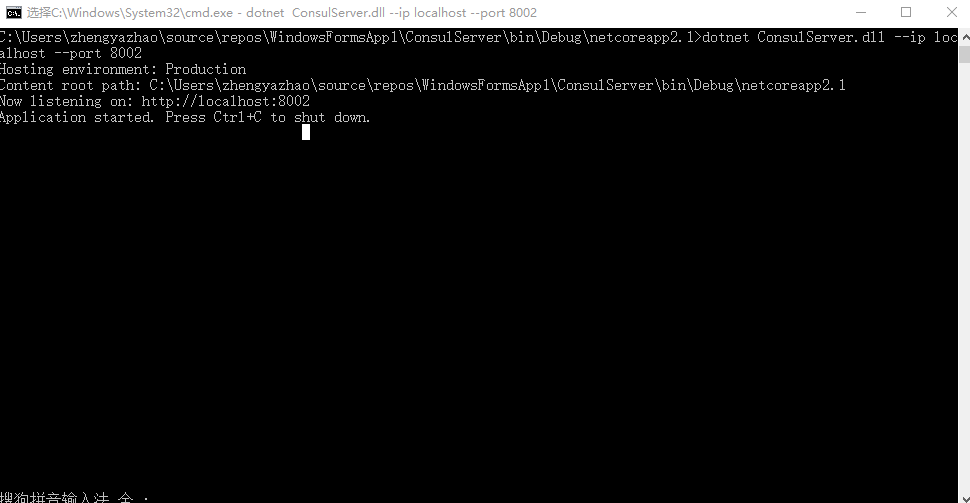
2.接下来把服务注册到consul当中,启动ConsulServer
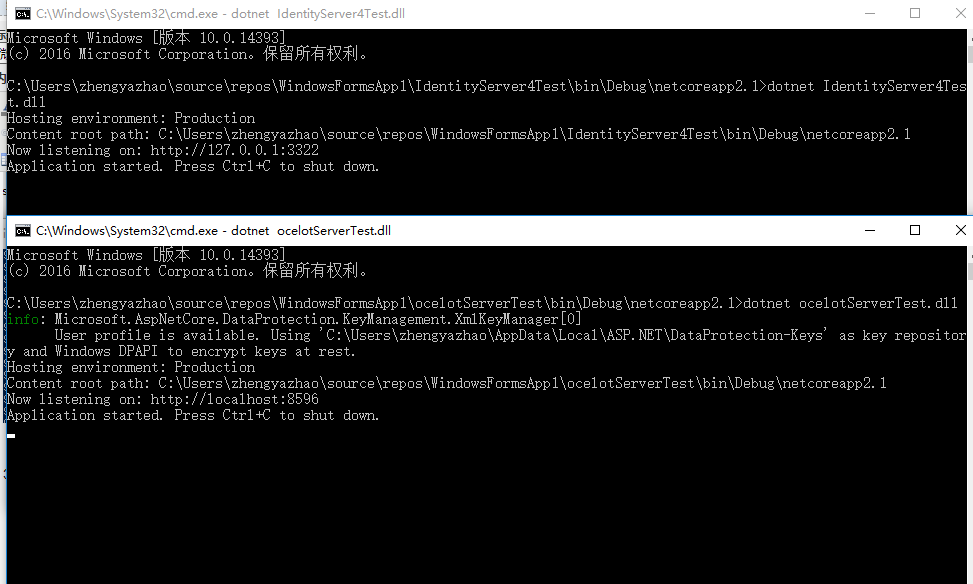
3.启动IdentityServer4Test和ocelotServerTest服务
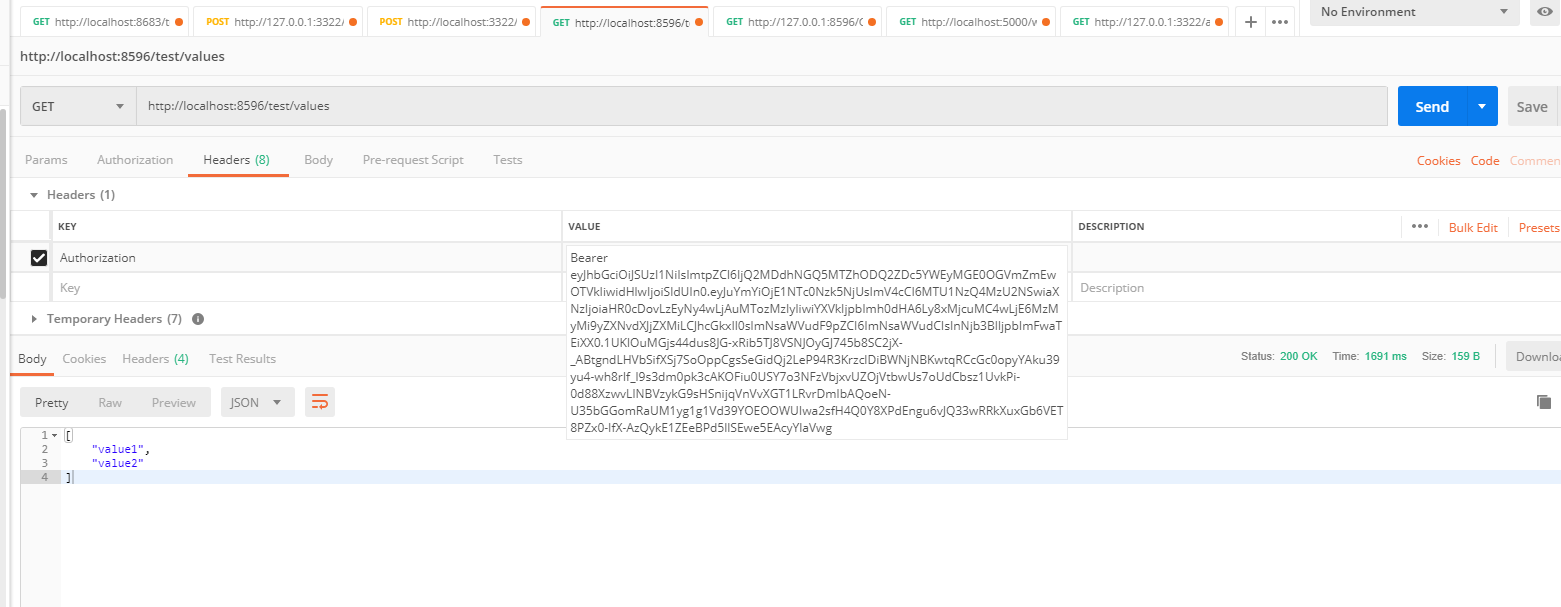
4.通过postMan获取token(正式开发中不会如此使用)

5.根据获取的token去请求Consulserver当中的数据,可正常返回数据
微服务(入门学习五):identityServer4+ocelot+consul实现简单客户端模式的更多相关文章
- .Net Core微服务入门全纪录(五)——Ocelot-API网关(下)
前言 上一篇[.Net Core微服务入门全纪录(四)--Ocelot-API网关(上)]已经完成了Ocelot网关的基本搭建,实现了服务入口的统一.当然,这只是API网关的一个最基本功能,它的进阶功 ...
- .Net Core微服务入门全纪录(完结)——Ocelot与Swagger
Tips:本篇已加入系列文章阅读目录,可点击查看更多相关文章. 前言 上一篇[.Net Core微服务入门全纪录(八)--Docker Compose与容器网络]完成了docker-compose.y ...
- .NET Core微服务架构学习与实践系列文章索引目录
一.为啥要总结和收集这个系列? 今年从原来的Team里面被抽出来加入了新的Team,开始做Java微服务的开发工作,接触了Spring Boot, Spring Cloud等技术栈,对微服务这种架构有 ...
- .Net Core微服务入门全纪录(八)——Docker Compose与容器网络
Tips:本篇已加入系列文章阅读目录,可点击查看更多相关文章. 前言 上一篇[.Net Core微服务入门全纪录(七)--IdentityServer4-授权认证]中使用IdentityServer4 ...
- .Net Core微服务入门全纪录(六)——EventBus-事件总线
前言 上一篇[.Net Core微服务入门全纪录(五)--Ocelot-API网关(下)]中已经完成了Ocelot + Consul的搭建,这一篇简单说一下EventBus. EventBus-事件总 ...
- .Net Core微服务入门全纪录(七)——IdentityServer4-授权认证
前言 上一篇[.Net Core微服务入门全纪录(六)--EventBus-事件总线]中使用CAP完成了一个简单的Eventbus,实现了服务之间的解耦和异步调用,并且做到数据的最终一致性.这一篇将使 ...
- .Net Core微服务入门全纪录(四)——Ocelot-API网关(上)
前言 上一篇[.Net Core微服务入门全纪录(三)--Consul-服务注册与发现(下)]已经使用Consul完成了服务的注册与发现,实际中光有服务注册与发现往往是不够的,我们需要一个统一的入口来 ...
- 微服务入门三:SpringCloud Alibaba
一.什么是SpringCloud Alibaba 1.简介 1)简介 阿里云未分布式应用开发提供了一站式解决方案.它包含了开发分布式应用程序所需的所有组件,使您可以轻松地使用springcloud开发 ...
- 微服务实践(五):微服务的事件驱动数据管理 - DockOne.io
原文:微服务实践(五):微服务的事件驱动数据管理 - DockOne.io [编者的话]本文是使用微服务创建应用系列的第五篇文章.第一篇文章介绍了微服务架构模式,并且讨论了使用微服务的优缺点:第二和第 ...
随机推荐
- Oracle merge into的优势
简介 Oracle merge into命令,顾名思义就是“有则更新,无则插入”,这个也是merge into 命令的核心思想,在实际开发过程中,我们会经常遇到这种通过两表互相关联匹配更新其中一个表的 ...
- 松软科技web课堂:SQLServer之UCASE() 函数
UCASE() 函数 UCASE 函数把字段的值转换为大写. SQL UCASE() 语法 SELECT UCASE(column_name) FROM table_name SQL UCASE() ...
- canvas之事件交互效果isPointPath
isPointInPath() 用来检测某个点是否在当前路径中,常用来做点击交互等. 需要注意的是,每次执行一次beginPath方法,检测路径就变成这次beginPath之后绘制的路径,原来的路径不 ...
- 【React Native】react-native之集成支付宝支付、微信支付
一.在使用支付宝支付.微信支付之前导入桥接好的头文件 github地址:https://github.com/xujianfu/react-native-pay 二.集成支付宝支付流程 RN支付宝需要 ...
- MySQL数据库:基本操作及增删改查语句
基本语法&&操作语句 create(创建) alter(更新) drop(删除) 一次性删除一个表中所有的数据 包括日志 truncate table 表名; 选中或者使用该数据库 说 ...
- CentOS7 忘记Root密码解决方法
1- 在启动grub菜单,选择编辑选项启动 2 - 按键盘e键,来进入编辑界面 3 - 找到Linux 16的那一行,将ro改为rw init=/sysroot/bin/sh 4 - 现在 ...
- Python踩坑系列之安装pycrypto报错:“Microsoft Visual C++14.0 is required”问题。
由于要使用Python3实现des3加密要使用pycrypto模块,所以使用pip install pycrypto 来安装,然后就常规性掉坑.安装报错“Microsoft Visual C++14. ...
- crossover mac如何使用?crossover mac使用教程
CrossOver Mac 破解版可以在 Mac 上运行成千上万的 Windows 程序,从办公软件.实用工具.游戏到设计软件.CrossOver 19 破解版可以让 Windows 程序和 Mac ...
- qt用于图片显示的窗口
用于图片显示的窗口 国产化
- poj 1979 Red and Black 题解《挑战程序设计竞赛》
地址 http://poj.org/problem?id=1979 Description There is a rectangular room, covered with square tiles ...