vue+webpack+element-ui项目打包优化速度与app.js、vendor.js打包后文件过大
---恢复内容开始---
从开通博客到现在也没写什么东西,最近几天一直在研究vue+webpack+element-ui项目打包速度优化,想把这几天的成果记录下来,可能对前端牛人来说我这技术比较菜,但还是希望给有需要的朋友提供一下方便。
一开始项目部署到线上后第一次访问首页的时间是7、8秒的样子,页面加载太慢了自己都接受不了何况用户。
主要是从一下几步来优化的:
1、vue路由的加载方式
import Home from '@/components/Index'
改为
const Index = resolve => require(['@/components/Index'], resolve)
上面那种普通的加载方式的缺点是把所有的路由打包在一个js文件里面页面多的话这个文件会非常大加载的很慢。
下面这种方式是按需加载在访问的时候只加载相关的路由,又被叫做(懒加载)
2、第三方依赖包的引入
main.js
import Vue from 'vue'

import router from './router'

import Element from 'element-ui'

import echarts from 'echarts'

Vue.use(Element)

Vue.prototype.echarts = echarts

new Vue({

  el: '#app',

  store,

  router,

  components: {App},

  template: '<App/>'

})
这样引入依赖包会把所依赖的第三方包全都打包起来从而造成打包后的 app.js和vendor.js文件过大加载的很慢,把这种方式改为CDN引入。
首先把main.js种引入的第三方包注释掉,vue不用注释
import Vue from 'vue'

//import router from './router'

//import Element from 'element-ui'

//import echarts from 'echarts'

//Vue.use(Element)

//Vue.prototype.echarts = echarts

new Vue({

  el: '#app',

  store,

  router,

  components: {App},

  template: '<App/>'

})
在webpack.base.conf.js中增加以下设置,这样就不会把依赖包打包到自己的项目里面了
module.exports = {

  externals: {

    'vue': 'Vue',

    'element-ui': 'ElementUI',

    'echarts': 'echarts',

  }

}
然后在index.html中用CDN的方式引入
<!DOCTYPE html>

<html>

<head>

  <meta charset="utf-8">

  <meta name="viewport" content="width=device-width,initial-scale=1.0">

  <link rel="stylesheet" href="https://cdn.bootcss.com/element-ui/2.11.0/theme-chalk/index.css">

  <title></title>

</head>

<body>

<div id="app"></div>

  <script src="https://cdn.jsdelivr.net/npm/vue@2.5.2/dist/vue.js"></script>

  <script src="https://cdn.bootcss.com/vue-router/3.0.1/vue-router.min.js"></script>

  <script src="https://cdn.bootcss.com/element-ui/2.11.0/index.js"></script>

  <script src="https://cdn.bootcss.com/echarts/4.2.1/echarts.min.js"></script>

</body>

</html>
这样在打包的时候就不会把这些依赖包打包到里面,vendor.js有之前的2M多变成了200多K。
3、打包生成压缩包,同时不生成.amp文件
先安装 npm install --save-dev compression-webpack-plugin
找到config/index.js 修改productionSourceMap: false,默认是true修改为false这样打包的时候就不会生成.map文件
build: {

    // Template for index.html

    index: path.resolve(__dirname, '../dist/index.html'),

    // Paths

    assetsRoot: path.resolve(__dirname, '../dist'),

    assetsSubDirectory: 'static',

    assetsPublicPath: '/',

    /**

     * Source Maps

     */

    productionSourceMap: false,

    // https://webpack.js.org/configuration/devtool/#production

    devtool: '#source-map',

    // Gzip off by default as many popular static hosts such as

    // Surge or Netlify already gzip all static assets for you.

    // Before setting to `true`, make sure to:

    // npm install --save-dev compression-webpack-plugin

    productionGzip: true,

    productionGzipExtensions: ['js', 'css'],

    // Run the build command with an extra argument to

    // View the bundle analyzer report after build finishes:

    // `npm run build --report`

    // Set to `true` or `false` to always turn it on or off

    bundleAnalyzerReport: process.env.npm_config_report

  }

}
打包生成压缩包修改 productionGzip:true 默认是false 修改为true,修改完成后设置webpack.prod.conf.js, 这个设置在vue-lic 2.0以上版本中默认就已经设置好了,所以就不用
手动设置。
if (config.build.productionGzip) {

  const CompressionWebpackPlugin = require('compression-webpack-plugin')

  webpackConfig.plugins.push(

    new CompressionWebpackPlugin({

      asset: '[path].gz[query]',

      algorithm: 'gzip',

      test: new RegExp(

        '\\.(' +

        config.build.productionGzipExtensions.join('|') +

        ')$'

      ),

      threshold: 10240,

      minRatio: 0.8

    })

  )

}
npm run build 有可能会报错
ValidationError: Compression Plugin Invalid Options

options should NOT have additional properties
这个错误是compression-webpack-plugin的版本的问题,我安装的版本是 @1.0.0 可以成功打包
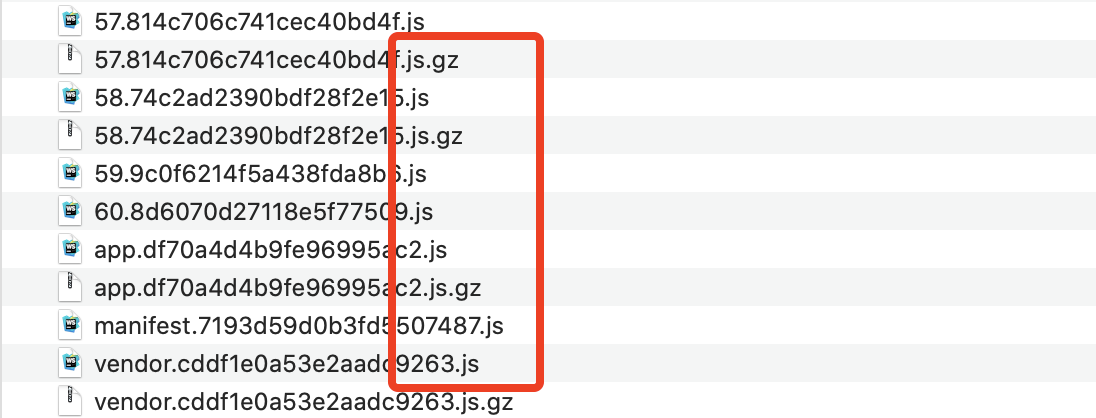
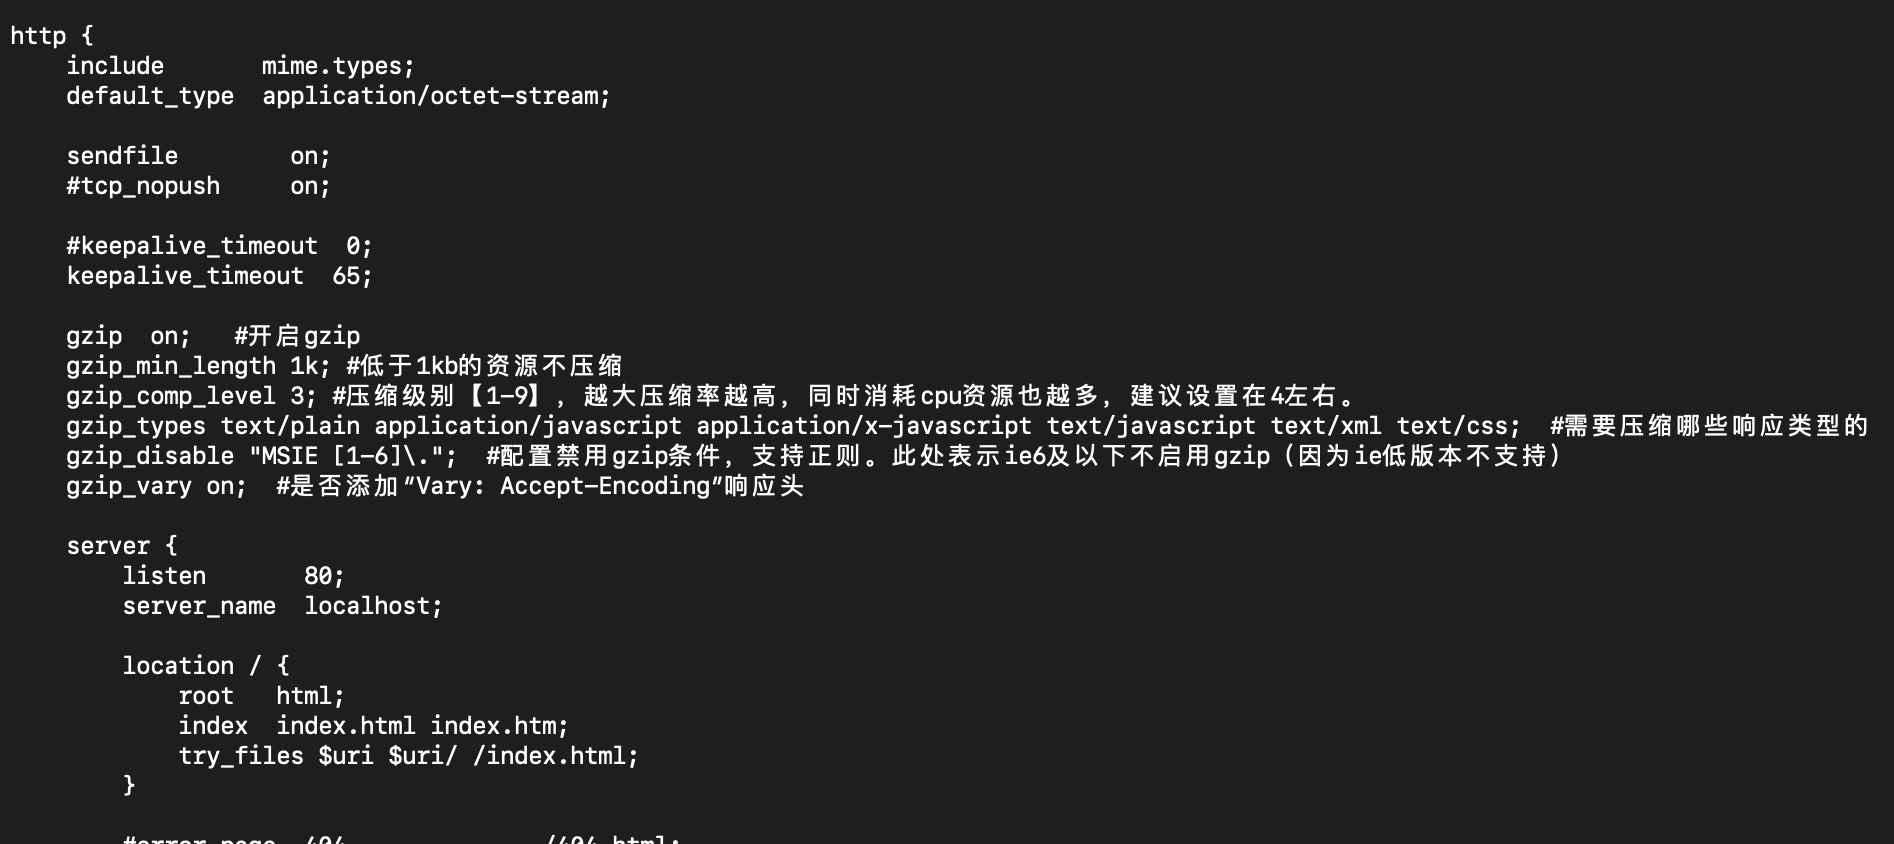
打包生成压缩包部署到线上需要后台的配合设置 nginx 开启:gzip
设置完以上及步骤后现在的速度保持在1s左右,打包后的js文件也变得很小了。

以上是我对项目速度优化的全部步骤希望对有需要的小伙伴们有所帮助!!
---恢复内容结束---
从开通博客到现在也没写什么东西,最近几天一直在研究vue+webpack+element-ui项目打包速度优化,想把这几天的成果记录下来,可能对前端牛人来说我这技术比较菜,但还是希望给有需要的朋友提供一下方便。
一开始项目部署到线上后第一次访问首页的时间是7、8秒的样子,页面加载太慢了自己都接受不了何况用户。
主要是从一下几步来优化的:
1、vue路由的加载方式
import Home from '@/components/Index'
改为
const Index = resolve => require(['@/components/Index'], resolve)
上面那种普通的加载方式的缺点是把所有的路由打包在一个js文件里面页面多的话这个文件会非常大加载的很慢。
下面这种方式是按需加载在访问的时候只加载相关的路由,又被叫做(懒加载)
2、第三方依赖包的引入
main.js
import Vue from 'vue'

import router from './router'

import Element from 'element-ui'

import echarts from 'echarts'

Vue.use(Element)

Vue.prototype.echarts = echarts

new Vue({

  el: '#app',

  store,

  router,

  components: {App},

  template: '<App/>'

})
这样引入依赖包会把所依赖的第三方包全都打包起来从而造成打包后的 app.js和vendor.js文件过大加载的很慢,把这种方式改为CDN引入。
首先把main.js种引入的第三方包注释掉,vue不用注释
import Vue from 'vue'

//import router from './router'

//import Element from 'element-ui'

//import echarts from 'echarts'

//Vue.use(Element)

//Vue.prototype.echarts = echarts

new Vue({

  el: '#app',

  store,

  router,

  components: {App},

  template: '<App/>'

})
在index.html中用CDN的方式引入
<!DOCTYPE html>

<html>

<head>

  <meta charset="utf-8">

  <meta name="viewport" content="width=device-width,initial-scale=1.0">

  <link rel="stylesheet" href="https://cdn.bootcss.com/element-ui/2.11.0/theme-chalk/index.css">

  <title></title>

</head>

<body>

<div id="app"></div>

  <script src="https://cdn.jsdelivr.net/npm/vue@2.5.2/dist/vue.js"></script>

  <script src="https://cdn.bootcss.com/vue-router/3.0.1/vue-router.min.js"></script>

  <script src="https://cdn.bootcss.com/element-ui/2.11.0/index.js"></script>

  <script src="https://cdn.bootcss.com/echarts/4.2.1/echarts.min.js"></script>

</body>

</html>
这样在打包的时候就不会把这些依赖包打包到里面,vendor.js有之前的2M多变成了200多K。
3、打包生成压缩包,同时不生成.amp文件
先安装 npm install --save-dev compression-webpack-plugin
找到config/index.js 修改productionSourceMap: false,默认是true修改为false这样打包的时候就不会生成.map文件
build: {

    // Template for index.html

    index: path.resolve(__dirname, '../dist/index.html'),

    // Paths

    assetsRoot: path.resolve(__dirname, '../dist'),

    assetsSubDirectory: 'static',

    assetsPublicPath: '/',

    /**

     * Source Maps

     */

    productionSourceMap: false,

    // https://webpack.js.org/configuration/devtool/#production

    devtool: '#source-map',

    // Gzip off by default as many popular static hosts such as

    // Surge or Netlify already gzip all static assets for you.

    // Before setting to `true`, make sure to:

    // npm install --save-dev compression-webpack-plugin

    productionGzip: true,

    productionGzipExtensions: ['js', 'css'],

    // Run the build command with an extra argument to

    // View the bundle analyzer report after build finishes:

    // `npm run build --report`

    // Set to `true` or `false` to always turn it on or off

    bundleAnalyzerReport: process.env.npm_config_report

  }

}
打包生成压缩包修改 productionGzip:true 默认是false 修改为true,修改完成后设置webpack.prod.conf.js, 这个设置在vue-lic 2.0以上版本中默认就已经设置好了,所以就不用
手动设置。
if (config.build.productionGzip) {

  const CompressionWebpackPlugin = require('compression-webpack-plugin')

  webpackConfig.plugins.push(

    new CompressionWebpackPlugin({

      asset: '[path].gz[query]',

      algorithm: 'gzip',

      test: new RegExp(

        '\\.(' +

        config.build.productionGzipExtensions.join('|') +

        ')$'

      ),

      threshold: 10240,

      minRatio: 0.8

    })

  )

}
npm run build 有可能会报错
ValidationError: Compression Plugin Invalid Options

options should NOT have additional properties
这个错误是compression-webpack-plugin的版本的问题,我安装的版本是 @1.0.0 可以成功打包
打包生成压缩包部署到线上需要后台的配合设置 nginx 开启:gzip
设置完以上及步骤后现在的速度保持在1s左右,打包后的js文件也变得很小了。
以上是我对项目速度优化的全部步骤希望对有需要的小伙伴们有所帮助!!
vue+webpack+element-ui项目打包优化速度与app.js、vendor.js打包后文件过大的更多相关文章
- Vue + Element UI项目初始化
1.安装相关组件 1.1安装Node 检查本地是否安装node node -v 如果没有安装,从Node官网下载 1.2安装npm npm -v 如果没有安装:使用该指令安装: npm install ...
- vue+element ui项目总结点(一)select、Cascader级联选择器、encodeURI、decodeURI转码解码、mockjs用法、路由懒加载三种方式
不多说上代码: <template> <div class="hello"> <h1>{{ msg }}</h1> <p> ...
- vue+element ui项目总结点(二)table合计栏目,按照起始年份--截止年份 插入数据并向后追加数据以最后一条年份+1
1.oninput 事件在用户输入时触发; <template> <div class="test_box"> <p>hell,你好</p ...
- webpack 打包优化的四种方法(多进程打包,多进程压缩,资源 CDN,动态 polyfill)
如今,webpack 毫无疑问是前端构建领域里最耀眼的一颗星,无论你前端走哪条路线,都需要有很强的webpack 知识.webpack 的基本用法这里就不展开讲了.主要探讨一下如何提高 webpack ...
- mac下搭建基于vue-cli 3.0的Element UI 项目
1.安装yarn管理工具(包含node.js); 2.安装全局vue-cli全家桶: yarn global add @vue/cli 3.创建.测试一个vue-cli项目: vue create a ...
- Vue框架Element UI教程-axios请求数据
Element UI手册:https://cloud.tencent.com/developer/doc/1270 中文文档:http://element-cn.eleme.io/#/zh-CN gi ...
- vue与element ui的el-checkbox的坑
一,场景 通过使用checkbox,实现如图的场景, 点击某个tag,实现选中和非选中状态. 二, 官网的例子 通过切换checked值为true或者false来实现,一个checkbox的状态切换 ...
- vue开源Element UI表单设计及代码生成器
在日常的开发工作中,表单开发是较为繁琐且重复的.本文介绍一个我自己写的,提高开发效率的小工具. 1 可视化设计器 设计器基于Element UI ,可通过点击或拖拽的方式设计基本表单, 设计器生成的代 ...
- 第五十三篇:Vue安装Element ui
好家伙,之前写的一篇过时了,用不了了,更新一波 (已新建一个vue项目) 1. 在项目目录下执行:npm i element-ui -S 2. 在main.js中写入 import ElementUI ...
随机推荐
- 基于WeChat的消息存储备份、远程控制、小功能项目开源分享计划
WeChat+ 关于该项目 起源 该项目的起因是一个比较程(老)序(油)猿(条)的理由,有一天我发现我下班时间比较早,有点尴尬,但是又不想没事干还坐在公司,那么如何解决我的问题呢,初步想法是远程控制电 ...
- 使用Thymeleaf给前端绑定值
1.pom依赖 <!-- thymeleaf --> <dependency> <groupId>org.springframework.boot</grou ...
- CentOS7 搭建php环境
1,先安装apache: yum install httpd 配置ServerName,进入httpd.conf文件: vi /etc/httpd/conf/httpd.conf 将#ServerNa ...
- TensorFlow基本计算单元与基本操作
在学习深度学习等知识之前,首先得了解著名的框架TensorFlow里面的一些基础知识,下面首先看一下这个框架的一些基本用法. import tensorflow as tf a = 3 # Pytho ...
- MongoDB安装过程中出现service MongoDB failed to start,verify that you have sufficient privileges to start...
win10系统下,安装MongoDB 64位, service MongoDB failed to start,verify that you have sufficient privileges t ...
- 02·nginx进阶·服务优化配置管理
企业场景常用的Nginx http功能模块汇总 ngx_ http_ core_ module 包括-些核心的http 参数配置,对应Nginx的配置为HTTP区块部分 ngx_ http _acce ...
- 重学Golang系列(一): 深入理解 interface和reflect
前言 interface(即接口),是Go语言中一个重要的概念和知识点,而功能强大的reflect正是基于interface.本文即是对Go语言中的interface和reflect基础概念和用法的一 ...
- javascript随机点名--案例
主要知识点涉及if选择结构判断语句.数组的定义.定时器.清除定时器.日期对象的使用. 1.HTML结构 <!DOCTYPE html> <html> <head> ...
- Dubbo和Zookerper的关系
1.Dubbo的作用 Dubbo是管理中间层的工具,在业务层到数据仓库间有非常多服务的接入和服务提供者需要调度,dubbo提供一个框架解决这个问题.Dubbo基于RPC(Remote Procedur ...
- Label的作用是什么,是怎么用的?
label标签来定义表单控制间的关系,当用户选择该标签时,浏览器会自动将焦点转到标签相关的表单控件上. 如: <form> <label for="male"&g ...