
2023-03-21:音视频解混合(demuxer)为MP3和H264,用go语言编写。
2023-03-21:音视频解混合(demuxer)为MP3和H264,用go语言编写。
答案2023-03-21:
步骤1:安装github.com/moonfdd/ffmpeg-go
go get -u github.com/moonfdd/ffmpeg-go
步骤2:导入所需的库
接下来,我们需要导入所需的库。这些库包括fmt、os、exec以及FFmpeg库中的libavcodec、libavdevice、libavformat和libavutil。在本教程中,我们还将使用moonfdd/ffmpeg-go库,该库提供了一些便捷的函数和类型定义,可帮助我们更轻松地使用FFmpeg库。
package main

import (

"fmt"

"os"

"os/exec"

"github.com/moonfdd/ffmpeg-go/ffcommon"

"github.com/moonfdd/ffmpeg-go/libavcodec"

"github.com/moonfdd/ffmpeg-go/libavdevice"

"github.com/moonfdd/ffmpeg-go/libavformat"

"github.com/moonfdd/ffmpeg-go/libavutil"

)
步骤3:设置FFmpeg库路径
在使用FFmpeg库之前,我们需要设置FFmpeg库的路径。您可以通过设置环境变量来实现这一点,也可以直接调用FFmpeg库的SetXxxPath函数进行设置。
// 设置环境变量

os.Setenv("Path", os.Getenv("Path")+";./lib")

// 设置FFmpeg库路径

ffcommon.SetAvutilPath("./lib/avutil-56.dll")

ffcommon.SetAvcodecPath("./lib/avcodec-58.dll")

ffcommon.SetAvdevicePath("./lib/avdevice-58.dll")

ffcommon.SetAvfilterPath("./lib/avfilter-56.dll")

ffcommon.SetAvformatPath("./lib/avformat-58.dll")

ffcommon.SetAvpostprocPath("./lib/postproc-55.dll")

ffcommon.SetAvswresamplePath("./lib/swresample-3.dll")

ffcommon.SetAvswscalePath("./lib/swscale-5.dll")
步骤4:定义必要的变量
在使用FFmpeg库之前,我们需要定义一些必要的变量。这些变量包括输入文件名、输出音频文件名、输出视频文件名、输入格式上下文、输出音频格式上下文、输出视频格式上下文、AVPacket等。在本教程中,我们还定义了用于保存视频索引和音频索引的变量。
var ifmtCtx, ofmtCtxAudio, ofmtCtxVideo *libavformat.AVFormatContext

var packet libavcodec.AVPacket

var videoIndex ffcommon.FInt = -1

var audioIndex ffcommon.FInt = -1

var ret ffcommon.FInt = 0

inFileName := "./resources/big_buck_bunny.mp4"

outFilenameAudio := "./out/a22.aac"

outFilenameVideo := "./out/a22.h264"
步骤5:注册设备
在使用FFmpeg库之前,我们需要先注册设备。您可以使用libavdevice.AvdeviceRegisterAll()函数来注册所有支持的设备。
libavdevice.AvdeviceRegisterAll()
步骤6:打开输入流
在从音视频文件中分离出音频和视频之前,我们需要打开音视频文件的输入流。您可以使用libavformat.AvformatOpenInput函数来打开输入流,并使用ifmtCtx参数保存输入流的上下文。
if libavformat.AvformatOpenInput(&ifmtCtx, inFileName, nil, nil) < 0 {

fmt.Printf("Could not open input file '%s'\n", inFileName)

return

}

defer ifmtCtx.AvformatCloseInput()
步骤7:读取媒体信息
打开输入流后,我们需要读取音视频文件的媒体信息。您可以使用libavformat.AvformatFindStreamInfo函数来读取媒体信息,并使用libavutil.AvDumpFormat函数将媒体信息输出到控制台。
if ifmtCtx.AvformatFindStreamInfo(nil) < 0 {

fmt.Println("Could not find stream information")

return

}

libavutil.AvDumpFormat(ifmtCtx, 0, inFileName, 0)
步骤8:查找音频和视频流
在读取媒体信息后,我们需要查找音频和视频流。您可以使用libavformat.AvformatFindStreamInfo函数来查找音频和视频流,并使用videoIndex和audioIndex变量保存视频流和音频流的索引。
for i := 0; i < int(ifmtCtx.NbStreams()); i++ {

codecParams := ifmtCtx.Streams()[i].CodecParameters()

codecType := codecParams.AvCodecGetType()

switch codecType {

case libavutil.AVMEDIA_TYPE_VIDEO:

    if videoIndex == -1 {

        videoIndex = ffcommon.FInt(i)

    }

case libavutil.AVMEDIA_TYPE_AUDIO:

    if audioIndex == -1 {

        audioIndex = ffcommon.FInt(i)

    }

}

}

if videoIndex == -1 || audioIndex == -1 {

    fmt.Println("Could not find video or audio stream")

    return

}
步骤9:打开输出流
在查找音频和视频流后,我们需要打开输出流,以便将分离出的音频和视频写入文件。您可以使用libavformat.AvformatAllocOutputContext2函数创建输出格式上下文,并使用ofmtCtxAudio和ofmtCtxVideo变量保存输出格式上下文。
// 打开输出音频流

if ofmtCtxAudio = libavformat.AvformatAllocOutputContext2(nil, nil, "", outFilenameAudio); ofmtCtxAudio == nil {

    fmt.Printf("could not create output context for '%s'\n", outFilenameAudio)

    return

}

// 打开输出视频流

if ofmtCtxVideo = libavformat.AvformatAllocOutputContext2(nil, nil, "h264", outFilenameVideo); ofmtCtxVideo == nil {

    fmt.Printf("could not create output context for '%s'\n", outFilenameVideo)

    return

}
步骤10:写入文件头
打开输出流后,我们需要写入文件头。您可以使用libavformat.AvformatWriteHeader函数来写入文件头。
// 写入音频文件头

if (ofmtCtxAudio.Oformat().Flags() & libavformat.AVFMT_NOFILE) == 0 {

    if ret = ofmtCtxAudio.AvioOpen(nil, libavformat.AVIO_FLAG_WRITE); ret < 0 {

        fmt.Printf("could not open output file '%s'\n", outFilenameAudio)

        return

    }

    defer ofmtCtxAudio.AvioClose()

}

if ret = ofmtCtxAudio.AvformatWriteHeader(nil); ret < 0 {

    fmt.Println("Could not write output file header")

    return

}

// 写入视频文件头

if (ofmtCtxVideo.Oformat().Flags() & libavformat.AVFMT_NOFILE) == 0 {

    if ret = ofmtCtxVideo.AvioOpen(nil, libavformat.AVIO_FLAG_WRITE); ret < 0 {

        fmt.Printf("could not open output file '%s'\n", outFilenameVideo)

        return

    }

    defer ofmtCtxVideo.AvioClose()

}

if ret = ofmtCtxVideo.AvformatWriteHeader(nil); ret < 0 {

    fmt.Println("Could not write output file header")

    return

}
步骤11:分离音频和视频
写入文件头后,我们可以开始分离音频和视频了。您可以使用libavformat.AvReadFrame函数读取音视频帧,并根据音频或视频流的索引将音频帧写入音频文件,将视频帧写入视频文件。
for {

if ret = ifmtCtx.AvReadFrame(&packet); ret <0 {

break

}

defer packet.AvPacketUnref()

if packet.StreamIndex() == audioIndex {

    // 写入音频流

    if ret = ofmtCtxAudio.AvInterleavedWriteFrame(&packet); ret < 0 {

        fmt.Printf("error while writing audio frame: %v\n", ret)

        return

    }

} else if packet.StreamIndex() == videoIndex {

    // 写入视频流

    if ret = ofmtCtxVideo.AvInterleavedWriteFrame(&packet); ret < 0 {

        fmt.Printf("error while writing video frame: %v\n", ret)

        return

    }

}

}
步骤12:写入文件尾
完成音视频分离后,我们需要写入文件尾。您可以使用libavformat.AvWriteTrailer函数来写入文件尾。
// 写入音频文件尾

if ret = ofmtCtxAudio.AvWriteTrailer(); ret < 0 {

    fmt.Println("Could not write output file trailer")

    return

}

// 写入视频文件尾

if ret = ofmtCtxVideo.AvWriteTrailer(); ret < 0 {

    fmt.Println("Could not write output file trailer")

    return

}
完整代码
// https://feater.top/ffmpeg/ffmpeg-demuxer-video-to-mp3-and-h264

package main

import (

	"fmt"

	"os"

	"os/exec"

	"github.com/moonfdd/ffmpeg-go/ffcommon"

	"github.com/moonfdd/ffmpeg-go/libavcodec"

	"github.com/moonfdd/ffmpeg-go/libavdevice"

	"github.com/moonfdd/ffmpeg-go/libavformat"

	"github.com/moonfdd/ffmpeg-go/libavutil"

)

func open_codec_context(streamIndex *ffcommon.FInt, ofmtCtx **libavformat.AVFormatContext, ifmtCtx *libavformat.AVFormatContext, type0 libavutil.AVMediaType) ffcommon.FInt {

	var outStream, inStream *libavformat.AVStream

	// int ret = -1, index = -1;

	var ret ffcommon.FInt = -1

	var index ffcommon.FInt = -1

	index = ifmtCtx.AvFindBestStream(type0, -1, -1, nil, 0)

	if index < 0 {

		fmt.Printf("can't find %s stream in input file\n", libavutil.AvGetMediaTypeString(type0))

		return ret

	}

	inStream = ifmtCtx.GetStream(uint32(index))

	outStream = (*ofmtCtx).AvformatNewStream(nil)

	if outStream == nil {

		fmt.Printf("failed to allocate output stream\n")

		return ret

	}

	ret = libavcodec.AvcodecParametersCopy(outStream.Codecpar, inStream.Codecpar)

	if ret < 0 {

		fmt.Printf("failed to copy codec parametes\n")

		return ret

	}

	outStream.Codecpar.CodecTag = 0

	*streamIndex = index

	return 0

}

func main() {

	os.Setenv("Path", os.Getenv("Path")+";./lib")

	ffcommon.SetAvutilPath("./lib/avutil-56.dll")

	ffcommon.SetAvcodecPath("./lib/avcodec-58.dll")

	ffcommon.SetAvdevicePath("./lib/avdevice-58.dll")

	ffcommon.SetAvfilterPath("./lib/avfilter-56.dll")

	ffcommon.SetAvformatPath("./lib/avformat-58.dll")

	ffcommon.SetAvpostprocPath("./lib/postproc-55.dll")

	ffcommon.SetAvswresamplePath("./lib/swresample-3.dll")

	ffcommon.SetAvswscalePath("./lib/swscale-5.dll")

	genDir := "./out"

	_, err := os.Stat(genDir)

	if err != nil {

		if os.IsNotExist(err) {

			os.Mkdir(genDir, 0777) //  Everyone can read write and execute

		}

	}

	inFileName := "./resources/big_buck_bunny.mp4"

	outFilenameAudio := "./out/a22.aac"

	outFilenameVideo := "./out/a22.h264"

	var ifmtCtx, ofmtCtxAudio, ofmtCtxVideo *libavformat.AVFormatContext

	var packet libavcodec.AVPacket

	var videoIndex ffcommon.FInt = -1

	var audioIndex ffcommon.FInt = -1

	var ret ffcommon.FInt = 0

	//注册设备

	libavdevice.AvdeviceRegisterAll()

	for {

		//打开输入流

		if libavformat.AvformatOpenInput(&ifmtCtx, inFileName, nil, nil) < 0 {

			fmt.Printf("Cannot open input file.\n")

			break

		}

		//获取流信息

		if ifmtCtx.AvformatFindStreamInfo(nil) < 0 {

			fmt.Printf("Cannot find stream info in input file.\n")

			break

		}

		//创建输出上下文:视频

		libavformat.AvformatAllocOutputContext2(&ofmtCtxVideo, nil, "", outFilenameVideo)

		if ofmtCtxVideo == nil {

			fmt.Printf("can't create video output context")

			break

		}

		//创建输出上下文:音频

		libavformat.AvformatAllocOutputContext2(&ofmtCtxAudio, nil, "", outFilenameAudio)

		if ofmtCtxAudio == nil {

			fmt.Printf("can't create audio output context")

			break

		}

		ret = open_codec_context(&videoIndex, &ofmtCtxVideo, ifmtCtx, libavutil.AVMEDIA_TYPE_VIDEO)

		if ret < 0 {

			fmt.Printf("can't decode video context\n")

			break

		}

		ret = open_codec_context(&audioIndex, &ofmtCtxAudio, ifmtCtx, libavutil.AVMEDIA_TYPE_AUDIO)

		if ret < 0 {

			fmt.Printf("can't decode video context\n")

			break

		}

		//Dump Format------------------

		fmt.Printf("\n==============Input Video=============\n")

		ifmtCtx.AvDumpFormat(0, inFileName, 0)

		fmt.Printf("\n==============Output Video============\n")

		ofmtCtxVideo.AvDumpFormat(0, outFilenameVideo, 1)

		fmt.Printf("\n==============Output Audio============\n")

		ofmtCtxAudio.AvDumpFormat(0, outFilenameAudio, 1)

		fmt.Printf("\n======================================\n")

		//打开输出文件:视频

		if ofmtCtxVideo.Oformat.Flags&libavformat.AVFMT_NOFILE == 0 {

			if libavformat.AvioOpen(&ofmtCtxVideo.Pb, outFilenameVideo, libavformat.AVIO_FLAG_WRITE) < 0 {

				fmt.Printf("can't open output file: %s\n", outFilenameVideo)

				break

			}

		}

		//打开输出文件:音频

		if ofmtCtxAudio.Oformat.Flags&libavformat.AVFMT_NOFILE == 0 {

			if libavformat.AvioOpen(&ofmtCtxAudio.Pb, outFilenameAudio, libavformat.AVIO_FLAG_WRITE) < 0 {

				fmt.Printf("can't open output file: %s\n", outFilenameVideo)

				break

			}

		}

		//写文件头

		if ofmtCtxVideo.AvformatWriteHeader(nil) < 0 {

			fmt.Printf("Error occurred when opening video output file\n")

			break

		}

		if ofmtCtxAudio.AvformatWriteHeader(nil) < 0 {

			fmt.Printf("Error occurred when opening audio output file\n")

			break

		}

		for {

			var ofmtCtx *libavformat.AVFormatContext

			var inStream, outStream *libavformat.AVStream

			if ifmtCtx.AvReadFrame(&packet) < 0 {

				break

			}

			inStream = ifmtCtx.GetStream(packet.StreamIndex)

			if packet.StreamIndex == uint32(videoIndex) {

				outStream = ofmtCtxVideo.GetStream(0)

				ofmtCtx = ofmtCtxVideo

			} else if packet.StreamIndex == uint32(audioIndex) {

				outStream = ofmtCtxAudio.GetStream(0)

				ofmtCtx = ofmtCtxAudio

			} else {

				continue

			}

			//convert PTS/DTS

			packet.Pts = libavutil.AvRescaleQRnd(packet.Pts, inStream.TimeBase, outStream.TimeBase,

				libavutil.AV_ROUND_NEAR_INF|libavutil.AV_ROUND_PASS_MINMAX)

			packet.Dts = libavutil.AvRescaleQRnd(packet.Dts, inStream.TimeBase, outStream.TimeBase,

				libavutil.AV_ROUND_NEAR_INF|libavutil.AV_ROUND_PASS_MINMAX)

			packet.Duration = libavutil.AvRescaleQ(packet.Duration, inStream.TimeBase, outStream.TimeBase)

			packet.Pos = -1

			packet.StreamIndex = 0

			//write

			if ofmtCtx.AvInterleavedWriteFrame(&packet) < 0 {

				fmt.Printf("Error muxing packet\n")

				break

			}

			packet.AvPacketUnref()

		}

		//write file trailer

		ofmtCtxVideo.AvWriteTrailer()

		ofmtCtxAudio.AvWriteTrailer()

		break

	}

	libavformat.AvformatCloseInput(&ifmtCtx)

	if ofmtCtxVideo != nil && (ofmtCtxVideo.Oformat.Flags&libavformat.AVFMT_NOFILE) == 0 {

		ofmtCtxVideo.Pb.AvioClose()

	}

	if ofmtCtxAudio != nil && (ofmtCtxAudio.Oformat.Flags&libavformat.AVFMT_NOFILE) == 0 {

		ofmtCtxAudio.Pb.AvioClose()

	}

	ofmtCtxVideo.AvformatFreeContext()

	ofmtCtxAudio.AvformatFreeContext()

	fmt.Println("-----------------------------------------")

	go func() {

		_, err = exec.Command("./lib/ffplay.exe", outFilenameAudio).Output()

		if err != nil {

			fmt.Println("play err = ", err)

		}

	}()

	_, err = exec.Command("./lib/ffplay.exe", outFilenameVideo).Output()

	if err != nil {

		fmt.Println("play err = ", err)

	}

}
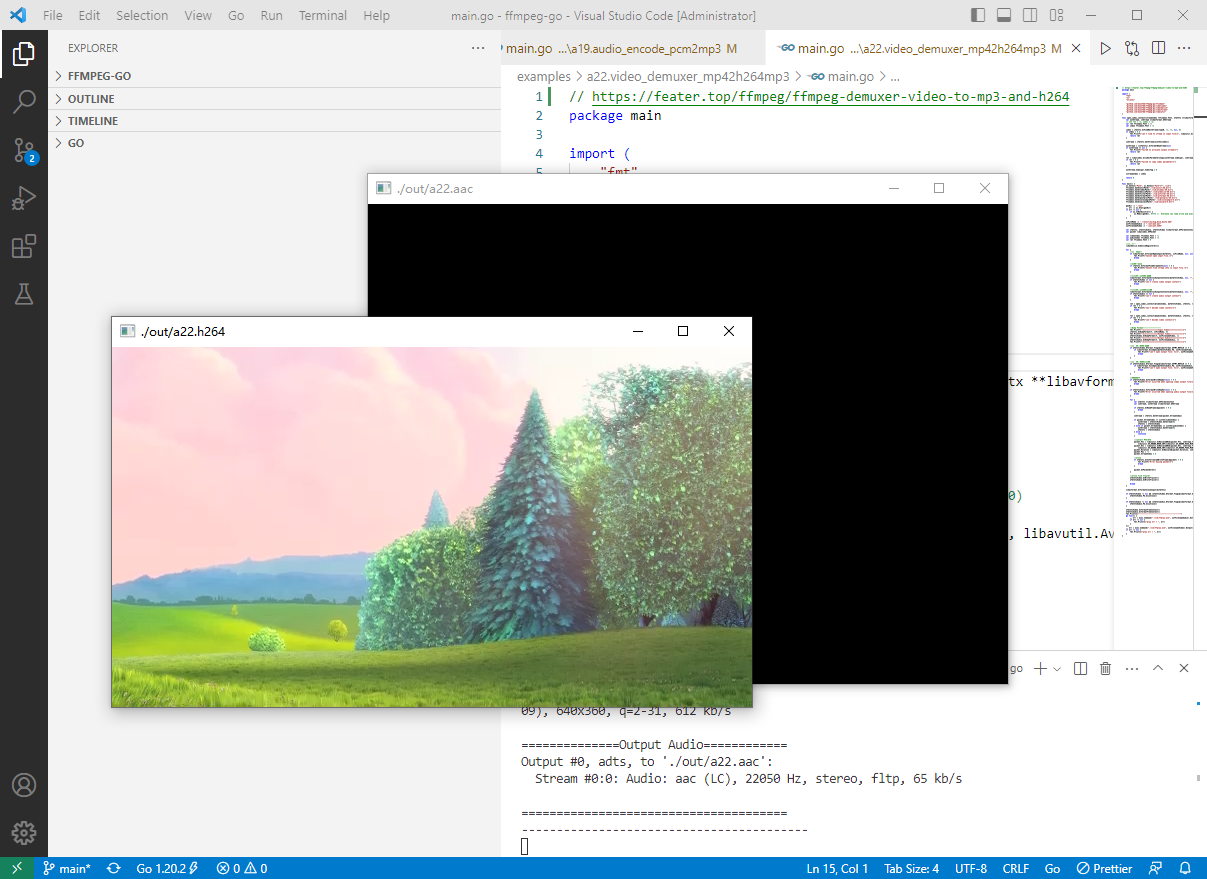
执行结果
执行命令:
go run ./examples/a22.video_demuxer_mp42h264mp3/main.go
2023-03-21:音视频解混合(demuxer)为MP3和H264,用go语言编写。的更多相关文章
- FFmpeg音视频解封装
一 . 解封装用到的函数和结构体 1.av_register_all() : open 一次就调用一次 2.avformat_network_init() : 网络模块初始化 3.avformat_o ...
- Android IOS WebRTC 音视频开发总结(七一)-- H265/H264有何不同
本文整理自自网络,非原创,喜欢相关文章请关注我们的微信公众号:blackerteam H.265 H.265是ITU-TVCEG继H.264之后所制定的新的视频编码标准.H.265标准围绕着现有的视频 ...
- Android硬编码——音频编码、视频编码及音视频混合
视频编解码对许多Android程序员来说都是Android中比较难的一个知识点.在Android 4.1以前,Android并没有提供硬编硬解的API,所以之前基本上都是采用FFMpeg来做视频软件编 ...
- WebRTC 音视频开发
WebRTC 音视频开发 webrtc Android IOS WebRTC 音视频开发总结(七八)-- 为什么WebRTC端到端监控很关键? 摘要: 本文主要介绍WebRTC端到端监控(我们翻译 ...
- 转:Android IOS WebRTC 音视频开发总结 (系列文章集合)
随笔分类 - webrtc Android IOS WebRTC 音视频开发总结(七八)-- 为什么WebRTC端到端监控很关键? 摘要: 本文主要介绍WebRTC端到端监控(我们翻译和整理的,译 ...
- Android 音视频开发(七): 音视频录制流程总结
在前面我们学习和使用了AudioRecord.AudioTrack.Camera.MediaExtractor.MediaMuxer API.MediaCodec. 学习和使用了上述的API之后,相信 ...
- 音视频处理概要 markdown
最近要想办法把录制的音视频进行拼接. 比方说此次录制的视频有三段,通过高清直播编码器录制,录制下的标准为h.264 直接用ffmpeg简单拼接,音频会丢失,所以有了此次解决方案(有可能会繁琐,简单方案 ...
- moviepy音视频剪辑:视频剪辑基类VideoClip的属性及方法详解
☞ ░ 前往老猿Python博文目录 ░ 一.概述 在<moviepy音视频剪辑:moviepy中的剪辑基类Clip详解>和<moviepy音视频剪辑:moviepy中的剪辑基类Cl ...
- Android 音视频开发(六): MediaCodec API 详解
在学习了Android 音视频的基本的相关知识,并整理了相关的API之后,我们应该对基本的音视频有一定的轮廓了. 下面开始接触一个Android音视频中相当重要的一个API: MediaCodec.通 ...
- 音视频入门-11-PNG文件格式详解
* 音视频入门文章目录 * PNG 文件格式解析 PNG 图像格式文件由一个 8 字节的 PNG 文件署名域和 3 个以上的后续数据块(IHDR.IDAT.IEND)组成. PNG 文件包括 8 字节 ...
随机推荐
- pycharm安装包的简便方法
- zabbix 告警说明及触发cpu告警
1. https://www.cnblogs.com/caonw/p/12766454.html 1.内存检测:Template OS Linux:vm.memory.size[available]. ...
- VSCODE C# 运行 找不到任务"BUILD"----C#常用命令
使用 Visual Studio Code 创建 .NET 类库 - .NET | Microsoft Docs 安装vscode.vscode c#相关拓展.MINIGW64 1.创建文件夹 2.用 ...
- 使用ActiveMQ中遇到的端口占用问题
原Linux虚拟机中安装了ActiveMQ,EMQX.后期使用中主要使用EMQX来实现消息服务,停止了ActiveMQ.但是虚拟机挂起之后,长时间未再使用.近期由于有使用ActiveMQ的需要,而临时 ...
- Visual Studio Tools for Apache Cordova 使用web技术构建使用Ios Andriod 和 windows 的应用
1.vs 开发web app 2.官方的解说
- Centos7.6操作系统安装
新建虚拟机 默认下一步 稍后安装操作系统 选择对应的操作系统和版本 指定虚拟机名称和存储位置 处理器配置 内存配置:图形化界面至少2G,字符界面至少1G. 网络类型默认为NAT I/O控制器类型默认L ...
- 使用arcgis按掩膜批量处理MODIS.tif数据提取研究区.shp边界的python代码
在输入代码之前,需要先用arcgis把需要处理的数据导入,再把研究区shp导入,然后定义投影,先掩膜处理一个数据,再进行下一步输入代码批量处理数据的步骤.如果 不先定义投影,可能会出现输入代码不执行的 ...
- 钉钉获取第三方token时提示签名时间戳参数超时的处理方法
今天在更新平台功能时,碰到一个问题,从钉钉跳转到平台,始终不能成功.查看日志发现,出现了 签名时间戳参数超时 的错误. 想着没有动过相对应的代码,应该不是代码的问题. 查询官方文档,没有给出明确的答复 ...
- MySQL学习(四)锁机制
分类 读锁(共享锁):对同一个数据,多个读操作可以同时进行,互不干扰 写锁(互斥锁):如果当前写操作没有完毕,则无法进行其他的读操作.写操作 操作范围 表锁:一次性对一张表整体加锁.如myisam存储 ...
- 一招教你 Notion 文章导出到公众号
Notion是一个功能强大的笔记应用程序,有许多优点,包括: 用户友好的界面 跨平台支持 可以结构化组织笔记 多人协作 可以添加多种类型的媒体文件 可以添加评论和任务 这些优点使Notion成为一个广 ...