CentOS 7.9 安装 kafka_2.13
一、CentOS 7.9 安装 kafka_2.13
地址
二、安装准备
1 安装JDK
在安装kafka之前必须先安装JDK和zookeeper,如何安装JDK,可以查看:CentOS 7.9 安装 jdk-8u333
2 下载安装zookeeper
如何在CentOS 7 下安装zookeeper,可以查看:CentOS 7.9 安装 zookeeper-3.6.3
二、kafka
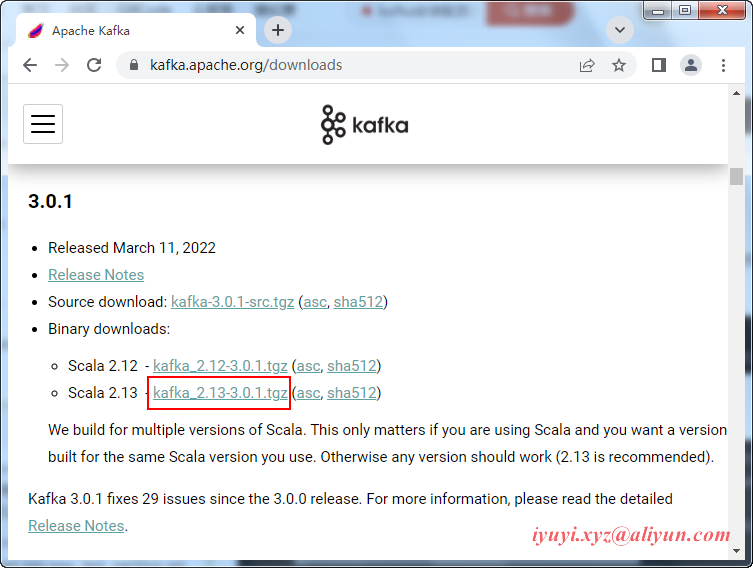
1 进入Apache官网 http://kafka.apache.org/downloads.html 选择Binary downloads,选择版本进行下载。
2 wget下载
wget https://archive.apache.org/dist/kafka/3.0.1/kafka_2.13-3.0.1.tgz3 解压
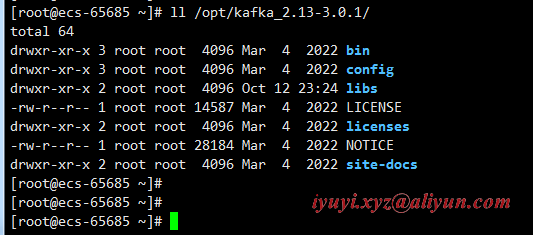
tar -zxvf /opt/software/kafka_2.13-3.0.1.tgz -C /opt/

ll /opt/kafka_2.13-3.0.1/
4 进入kafka目录
5 启动kafka之前要确保zookeeper已经启动,如果没有启动,执行以下命令
zkServer.sh start6 修改kafka配置文件中的zookeeper地址,打开配置文件
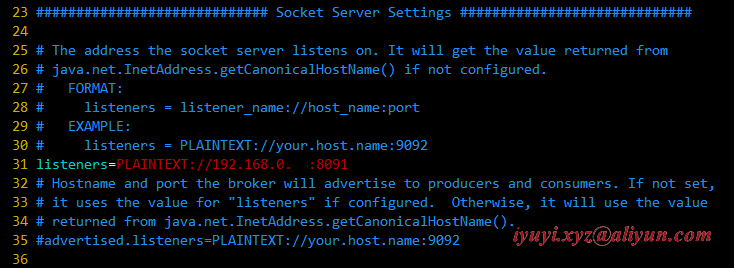
vim /opt/kafka_2.13-3.0.1/config/server.properties

# The id of the broker. This must be set to a unique integer for each broker.

broker.id=0

############################# Socket Server Settings #############################

# The address the socket server listens on. It will get the value returned from

# java.net.InetAddress.getCanonicalHostName() if not configured.

#   FORMAT:

#     listeners = listener_name://host_name:port

#   EXAMPLE:

#     listeners = PLAINTEXT://your.host.name:9092

listeners=PLAINTEXT://192.168.0...:8091

# Hostname and port the broker will advertise to producers and consumers. If not set,

# it uses the value for "listeners" if configured.  Otherwise, it will use the value

# returned from java.net.InetAddress.getCanonicalHostName().

#advertised.listeners=PLAINTEXT://your.host.name:9092

# A comma separated list of directories under which to store log files

log.dirs=/opt/kafka_2.13-3.0.1/logs

############################# Zookeeper #############################

# Zookeeper connection string (see zookeeper docs for details).

# This is a comma separated host:port pairs, each corresponding to a zk

# server. e.g. "127.0.0.1:3000,127.0.0.1:3001,127.0.0.1:3002".

# You can also append an optional chroot string to the urls to specify the

# root directory for all kafka znodes.

zookeeper.connect=192.168.0.98:2181

# Timeout in ms for connecting to zookeeper

zookeeper.connection.timeout.ms=18000
7 新建日志储存路径
mkdir /opt/kafka_2.13-3.0.1/logs8 启动kafka
./bin/kafka-server-start.sh config/server.properties

# 后台启动

./bin/kafka-server-start.sh -daemon config/server.properties
四、设置开机自动启动
1 切换到/lib/systemd/system/目录,创建自启动文件
vim /lib/systemd/system/kafka.service

[Unit]

Description=kafkaservice

After=network.target

[Service]

WorkingDirectory=/opt/kafka_2.13-3.0.1

ExecStart=/opt/kafka_2.13-3.0.1/bin/kafka-server-start.sh /opt/kafka_2.13-3.0.1/config/server.properties

ExecStop=/opt/kafka_2.13-3.0.1/bin/kafka-server-stop.sh

User=root

Group=root

Restart=always

RestartSec=10

[Install]

WantedBy=multi-user.target
2 设置自启动
systemctl enable kafka.service3 立即启动服务
systemctl start kafka.service4 查看启动状态
systemctl status kafka.service五、Kafka命令测试
1 创建topic
./bin/kafka-topics.sh --bootstrap-server 192.168.0.98:8091 --create --topic iyuyixyz --partitions 2 --replication-factor 12 列出所有topic
./bin/kafka-topics.sh --bootstrap-server 192.168.0.98:8091 --list3 列出所有topic的信息
./bin/kafka-topics.sh --bootstrap-server 192.168.0.98:8091 --describe4 列出指定topic的信息
./bin/kafka-topics.sh --bootstrap-server 192.168.0.98:8091 --describe --topic iyuyixyz5 生产者(消息发送程序)
./bin/kafka-console-producer.sh --broker-list 192.168.0.98:8091 --topic iyuyixyz6 消费者(消息接收程序)
./bin/kafka-console-consumer.sh --bootstrap-server 192.168.0.98:8091 --topic iyuyixyz六、配置系统环境变量
vim /etc/profile

export PATH=$PATH:/opt/kafka_2.13-3.0.1/bin

# 使配置生效

source /etc/profile
七、报错
1 zookeeper is not a recognized option
新版已不支持zookeeper参数,需要换成bootstrap-server参数。
./bin/kafka-topics.sh --create --zookeeper 192.168.0.98:2181 --replication-factor 1 --partitions 1 --topic iyuyixyz原来新版本的kafka,已经不需要依赖zookeeper来创建topic,新版的kafka创建topic指令为下
./bin/kafka-topics.sh --bootstrap-server 192.168.0.98:8091 --create --topic iyuyixyz --partitions 2 --replication-factor 1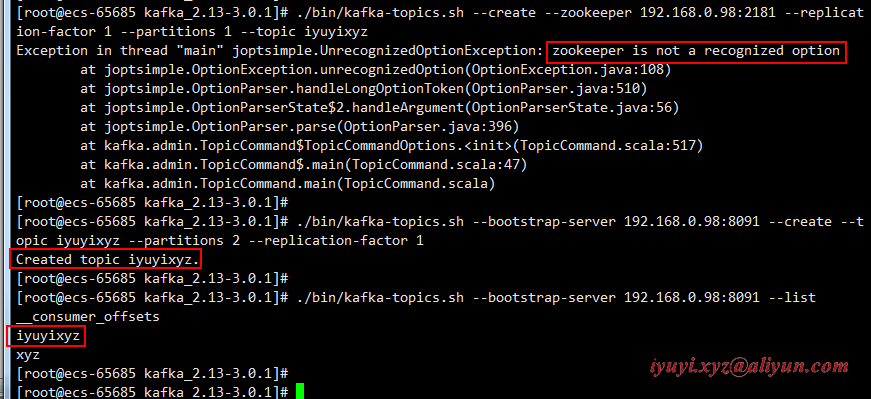
2 节点响应超时(请求超时)
[2022-10-13 01:11:34,670] WARN [AdminClient clientId=adminclient-1] Connection to node -1 (/192.168.0.92:8092) could not be established. Broker may not be available. (org.apache.kafka.clients.NetworkClient)

[2022-10-13 01:11:37,676] WARN [AdminClient clientId=adminclient-1] Connection to node -1 (/192.168.0.92:8092) could not be established. Broker may not be available. (org.apache.kafka.clients.NetworkClient)

[2022-10-13 01:11:40,682] WARN [AdminClient clientId=adminclient-1] Connection to node -1 (/192.168.0.92:8092) could not be established. Broker may not be available. (org.apache.kafka.clients.NetworkClient)

Error while executing topic command : Timed out waiting for a node assignment. Call: createTopics

[2022-10-13 01:11:43,600] ERROR org.apache.kafka.common.errors.TimeoutException: Timed out waiting for a node assignment. Call: createTopics

 (kafka.admin.TopicCommand$)
该错误是由于没有用对应版本的命令,访问了错的主机名(或IP)和端口,所以请求失败导致超时。
其中的createTopics、listTopics等都会出现该错误。如果没配置server.properties文件的listeners值,也会报以上错误。
listeners值默认是PLAINTEXT://:9092,要改为PLAINTEXT://localhost:9092或PLAINTEXT://IP:9092等
CentOS 7.9 安装 kafka_2.13的更多相关文章
- CentOS 7 下安装 teamviewer 13
CentOS 版本:centos-release-7-4.1708.el7.centos.x86_64(通过 rpm -q centos-release 查询) teamviewer 版本:teamv ...
- 阿里云CentOS服务器下安装Golang1.13并配置代理
注:root账户或添加sudo命令运行. 下载到/usr/local位置并解压 cd /usr/local wget https://studygolang.com/dl/golang/go1.13. ...
- centos使用Yum安装postgresql 13
rpm源安装 yum install -y https://download.postgresql.org/pub/repos/yum/reporpms/EL-7-x86_64/pgdg-redhat ...
- CentOS 6.9安装Python2.7.13
查看当前系统中的 Python 版本 python --version 返回 Python 2.6.6 为正常. 检查 CentOS 版本 cat /etc/redhat-release 返回 Cen ...
- 在Centos 7上安装配置 Apche Kafka 分布式消息系统集群
Apache Kafka是一种颇受欢迎的分布式消息代理系统,旨在有效地处理大量的实时数据.Kafka集群不仅具有高度可扩展性和容错性,而且与其他消息代理(如ActiveMQ和RabbitMQ)相比,还 ...
- Centos 使用YUM安装MariaDB
1.在 /etc/yum.repos.d/ 下建立 MariaDB.repo,内容如下: [azureuser@mono etc]$ cd /etc/yum.repos.d [azureuser@mo ...
- 如何在CentOS 7上安装Percona服务器
在这篇文章中我们将了解关于 Percona 服务器,一个开源的MySQL,MariaDB的替代品.InnoDB的数据库引擎使得Percona 服务器非常有吸引力,如果你需要的高性能,高可靠性和高性价比 ...
- centos下编译安装mysql5.5/5.6
2013年11月16日 19:39:13 centos 6 mysql 5.5.28 我只说些我出错的地方: cmake后删除的方法是 xargs rm < install_manifest.t ...
- CentOS 5.X安装LAMP最高版本环境
#------------CentOS 5.X安装LAMP最高版本环境------------------#! /bin/sh #安装Apacheyum install httpd -y#1.关闭se ...
随机推荐
- 运行 vue 项目时报错
INFO Starting development server... ERROR Error: C - D:\T32890\Desktop\my-project\node_modules\@vue\ ...
- CF1615G Maximum Adjacent Pairs
\(CF1615G\) Description 给定一个数列 \(a\),你需要将所有 \(a_i=0\) 的位置填上一个 \(1\sim n\) 的正整数,使得数列的「值」最大. 数列的值定义为满足 ...
- 封装Fraction-分数类(C++)
Fraction 分数类 默认假分数,可自行修改 由于concept的原因 template <typename T> concept is_float_v = std::is_float ...
- 化整为零优化重用,Go lang1.18入门精炼教程,由白丁入鸿儒,go lang函数的定义和使用EP07
函数是基于功能或者逻辑进行聚合的可复用的代码块.将一些复杂的.冗长的代码抽离封装成多个代码片段,即函数,有助于提高代码逻辑的可读性和可维护性.不同于Python,由于 Go lang是编译型语言,编译 ...
- MySQL 数据操纵语句
插入 插入多个字段 insert into grade (`name`) values ('大一'),('大二'),('大三'),('大四'); 修改 设置时间为当前时间 update `studen ...
- Python小游戏——外星人入侵(保姆级教程)第一章 05重构模块game_functions
系列文章目录 第一章:武装飞船 05:重构:模块game_functions 一.重构 在大型项目中,经常需要在添加新代码前重构既有代码.重构旨在简化既有代码的结构,使其更容易扩展.在本节中,我们将创 ...
- HandInDevil 的头发 (分 块)
题面 H a n d I n D e v i l \rm HandInDevil HandInDevil 的头发很油,因此随时有跳蚤跳上 H a n d I n D e v i l \rm HandI ...
- 01 - 快速体验 Spring Security 5.7.2 | 权限管理基础
在前面SpringBoot 2.7.2 的系列文章中,已经创建了几个 computer 相关的接口,这些接口直接通过 Spring Doc 或 POSTMAN 就可以访问.例如: GET http:/ ...
- 第九十七篇:CSS的选择器及优先级
好家伙,来补一点关于CSS的基础 1.id选择器 id 选择器可以为标有特定 id 的 HTML 元素指定特定的样式 使用#号来定义样式 2.class选择器 class 选择器用于描述一组元素的样式 ...
- 【读书笔记】C#高级编程 第二十二章 安全性
(一)身份验证和授权 安全性的两个基本支柱是身份验证和授权.身份验证是标识用户的过程,授权在验证了所标识用户是否可以访问特性资源之后进行的. 1.标识和Principal 使用标识可以验证运行应用程序 ...