将jar安装到本地mvn仓库
声明:仅限于将maven Repository下载的jar(使用maven打包的jar)安装到本地的maven仓库中,不保证全部成功,最初的时候添加依赖发现下载始终不成功,只能手动下载,但是手动下载完毕后,只能通过mvn install:install-file -Dfile=..这种方式安装jar包到仓库,实在是太过繁琐,仔细观察jar包后发现jar的坐标信息很容易从jar名称已经jar内部的pom.properties文件获得,代码如下
 package installJarToMVN;

 import java.io.BufferedReader;

 import java.io.File;

 import java.io.IOException;

 import java.io.InputStream;

 import java.io.InputStreamReader;

 import java.util.Enumeration;

 import java.util.jar.JarEntry;

 import java.util.jar.JarFile;

 import java.util.zip.ZipEntry;

 /**

  * 读取jar包内的pom.properties 获得groupid

  * version,artifactId可以从jar包名称获取,也可以从pom.properties获取

  *

  * @author Tele

  *

  */

 public class InstallJar {

     // 默认jar包路径,填写到目录

     private static String jarPath = "d:/jartoMVN/";

     private static BufferedReader reader;

     public static void main(String[] args) {

         if (args.length > 0) {

             if (args[0] != null && args[0].trim().length() > 0) {

                 jarPath = args[0];

             }

         }

         File dir = new File(jarPath);

         if (!dir.exists()) {

             throw new RuntimeException("jar包目录不存在!");

         } else {

             if (!dir.isDirectory()) {

                 throw new RuntimeException("输入的参数必须为jar包所在目录!");

             } else {

                 File[] listFiles = dir.listFiles();

                 if (listFiles.length == 0) {

                     throw new RuntimeException("当前目录下没有文件");

                 }

                 String[] params = new String[4];

                 // 遍历

                 for (int i = 0; i < listFiles.length; i++) {

                     File jarFile = listFiles[i];

                     // 过滤非jar文件

                     if (!jarFile.getName().contains(".jar")) {

                         continue;

                     }

                     // 去除后缀,jar的名字可能含有多个 ".",hadoop-yarn-server-applicationhistoryservice-3.1.1.jar

                     String jarName = jarFile.getName();

                     // 保留原始的jar名称

                     String orginalName = jarName;

                     // hadoop-yarn-server-applicationhistoryservice-3.1.1

                     jarName = jarName.substring(0, jarName.lastIndexOf("."));

                     // 获得artifactId

                     String artifactId = jarName.substring(0, jarName.lastIndexOf("-"));

                     // 获得版本号

                     String version = jarName.substring(jarName.lastIndexOf("-") + 1);

                     // 获得groupId

                     // 拼接的完整路径

                     String groupId = readPomproperties(jarPath + orginalName);

                     if (groupId == null) {

                         throw new RuntimeException("获取groupId失败");

                     }

                     groupId = groupId.split("=")[1];

                     // 封装参数

                     params[0] = jarPath + orginalName;

                     params[1] = groupId;

                     params[2] = artifactId;

                     params[3] = version;

                     install(params);

                 }

             }

         }

     }

     /**

      *

      * @param path groupId=org.apache.hadoop

      * @return 获得groupId,在pom.properties文件的第四行

      */

     public static String readPomproperties(String path) {

         JarFile jarFile = null;

         String groupId = null;

         // groupId在第四行

         int number = 4;

         try {

             jarFile = new JarFile(path);

             Enumeration<JarEntry> entries = jarFile.entries();

             while (entries.hasMoreElements()) {

                 JarEntry jarEntry = entries.nextElement();

                 String name = jarEntry.getName();

                 if (name.contains("pom.properties")) {

                     reader = new BufferedReader(new InputStreamReader(jarFile.getInputStream(jarEntry), "utf-8"));

                     String line = "";

                     // 计行数

                     int count = 0;

                     while ((line = reader.readLine()) != null) {

                         count++;

                         if (count == 4) {

                             groupId = line;

                         }

                     }

                 }

             }

         } catch (IOException e) {

             // TODO Auto-generated catch block

             e.printStackTrace();

         } finally {

             if (reader != null) {

                 try {

                     reader.close();

                 } catch (IOException e) {

                     // TODO Auto-generated catch block

                     e.printStackTrace();

                 }

             }

             if (jarFile != null) {

                 try {

                     jarFile.close();

                 } catch (IOException e) {

                     // TODO Auto-generated catch block

                     e.printStackTrace();

                 }

             }

         }

         return groupId;

     }

     // 执行安装命令

     public static void install(String[] params) {

         // 拼接命令

         String order = "mvn install:install-file" + " -Dfile=" + params[0] + " -DgroupId=" + params[1]

                 + " -DartifactId=" + params[2] + " -Dversion=" + params[3] + " -Dpackaging=jar";

         Runtime rt = Runtime.getRuntime();

         // 执行安装

         System.out.println(order);

         Process p;

         try {

             p = rt.exec("cmd.exe /c " + " " + order);

             reader = new BufferedReader(new InputStreamReader(p.getInputStream()));

             String line;

             // 输出进程

             while ((line = reader.readLine()) != null) {

                 System.out.println(line);

             }

             if (reader != null) {

                 reader.close();

             }

             // waitFor()是阻塞方法,等待外部命令执行结束

             p.waitFor();

             p.destroy();

             p = null;

         } catch (IOException e) {

             // TODO Auto-generated catch block

             e.printStackTrace();

         } catch (InterruptedException e) {

             // TODO Auto-generated catch block

             e.printStackTrace();

         }

     }

 }
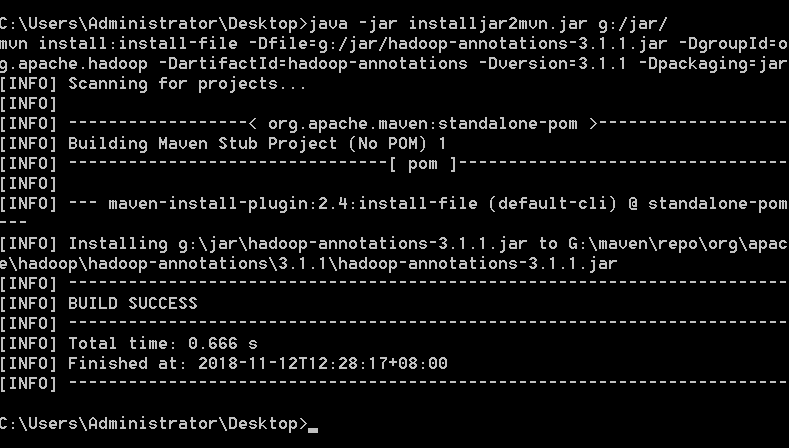
测试结果:
1.eclipse中运行
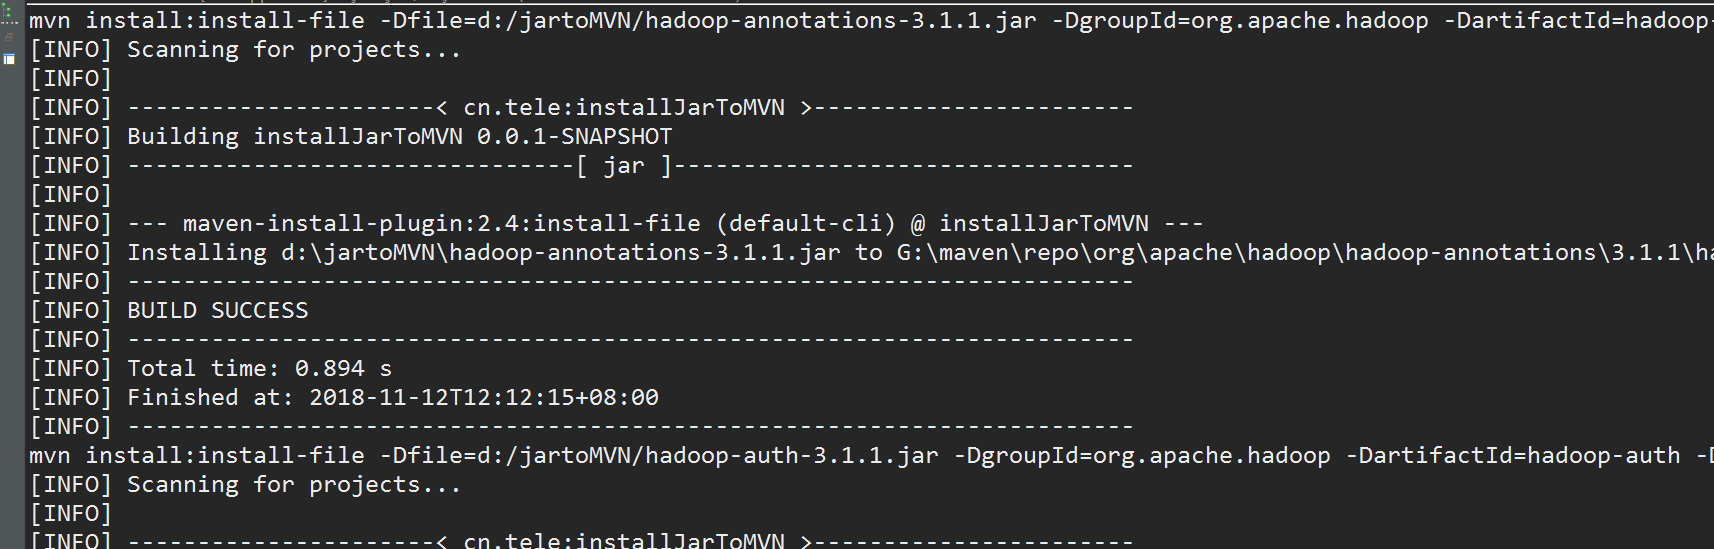
2.打包成jar
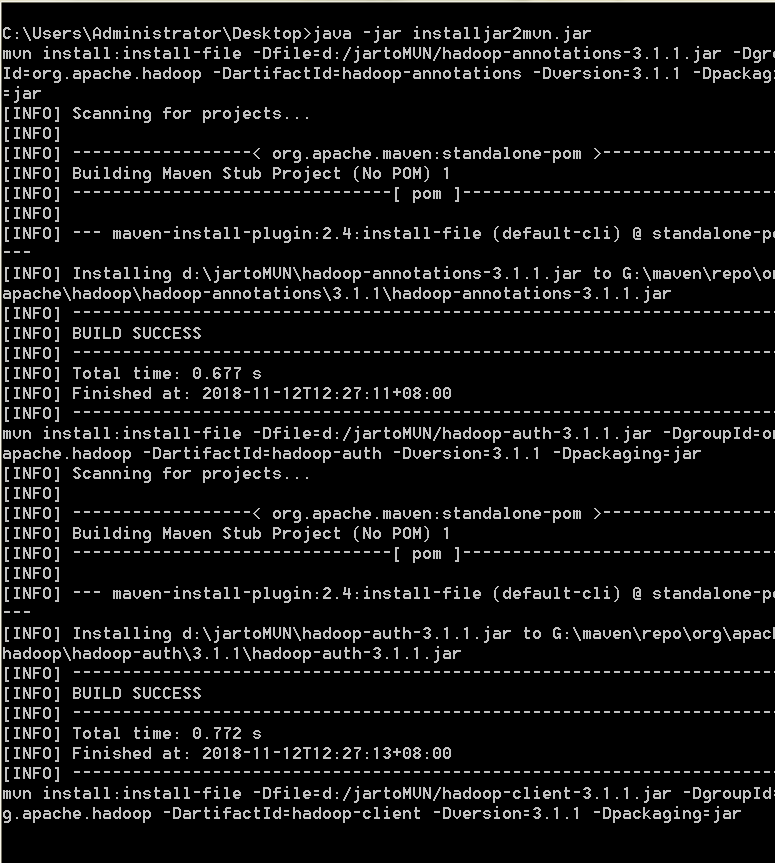
3.可以指定目录.默认的目录为d:/jartoMVN/ ,直接拷贝路径时记得加上 "/"
jar包链接:https://files.cnblogs.com/files/tele-share/installjar2mvn.zip
将jar安装到本地mvn仓库的更多相关文章
- 本地JAR包打入本地mvn仓库
新建目录my-lib,将jar包移动到目录中,添加pom文件(用alipay测试) <project xmlns="http://maven.apache.org/POM/4.0.0& ...
- 添加jar包到本地Maven仓库
在使用Maven的过程中,经常碰到有些jar包在中央仓库没有的情况.如果公司有私服,那么就把jar包安装到私服上.如果没有私服,那就把jar包安装到本地Maven仓库.今天介绍2种 ...
- 【Maven】2.使用Nexus3搭建Maven私服+上传第三方jar包到本地maven仓库
参考文章: http://www.cnblogs.com/luotaoyeah/p/3791966.html --------------------------------------------- ...
- 使用Nexus3搭建Maven私服+上传第三方jar包到本地maven仓库
1.搭建Maven私服背景 公司还是按捺不住,要搭建一个自己的Maven本地仓库,可以让开发人员down架包,从内网还是快很多. 这样公司的maven本地仓库就是 开发人员自己电脑上的maven仓库 ...
- Maven:将Jar安装到本地仓库和Jar上传到私服
1.依赖如下: <dependency> <groupId>org.quartz-scheduler.internal</groupId> <artifact ...
- Maven : 将Jar安装到本地仓库和Jar上传到私服 转
http://blog.csdn.net/we_shell/article/details/49819221 Jar的maven配置 <dependency><groupId> ...
- maven如何将本地jar安装到本地仓库
1.首先确认你的maven是否已经配置: 指令:mvn -v 2.本地的jar包位置: 3.在自己项目pom.xml中添加jar依赖: <dependency> <groupId&g ...
- 将Jar安装到本地仓库和Jar上传到私服
举例 1. 依赖如下: <dependency> <groupId>org.quartz-scheduler.internal</groupId> <arti ...
- 把jar包安装到本地Maven仓库
使用的场景 自己写的工具类想安装到本地 从Maven仓库中下载不下来的jar 使用的步骤 首先要保证自己的Maven配置全局环境变量,如果没有配置过maven全局变量,可以按照下面的步骤配 ...
随机推荐
- html只能有一个id,并且id的值只能是一个
1.如果有相同的ID,javascript只会取第一个具有该ID的标签. 2.如果id值有两个,JS只会取到第一个,并不会像class类一样,类名并列就可以同时取到.
- 7. 基于Express实现接口
安装Mongoose 创建model //server/models/goods.js var mongoose = require('mongoose');//优先到node_modeles里加载 ...
- 如何不使用js实现鼠标hover弹出菜单效果
最近看到很多同学在实现鼠标hover弹出菜单的效果时都是用的js代码去实现的,默认给弹出隐藏掉,通过js事件绑定动态的显/隐弹出菜单元素. <ul> <li>主页</li ...
- PatentTips - Apparatus and method for a generic, extensible and efficient data manager for virtual peripheral component interconnect devices (VPCIDs)
BACKGROUND A single physical platform may be segregated into a plurality of virtual networks. Here, ...
- asp.net--TextBox属性全研究
. .aspx代码例如以下: <%@ Page Language="C#" AutoEventWireup="true" CodeFile="T ...
- CSS笔记 - fgm练习 2-9 - 播放列表收缩展开
练习地址: http://www.fgm.cc/learn/lesson2/09.html <style> *{ margin: 0;padding: 0;font-size: 12px; ...
- Day2:数据类型
一.数字 1.整型(int),无长整型.python3.x,不论多大的数都是int #!/usr/bin/env python # -*- coding:utf-8 -*- # Author:Hiuh ...
- SpringBoot 使用yml配置 mybatis+pagehelper+druid+freemarker实例
SpringBoot 使用yml配置 mybatis+pagehelper+druid+freemarker实例 这是一个简单的SpringBoot整合实例 这里是项目的结构目录 首先是pom.xml ...
- python的sorted() 函数
摘自:http://www.runoob.com/python/python-func-sorted.html sortedClassCount=sorted(classCount.items(),k ...
- 以Spring整合EhCache为例从根本上了解Spring缓存这件事(转)
前两节"Spring缓存抽象"和"基于注解驱动的缓存"是为了更加清晰的了解Spring缓存机制,整合任何一个缓存实现或者叫缓存供应商都应该了解并清楚前两节,如果 ...