centos6.7 安装Docker
一、查看系统版本
[root@localhost ~]# cat /etc/redhat-release

CentOS release 6.7 (Final)
二、安装EPEL
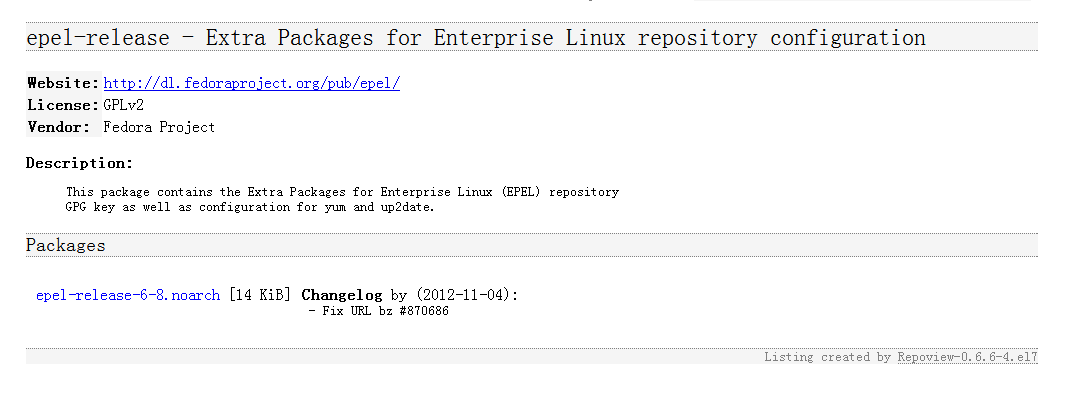
1.进入centos6系列EPEL下载地址
http://download.fedoraproject.org/pub/epel/6/i386/repoview/epel-release.html
2. wget下载
[root@localhost ~]# wget http://download.fedoraproject.org/pub/epel/6/i386/epel-release-6-8.noarch.rpm

--2015-09-10 17:50:49--  http://download.fedoraproject.org/pub/epel/6/i386/epel-release-6-8.noarch.rpm

正在解析主机 download.fedoraproject.org... 67.219.144.68, 209.132.181.16, 66.35.62.162, ...

正在连接 download.fedoraproject.org|67.219.144.68|:80... 已连接。

已发出 HTTP 请求,正在等待回应... 302 Found

位置:http://mirrors.opencas.cn/epel/6/i386/epel-release-6-8.noarch.rpm [跟随至新的 URL]

--2015-09-10 17:50:50--  http://mirrors.opencas.cn/epel/6/i386/epel-release-6-8.noarch.rpm

正在解析主机 mirrors.opencas.cn... 159.226.11.160, 2001:cc0:2004:1:225:90ff:fe00:fe8b, 2001:cc0:2004:1:225:90ff:fe3a:e6b5

正在连接 mirrors.opencas.cn|159.226.11.160|:80... 已连接。

已发出 HTTP 请求,正在等待回应... 200 OK

长度:14540 (14K) [application/x-redhat-package-manager]

正在保存至: “epel-release-6-8.noarch.rpm”

100%[=======================================================================================================>] 14,540      12.9K/s   in 1.1s

2015-09-10 17:50:56 (12.9 KB/s) - 已保存 “epel-release-6-8.noarch.rpm” [14540/14540])
3.rpm安装EPEL(我已经安装过了,所以显示已经安装了)
[root@localhost ~]# rpm -ivh epel-release-6-8.noarch.rpm

warning: epel-release-6-8.noarch.rpm: Header V3 RSA/SHA256 Signature, key ID 0608b895: NOKEY

Preparing...                ########################################### [100%]

	package epel-release-6-8.noarch is already installed
4.安装好EPEL 源后,用yum 命令来检查是否添加到源列表
root@localhost ~]#  yum repolist

已加载插件:fastestmirror, refresh-packagekit, security

Loading mirror speeds from cached hostfile

 * base: centos.ustc.edu.cn

 * epel: mirror01.idc.hinet.net

 * extras: mirrors.163.com

 * updates: mirrors.163.com

仓库标识                                          仓库名称                                                                                 状态

base                                              CentOS-6 - Base                                                                           6,575

*epel                                             Extra Packages for Enterprise Linux 6 - x86_64                                           11,766

extras                                            CentOS-6 - Extras                                                                            35

updates                                           CentOS-6 - Updates                                                                          298

repolist: 18,674
5.bingo,已经添加。进行缓存。
[root@localhost ~]# yum makecache

已加载插件:fastestmirror, refresh-packagekit, security

Loading mirror speeds from cached hostfile

Could not get metalink https://mirrors.fedoraproject.org/metalink?repo=epel-6&arch=x86_64 error was

12: Timeout on https://mirrors.fedoraproject.org/metalink?repo=epel-6&arch=x86_64: (28, 'Operation too slow. Less than 1 bytes/sec transfered the last 30 seconds')

 * base: mirrors.hust.edu.cn

 * epel: ftp.cuhk.edu.hk

 * extras: centos.ustc.edu.cn

 * updates: centos.ustc.edu.cn

base                                                                                                                      | 3.7 kB     00:00

extras                                                                                                                    | 3.4 kB     00:00

updates                                                                                                                   | 3.4 kB     00:00

元数据缓存已建立
三、禁用selinux
1.查看selinux状态
[root@localhost ~]# cat /etc/selinux/config

# This file controls the state of SELinux on the system.

# SELINUX= can take one of these three values:

#     enforcing - SELinux security policy is enforced.

#     permissive - SELinux prints warnings instead of enforcing.

#     disabled - No SELinux policy is loaded.

SELINUX=enforcing

# SELINUXTYPE= can take one of these two values:

#     targeted - Targeted processes are protected,

#     mls - Multi Level Security protection.

SELINUXTYPE=targeted
2.修改该配置文件中将enforcing替换为disabled
[root@localhost ~]# cat /etc/selinux/config

# This file controls the state of SELinux on the system.

# SELINUX= can take one of these three values:

#     enforcing - SELinux security policy is enforced.

#     permissive - SELinux prints warnings instead of enforcing.

#     disabled - No SELinux policy is loaded.

SELINUX=disabled

# SELINUXTYPE= can take one of these two values:

#     targeted - Targeted processes are protected,

#     mls - Multi Level Security protection.

SELINUXTYPE=targeted
3.reboot重启一下系统,使生效。
四、准备就绪,安装docker-io,摸摸哒。
[root@localhost ~]# yum install docker-io

已加载插件:fastestmirror, refresh-packagekit, security

设置安装进程

Loading mirror speeds from cached hostfile

 * base: mirrors.hust.edu.cn

 * epel: ftp.cuhk.edu.hk

 * extras: mirrors.163.com

 * updates: mirrors.163.com

解决依赖关系

--> 执行事务检查

---> Package docker-io.x86_64 0:1.7.1-2.el6 will be 安装

--> 处理依赖关系 lxc,它被软件包 docker-io-1.7.1-2.el6.x86_64 需要

--> 处理依赖关系 libcgroup,它被软件包 docker-io-1.7.1-2.el6.x86_64 需要

--> 执行事务检查

---> Package libcgroup.x86_64 0:0.40.rc1-16.el6 will be 安装

---> Package lxc.x86_64 0:1.0.7-2.el6 will be 安装

--> 处理依赖关系 lua-lxc(x86-64) = 1.0.7-2.el6,它被软件包 lxc-1.0.7-2.el6.x86_64 需要

--> 处理依赖关系 lua-alt-getopt,它被软件包 lxc-1.0.7-2.el6.x86_64 需要

--> 处理依赖关系 liblxc.so.1()(64bit),它被软件包 lxc-1.0.7-2.el6.x86_64 需要

--> 执行事务检查

---> Package lua-alt-getopt.noarch 0:0.7.0-1.el6 will be 安装

---> Package lua-lxc.x86_64 0:1.0.7-2.el6 will be 安装

--> 处理依赖关系 lua-filesystem,它被软件包 lua-lxc-1.0.7-2.el6.x86_64 需要

---> Package lxc-libs.x86_64 0:1.0.7-2.el6 will be 安装

--> 执行事务检查

---> Package lua-filesystem.x86_64 0:1.4.2-1.el6 will be 安装

--> 完成依赖关系计算

依赖关系解决

=================================================================================================================================================

 软件包                                架构                          版本                                      仓库                         大小

=================================================================================================================================================

正在安装:

 docker-io                             x86_64                        1.7.1-2.el6                               epel                        4.6 M

为依赖而安装:

 libcgroup                             x86_64                        0.40.rc1-16.el6                           base                        129 k

 lua-alt-getopt                        noarch                        0.7.0-1.el6                               epel                        6.9 k

 lua-filesystem                        x86_64                        1.4.2-1.el6                               epel                         24 k

 lua-lxc                               x86_64                        1.0.7-2.el6                               epel                         15 k

 lxc                                   x86_64                        1.0.7-2.el6                               epel                        120 k

 lxc-libs                              x86_64                        1.0.7-2.el6                               epel                        250 k

事务概要

=================================================================================================================================================

Install       7 Package(s)

总下载量:5.1 M

Installed size: 20 M

确定吗?[y/N]:
还需要我解释么,一路y下去。
启动我们的宝贝docker
[root@localhost ~]# /etc/init.d/docker start

Starting cgconfig service:                                 [确定]

Starting docker:	                                   [确定]
查看docker进程
[root@localhost ~]# ps -ef | grep docker

root       3602      1  0 18:26 pts/0    00:00:00 /usr/bin/docker -d

root       3745   3429  0 18:27 pts/0    00:00:00 grep docker
查看安装的docker版本
Status: Downloaded newer image for centos:latest

[root@localhost ~]# docker version

Client version: 1.7.1

Client API version: 1.19

Go version (client): go1.4.2

Git commit (client): 786b29d/1.7.1

OS/Arch (client): linux/amd64

Server version: 1.7.1

Server API version: 1.19

Go version (server): go1.4.2

Git commit (server): 786b29d/1.7.1

OS/Arch (server): linux/amd64
注意:
我在这里并没有升级系统内核
[root@localhost ~]# uname -r

2.6.32-573.3.1.el6.x86_64
docker官方文档说要求Linux kernel至少3.8以上。
在一个新的终端里守护模式运行docker时,会出现warning
[root@localhost ~]# docker -d

WARN[0000] You are running linux kernel version 2.6.32-573.3.1.el6.x86_64, which might be unstable running docker. Please upgrade your kernel to 3.10.0.
但是目前表示我可以正常使用。
centos6.7 安装Docker的更多相关文章
- 实战CENTOS6.5安装docker并创建asp.net mvc 5 镜像,运行MVC 网站
Docker,容器,让研发.测试.生产同一环境,可在linux平台上混合使用JAVA与net 程序 Centos6.5安装docker 参考http://my.oschina.net/kcw/blog ...
- 1.centos6.8安装docker
简介环境安装依赖安装步骤1.删除旧版本的docker2.安装docker2.1 yum安装docker2.2 tar安装2.3 在线脚本事实证明以上的安装方式都行不通 参考文档:https://doc ...
- centos6.5安装docker(亲测)
centos6.5下安装docker的过程办法 在看了网上N多复制粘贴的文章,又尝试无效后,我把我最终成功的办法发出来,希望能帮到拼命干环境的你. 操作环境: centos6.5(Final) 内核: ...
- docker入门之:centos6.5 安装docker
centos6.5 : 使用EPEL库安装docker: # sudo yum install -y http://mirrors.yun-idc.com/epel/6/i386/epel-rele ...
- CentOS6.8安装Docker
在CentOS6.8上安装Docker 1.Docker使用EPEL发布,RHEL系的OS首先要确保已经持有EPEL仓库,否则先检查OS的版本,然后安装相应的EOEL包:如下命令: yum insta ...
- centos6.5linux安装docker之升级内核
一.运行docker Linux内核版本需要在3.8以上,针对centos6.5 内核为2.6的系统需要先升级内核.不然会特别卡 在yum的ELRepo源中,有mainline(4.5).long-t ...
- 阿里云ECS服务器centos6.x安装docker问题盘点
1.首先在centos6.x和centos7.x中yum安装docker的区分. centos6.x: yum install docker-io centos7.x: yum install doc ...
- [Docker] 在CentOS6.8 安装 Docker
运行docker Linux内核版本需要在3.8以上,针对centos6.5 内核为2.6的系统需要先升级内核.不然会特别卡,退出容器. # 查看当前版本: cat /etc/issue # 导入pu ...
- centos6下安装docker
安装docker对内核版本的要求很高,需要内核3.10以上. 一.docker卸载 查看内核版本: 如果不升级内核到3.10安装docker,后面会有很多奇怪的问题,像我就是拉取不到镜像. 以下我是r ...
随机推荐
- 学习笔记(一)——MVC扩展
1.视图引擎的作用,总结为两点: 查找视图 渲染视图 ViewEngine即视图引擎, 在ASP.NET MVC中将ViewEngine的作用抽象成了 IViewEngine 接口. 默认情况下,AS ...
- 重新想象 Windows 8.1 Store Apps (90) - 通信的新特性: 通过 HttpBaseProtocolFilter 实现 http 请求的缓存控制,以及 cookie 读写; 自定义 HttpFilter; 其他
[源码下载] 重新想象 Windows 8.1 Store Apps (90) - 通信的新特性: 通过 HttpBaseProtocolFilter 实现 http 请求的缓存控制,以及 cooki ...
- Wijmo金融图表系列之等量图&成交量柱状图
Wijmo金融图表有很多类型,我们来一一介绍.之前介绍了平均K线图(Heikin-Ashi)和砖形图,现在我们来一起看看等量图和成交量柱状图. 图表 #3: 等量图(EquiVolume) 等量图和K ...
- c语言笔试题
填空: 1,short int a[10]={123, 456, 789}; sizeof(a)=( ); short int *p=&a, 则sizeof(p)=( ...
- [javaSE] java获取文件列表
递归测试 import java.io.File; import java.util.ArrayList; import java.util.HashMap; import java.util.Lis ...
- yii2.0用户登录,退出判断(摘录)
文章来源:http://blog.sina.com.cn/s/blog_88a65c1b0101ix13.html 判断用户是否登录 在 Yii2.0 里面,判断用户是否已经登录,我们用下面的代码即可 ...
- 二、SQL语句映射文件(2)增删改查、参数、缓存
//备注:该博客引自:http://limingnihao.iteye.com/blog/106076 2.2 select 一个select 元素非常简单.例如: Xml代码 收藏代码 <!- ...
- 求Mac 的adt插件!
搞了半天原来ADT Mac和win是通用的安装方法也相同! 自己配环境! 下载一个Eclipse,然后安装就行! dns:203.195.223.190 这个DNS可以连上谷歌的服务器(只限学习使用) ...
- 使用Apache ab进行压力测试(参数说明)
我们一般会使用Apache自带的ab来对项目进行压力测试,看项目的执行情况如何. 我们可以使用 ab -v 来查看ab的详细参数使用方法. [root@node234 bin]# ./ab -v ab ...
- 函数改变全局变量-JS
切记,一定按三步走: 1. 全局变量声明 2. 函数声明 3. 函数调用 正确做法: var dataStr = null; function remoteCallback(data) { dataS ...