Nginx 笔记与总结(15)nginx 实现反向代理 ( nginx + apache 动静分离)
在 nginx 中,proxy 用来实现反向代理,upstream 用来实现负载均衡。
例如有两台服务器,nginx 服务器作为代理服务器,执行 .html 文件,apache 服务器上执行 .php 文件,客户端发来的请求首先发送给 nginx 服务器,如果发送请求的是 .php 文件,则把请求通过 proxy pass 转发给 apache 服务器,apache 服务器处理后把结果返回给 nginx 服务器,nginx 服务再把结果返回给客户端。该例中 nginx 服务器实现了反向代理,或者说实现了 nginx + apache 的动静分离。
配置过程:
① 首先不让 nginx 服务器执行 .php 文件,修改 /usr/local/nginx/conf/nginx.conf 文件,把以下 location 段注释:
        location ~ \.php$ {

            #root           html;

            #fastcgi_pass   127.0.0.1:;

            #fastcgi_index  index.php;

            #fastcgi_param  SCRIPT_FILENAME  $document_root$fastcgi_script_name;

            #include        fastcgi_params;

        }
保存退出。平滑重启 nginx。
此时访问 http://192.168.254.100/test.php:
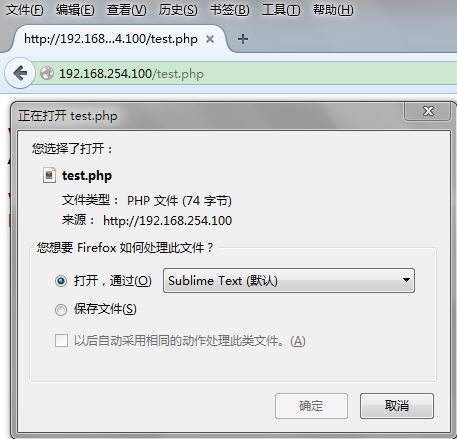
nginx 已经不能解析 .php 文件了。
② 编辑 apache 的配置文件 httpd.conf
[root@localhost nginx]# find / -name httpd

/usr/local/apache2/bin/httpd

/root/httpd-2.2./httpd

/root/httpd-2.2./.libs/httpd

[root@localhost nginx]# vim /usr/local/apache2/conf/httpd.conf
修改监听端口(nginx 已经监听 80 端口,所以把 apache 的监听端口改为 8080):Listen 8080
保存退出。
③ 启动 apache:
[root@localhost nginx]# /usr/local/apache2/bin/apachectl start
访问 http://192.168.254.100:8080:

④ 配置 apache 的虚拟主机及端口:
[root@localhost nginx]# vim /usr/local/apache2/conf/extra/httpd-vhosts.conf
修改 httpd-vhosts.conf:
NameVirtualHost *:

#

# VirtualHost example:

# Almost any Apache directive may go into a VirtualHost container.

# The first VirtualHost section is used for all requests that do not

# match a ServerName or ServerAlias in any <VirtualHost> block.

#

<VirtualHost *:>

    DocumentRoot "/usr/local/nginx/html"

    ServerName test.com

</VirtualHost>
把 DocumentRoot 定义到 /usr/local/nginx/html 目录下。保存退出。
编辑 httpd.conf:
把
<Directory />

    Options FollowSymLinks

    AllowOverride None

    Order deny,allow

    Deny from all

</Directory>
改为
<Directory />

    Options FollowSymLinks

    AllowOverride all

    Order deny,allow

    Allow from all

</Directory>
把 line:151
AllowOverride None
改为
AllowOverride All
保存退出。重启 apache。
⑤ 测试:访问 http://192.168.254.100:8080

访问 http://192.168.254.100:8080/ecshop/

⑥ 配置 nginx 的反向代理
[root@localhost nginx]# vim conf/nginx.conf
nginx.conf,修改 location ~ \.php$,只需要添加一句:proxy_pass 192.168.254.100:8080;
        location ~ \.php$ {

            proxy_pass http://192.168.254.100:;

            #root           html;

            #fastcgi_pass   127.0.0.1:;

            #fastcgi_index  index.php;

            #fastcgi_param  SCRIPT_FILENAME  $document_root$fastcgi_script_name;

            #include        fastcgi_params;

        }
保存退出。平滑重启 nginx。
测试动静分离:此时访问 http://192.168.254.100/test.php

也就是说,此时的 url 不带 8080 端口,访问 .php 文件,同样能够解析,而且是通过 apache 进行解析。
测试动静分离 2:
修改 /usr/local/nginx/html/test.php
[root@localhost nginx]# vim html/test.php
test.php:
<?php

//phpinfo();

echo rand(,);

?>

<img src='image/nginx.png'>
保存退出。
再次访问 http://192.168.254.100/test.php

此时分析 apache 日志:
[root@localhost nginx]# tail -f /usr/local/apache2/logs/access_log
access.log:

apache 没有响应图片。
再分析 nginx 日志:
[root@localhost nginx]# tail -f /usr/local/nginx/logs/access.log

nginx 响应的图片。
Nginx 笔记与总结(15)nginx 实现反向代理 ( nginx + apache 动静分离)的更多相关文章
- 【nginx网站性能优化篇(2)】反向代理实现Apache与Nginx的动静分离(LNMPA)
为什么要使用反向代理 具体请参考这篇博文:[Linux常识篇(1)]所谓的正向代理与反向代理 在虚拟机上配置反向代理的步骤 首先假设你已经假设好了LNMP架构了,这时我们还要安装Apache和php, ...
- nginx配置文件(反向代理+集群+动静分离)
1.nginx纯反向代理配置(nginx.conf): #user nobody;worker_processes 4;error_log logs/error.log info;pid logs/n ...
- 15 nginx反向代理实现nginx+apache动静分离
一:nginx反向代理实现nginx+apache动静分离-------------概念--------------------------- nginx反向代理服务器+负载均衡 用nginx做反向代 ...
- Nginx网络架构实战学习笔记(三):nginx gzip压缩提升网站速度、expires缓存提升网站负载、反向代理实现nginx+apache动静分离、nginx实现负载均衡
文章目录 nginx gzip压缩提升网站速度 expires缓存提升网站负载 反向代理实现nginx+apache动静分离 nginx实现负载均衡 nginx gzip压缩提升网站速度 网页内容的压 ...
- nginx反向代理nginx,RealServer日志打印真实ip
title: nginx反向代理nginx,RealServer日志打印真实ip date: 2016-05-11 19:15:37 tags: --- nginx反向代理nginx,RealServ ...
- nginx 反向代理 与 Apache backend的配置联合配置
nginx 反向代理 与 Apache backend的配置联合配置: 说明: nginx 将http映射到Apache上的特定子目录. 配置方法步骤: 1. 设置域名, 子域名映射到指定服务器ip ...
- nginx在使用非80端口做反向代理【转】
设置nginx反向代理,nginx在使用非80端口做反向代理时,浏览器访问发现返回302错误 upstream jboss{ server max_fails= fail_timeout=20s; s ...
- 生产环境中nginx既做web服务又做反向代理
一.写对于初入博客园的感想 众所周知,nginx是一个高性能的HTTP和反向代理服务器,在以前工作中要么实现http要么做反向代理或者负载均衡.尚未在同一台nginx或者集群上同时既实现HTTP又实现 ...
- 【nginx网站性能优化篇(3)】反向代理实现负载均衡
注意,本篇文章为负载均衡的理论篇,后续找个机会推出实战篇.理论篇主要讲述如何配置负载均衡,配置负载均衡不难.难的是真正的实战,比如如何做到多服务器之间的数据共享(session,file等),多cac ...
随机推荐
- javascript reduce map函数方法
retduce: 对数组中的所有元素调用指定的回调函数.该回调函数的返回值为累积结果,并且此返回值在下一次调用该回调函数时作为参数提供. 语法 array1.reduce(callbackfn ...
- Android Bander设计与实现 - 设计篇
转自:http://blog.csdn.net/universus/article/details/6211589#t7 Binder Android IPC Linux 内核 驱动 摘要 Binde ...
- iOS开发网络篇—GET请求和POST请求(转)
一.GET请求和POST请求简单说明 创建GET请求 1 // 1.设置请求路径 2 NSString *urlStr=[NSString stringWithFormat:@"http:/ ...
- HDU 3695 / POJ 3987 Computer Virus on Planet Pandora(AC自动机)(2010 Asia Fuzhou Regional Contest)
Description Aliens on planet Pandora also write computer programs like us. Their programs only consi ...
- [译]SQL Server 之 查询计划缓存和重编译
查询优化是一个复杂而且耗时的操作,所以SQL Server需要重用现有的查询计划.查询计划的缓存和重用在多数情况下是有益的的,但是在某些特殊的情况下,重编译一个查询计划可能能够改善性能. SELECT ...
- oracle DBA学习方法交流
你想做什么数据库 Oracle? db2?我是做Oracle的 DB2帮不了你 oracle的体系太庞大了,对于初学者来说,难免会有些无从下手的感觉,什么都想学,结果什么都学不好,所以把学习经验共享一 ...
- hdu 1754 单点更新
题意:很多学校流行一种比较的习惯.老师们很喜欢询问,从某某到某某当中,分数最高的是多少.这让很多学生很反感.不管你喜不喜欢,现在需要你做的是,就是按照老师的要求,写一个程序,模拟老师的询问.当然,老师 ...
- SQL Server:查询当前服务器有多少连接请求
有时DBA需要检查当前服务器有多少连接请求,以及连接请求的登录名,客户端版本,主机名,程序名等等之类的信息,我们就可以对服务器的连接状况有所了解,防止不明用户使用. SQL Server本身提供了这么 ...
- Spark metrics on wordcount example
I read the section Metrics on spark website. I wish to try it on the wordcount example, I can't make ...
- 下拉更新列表Android-PullToRefresh
项目地址:https://github.com/chrisbanes/Android-PullToRefresh