从FBV到CBV二(认证器)
span::selection, .CodeMirror-line > span > span::selection { background: #d7d4f0; }.CodeMirror-line::-moz-selection, .CodeMirror-line > span::-moz-selection, .CodeMirror-line > span > span::-moz-selection { background: #d7d4f0; }.cm-searching {background: #ffa; background: rgba(255, 255, 0, .4);}.cm-force-border { padding-right: .1px; }@media print { .CodeMirror div.CodeMirror-cursors {visibility: hidden;}}.cm-tab-wrap-hack:after { content: ""; }span.CodeMirror-selectedtext { background: none; }.CodeMirror-activeline-background, .CodeMirror-selected {transition: visibility 0ms 100ms;}.CodeMirror-blur .CodeMirror-activeline-background, .CodeMirror-blur .CodeMirror-selected {visibility:hidden;}.CodeMirror-blur .CodeMirror-matchingbracket {color:inherit !important;outline:none !important;text-decoration:none !important;}.CodeMirror-sizer {min-height:auto !important;}
-->
li {list-style-type:decimal;}.wiz-editor-body ol.wiz-list-level2 > li {list-style-type:lower-latin;}.wiz-editor-body ol.wiz-list-level3 > li {list-style-type:lower-roman;}.wiz-editor-body li.wiz-list-align-style {list-style-position: inside; margin-left: -1em;}.wiz-editor-body blockquote {padding: 0 12px;}.wiz-editor-body blockquote > :first-child {margin-top:0;}.wiz-editor-body blockquote > :last-child {margin-bottom:0;}.wiz-editor-body img {border:0;max-width:100%;height:auto !important;margin:2px 0;}.wiz-editor-body table {border-collapse:collapse;border:1px solid #bbbbbb;}.wiz-editor-body td,.wiz-editor-body th {padding:4px 8px;border-collapse:collapse;border:1px solid #bbbbbb;min-height:28px;word-break:break-word;box-sizing: border-box;}.wiz-editor-body td > div:first-child {margin-top:0;}.wiz-editor-body td > div:last-child {margin-bottom:0;}.wiz-editor-body img.wiz-svg-image {box-shadow:1px 1px 4px #E8E8E8;}.wiz-hide {display:none !important;}
-->
- 认证


'DEFAULT_AUTHENTICATION_CLASSES': (
'rest_framework_jwt.authentication.JSONWebTokenAuthentication',
'rest_framework.authentication.SessionAuthentication',
'rest_framework.authentication.BasicAuthentication',
)
}<wiz_code_mirror>
REST_FRAMEWORK = {
'DEFAULT_AUTHENTICATION_CLASSES': (
'rest_framework_jwt.authentication.JSONWebTokenAuthentication',
'rest_framework.authentication.SessionAuthentication',
'rest_framework.authentication.BasicAuthentication',
)
}


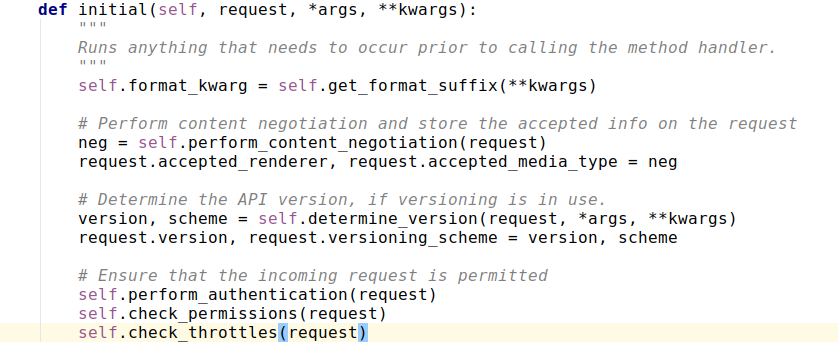
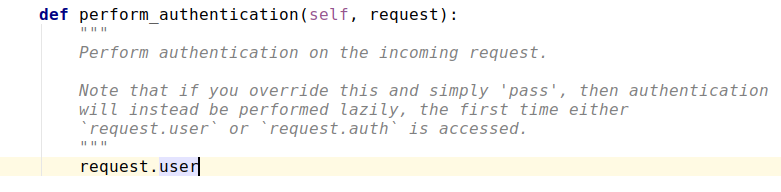


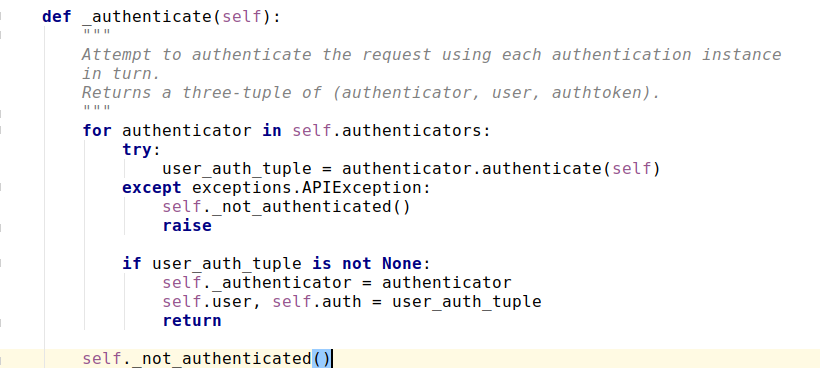

- for authenticator in self.authenticators:
通过遍历找到我们的认证器 - user_auth_tuple = authenticator.authenticate(self)
- except exceptions.APIException: self._not_authenticated() raise
- if user_auth_tuple is not None:
self._authenticator = authenticator
self.user, self.auth = user_auth_tuple
return
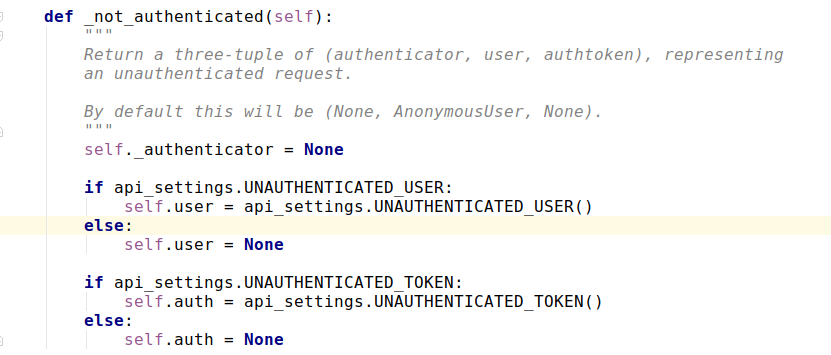
- self._not_authenticated()

class MyAuthentication(object):
# authenticate authenticate_header 两个方法是必须有的,authenticate用来写我们自己的认证方式,authenticate_header直接写pass就行,不写会抛错,缺少authenticate_header方法
def authenticate(self, request):
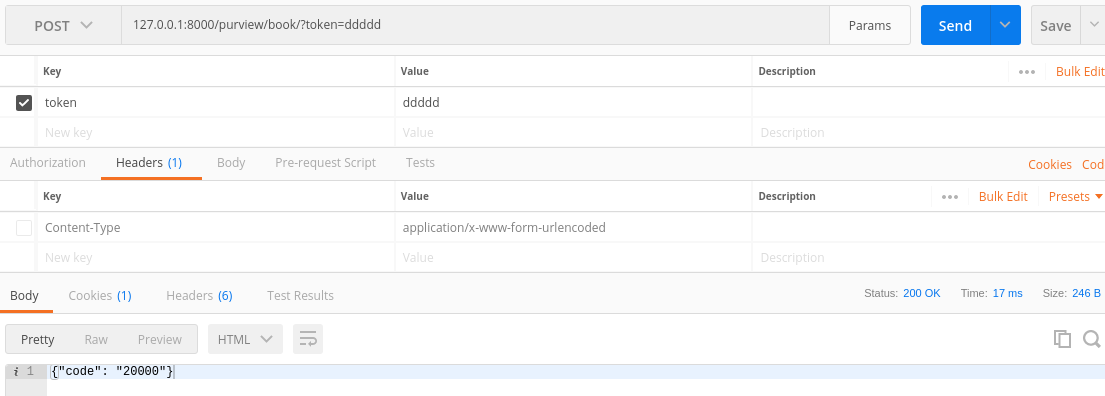
self.token = request._request.GET.get('token')
if not self.token:
raise AuthenticationFailed('用户认证失败') # 如果认证失败,就抛出一个AuthenticationFailed异常
return ('wbj', self.token) # 如果认证通过,就行返回一个元组,第一个元素是用户身份(user),第二个是auth
def authenticate_header(self, request):
pass
from rest_framework.exceptions import AuthenticationFailed
class MyAuthentication(object):
# authenticate authenticate_header 两个方法是必须有的,authenticate用来写我们自己的认证方式,authenticate_header直接写pass就行,不写会抛错,缺少authenticate_header方法
def authenticate(self, request):
self.token = request._request.GET.get('token')
if not self.token:
raise AuthenticationFailed('用户认证失败') # 如果认证失败,就抛出一个AuthenticationFailed异常
return ('wbj', self.token) # 如果认证通过,就行返回一个元组,第一个元素是用户身份(user),第二个是auth
def authenticate_header(self, request): # 如果不想写这个方法,可以让MyAuthentication继承于rest_framework.authentication.BaseAuthentication
pass
authentication_classes = [MyAuthentication, ]
def dispatch(self, request, *args, **kwargs):
return super().dispatch(request, *args, **kwargs)
def get(self, request):
# get a book
return HttpResponse(json.dumps({'code': '20000'}))
def post(self, request):
return HttpResponse(json.dumps({'code': '20000'}))
def put(self, request):
# update a book
return HttpResponse(json.dumps({'code': '20000'}))
def delete(self, request):
# delete a book
return HttpResponse(json.dumps({'code': '20000'}))
class Book(APIView):
authentication_classes = [MyAuthentication, ]
def dispatch(self, request, *args, **kwargs):
return super().dispatch(request, *args, **kwargs)
def get(self, request):
# get a book
return HttpResponse(json.dumps({'code': '20000'}))
def post(self, request):
return HttpResponse(json.dumps({'code': '20000'}))
def put(self, request):
# update a book
return HttpResponse(json.dumps({'code': '20000'}))
def delete(self, request):
# delete a book
return HttpResponse(json.dumps({'code': '20000'}))


从FBV到CBV二(认证器)的更多相关文章
- django的FBV和CBV的装饰器例子
备忘 def auth(func): def inner(request,*args,**kwargs): u = request.COOKIES.get('username111') if not ...
- 一、虚拟环境.二、路由配置主页与404.三、2.x路由分发.四、伪静态.五、request对象.六、FBV与CBV.七、文件上传.
一.虚拟环境 ''' 解决版本共存 1. 用pycharm选择File点击NewProject然后选择virtualenv创建一个纯净环境 2. 打开下载的目录将venv文件夹下的所有文件(纯净的环境 ...
- django基础 -- 4. 模板语言 过滤器 模板继承 FBV 和CBV 装饰器 组件
一.语法 两种特殊符号(语法): {{ }}和 {% %} 变量相关的用{{}},逻辑相关的用{%%}. 二.变量 1. 可直接用 {{ 变量名 }} (可调用字符串, 数字 ,列表,字典,对象等) ...
- diango中的MTV——FBV/CBV以及装饰器的复用问题解决
MVC M: model 模型 与数据库交互 V: view 视图 HTML C:controller 控制器 流程 和 业务逻辑 MTV M:model ORM T:template 模板 HTML ...
- epic游戏平台如何启用认证器应用程序/二次验证码/谷歌身份验证器?
1.登陆epic游戏平台,找到二次验证绑定界面 登陆https://www.epicgames.com/store/zh-CN/, 点右上角用户头像-[账户]. 之后点-[密码与安全] 在[双重验证] ...
- Django FBV和CBV -
一.FBV和CBV 在Python菜鸟之路:Django 路由.模板.Model(ORM)一节中,已经介绍了几种路由的写法及对应关系,那种写法可以称之为FBV: function base view ...
- CBV加装饰器解决登录注册问题和 <<中间件>>
文本目录 CBV加装饰器解决登录注册问题 一:什么是中间件 二:中间件有什么用 三:自定义中间件 四:中间件应用场景 五:SCRF TOKEN跨站请求伪造 六: 其他操作 CBV加装饰器解决登录注册问 ...
- Python菜鸟之路:Django 路由补充1:FBV和CBV - 补充2:url默认参数
一.FBV和CBV 在Python菜鸟之路:Django 路由.模板.Model(ORM)一节中,已经介绍了几种路由的写法及对应关系,那种写法可以称之为FBV: function base view ...
- Django CBV加装饰器、Django中间件、auth模块
一. CBV加装饰器 在视图层中,基于函数的视图叫FBV(function base views),基于类的视图叫CBV(class base views).当需要用到装饰器时,例如之前的基于Cook ...
随机推荐
- JDBC事务案例学习
package com.loaderman.demo.d_tx; import com.loaderman.demo.utils.JdbcUtil; import java.sql.Connectio ...
- JDBC插入数据,获取自增长值
package com.loaderman.demo.c_auto; public class Dept { private int id; private String deptName; publ ...
- Back键和Menu键程序退出弹窗以及按钮退出程序弹窗的实现
MainActivity.java package com.loaderman.backmenudemo; import android.content.Intent; import android. ...
- 运维之思科篇——NAT基础配置
一. NAT(网络地址转换) 1. 作用:通过将内部网络的私有IP地址翻译成全球唯一的公网IP地址,使内部网络可以连接到互联网等外部网络上. 2. 优点: 节省公有合法IP地址 处理地址重叠 增强灵活 ...
- 客户端连接oracle11出现提示ORA-12514:错误解决方法
近来安装oracle11g,使用后发现plsql和sqldeveloper等客户端工具不能用,提示以下错误: 1.ORA-12514: TNS: 程序无法监听 原因:OracleOraDb11g_ho ...
- JavaFx入门(一)
JavaFx和Swing的对比: javaFX确实比swing好看些,但没有swing的事件按钮等写法爽快,特别是使用eclipse的matisse开发视图,托拉拽的方式.可javaFX不只是有swi ...
- gl-transitions 【68个转场效果图】
angular.glsl Bounce.glsl BowTieHorizontal.glsl BowTieVertical.glsl burn.glsl ButterflyWaveScrawler.g ...
- Python中的变量和作用域详解
Python中的变量和作用域详解 python中的作用域分4种情况: L:local,局部作用域,即函数中定义的变量: E:enclosing,嵌套的父级函数的局部作用域,即包含此函数的上级函数的局部 ...
- body和document的梗
http://bbs.zhinengshe.com/thread-1199-1-1.html 1. 在空白的页面加点击事件,是加在body上么 ? <!DOCTYPE html> < ...
- C++ vector的详细用法
vector容器类型 vector容器是一个模板类,可以存放任何类型的对象(但必须是同一类对象).vector对象可以在运行时高效地添加元素,并且vector中元素是连续存储的.vector的构造 函 ...