[转]How to Create an Add-in for Microsoft Outlook
本文转自:https://www.codeproject.com/Articles/1112815/How-to-Create-an-Add-in-for-Microsoft-Outlook
1. Introduction
Visual Studio Tool for Office (VSTO) Add-in is a toolset available in .NET Framework that lets us extend and customize the Microsoft Office products in (versions 2003 and later).
In this tutorial, we are going use Outlook 2013 as a case study and Visual Studio 2015.
2. Outlook Object Model
This is the starting point when we want to create an Outlook Add-in and it's important to understand the meaning of these objects.
Outlook Object Model:
Application: It represents the Outlook application and is the highest-level object in the model. This object is the starting point to reach the other objects of the model.Explorer: It represents a window to display the folder's contents, such as emails, message, tasks, appointments, etc.Inspector: It represents a window to display an item, such as an email message, a task, an appointment, etc.MAPIFolder: It represents a folder that contains emails, contacts, appointments, etc.
Remark: This object is obsoleted and, in substitution, you should use Folder object instance ofMAPIFolder.MailItem: It represents an email message.AppointmentItem: It represents a meeting, a one-time appointment, schedule appointment or a meeting in the Calendar folder.TaskItem: It represents a task to be performed within a specified time frame.ContactItem: It represents a contact in the Contact folder.
3. How to Start
In the following section, we are going to start in this type of applications.
3.1. How to Create the Project
- Start Visual Studio.
- File menu / New / Project.
- In the template panel of the project, open Visual C#, Office/SharePoint, Office Add-ins.
- Select Outlook 2013 and 2016 VSTO Add-in template.
- Complete the project name and click OK.
3.2. Project Layout
Actually, the project layout generated for Visual Studio is very intuitive and simple.
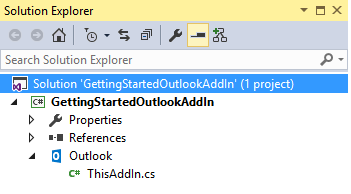
The main class is ThisAddIn and is like this:
public partial class ThisAddIn

{

    private void ThisAddIn_Startup(object sender, System.EventArgs e)

    {

    }

    private void ThisAddIn_Shutdown(object sender, System.EventArgs e)

    {

        // Note: Outlook no longer raises this event. If you have code that

        //    must run when Outlook shuts down, see

        //    http://go.microsoft.com/fwlink/?LinkId=506785

    }

    #region VSTO generated code

    /// <summary>

    /// Required method for Designer support - do not modify

    /// the contents of this method with the code editor.

    /// </summary>

    private void InternalStartup()

    {

        this.Startup += new System.EventHandler(ThisAddIn_Startup);

        this.Shutdown += new System.EventHandler(ThisAddIn_Shutdown);

    }

    #endregion

}
It's a very simple class. The ThisAddIn_Startup method is the application starting point. In this method, we can get the object Application and the other objects model. Also, we can perform our initialization processes such as configurations and access to a database.
The ThisAddIn_Shutdown method is executed when the user closes the Outlook. But it is important to say that in the current version, this method is not being called due to performance issues. However, if it's needed to perform some code when the Outlook is being closed, you can check this link for an alternative.
3.3. Application Object and the Others Model Objects
Next, we are going to see how to get others objects model. For this, we require to use the needed namespace:
using Outlook = Microsoft.Office.Interop.Outlook;
And it would be like this:
private void ThisAddIn_Startup(object sender, System.EventArgs e)

{

    // Get the Application object

    Outlook.Application application = this.Application;

    // Get the Inspector object

    Outlook.Inspectors inspectors = application.Inspectors;

    // Get the active Inspector object

    Outlook.Inspector activeInspector = application.ActiveInspector();

    if (activeInspector != null)

    {

        // Get the title of the active item when the Outlook start.

        MessageBox.Show("Active inspector: " + activeInspector.Caption);

    }

    // Get the Explorer objects

    Outlook.Explorers explorers = application.Explorers;

    // Get the active Explorer object

    Outlook.Explorer activeExplorer = application.ActiveExplorer();

    if (activeExplorer != null)

    {

        // Get the title of the active folder when the Outlook start.

        MessageBox.Show("Active explorer: " + activeExplorer.Caption);

    }

}
The other objects model can be obtained using the Inspector and Explorer objects. The how-to do it is generally event-based, for this reason, is necessary to subscribe to the events triggered by these two objects. It would be like this:
private void ThisAddIn_Startup(object sender, System.EventArgs e)

{

    // ...

    // Add a new Inspector to the application

    inspectors.NewInspector +=

        new Outlook.InspectorsEvents_NewInspectorEventHandler(

            Inspectors_AddTextToNewMail);

}
The Inspectors_AddTextToNewMail method is where would take place our functionality and it would be like this:
void Inspectors_AddTextToNewMail(Outlook.Inspector inspector)

{

}
The inspector param should be a reference to an email message or a contact, depending on the user action in the Outlook.
3.4. At the Project Ending
At the project ending, to remove the add-in from Outlook on the development computer, go to Build menu in Visual Studio and click on Clean Solution option.
3.5. How to Make An Installer
In Visual Studio, go to Build menu / "Publish...".
Remark: Sometimes, the installer generated by Visual Studio may fail when it is being installed in the user computer and you should get the following error message:
Quote:“The value of the property 'type' cannot be parsed. The error is: Could not load file or assembly …“.
To solve this error, check out this link and this link.
4. Basic Examples
In the following section, we are going to see some examples about creating a VSTO Add-in for Outlook 2013.
4.1. How to Handle a New Email Message
The following example takes place when the user creates a new email message and in this case, we'll put a custom text in the email subject and body. To accomplish it, in the ThisAddIn_Startup method, we need to register a new Inspector that when the user creates or open an email, this will call the Inspectors_AddTextToNewMail method.
private void ThisAddIn_Startup(object sender, System.EventArgs e)

{

    // Get the Application object

    Outlook.Application application = this.Application;

    // Add a new Inspector

    inspectors.NewInspector +=

        new Outlook.InspectorsEvents_NewInspectorEventHandler(

            Inspectors_AddTextToNewMail);

}

void Inspectors_AddTextToNewMail(Outlook.Inspector inspector)

{

    // Get the current item for this Inspecto object and check if is type

    // of MailItem

    Outlook.MailItem mailItem = inspector.CurrentItem as Outlook.MailItem;

    if (mailItem != null)

    {

        if (mailItem.EntryID == null)

        {

            mailItem.Subject = "My subject text";

            mailItem.Body = "My body text";

        }

    }

}
Remark: It's needed to check if the mailItem object is a type of MailItem class because when this event is triggered, by a user action in Outlook, we don't know which Inspector object will have been executed.
4.2. How to Handle an Email When It's Sent
The following example allows us to update an email message when it's sent, which is a very interesting and applicable functionality. There are Outlook add-ins that perform these type of operations, for example, the antivirus when they include a signature in the emails sent.
To accomplish it, we are going to subscribe our code to the ItemSend event, that it's triggered when an element is sent by the user or by a schedule operation.
private void ThisAddIn_Startup(object sender, System.EventArgs e)

{

    // Get the Application object

    Outlook.Application application = this.Application;

    // Subscribe to the ItemSend event, that it's triggered when an email is sent

    application.ItemSend +=

        new Outlook.ApplicationEvents_11_ItemSendEventHandler(

            ItemSend_BeforeSend);

}

void ItemSend_BeforeSend(object item, ref bool cancel)

{

    Outlook.MailItem mailItem = (Outlook.MailItem) item;

    if (mailItem != null)

    {

        mailItem.Body += "Modified by GettingStartedOutlookAddIn";

    }

    cancel = false;

}
4.3. How to Add a Control to the Ribbon Toolbar
In the following example, we'll see how to add controls to the ribbon (the toolbar) in Outlook. Specifically, how to add a button to the ribbon when the user edits or reads an email message.
Do the following:
- Add a new item to the project. In my case, I named it
RibbonDemo.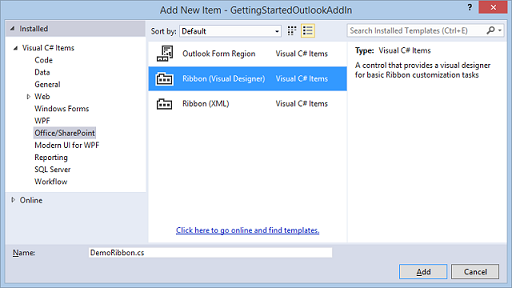
- In the ribbon designer, select the ribbon component and go to the Properties Window.
- Look for
RibbonTypeproperty and select the valuesMicrosoft.Outlook.Mail.ComposeandMicrosoft.Outlook.Mail.Read, which it refers to the ribbons of creating and reading email messages. - Let's set an appropriate name to the group. To accomplish it, select it and look for the
Labelproperty in the Property Window and type a name for it.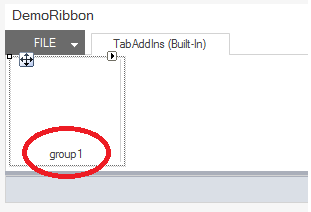
- Next, we add the button from the
ToolBoxand ready. - Optionally, using the
ControlSizeandShowImageproperties of the button, we can accomplish the Microsoft Office products' appearance.
What comes next is like any C# desktop application. Let's program the OnClick event of the button ButtonDemo and handle the email message.
private void buttonDemo_Click(object sender, RibbonControlEventArgs e)

{

    // Get the Application object

    Outlook.Application application = Globals.ThisAddIn.Application;

    // Get the active Inspector object and check if is type of MailItem

    Outlook.Inspector inspector = application.ActiveInspector();

    Outlook.MailItem mailItem = inspector.CurrentItem as Outlook.MailItem;

    if (mailItem != null)

    {

        MessageBox.Show("Subject: " + mailItem.Subject);

    }

}
5. Examples With Other Models
In the following section, we'll see examples where access is needed to other models.
Placing ourselves in context, when we are working with an email body, there are just a few functionalities we can perform using the Outlook objects, for example, accessing the Body properties of the MailItem object. But if it's needed to get more control over the email body, it's necessary to work with it as a Word document. Next, we'll see some examples about it.
Before Starting
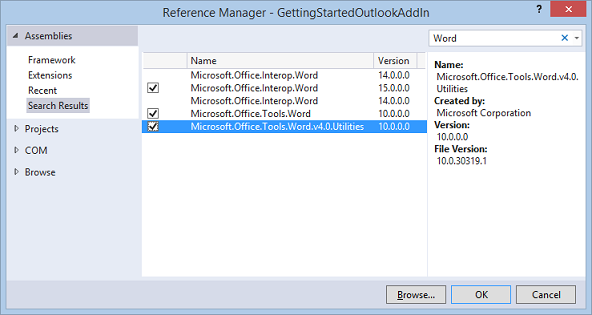
First, we'll see how to include the references to the Word Object Model from "Outlook 2013 and 2016 VSTO Add-in". It's important to select the same versions you're using in the Outlook application and also, select the references of tools and utilities.
In my case, I'm using the version 15.0.0.0 for Outlook.
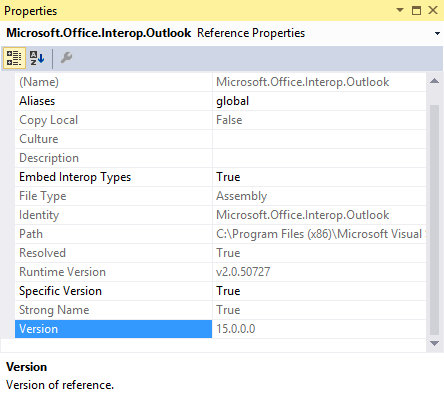
Therefore, we'll select the same versions of the Word references.
5.1. How to Get the Selected Text in an Email Message from a Button on the Ribbon
The following example takes place in the OnClick event of a button added to the Ribbon (see previous section 4.3. How to add a control to the Ribbon toolbar).
private void button2Demo_Click(object sender, RibbonControlEventArgs e)

{

    // Get the Application object

    Outlook.Application application = Globals.ThisAddIn.Application;

    // Get the active Inspector object and check if is type of MailItem

    Outlook.Inspector inspector = application.ActiveInspector();

    Outlook.MailItem mailItem = inspector.CurrentItem as Outlook.MailItem;

    if (mailItem != null)

    {

        Word.Document document = (Word.Document) inspector.WordEditor;

        string selectedText = document.Application.Selection.Text;

        MessageBox.Show(selectedText);

    }

}
The following picture takes place when the user is creating a new email. In this, we can see that the application shows a message with the text where the user has selected and clicked on the "Get text selected" button.

5.2. How to Subscribe to Events Over the Email Body
In the following example, we'll demonstrate how to subscribe our application to the mouse's events that the user performs over an email body. Specifically, we'll subscribe to events from the Word document (that it represent the email body) and when the user performs a double-click on the text, we'll get the word where the click was done.
We'll start from the application entry point and we'll create an Inspector object to monitor when the user creates/edits an email.
private void ThisAddIn_Startup(object sender, System.EventArgs e)

{

    // Get the Application object

    Outlook.Application application = this.Application;

    // Add a new Inspector

    inspectors.NewInspector +=

        new Outlook.InspectorsEvents_NewInspectorEventHandler(

            Inspectors_RegisterEventWordDocument);

}
With this Inspector, let's execute our code when the email editor is opened. At this time, we'll check that the Inspector object is a MailItem. Next, we'll check that the email editor is a Word editor (sometimes it is of another type) and, at last, we'll get the Word document object.
void Inspectors_RegisterEventWordDocument(Outlook.Inspector inspector)

{

    Outlook.MailItem mailItem = inspector.CurrentItem as Outlook.MailItem;

    if (mailItem != null)

    {

        // Check that the email editor is Word editor

        // Although "always" is a Word editor in Outlook 2013, it's best done perform this check

        if (inspector.EditorType == Outlook.OlEditorType.olEditorWord

            && inspector.IsWordMail())

        {

            // Get the Word document

            Word.Document document = inspector.WordEditor;

            if (document != null)

            {

                // Subscribe to the BeforeDoubleClick event of the Word document

                document.Application.WindowBeforeDoubleClick +=

                    new Word.ApplicationEvents4_WindowBeforeDoubleClickEventHandler(

                        ApplicationOnWindowBeforeDoubleClick);

            }

        }

    }

}
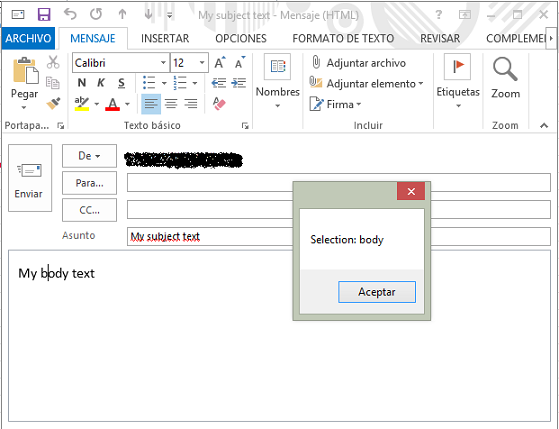
Next, we're going to subscribe to the BeforeDoubleClick event of the Word document that we got (in previous code) and when the event is triggered, we'll select the word where the user has clicked.
private void ApplicationOnWindowBeforeDoubleClick(Word.Selection selection,

    ref bool cancel)

{

    // Get the selected word

    Word.Words words = selection.Words;

    MessageBox.Show("Selection: " + words.First.Text);

}
We can get access to the user selected words by the selection object, which it has a lot of functionalities. In our example, using the Word property, we get a collection of all the selected words by the user and, the Firstproperty is where the user has clicked.
The following picture takes place when the user is creating a new email. In this, we can see that the application shows a message with the text where the user has done a double-click.
6. Conclusion
As can be seen, we can extend the Outlook functionalities in many ways and easily, using the VSTO Add-in tools. In my opinion, there're many requirements to this type of application in the enterprise sectors that resolve some kind of problems in a quick way, and also, usually the office users feel comfortable with Microsoft Office products than others applications. With VSTO Add-in, we can query databases to get employee's contacts, product list to include on emails, synchronize appointments between an enterprise application and the Outlook, and so on.
7. References
License
This article, along with any associated source code and files, is licensed under The Code Project Open License (CPOL)
[转]How to Create an Add-in for Microsoft Outlook的更多相关文章
- Home not found. Define system property "openfireHome" or create and add the openfire_init.xml file to the classpath
启动openfire后出现这个错误,貌似什么配置没对吧.网上搜索了下,找到解决办法, $ vi /etc/profile在里面加入:export openfireHome=/opt/openfire ...
- Problem to create "New Database Diagram" in Microsoft SQL Server Management Studio for SQL Server 2012
Error: when click "New Database Diagram", a error popped up and said "Attempted to re ...
- WMIC命令的利用技巧
WMIC扩展WMI(Windows Management Instrumentation,Windows管理工具),提供了从命令行接口和批命令脚本执行系统管理的支持.在WMIC出现之前,如果要管理WM ...
- SharePoint自动化系列——Create a local user and add to SharePoint
转载请注明出自天外归云的博客园:http://www.cnblogs.com/LanTianYou/ 实现过程:在本地创建一个local user并将该user添加到Administrators组中, ...
- 通过TStringList保存csv文件,只要循环.Add表格里面的每行记录进去,保存即可
dlgSave := TSaveDialog.Create(nil); dlgSave.filter := 'CSV文件|*.CSV'; dlgSave.DefaultExt := '*.CSV'; ...
- Add AI feature to Xamarin.Forms app
Now, AI is one of important technologies.Almost all platforms have API sets of AI. Following list is ...
- How to automate Microsoft Word to create a new document by using Visual C#
How to automate Microsoft Word to create a new document by using Visual C# For a Microsoft Visual Ba ...
- 使用create react app教程
This project was bootstrapped with Create React App. Below you will find some information on how to ...
- CREATE FUNCTION - 定义一个新函数
SYNOPSIS CREATE [ OR REPLACE ] FUNCTION name ( [ argtype [, ...] ] ) RETURNS rettype { LANGUAGE lang ...
随机推荐
- Mongoose也是个大坑
http://blog.csdn.net/qq_31280709/article/details/53900290 折腾了两个小时,MLGB居然是因为mongoose查询集合的时候自动加s后缀!!!
- 知物由学 | 未来安全隐患:AI的软肋——故意欺骗神经网络
本文由 网易云发布. “知物由学”是网易云易盾打造的一个品牌栏目,词语出自汉·王充<论衡·实知>.人,能力有高下之分,学习才知道事物的道理,而后才有智慧,不去求问就不会知道.“知物由学 ...
- Zookeeper原理分析之存储结构Snapshot
Zookeeper内存结构 Zookeeper数据在内存中的结构类似于linux的目录结构,DataTree代表这个目录结构, DataNode代表一个节点.DataTree默认初始化三个目录:&qu ...
- ajax请求失败 chrome报错net::ERR_INCOMPLETE_CHUNKED_ENCODING 问题原因
项目框架 React.js + webpack + ES6 + JQuery 问题场景 ajax请求用户数据,服务器返回json格式,数据很可能会比较长,甚至达到几百kb. 问题描述 客户端ajax请 ...
- 记录Kali Linux 安装输入法过程
1.首先设置源,打开终端输入. eafpad /etc/apt/sources.list 清空Sources.list里的内容,设置一个阿里云的源就行了. deb http://mirrors.ali ...
- day 55 linux 的常用命令
前言 前面咱们已经成功安装了Linux系统--centos7,那么我们现在提好裤腰带,准备奔向Linux的大门. Linux命令行的组成结构 [root@oldboy_python ~]# [roo ...
- iOS开发--应用国际化,应用内切换语言
1.前言 自己负责的项目需要做国际化,并且要求应用内部切换语言.这个是可以做到的,也并不难,可以直接戳Github看一下 https://github.com/leo90821/Localiztion ...
- 百度地图笔记_覆盖物(标注marker,折线polyline,多边形polygon)的点击弹窗和右键菜单
利用绘制工具绘制点线面,并在执行绘制完成回调事件给相应覆盖物添加事件操作,提供标注的点击弹窗和标注.折线.多边形的右键删除 效果图如下: 完整代码如下:html+js <!DOCTYPE htm ...
- Fast Newman-FN算法以及模块度定义介绍
一.社区的定义 Newman第一次提出模块度定义就是在2004年发表的这篇文章“fast algorithm for community structure in networks”,第一次用量化的公 ...
- string的七种用法
以下是string的七种用法,注意哦,记得要时常去查看java的API文档,那个里面也有很详细的介绍 1>获取 1.1:字符串中包含的字符数,也就是字符串的长度. int length():获 ...