Android PopupWindow的使用技巧(转)
Android PopupWindow的使用技巧
PopupWindow是Android上自定义弹出窗口,使用起来很方便。
PopupWindow的构造函数为
public PopupWindow(View contentView, int width, int height, boolean focusable)
contentView为要显示的view,width和height为宽和高,值为像素值,也可以是MATCHT_PARENT和WRAP_CONTENT。
focusable为是否可以获得焦点,这是一个很重要的参数,也可以通过
public void setFocusable(boolean focusable)
来设置,如果focusable为false,在一个Activity弹出一个PopupWindow,按返回键,由于PopupWindow没有焦点,会直接退出Activity。如果focusable为true,PopupWindow弹出后,所有的触屏和物理按键都有PopupWindows处理。
如果PopupWindow中有Editor的话,focusable要为true。
下面实现一个简单的PopupWindow
主界面的layout为:

<RelativeLayout xmlns:android="http://schemas.android.com/apk/res/android"

    xmlns:tools="http://schemas.android.com/tools"

    android:id="@+id/layout_main"

    android:layout_width="match_parent"

    android:layout_height="match_parent"

    android:paddingBottom="@dimen/activity_vertical_margin"

    android:paddingLeft="@dimen/activity_horizontal_margin"

    android:paddingRight="@dimen/activity_horizontal_margin"

    android:paddingTop="@dimen/activity_vertical_margin"

    tools:context=".MainActivity" >

    <Button

        android:id="@+id/btn_test_popupwindow"

        android:layout_width="wrap_content"

        android:layout_height="wrap_content"

        android:layout_centerInParent="true"

        android:text="@string/app_name" />

</RelativeLayout>

PopupWindow的layout为:

<?xml version="1.0" encoding="utf-8"?>

<RelativeLayout xmlns:android="http://schemas.android.com/apk/res/android"

    android:layout_width="wrap_content"

    android:layout_height="wrap_content"

    android:background="#000000" >

    <TextView

        android:layout_width="wrap_content"

        android:layout_height="80dp"

        android:text="@string/app_name"

        android:textColor="#ffffffff"

        android:layout_centerInParent="true"

        android:gravity="center"/>

</RelativeLayout>

Activity的代码为:

public class MainActivity extends Activity {

    private Button mButton;

    private PopupWindow mPopupWindow;

    @Override

    protected void onCreate(Bundle savedInstanceState) {

        super.onCreate(savedInstanceState);

        setContentView(R.layout.activity_main);

        View popupView = getLayoutInflater().inflate(R.layout.layout_popupwindow, null);

        mPopupWindow = new PopupWindow(popupView, LayoutParams.MATCH_PARENT, LayoutParams.WRAP_CONTENT, true);

        mPopupWindow.setTouchable(true);

        mPopupWindow.setOutsideTouchable(true);

        mPopupWindow.setBackgroundDrawable(new BitmapDrawable(getResources(), (Bitmap) null));

        mButton = (Button) findViewById(R.id.btn_test_popupwindow);

        mButton.setOnClickListener(new OnClickListener() {

            @Override

            public void onClick(View v) {

                mPopupWindow.showAsDropDown(v);

            }

        });

    }

}

这三行代码
mPopupWindow.setTouchable(true);

mPopupWindow.setOutsideTouchable(true);

mPopupWindow.setBackgroundDrawable(new BitmapDrawable(getResources(), (Bitmap) null));
的作用是点击空白处的时候PopupWindow会消失
mPopupWindow.showAsDropDown(v);
这一行代码将PopupWindow以一种向下弹出的动画的形式显示出来
public void showAsDropDown(View anchor, int xoff, int yoff)
这个函数的第一个参数为一个View,我们这里是一个Button,那么PopupWindow会在这个Button下面显示,xoff,yoff为显示位置的偏移。
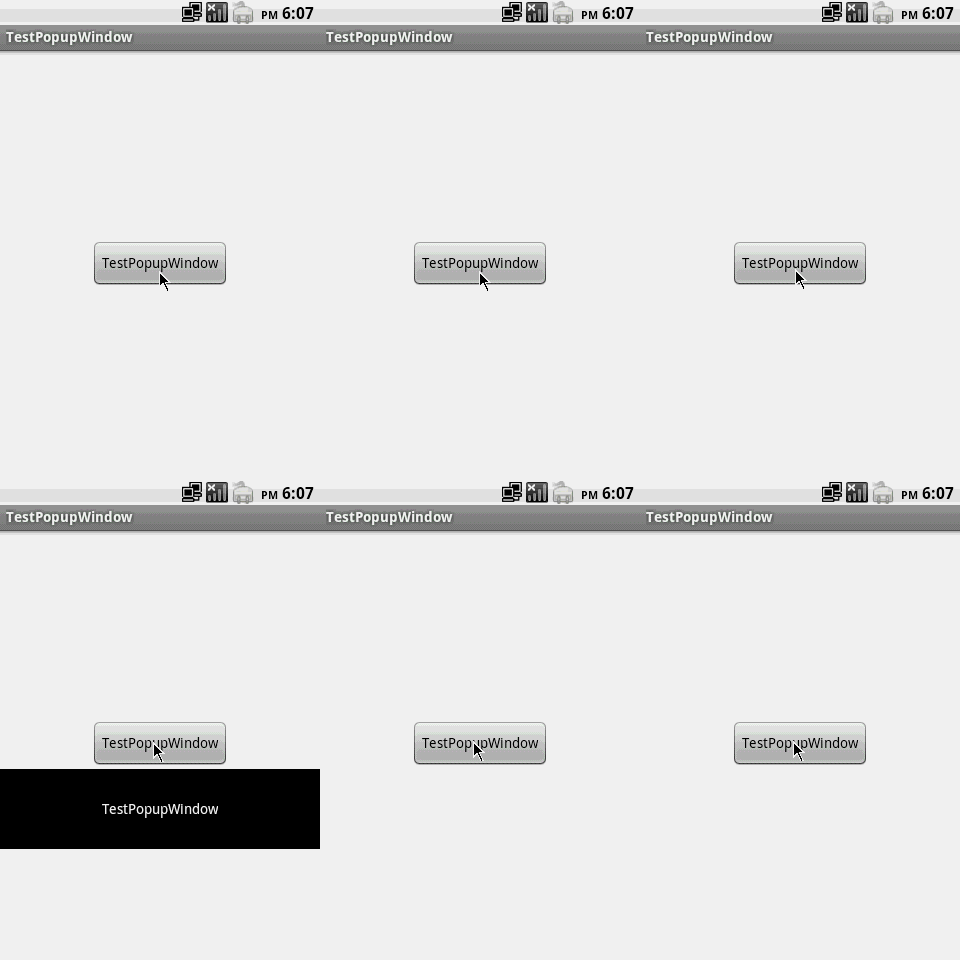
点击按钮,就会显示出PopupWindow

很多时候我们把PopupWindow用作自定义的菜单,需要一个从底部向上弹出的效果,这就需要为PopupWindow添加动画。
在工程res下新建anim文件夹,在anim文件夹先新建两个xml文件
menu_bottombar_in.xml

<?xml version="1.0" encoding="utf-8"?>

<set xmlns:android="http://schemas.android.com/apk/res/android" >

    <translate

        android:duration="250"

        android:fromYDelta="100.0%"

        android:toYDelta="0.0" />

</set>

menu_bottombar_out.xml

<?xml version="1.0" encoding="utf-8"?>

<set xmlns:android="http://schemas.android.com/apk/res/android" >

    <translate

        android:duration="250"

        android:fromYDelta="0.0"

        android:toYDelta="100%" />

</set>

在res/value/styles.xml添加一个sytle
    <style name="anim_menu_bottombar">

        <item name="android:windowEnterAnimation">@anim/menu_bottombar_in</item>

        <item name="android:windowExitAnimation">@anim/menu_bottombar_out</item>

    </style>
Acivity修改为

public class MainActivity extends Activity {

    private PopupWindow mPopupWindow;

    @Override

    protected void onCreate(Bundle savedInstanceState) {

        super.onCreate(savedInstanceState);

        setContentView(R.layout.activity_main);

        View popupView = getLayoutInflater().inflate(R.layout.layout_popupwindow, null);

        mPopupWindow = new PopupWindow(popupView, LayoutParams.MATCH_PARENT, LayoutParams.WRAP_CONTENT, true);

        mPopupWindow.setTouchable(true);

        mPopupWindow.setOutsideTouchable(true);

        mPopupWindow.setBackgroundDrawable(new BitmapDrawable(getResources(), (Bitmap) null));

        mPopupWindow.getContentView().setFocusableInTouchMode(true);

        mPopupWindow.getContentView().setFocusable(true);

        mPopupWindow.getContentView().setOnKeyListener(new OnKeyListener() {

            @Override

            public boolean onKey(View v, int keyCode, KeyEvent event) {

                if (keyCode == KeyEvent.KEYCODE_MENU && event.getRepeatCount() == 0

                        && event.getAction() == KeyEvent.ACTION_DOWN) {

                    if (mPopupWindow != null && mPopupWindow.isShowing()) {

                        mPopupWindow.dismiss();

                    }

                    return true;

                }

                return false;

            }

        });

    }

    @Override

    public boolean onKeyDown(int keyCode, KeyEvent event) {

        if (keyCode == KeyEvent.KEYCODE_MENU && event.getRepeatCount() == 0) {

            if (mPopupWindow != null && !mPopupWindow.isShowing()) {

                mPopupWindow.showAtLocation(findViewById(R.id.layout_main), Gravity.BOTTOM, 0, 0);

            }

            return true;

        }

        return super.onKeyDown(keyCode, event);

    }

}

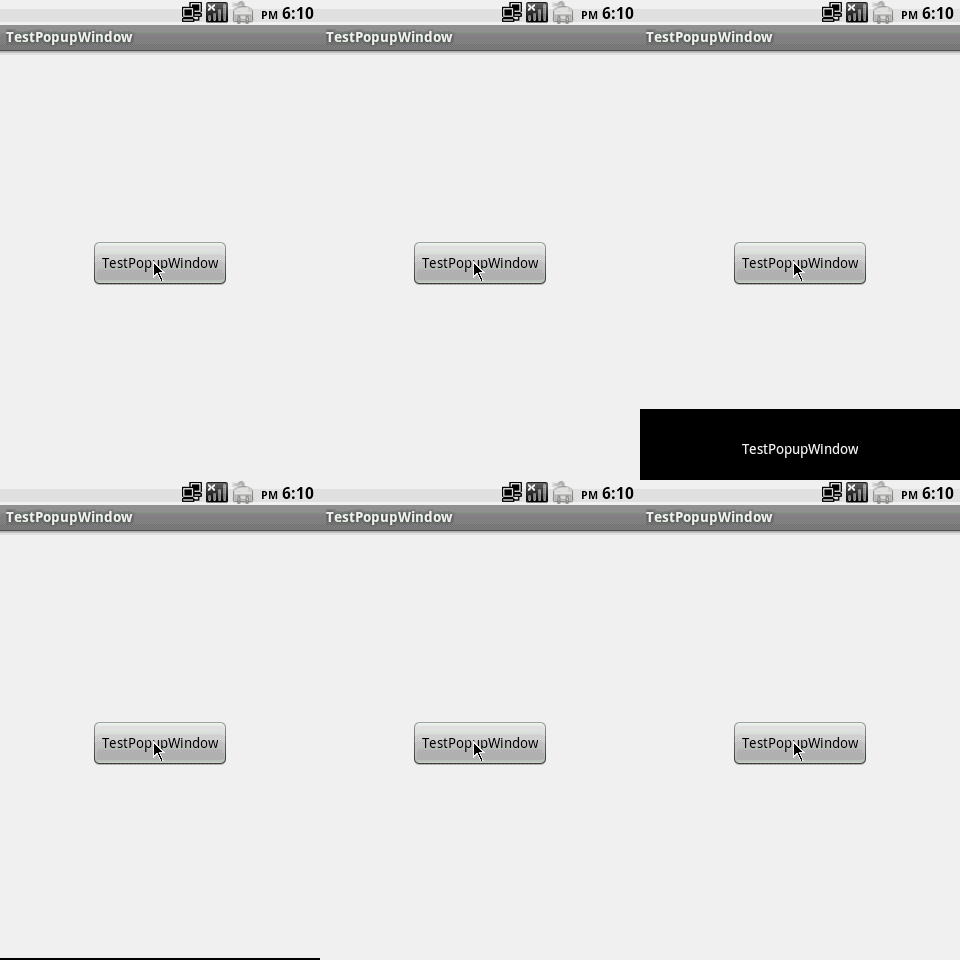
这样点击菜单键会弹出自定义的PopupWindow,点击空白处或者返回键、菜单键,PopupWindow会消失。

Android PopupWindow的使用技巧(转)的更多相关文章
- Android PopupWindow Dialog 关于 is your activity running 崩溃详解
Android PopupWindow Dialog 关于 is your activity running 崩溃详解 [TOC] 起因 对于 PopupWindow Dialog 需要 Activi ...
- 最强 Android Studio 使用小技巧和快捷键
写在前面 本文翻译自 Android Studio Tips by Philippe Breault,一共收集了62个 Android Studio 使用小技巧和快捷键. 根据这些小技巧的使用场景,本 ...
- Android PopupWindow的使用和分析
Android PopupWindow的使用和分析 PopupWindow使用 PopupWindow这个类用来实现一个弹出框,可以使用任意布局的View作为其内容,这个弹出框是悬浮在当前activi ...
- Android课程---Android Studio使用小技巧:提取方法代码片段
这篇文章主要介绍了Android Studio使用小技巧:提取方法代码片段,本文分享了一个快速复制粘贴方法代码片段的小技巧,并用GIF图演示,需要的朋友可以参考下 今天来给大家介绍一个非常有用的Stu ...
- Android开发——ListView使用技巧总结(二)
0. 前言 Android中的ListView是用的比较多的控件之一,在上一篇Android开发--ListView使用技巧总结(一)中对ListView的ViewHolder机制.优化卡顿方式以及 ...
- Android开发——ListView使用技巧总结(一)
)还有一点就是要控制异步任务的执行频率,因为当用户频繁的上下滑动,会瞬间产生上百个异步任务,会带来无意义的大量的UI更新操作,因此可以考虑在列表滑动时停止进行异步任务,直到列表停下来. //判断列表的 ...
- 最强 Android Studio 使用小技巧和快捷键总结
最强 Android Studio 使用小技巧和快捷键总结 写在前面 本文翻译自 Android Studio Tips by Philippe Breault,一共收集了62个 Android ...
- Android Studio 使用小技巧和快捷键
Android Studio 使用小技巧和快捷键 Alt+回车 导入包,自己主动修正 Ctrl+N 查找类 Ctrl+Shift+N 查找文件 Ctrl+Alt+L 格式化代码 Ctrl+Alt ...
- (转载) Android Studio你不知道的调试技巧
Android Studio你不知道的调试技巧 标签: android studio 2015-12-29 16:05 2514人阅读 评论(0) 收藏 举报 分类: android(74) ...
随机推荐
- 《Windows驱动开发技术详解》之Windows内核函数
内核模式下字符串操作 ANSI_STRING和UNICODE_STRING分别定义如下:
- hdu_3068_最长回文(Manacher)
题目连接:http://acm.hdu.edu.cn/showproblem.php?pid=3068 题意:给你一个字符串,让你求最长的回文子串. 题解:数据量比较大,暴力O(n2)会超时,直接上马 ...
- 缓存2 动态缓存 memcached
01准备下载好memcached.exe文件-->放置c:\memcached目录中02准备下载好php_memcache.dll文件-->放置php\ext扩展目录中03配置 php.i ...
- LeetCode OJ 199. Binary Tree Right Side View
Given a binary tree, imagine yourself standing on the right side of it, return the values of the nod ...
- rebot framework的搭建 在windows下
Robot Framework 介绍 Robot Framework 是一款基于 Python 的功能自动化测试框架.它具备良好的可扩展性,支持关键字驱动,可以同时测试多种类型的客户端或者接口,可以进 ...
- 使用PLSQL Developer连接Oracle Database 11g Express Edition
要使用oracle数据库,需要准备三部分: 1.oracle服务端 2.oracle客户端 3.连接工具 你装的Oracle Database 11g Express Edition就是服务端,pls ...
- Server对象(是属性)
html, body { font-size: 10.5pt; } body { font-family: 微软雅黑, Helvetica, "Hiragino Sans GB", ...
- linux脚本定期执行
vi /etc/crontab SHELL=/bin/bash PATH=/sbin:/bin:/usr/sbin:/usr/bin MAILTO=root HOME=/ # .----------- ...
- cisco 2950 3550 3750 系列交换机密码破解
破解密码原则:只删除密码 ,不破坏配置#本文中的#号表示注释的意思#第一步. 连接交换机的console口到终端#第二步. 按住交换机面板上的mode键的同时 插入电源,直到sys灯不闪,常亮再松开m ...
- myeclipse 之 快捷键
简单记录一下,新装了个机器,win7系统,想设置一下自己习惯的快捷键 如:ctrl+alt+方向键,复制行,发现设置不上,原先的自带的也失效,设置一下ctrl+alt+其它键,ok可以使用,这说明某些 ...
