环境篇:Virtualbox+Vagrant安装Centos7
环境篇:Virtualbox+Vagrant安装Centos7

1 安装Vagrant
Vagrant下载地址:https://www.vagrantup.com/
Vagrant百度网盘:https://pan.baidu.com/s/1jqnMml024niqWQPbrGVuJw提取码:xv8h
傻瓜安装即可
vagrant -v 查看版本

2 下载virtualbox.box镜像
virtualbox.box百度网盘:https://pan.baidu.com/s/1EBrysc13fd0qf9EbT5rKdw提取码:1dk4
3 安装Virtualbox
virtualbox下载地址:https://www.virtualbox.org
virtualbox百度网盘:https://pan.baidu.com/s/1InyLZ-8Zmjuj7Qyk0Qg1Uw提取码:ewty
傻瓜安装即可,注意和Vagrant有版本兼容问题
4 安装centos7
4.1 添加本地centos/7镜像
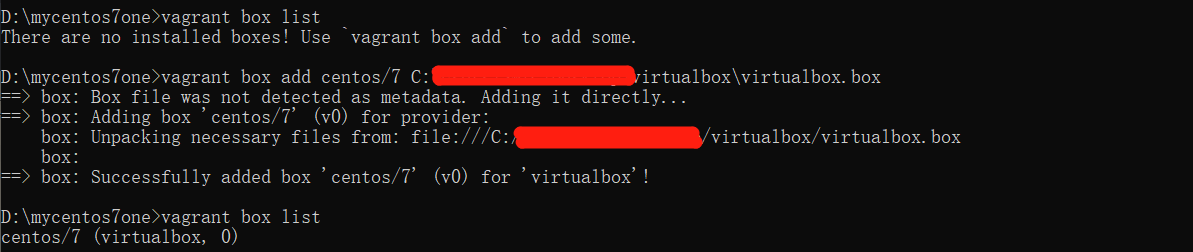
找到下载好的virtualbox.box文件目录
使用
vagrant box add centos/7 C:\Users\SMZC\Desktop\virtualbox\virtualbox.box添加vagrant镜像使用
vagrant box list查询镜像
4.2 创建虚拟机环境
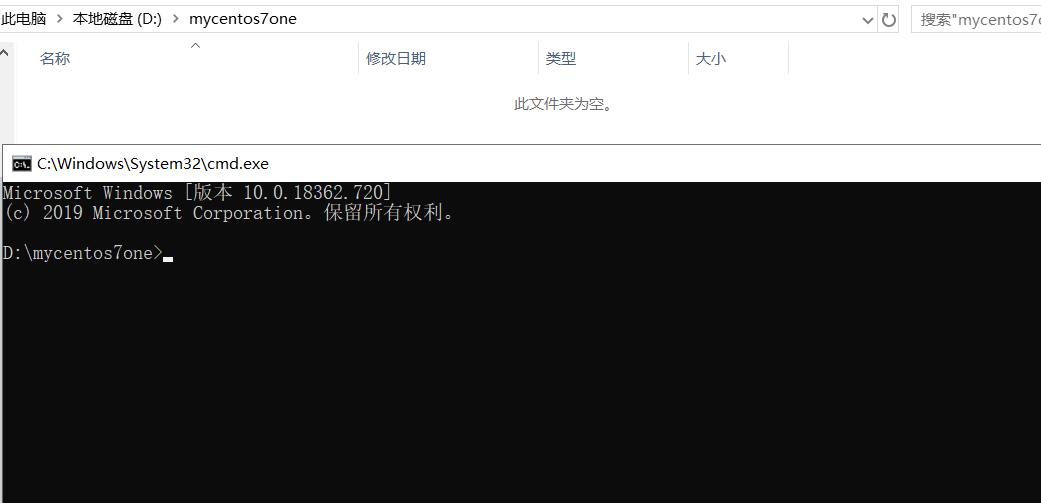
- 新建一个文件夹,并进入命令行cmd
- 使用
vagrant init命令
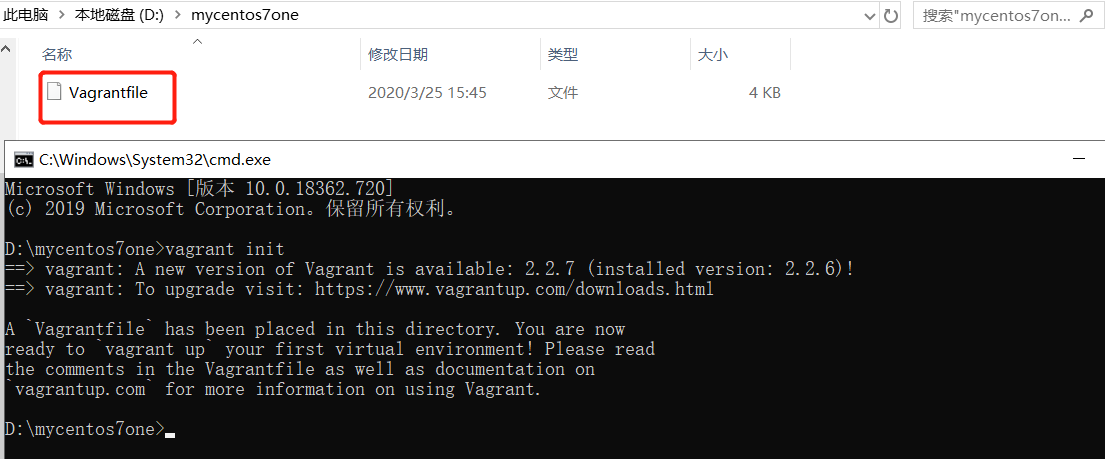
- 修改Vagrantfile文件
# -*- mode: ruby -*-
# vi: set ft=ruby :
# All Vagrant configuration is done below. The "2" in Vagrant.configure
# configures the configuration version (we support older styles for
# backwards compatibility). Please don't change it unless you know what
# you're doing.
Vagrant.configure("2") do |config|
# The most common configuration options are documented and commented below.
# For a complete reference, please see the online documentation at
# https://docs.vagrantup.com.
# Every Vagrant development environment requires a box. You can search for
# boxes at https://vagrantcloud.com/search.
#拉取镜像centos/7
config.vm.box = "centos/7"
# Disable automatic box update checking. If you disable this, then
# boxes will only be checked for updates when the user runs
# `vagrant box outdated`. This is not recommended.
# config.vm.box_check_update = false
# Create a forwarded port mapping which allows access to a specific port
# within the machine from a port on the host machine. In the example below,
# accessing "localhost:8080" will access port 80 on the guest machine.
# NOTE: This will enable public access to the opened port
# config.vm.network "forwarded_port", guest: 80, host: 8080
#采用桥接网络,共享主机网络
config.vm.network "public_network"
# Create a forwarded port mapping which allows access to a specific port
# within the machine from a port on the host machine and only allow access
# via 127.0.0.1 to disable public access
# config.vm.network "forwarded_port", guest: 80, host: 8080, host_ip: "127.0.0.1"
# Create a private network, which allows host-only access to the machine
# using a specific IP.
# config.vm.network "private_network", ip: "192.168.33.10"
# Create a public network, which generally matched to bridged network.
# Bridged networks make the machine appear as another physical device on
# your network.
# config.vm.network "public_network"
# Share an additional folder to the guest VM. The first argument is
# the path on the host to the actual folder. The second argument is
# the path on the guest to mount the folder. And the optional third
# argument is a set of non-required options.
# config.vm.synced_folder "../data", "/vagrant_data"
# Provider-specific configuration so you can fine-tune various
# backing providers for Vagrant. These expose provider-specific options.
# Example for VirtualBox:
#
# config.vm.provider "virtualbox" do |vb|
# # Display the VirtualBox GUI when booting the machine
# vb.gui = true
#
# # Customize the amount of memory on the VM:
# vb.memory = "1024"
# end
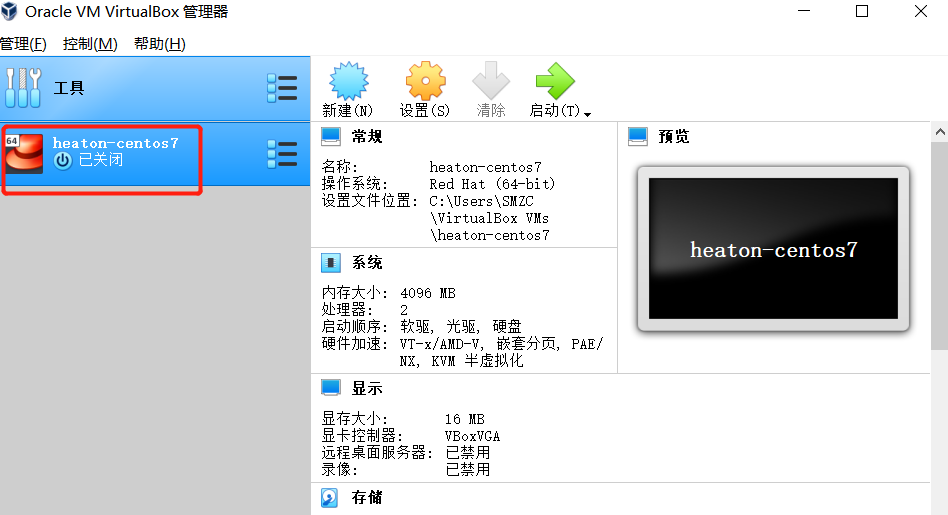
#虚拟机名字heaton-centos7,内存,核数
config.vm.provider "virtualbox" do |vb|
vb.memory = "4096"
vb.name= "heaton-centos7"
vb.cpus= 2
end
#
# View the documentation for the provider you are using for more
# information on available options.
# Enable provisioning with a shell script. Additional provisioners such as
# Puppet, Chef, Ansible, Salt, and Docker are also available. Please see the
# documentation for more information about their specific syntax and use.
# config.vm.provision "shell", inline: <<-SHELL
# apt-get update
# apt-get install -y apache2
# SHELL
end
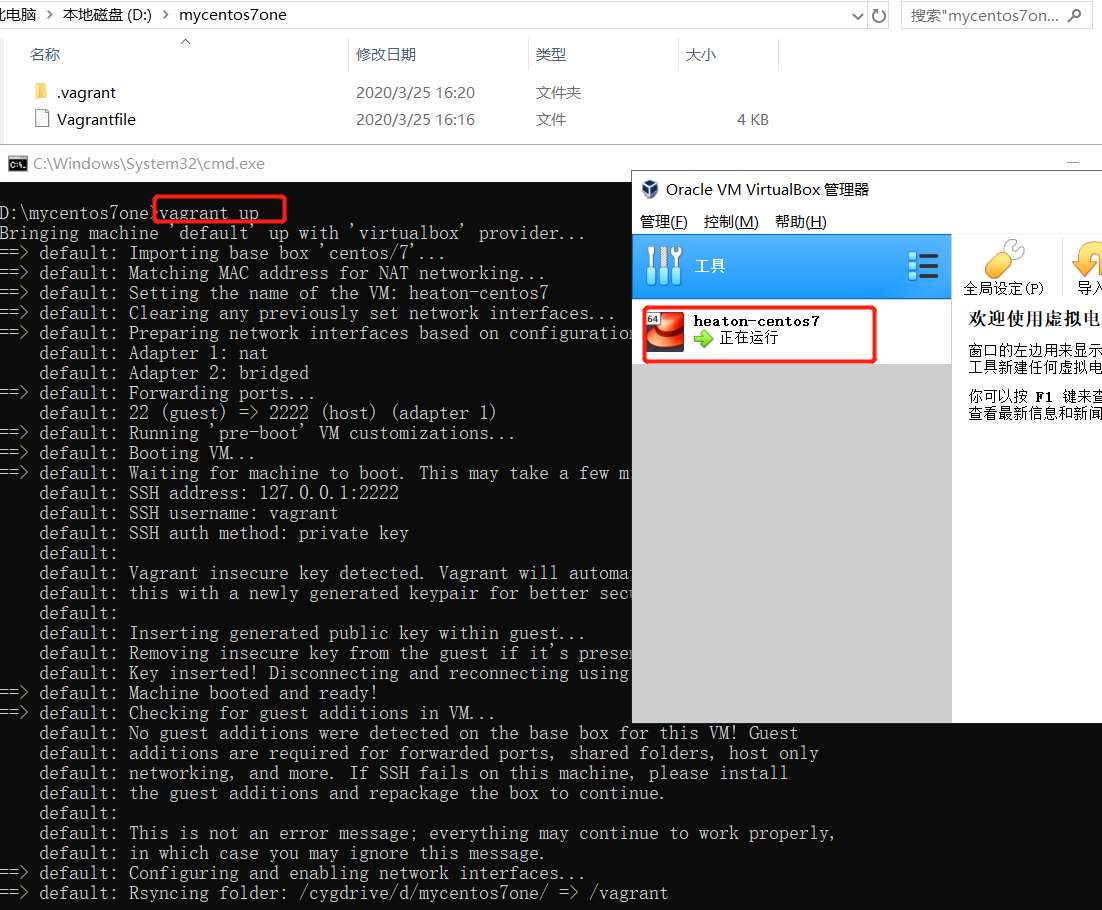
- 在Vagrantfile文件命令行目录,使用命令
vagrant up创建启动虚拟机
4.3 修改root密码
使用
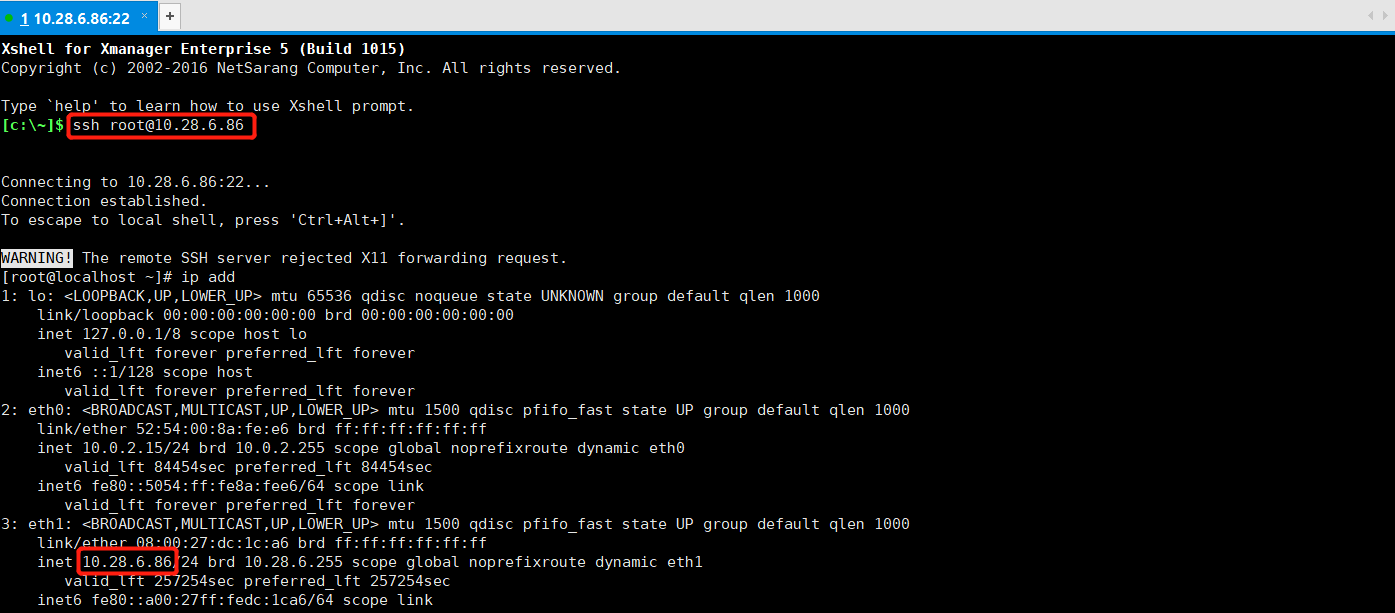
vagrant ssh命令进入刚刚创建的虚拟机使用
sudo -i命令进入root用户使用
vi /etc/ssh/sshd_config命令修改sshd_config使root用户可以使用密码登录
PasswordAuthentication yes

- 使用
passwd设置密码

- 使用
systemctl restart sshd重启密码服务 - 使用
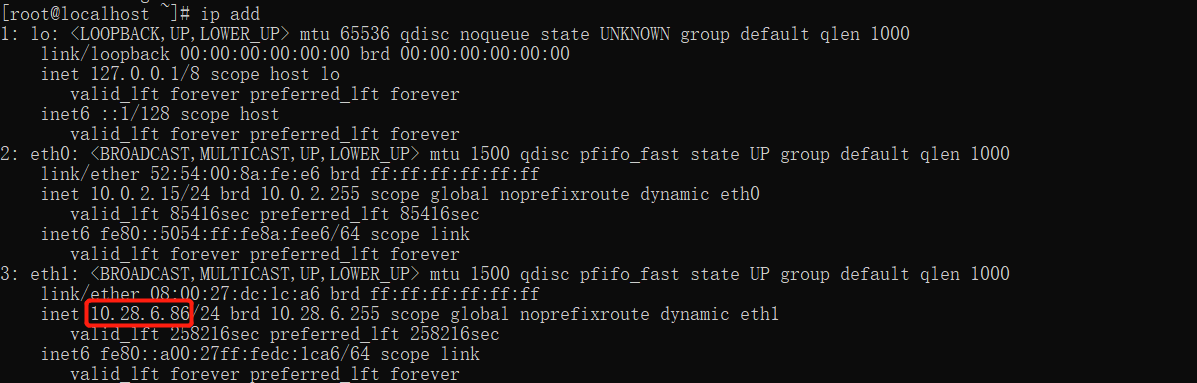
ip add查看ip即可使用远程工具登录root用户
5 复制虚拟机
- 关闭需要复制的虚拟机
- 进入虚拟机所在目录
vagrant package --output heaton-centos7.box
- 将上面得到的heaton-centos7.box文件添加进vagrant镜像中
vagrant box add heaton-centos77 heaton-centos7.box

- 进入一个新目录,生成新的虚拟机Vagrantfile
vagrant init heaton-centos77
- 启动,则得到一个一模一样的虚拟机(注意修改网络)
vagrant up

6 一次性创建多台centos7
6.1 添加本地centos/7镜像
找到下载好的virtualbox.box文件目录
使用
vagrant box add centos/7 C:\Users\SMZC\Desktop\virtualbox\virtualbox.box添加vagrant镜像使用
vagrant box list查询镜像
6.2 创建虚拟机环境
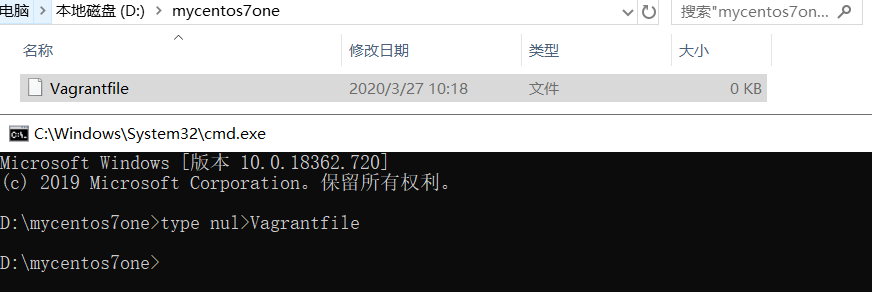
- 新建一个文件夹,并进入命令行cmd
- 使用
type nul>Vagrantfile命令创建Vagrantfile文件
- 修改Vagrantfile文件
- 先查询本机ip记住前三段,需要在Vagrantfile中指定
- 以下是创建3台的Vagrantfile
boxes = [

	{

		:name => "master",

		:eth1 => "192.168.192.10",

		:mem => "2048",

		:cpu => "2",

		:sshport => 22230

	},

	{

		:name => "slave1",

		:eth1 => "192.168.192.11",

		:mem => "2048",

		:cpu => "2",

		:sshport => 22231

	},

	{

		:name => "slave2",

		:eth1 => "192.168.192.12",

		:mem => "2048",

		:cpu => "2",

		:sshport => 22232

	}

]

Vagrant.configure(2) do |config|

	config.vm.box = "centos/7"

	boxes.each do |opts|

		config.vm.define opts[:name] do |config|

			config.vm.hostname = opts[:name]

			config.vm.network :public_network, ip: opts[:eth1]

			config.vm.network "forwarded_port", guest: 22, host: 2222, id: "ssh", disabled: "true"

		config.vm.network "forwarded_port", guest: 22, host: opts[:sshport]

			config.vm.provider "vmware_fusion" do |v|

				v.vmx["memsize"] = opts[:mem]

				v.vmx["numvcpus"] = opts[:cpu]

			end

			config.vm.provider "virtualbox" do |v|

				v.customize ["modifyvm", :id, "--memory", opts[:mem]]

			v.customize ["modifyvm", :id, "--cpus", opts[:cpu]]

				v.customize ["modifyvm", :id, "--name", opts[:name]]

			end

		end

	end

end
- 在Vagrantfile文件命令行目录,使用命令
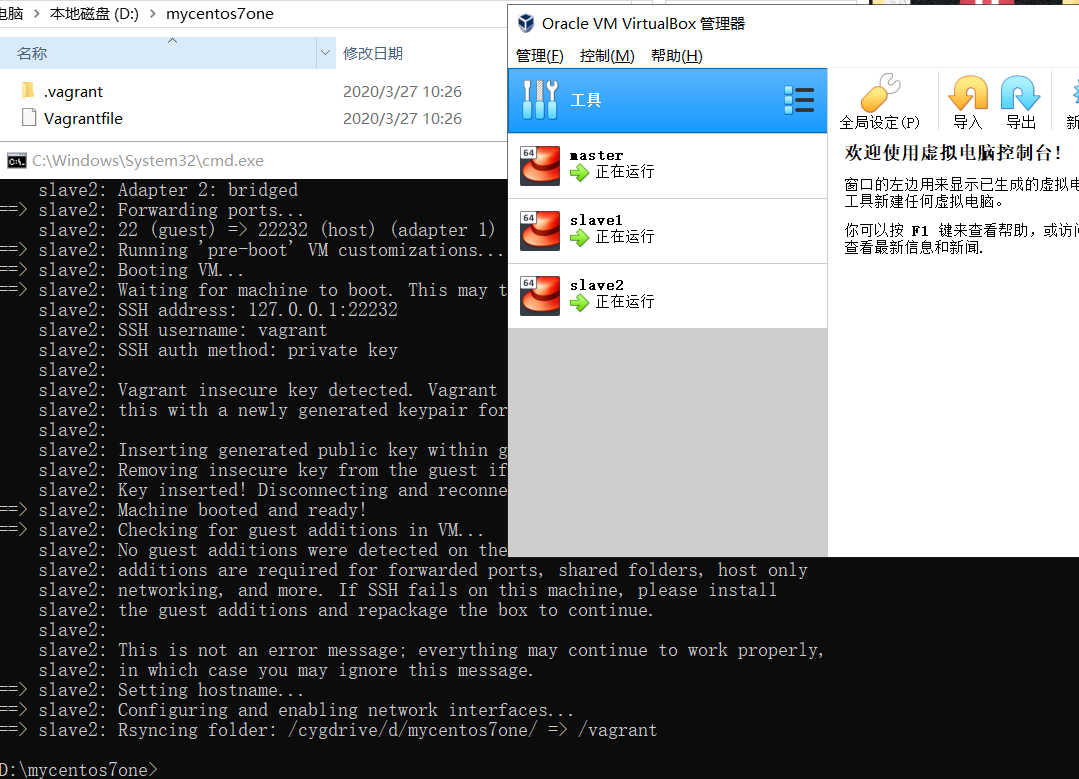
vagrant up创建启动虚拟机
6.3 修改root密码
使用命令进入刚刚创建的虚拟机,如下为上面创建的3台虚拟机,可以选择多开cmd,或者依次处理。
vagrant ssh mastervagrant ssh slave1vagrant ssh slave2
使用
sudo -i命令进入root用户使用
vi /etc/ssh/sshd_config命令修改sshd_config文件,使root用户可以使用密码登录
PasswordAuthentication yes

- 使用
passwd设置密码

- 使用
systemctl restart sshd重启密码服务 - 即可使用远程工具登录Vagrantfile上指定ip的root用户。
环境篇:Virtualbox+Vagrant安装Centos7的更多相关文章
- virtualbox + vagrant 安装centos7 以及 vagrant up下载太慢的解决方案
下载安装 virtualbox下载 vagrant下载 下载启动镜像vagrant up有下载过慢的问题,可以到网页vagrant镜像仓库,找到自己需要的镜像,选择virtualbox版本下载 下载好 ...
- VirtualBox下安装CentOS7系统
本文假定你已经知道如何安装VirtualBox虚拟机软件,并且已经安装好了. 首先我们需要准备好centos的iso镜像文件,可以从centos的官网下载. 以下操作使用的VirtualBox版本号是 ...
- (转)VirtualBox下安装CentOS7系统
转:https://www.cnblogs.com/hihtml5/p/8217062.html 本文假定你已经知道如何安装VirtualBox虚拟机软件,并且已经安装好了. 首先我们需要准备好cen ...
- Virtualbox/Vagrant安装
它们分别是什么? VirtualBox: 号称是最强的免费虚拟机软件和VM类似. 不仅具有丰富的特色,而且性能也很优异. Vagrant: 是一个基于Ruby的工具,用于创建和部署虚拟化开发环境. 使 ...
- vagrant安装centos7
1. 安装VirtualBox 去官网https://www.virtualbox.org/wiki/Downloads下载最新版的Virtualbox,然后双击安装,一直点击确认完成. 2. 安装V ...
- 在virtualbox中安装CentOS-7
当初才接触linux的时候,因为条件限制,只能在虚拟机中安装linux系统使用,由于是小白,爬了好多坑.于是决定写一篇关于在虚拟机中安装linux系统的博客.一是为了巩固自己的知识,二是希望能够对新手 ...
- 在VirtualBox上安装CentOS7
文章的出处:http://jingyan.baidu.com/article/9c69d48f8ec01613c8024e58.html 工具: VirtualBox-5.1.2-108956-Win ...
- Mac下安装VirtualBox并在VirtualBox中安装CentOS7
VirtualBox (百科)VirtualBox 是一款开源虚拟机软件.VirtualBox 是由德国 Innotek 公司开发,由Sun Microsystems公司Sun Microsystem ...
- VirtualBox中安装CentOS-7问题说明
之所以选择VirtualBox和CentOS,原因很简单. 目前我只有一台PC,用了几年了,性能很一般,我还需要用它做其他应用,不能直接装Linux,万一安装不成功,有可能一周内就完全没法学习了.以前 ...
随机推荐
- Mercurial 小结
基本操作 # 拉取 并 更新 pull pull && hg update # 撤销上一个命令(不能重复运行) hg rollback # 恢复到指定的 changeset hg st ...
- Git忽略规则(.gitignore配置)不生效原因和解决
问题: .gitignore中已经标明忽略的文件目录下的文件,git push的时候还会出现在push的目录中,或者用git status查看状态,想要忽略的文件还是显示被追踪状态. 原因是因为在gi ...
- python3下BeautifulSoup练习一(爬取小说)
上次写博客还是两个月以前的事,今天闲来无事,决定把以前刚接触python爬虫时的一个想法付诸行动:就是从网站上爬取小说,这样可以省下好多流量(^_^). 因为只是闲暇之余写的,还望各位看官海涵:不足之 ...
- Machine-learning-DecisionTree
前言 决策树是一种自上而下,对样本数据进行树形分类的过程,由结点和有向边组成.结点分为内部结点和叶结点,其中每个内部结点表示一个特征或属性,叶节点表示类别.从顶部根节点开始,所有样本聚在一起,经过根节 ...
- [红日安全]Web安全Day3 - CSRF实战攻防
本文由红日安全成员: Once 编写,如有不当,还望斧正. 大家好,我们是红日安全-Web安全攻防小组.此项目是关于Web安全的系列文章分享,还包含一个HTB靶场供大家练习,我们给这个项目起了一个名字 ...
- Taro_Mall 是一款多端开源在线商城小程序.
介绍 Taro_Mall是一款多端开源在线商城应用程序,后台是基于litemall基础上进行开发,前端采用Taro框架编写,现已全部完成小程序和h5移动端,后续会对APP,淘宝,头条,百度小程序进行适 ...
- 怎么用Python写一个三体的气候模拟程序
首先声明一下,这个所谓的三体气候模拟程序还是很简单的,没有真的3D效果或数学模型之类的,只不过是一个文字表示的模拟程序.该程序的某些地方可能不太严谨,所以也请各位多多包涵. 所谓三体气候模拟,就是将太 ...
- js中的0就是false,非0就是true。
在处理js代码判断真假时经常会这么写. var vale = fun();//从某个地方获取的值. if(!value){ 进入这里表示value为false或不存在 }但fun()可能得到的是数字0 ...
- HTML5中form的新增属性或元素
1.新增的表单元素 1.1 progress表示任务的完成情况,常用于进度条. max 定义进度元素所要求的任务的工作量,默认值为1 value 定义已经完成的工作量,如果max值为1,该值必须是介于 ...
- 搭建Flutter开发环境需要注意的几个小Tips
目录 下载SDK 安装 Android Stdio + SDK + tool SDK + 创建模拟器 + 插件(flutter和dart) Xcode + cocoapods VSCode + Flu ...