SpringBoot整合ActiveMQ快速入门
Spring Boot 具有如下特性:
为基于 Spring 的开发提供更快的入门体验
开箱即用,没有代码生成,也无需 XML 配置。同时也可以修改默认值来满足特定的需求。
提供了一些大型项目中常见的非功能性特性,如嵌入式服务器、安全、指标,健康检测、外部配置等。
Spring Boot 并不是不对 Spring 功能上的增强,而是提供了一种快速使用 Spring 的方式。
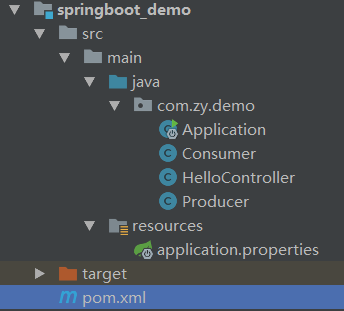
快速入门案例:
最终pom.xml:
<?xml version="1.0" encoding="UTF-8"?>

<project xmlns="http://maven.apache.org/POM/4.0.0" xmlns:xsi="http://www.w3.org/2001/XMLSchema-instance"

         xsi:schemaLocation="http://maven.apache.org/POM/4.0.0 http://maven.apache.org/xsd/maven-4.0.0.xsd">

    <!--自己项目本身所属的父工程-->

    <parent>

        <artifactId>project_demo</artifactId>

        <groupId>com.zy</groupId>

        <version>1.0-SNAPSHOT</version>

    </parent>

    <modelVersion>4.0.0</modelVersion>

    <artifactId>springboot_demo</artifactId>

    <!--变更jdk版本-->

    <properties>

        <java.version>1.7</java.version>

    </properties>

    <!--自己项目本身是有parent的情况-->

    <!--type 是 pom scope 是 import 这种类型的dependency只能在 dependencyManagement 标签中声明-->

    <dependencyManagement>

        <dependencies>

            <dependency>

                <groupId>org.springframework.boot</groupId>

                <artifactId>spring-boot-dependencies</artifactId>

                <version>1.4.0.RELEASE</version>

                <type>pom</type>

                <scope>import</scope>

            </dependency>

        </dependencies>

    </dependencyManagement>

    <dependencies>

        <!--spring boot起步依赖-->

        <dependency>

            <groupId>org.springframework.boot</groupId>

            <artifactId>spring-boot-starter-web</artifactId>

        </dependency>

        <!--热部署 在idea中需要设置-->

        <dependency>

            <groupId>org.springframework.boot</groupId>

            <artifactId>spring-boot-devtools</artifactId>

        </dependency>

        <!--activemq 消息中间件-->

        <dependency>

            <groupId>org.springframework.boot</groupId>

            <artifactId>spring-boot-starter-activemq</artifactId>

        </dependency>

    </dependencies>

</project>
首先是我们的pom.xml文件:
1,官方示例中,让我们继承一个spring的 spring-boot-starter-parent 这个parent:
<parent>

    <groupId>org.springframework.boot</groupId>

    <artifactId>spring-boot-starter-parent</artifactId>

    <version>1.5.1.RELEASE</version>

</parent>

<dependencies>

    <dependency>

        <groupId>org.springframework.boot</groupId>

        <artifactId>spring-boot-starter-web</artifactId>

    </dependency>

</dependencies>
2,但是,一般情况下,在我们自己的项目中,会定义一下自己的 parent 项目,这种情况下,上面的这种做法就行不通了。那么,该如何来做呢?其实,在spring的官网也给出了变通的方法的:
<dependencyManagement>

    <dependencies>

        <dependency>

            <groupId>org.springframework.boot</groupId>

            <artifactId>spring-boot-dependencies</artifactId>

            <version>1.5.1.RELEASE</version>

            <type>pom</type>

            <scope>import</scope>

        </dependency>

    </dependencies>

</dependencyManagement>
3,然后,把我们项目中的 子项目 中,parent 的声明,修改为我们自己项目的 parent 项目就可以了
<?xml version="1.0" encoding="UTF-8"?>

<project xmlns="http://maven.apache.org/POM/4.0.0" xmlns:xsi="http://www.w3.org/2001/XMLSchema-instance"

         xsi:schemaLocation="http://maven.apache.org/POM/4.0.0 http://maven.apache.org/xsd/maven-4.0.0.xsd">

    <!--自己项目本身所属的父工程-->

    <parent>

        <artifactId>project_demo</artifactId>

        <groupId>com.zy</groupId>

        <version>1.0-SNAPSHOT</version>

    </parent>

    <modelVersion>4.0.0</modelVersion>

    <artifactId>springboot_demo</artifactId>

    <!--变更jdk版本-->

    <properties>

        <java.version>1.7</java.version>

    </properties>

    <!--自己项目本身是有parent的情况-->

    <!--type 是 pom scope 是 import 这种类型的dependency只能在 dependencyManagement 标签中声明-->

    <dependencyManagement>

        <dependencies>

            <dependency>

                <groupId>org.springframework.boot</groupId>

                <artifactId>spring-boot-dependencies</artifactId>

                <version>1.4.0.RELEASE</version>

                <type>pom</type>

                <scope>import</scope>

            </dependency>

        </dependencies>

    </dependencyManagement>

    <dependencies>

        <!--spring boot起步依赖-->

        <dependency>

            <groupId>org.springframework.boot</groupId>

            <artifactId>spring-boot-starter-web</artifactId>

        </dependency>

    </dependencies>

</project>
其他一些配置文件默认在resources下的application.properties文件中:
#修改tomcat端口

server.port=8088

#-------

url=http://www.1688.com

#activemq地址

spring.activemq.broker-url=tcp://192.168.25.128:61616
简单示例 HelloController:
package com.zy.demo;

import org.springframework.beans.factory.annotation.Autowired;

import org.springframework.core.env.Environment;

import org.springframework.web.bind.annotation.RequestMapping;

import org.springframework.web.bind.annotation.RestController;

@RestController

@RequestMapping("/hello")

public class HelloController {

    @Autowired

    private Environment env;

    @RequestMapping("/helloSpringBoot")

    public String hello() {

        return "hello springboot";

    }

    @RequestMapping("/info")

    public String info() {

        return "info:" + env.getProperty("url");

    }

}
我们现在想访问HelloController,所以需要创建一个引导类Application:
package com.zy.demo;

import org.springframework.boot.SpringApplication;

import org.springframework.boot.autoconfigure.SpringBootApplication;

@SpringBootApplication

public class Application {

    public static void main(String[] args) {

        SpringApplication.run(Application.class, args);

    }

}
现在就可以访问http://localhost:8088/hello/helloSpringBoot (由于我们在application.properties配置文件中修改了tomcat的端口为8088)。
SpringBoot整合ActiveMQ:
不需要其他配置,值需要在pom文件中引入ActiveMQ的依赖,并创建生产者 消费者即可:
<dependency>

    <groupId>org.springframework.boot</groupId>

    <artifactId>spring-boot-starter-activemq</artifactId>

</dependency>
生产者Producer:
package com.zy.demo;

import org.springframework.beans.factory.annotation.Autowired;

import org.springframework.jms.core.JmsMessagingTemplate;

import org.springframework.web.bind.annotation.RequestMapping;

import org.springframework.web.bind.annotation.RestController;

import java.util.HashMap;

import java.util.Map;

@RestController

public class Producer {

    //注入jsmtemplate

    @Autowired

    private JmsMessagingTemplate jmsMessagingTemplate;

    @RequestMapping("/sendMsg")

    public void sendMsg(String msg) {

        jmsMessagingTemplate.convertAndSend("my_msg", msg);

        System.out.println("msg发送成功");

    }

    @RequestMapping("/sendMap")

    public void sendMap() {

        Map map = new HashMap();

        map.put("mobile", "13888888888");

        map.put("content", "王总喜提兰博基尼");

        jmsMessagingTemplate.convertAndSend("my_map", map);

        System.out.println("map发送成功");

    }

}
消费者Consumer:
package com.zy.demo;

import org.springframework.jms.annotation.JmsListener;

import org.springframework.stereotype.Component;

import java.util.Map;

@Component

public class Consumer {

    @JmsListener(destination = "my_msg")

    public void readMsg(String text) {

        System.out.println("接收到消息:" + text);

    }

    @JmsListener(destination = "my_map")

    public void readMap(Map map) {

        System.out.println(map);

    }

}
访问http://localhost:8088/...... 即可。
SpringBoot整合ActiveMQ快速入门的更多相关文章
- SpringBoot整合mybatis快速入门
一.创建一个SpringBoot项目 二.引入相关依赖 <!--web核心依赖--> <dependency> <groupId>o ...
- Springboot 完整搭建快速入门,必看!
前言 手把手教你Springboot微服务项目搭建快速入门,通过本文学习Springboot的搭建快速入门,掌握微服务大致的配置服务,后续将会继续将核心组件引入到项目中,欢迎关注,点赞,转发. Spr ...
- Web项目容器集成ActiveMQ & SpringBoot整合ActiveMQ
集成tomcat就是随项目启动而启动tomcat,最简单的方法就是监听器监听容器创建之后以Broker的方式启动ActiveMQ. 1.web项目中Broker启动的方式进行集成 在这里采用Liste ...
- SpringBoot系列: RestTemplate 快速入门
====================================相关的文章====================================SpringBoot系列: 与Spring R ...
- SpringBoot系列八:SpringBoot整合消息服务(SpringBoot 整合 ActiveMQ、SpringBoot 整合 RabbitMQ、SpringBoot 整合 Kafka)
声明:本文来源于MLDN培训视频的课堂笔记,写在这里只是为了方便查阅. 1.概念:SpringBoot 整合消息服务 2.具体内容 对于异步消息组件在实际的应用之中会有两类: · JMS:代表作就是 ...
- 解决Springboot整合ActiveMQ发送和接收topic消息的问题
环境搭建 1.创建maven项目(jar) 2.pom.xml添加依赖 <parent> <groupId>org.springframework.boot</group ...
- SpringBoot整合ActiveMQ和开启持久化
一.点对点 1.提供者目录展示 2.导入依赖 <dependency> <groupId>org.springframework.boot</groupId> &l ...
- ActiveMQ 笔记(四)Spring\SpringBoot 整合 Activemq
个人博客网:https://wushaopei.github.io/ (你想要这里多有) 一.Spring 整合Activemq 1.所需jar包 <dependencies> &l ...
- Springboot整合activemq
今天呢心血来潮,也有很多以前的学弟问到我关于消息队列的一些问题,有个刚入门,有的有问题都来问我,那么今天来说说如何快速入门mq. 一.首先说下什么是消息队列? 1.消息队列是在消息的传输过程中保存消息 ...
随机推荐
- struts 2整合spring要注意的问题(二)
在 struts2_spring_plugin.xml配置文件里有一个strus.objectFactory.spring.autoWire 属性 默认值为name 也就是说你不想装载.它都会找个 ...
- Nexus搭建私服
什么是Nexus Nexus是一个强大的Maven仓库管理器,它极大地简化了本地内部仓库的维护和外部仓库的访问. 运行原理 本地仓库与私服处在同一个局域网中,当本地仓库没有资源时,会向私服发起请求获取 ...
- 4.JMeter聚合报告分析
1.Label:每个Jmeter的element的Name值 2.Samples:发出的请求数量 3.Average:平均响应时间 4.Median:表示50%用户的响应时间 5.90%Line:90 ...
- NumPy-快速处理数据--ndarray对象--多维数组的存取、结构体数组存取、内存对齐、Numpy内存结构
本文摘自<用Python做科学计算>,版权归原作者所有. 上一篇讲到:NumPy-快速处理数据--ndarray对象--数组的创建和存取 接下来接着介绍多维数组的存取.结构体数组存取.内存 ...
- 常见企业IT支撑【8、端口回流问题】
端口回流故障场景,常见于内网启用了Server服务器,使用出口路由设备的外网口NAT映射了一个公网地址,域内内网主机访问了这个公网地址,访问不通. 故障容易出现在办公网内的带有对外Server测试环境 ...
- springMvc架构简介
什么是spring 关于spring的定义无论是从官方还是市面上已经很多能够清晰明了的做出解释了.我姑且简单定义它为一个轻量级的控制反转(IoC)和面向切面(AOP)的容器,Java 开发框架,至于控 ...
- Zookeeper--Watcher 和 ACL
Zookeeper--Watcher 和 ACL Watcher (观察) Zookeeper中的znode可以被监控,这是zk的核心特性. 通过exists,getChildren和getData这 ...
- 阻塞队列之六:LinkedBlockingDeque
一.LinkedBlockingDeque简介 java6增加了两种容器类型,Deque和BlockingDeque,它们分别对Queue和BlockingQueue进行了扩展. Deque是一个双端 ...
- Java-Runoob:Java Stream、File、IO
ylbtech-Java-Runoob:Java Stream.File.IO 1.返回顶部 1. Java 流(Stream).文件(File)和IO Java.io 包几乎包含了所有操作输入.输出 ...
- Window下安装Memecached
原创,如有转载请注明来处! memcached是一套分布式的快取系统,当初是Danga Interactive为了LiveJournal所发展的,但被许多软件(如MediaWiki)所使用.这是一套开 ...