
Centos7 Apache配置虚拟主机的三种方式
https://blog.csdn.net/tladagio/article/details/80760261
一、虚机主机的三种方式
1、基于IP
2、基于IP+端口
3、基于域名
官网文档:http://httpd.apache.org/docs/2.4/
二、安装Apache
1、系统环境
[root@localhost ~]# cat /etc/redhat-release

CentOS Linux release 7.2.1511 (Core)

[root@localhost ~]# ip ad

1: lo: <LOOPBACK,UP,LOWER_UP> mtu 65536 qdisc noqueue state UNKNOWN

    link/loopback 00:00:00:00:00:00 brd 00:00:00:00:00:00

    inet 127.0.0.1/8 scope host lo

       valid_lft forever preferred_lft forever

    inet6 ::1/128 scope host

       valid_lft forever preferred_lft forever

2: eno16777736: <BROADCAST,MULTICAST,UP,LOWER_UP> mtu 1500 qdisc pfifo_fast state UP qlen 1000

    link/ether 00:0c:29:5c:ff:91 brd ff:ff:ff:ff:ff:ff

    inet 192.168.253.128/24 brd 192.168.253.255 scope global dynamic eno16777736

       valid_lft 1388sec preferred_lft 1388sec

    inet6 fe80::20c:29ff:fe5c:ff91/64 scope link

       valid_lft forever preferred_lft forever
2、yum安装
[root@localhost ~]# yum install -y httpd

*****

======================================================================================================================================================

 Package                             架构                           版本                                           源                            大小

======================================================================================================================================================

正在安装:

 httpd                               x86_64                         2.4.6-80.el7.centos                            base                         2.7 M

为依赖而安装:

 apr                                 x86_64                         1.4.8-3.el7_4.1                                base                         103 k

 apr-util                            x86_64                         1.5.2-6.el7                                    base                          92 k

 httpd-tools                         x86_64                         2.4.6-80.el7.centos                            base                          89 k

 mailcap                             noarch                         2.1.41-2.el7                                   base                          31 k

***

已安装:

  httpd.x86_64 0:2.4.6-80.el7.centos

作为依赖被安装:

  apr.x86_64 0:1.4.8-3.el7_4.1     apr-util.x86_64 0:1.5.2-6.el7     httpd-tools.x86_64 0:2.4.6-80.el7.centos     mailcap.noarch 0:2.1.41-2.el7

完毕!
可以查看安装了内容
[root@localhost ~]# rpm -ql httpd | less
3、配置Selinux文件,SELINUX=disabled。
[root@localhost ~]# vim /etc/selinux/config
SELINUX=disabled
SELINUXTYPE=targeted
或者临时关闭
[root@localhost ~]# setenforce 0
4、关闭防火墙
[root@localhost ~]# systemctl stop firewalld

[root@localhost ~]# systemctl disable firewalld

Removed symlink /etc/systemd/system/dbus-org.fedoraproject.FirewallD1.service.

Removed symlink /etc/systemd/system/basic.target.wants/firewalld.service.
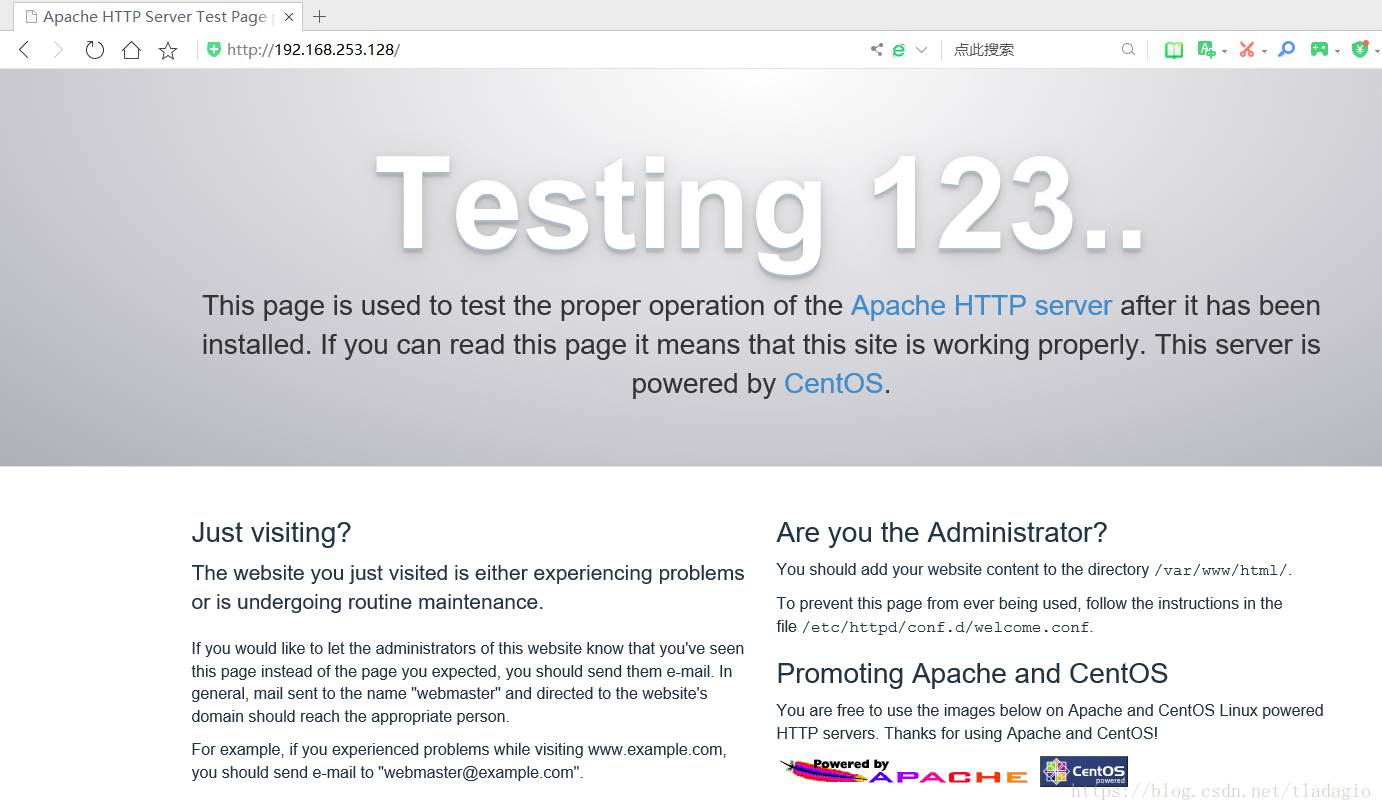
5、启动httpd服务,访问测试
[root@localhost ~]# systemctl start httpd
三、修改主配置文件
1、查看apache主配置文件,确保存在以下配置,因为等下需要在conf.d/创建虚机主机配置。
[root@localhost ~]# vim /etc/httpd/conf/httpd.conf
IncludeOptional conf.d/*.conf
2、另外,把 Require all denied默认拒绝访问设置为允许访问: Require all granted,方便测试。
<Directory />

    AllowOverride none

#  Require all denied

    Require all granted

</Directory>
四、新增虚拟主机配置文件
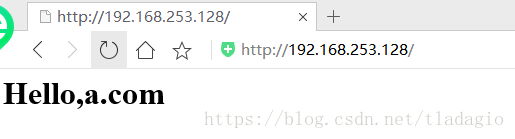
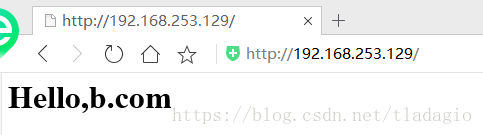
1、添加基于多个IP的虚拟主机
1)创建配置文件
    [root@localhost ~]# cd /etc/httpd/conf.d/

    [root@localhost conf.d]# vim virtual.conf
<VirtualHost 192.168.253.128:80>

        ServerName a.com

        DocumentRoot "/www/a.com/"    #网页路径

</VirtualHost>

<VirtualHost 192.168.253.129:80>

        ServerName b.com

        DocumentRoot "/www/b.com/"    #网页路径

</VirtualHost>
2)网卡绑定多个IP(我的网卡名是eno16777736,不是eth0)
[root@localhost conf.d]# ip addr add 192.168.253.129 dev eno16777736

[root@localhost conf.d]# ip add

1: lo: <LOOPBACK,UP,LOWER_UP> mtu 65536 qdisc noqueue state UNKNOWN

    link/loopback 00:00:00:00:00:00 brd 00:00:00:00:00:00

    inet 127.0.0.1/8 scope host lo

       valid_lft forever preferred_lft forever

    inet6 ::1/128 scope host

       valid_lft forever preferred_lft forever

2: eno16777736: <BROADCAST,MULTICAST,UP,LOWER_UP> mtu 1500 qdisc pfifo_fast state UP qlen 1000

    link/ether 00:0c:29:5c:ff:91 brd ff:ff:ff:ff:ff:ff

    inet 192.168.253.128/24 brd 192.168.253.255 scope global dynamic eno16777736

       valid_lft 1542sec preferred_lft 1542sec

    inet 192.168.253.129/32 scope global eno16777736

       valid_lft forever preferred_lft forever

    inet6 fe80::20c:29ff:fe5c:ff91/64 scope link

       valid_lft forever preferred_lft forever
3)创建虚机主机a.com和b.com的主页面
[root@localhost conf.d]# mkdir -pv /www/{a.com,b.com}

mkdir: 已创建目录 "/www"

mkdir: 已创建目录 "/www/a.com"

mkdir: 已创建目录 "/www/b.com"
[root@localhost conf.d]# vim /www/a.com/index.html
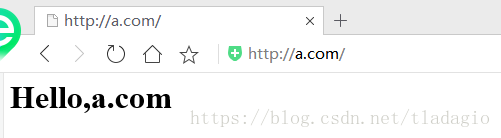
<h1>Hello,a.com</h1>
[root@localhost conf.d]# vim /www/b.com/index.html
<h1>Hello,b.com</h1>
4)检查配置文件是否正常
    [root@localhost conf.d]# httpd -t

    AH00558: httpd: Could not reliably determine the server's fully qualified domain name, using localhost.localdomain. Set the 'ServerName' directive globally to suppress this message

    Syntax OK
5)重启httpd服务
[root@localhost conf.d]# systemctl restart httpd
6)打开浏览器,查看结果
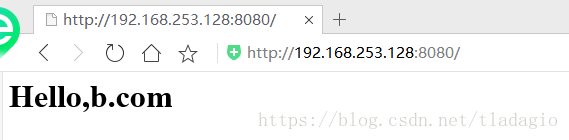
2、配置基于IP+端口的虚拟主机
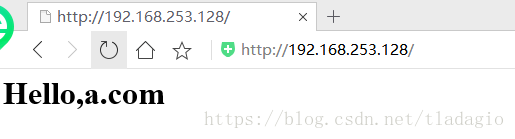
1)创建配置文件
    [root@localhost ~]# cd /etc/httpd/conf.d/

    [root@localhost conf.d]# vim virtual.conf
<VirtualHost 192.168.253.128:80>

        ServerName a.com

        DocumentRoot "/www/a.com/"

</VirtualHost>

<VirtualHost 192.168.253.128:8080>

        ServerName b.com

        DocumentRoot "/www/b.com/"

</VirtualHost>
2)修改httpd主配置文件,在Listen 80下面添加一行监控8080端口
[root@localhost conf.d]# vim /etc/httpd/conf/httpd.conf
Listen 8080
3)创建虚机主机a.com和b.com的主页面(如果前面已经创建就不用重复)
    [root@localhost conf.d]# mkdir -pv /www/{a.com,b.com}

    mkdir: 已创建目录 "/www"

    mkdir: 已创建目录 "/www/a.com"

    mkdir: 已创建目录 "/www/b.com"

[root@localhost conf.d]# vim /www/a.com/index.html
<h1>Hello,a.com</h1>
[root@localhost conf.d]# vim /www/b.com/index.html
<h1>Hello,b.com</h1>
4)检查配置文件
    [root@localhost conf.d]# httpd -t

    AH00558: httpd: Could not reliably determine the server's fully qualified domain name, using localhost.localdomain. Set the 'ServerName' directive globally to suppress this message

    Syntax OK
5)重启httpd服务
[root@localhost conf.d]# systemctl restart httpd
6)打开浏览器,查看结果
3、基于域名的虚拟主机
1)创建配置文件
    [root@localhost ~]# cd /etc/httpd/conf.d/

    [root@localhost conf.d]# vim virtual.conf
<VirtualHost *:80>

        ServerName a.com

        DocumentRoot "/www/a.com/"

</VirtualHost>

<VirtualHost *:80>

        ServerName b.com

        DocumentRoot "/www/b.com/"

</VirtualHost>
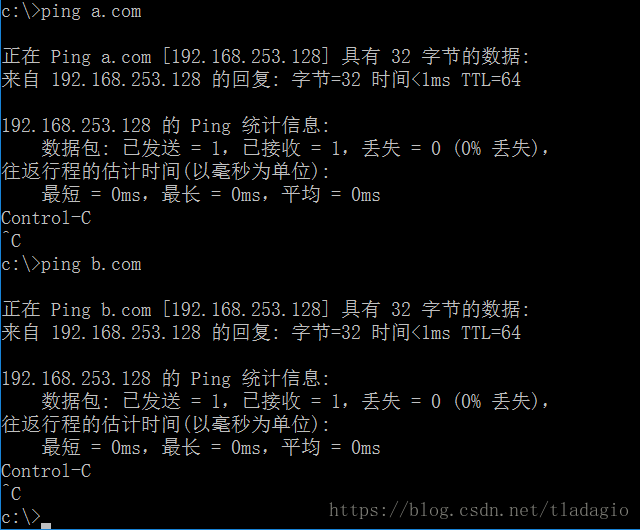
2)修改物理主机hosts文件(C:\Windows\System32\drivers\etc),因为这里是因为物理机去访问Apache服务器
添加:
192.168.253.128 a.com
192.168.253.128 b.com
3)物理主机ping域名测试
4)创建虚机主机a.com和b.com的主页面(如果前面已经创建就不用重复)
    [root@localhost conf.d]# mkdir -pv /www/{a.com,b.com}

    mkdir: 已创建目录 "/www"

    mkdir: 已创建目录 "/www/a.com"

    mkdir: 已创建目录 "/www/b.com"
[root@localhost conf.d]# vim /www/a.com/index.html
<h1>Hello,a.com</h1>
[root@localhost conf.d]# vim /www/b.com/index.html
<h1>Hello,b.com</h1>
5)检查配置文件
    [root@localhost conf.d]# httpd -t

    AH00558: httpd: Could not reliably determine the server's fully qualified domain name, using localhost.localdomain. Set the 'ServerName' directive globally to suppress this message

    Syntax OK
6)重启httpd服务
[root@localhost conf.d]# systemctl restart httpd
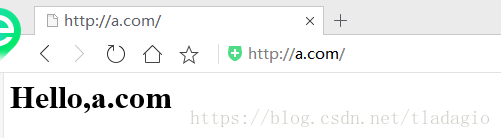
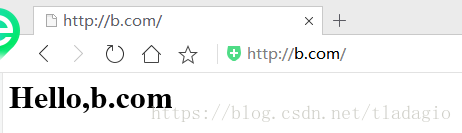
7)打开浏览器,查看结果
五、扩展虚机主机配置文件
1、先修改回apache主配置文件,设置 Require all denied默认拒绝访问
<Directory />

    AllowOverride none

    Require all denied

</Directory>
这时候再去访问以上的三种配置虚机主机,会全部访问不了。因此需要针对虚机目录设置访问权限。
2、修改虚拟主机配置文件
    [root@localhost ~]# cd /etc/httpd/conf.d/

    [root@localhost conf.d]# vim virtual.conf
<VirtualHost *:80>
#绑定的主域
ServerName a.com
#绑定的子域名
ServerAlias www.test.com
#网站主目录
DocumentRoot "/www/a.com/"
#错误日志目录
ErrorLog "/var/log/httpd/a.com/error.log"
#访问日志目录
CustomLog "/va/log/httpd/a.com.access.log"
<Directory "www/a.com/">
Options FollowSymLinks
AllowOverride All
#允许任意访问
Require all granted
</Directory>
</VirtualHost>
3、创建日志目录
- [root@localhost b.com]# cd /var/log/httpd/
- [root@localhost httpd]# mkdir a.com
- [root@localhost httpd]# ll
- 总用量 60
- -rw-r--r--. 1 root root 37976 1月 23 22:26 access_log
- drwxr-xr-x. 2 root root 6 1月 23 22:41 a.com
- -rw-r--r--. 1 root root 17795 1月 23 22:38 error_log
- [root@localhost httpd]# cd a.com/
- [root@localhost a.com]# touch error.log
- [root@localhost a.com]# touch access.log
日志目录记得更改属主和属组为Apache,否则httpd启动失败
[root@localhost httpd]# chown -R apache:apache a.com/4、配置指定IP可以访问虚拟主机(可以单个IP,也可以是一个网段)
[root@localhost conf.d]# vim /etc/httpd/conf.d/virtual.conf- <VirtualHost *:80>
- #绑定的主域
- ServerName a.com
- #绑定的子域名
- ServerAlias www.test.com
- #网站主目录
- DocumentRoot "/www/a.com/"
- #错误日志目录
- ErrorLog "/var/log/httpd/a.com/error.log"
- #访问日志目录
- CustomLog "/va/log/httpd/a.com.access.log"
- <Directory "www/a.com/">
- Options FollowSymLinks
- AllowOverride All
- #允许任意访问
- Require ip 192.168.253.0/24
- </Directory>
5、配置指定用户可以访问虚拟主机
[root@localhost conf.d]# vim /etc/httpd/conf.d/virtual.conf
    <VirtualHost *:80>

    #绑定的主域

    ServerName a.com

    #绑定的子域名

    ServerAlias www.test.com

    #网站主目录

    DocumentRoot "/www/a.com/"

    #错误日志目录

    ErrorLog "/var/log/httpd/a.com/error.log"

    #访问日志目录

    CustomLog "/va/log/httpd/a.com.access.log"

    <Directory "www/a.com/">

    Options FollowSymLinks

    AllowOverride authconfig

    AuthType basic

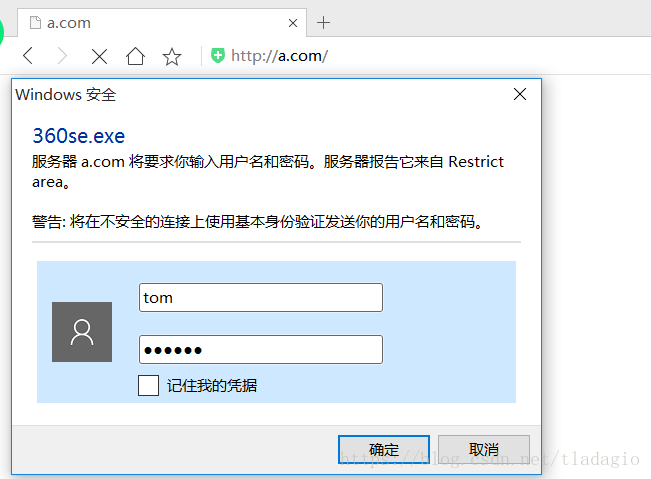
    AuthName "Restrict area"

    AuthUserFile "etc/httpd/.htpasswd"

    Require valid-user

    </Directory>
创建用户文件,第一次创建的时候要加-c,以后创建都不用加-c,否则会覆盖原数据
    [root@localhost conf.d]# pwd

    /etc/httpd/conf.d

    [root@localhost conf.d]# htpasswd -h

    htpasswd: illegal option -- h

    Usage:

    htpasswd [-cimBdpsDv] [-C cost] passwordfile username

    htpasswd -b[cmBdpsDv] [-C cost] passwordfile username password

    htpasswd -n[imBdps] [-C cost] username

    htpasswd -nb[mBdps] [-C cost] username password

    -c Create a new file.

    -n Don't update file; display results on stdout.

    -b Use the password from the command line rather than prompting for it.

    -i Read password from stdin without verification (for script usage).

    -m Force MD5 encryption of the password (default).

    -B Force bcrypt encryption of the password (very secure).

    -C Set the computing time used for the bcrypt algorithm

    (higher is more secure but slower, default: 5, valid: 4 to 31).

    -d Force CRYPT encryption of the password (8 chars max, insecure).

    -s Force SHA encryption of the password (insecure).

    -p Do not encrypt the password (plaintext, insecure).

    -D Delete the specified user.

    -v Verify password for the specified user.

    On other systems than Windows and NetWare the '-p' flag will probably not work.

    The SHA algorithm does not use a salt and is less secure than the MD5 algorithm.

    [root@localhost conf.d]# htpasswd -c -m /etc/httpd/.htpasswd tom

    New password:

    Re-type new password:

    Adding password for user tom
重启httpd服务
    [root@localhost conf.d]# httpd -t

    AH00558: httpd: Could not reliably determine the server's fully qualified domain name, using localhost.localdomain. Set the 'ServerName' directive globally to suppress this message

    Syntax OK

    [root@localhost conf.d]# systemctl restart httpd
在浏览器测试登录
6、Require参考
Require all granted
无条件允许访问。
Require all denied
访问被无条件拒绝。
Require env env-var [env-var] ...
只有在给定的环境变量之一被设置的情况下才允许访问。
Require method http-method [http-method] ...
只有给定的HTTP方法才允许访问。
Require expr expression
如果表达式计算结果为true,则允许访问。
Require user userid [userid] ...
只有指定的用户才能访问资源。
Require group group-name [group-name] ...
只有指定组中的用户才能访问资源。
Require valid-user
所有有效的用户都可以访问资源。
Require ip 10 172.20 192.168.2
指定IP地址范围内的客户端可以访问资源。
7、Options
Centos7 Apache配置虚拟主机的三种方式的更多相关文章
- apache配置虚拟主机的三种方式
Apache 配置虚拟主机三种方式 一.基于IP 1. 假设服务器有个IP地址为192.168.1.10,使用ifconfig在同一个网络接口eth0上绑定3个IP: [root@localhos ...
- Apache配置虚拟主机的三种方法(基于IP、端口、域名)
1 Apache虚拟主机的实现方式有3种. 基于IP的虚拟主机 基于端口的虚拟主机 基于域名的虚拟主机 2.1 启用虚拟主机的准备工作 2.1.1安装httpd [root@mail httpd]# ...
- Nginx下配置虚拟主机的三种方法
Nginx下,一个server标签就是一个虚拟主机. 1.基于域名的虚拟主机,通过域名来区分虚拟主机——应用:外部网站 2.基于端口的虚拟主机,通过端口来区分虚拟主机——应用:公司内部网站,外部网站的 ...
- nginx 配置虚拟主机的三种方法
nginx,一个server标签就是一个虚拟主机. 1.基于域名的虚拟主机,通过域名来区分虚拟主机——应用:外部网站 2.基于端口的虚拟主机,通过端口来区分虚拟主机——应用:公司内部网站,外部网站的管 ...
- 部署web应用到虚拟主机的三种方式
方式一: 在 [tomcat]/conf/server.xml 文件中的<Engine>标签下的<Host>标签内部, 添加一个 <Context ...
- Tomcat配置虚拟主机的两种方式
1.基于主机名的虚拟主机配置 在随意盘符下建立一个目录作为虚拟地址的目录.例如:F:\virtualhost1,在其下建立 test1.html,写入内容例如:test 在tomcat/conf/se ...
- nginx配置虚拟主机的两种方式
一. 通过端口区分不同的虚拟主机 二. 通过域名区分不同的虚拟主机 备注: 1)hosts文件路径:
- 【转】Apache 配置虚拟主机三种方式
Apache 配置虚拟主机三种方式 原文博客http://www.cnblogs.com/hi-bazinga/archive/2012/04/23/2466605.html 一.基于IP 1. 假 ...
- apache配置虚拟主机后,启动速度慢
apache配置虚拟主机后,启动速度慢且提示“the requested operation has failed” 可以通过在cmd下启动,来查找问题(命令中的“apache2.2”,是服务名,根据 ...
随机推荐
- SPSS20.O---软件安装
统计要与大量的数据打交道,涉及繁杂的计算和图表绘制.现代的数据分析工作如果离开统计软件几乎是无法正常开展.在准确理解和掌握了各种统计方法原理之后,再来掌握几种统计分析软件的实际操作,是十分必要的. 常 ...
- day37 06-Hibernate二级缓存:更新时间戳区
二级缓存区:类缓存区,集合缓存区,更新时间戳区. 它会记录一个时间T1.其实在我们查询之后它会记录一个时间.假设时间叫做T1.就是你查询完之后的当前时间是T1.当我们自己手动在下面做了一个更新之后,它 ...
- PHP 学习1.3
1.展示类的继承和静态的方法 <!DOCTYPE html PUBLIC "-//W3C//DTD XHTML 1.0 Transitional//EN" "htt ...
- Hdu 4751(2-SAT)
题目链接 Divide Groups Time Limit: 2000/1000 MS (Java/Others) Memory Limit: 32768/32768 K (Java/Other ...
- python 结构化的数据
- Leetcode695.Max Area of Island岛屿的最大面积
给定一个包含了一些 0 和 1的非空二维数组 grid , 一个 岛屿 是由四个方向 (水平或垂直) 的 1 (代表土地) 构成的组合.你可以假设二维矩阵的四个边缘都被水包围着. 找到给定的二维数组中 ...
- ubuntu上设置截图快捷键
ubuntu自带的截图工具感觉能够满足基本的截图功能,可以不必安装另外的截图软件. 一般用到的截图类型有三种:全屏.当前活动窗口.自定义区域,其中自定义区域截图是最灵活也是我们用的最多的方式.在ubu ...
- Future Maker | 领跑亚太 进击的阿里云数据库
7月31日,阿里云马来西亚峰会在吉隆坡召开,阿里巴巴集团副总裁.阿里云智能数据库事业部总裁李飞飞在演讲中表示:“作为亚太地区第一的云服务提供商,阿里云数据库已为多家马来西亚知名企业提供技术支持,助力企 ...
- 【SPOJ 220】 PHRASES - Relevant Phrases of Annihilation
[链接]h在这里写链接 [题意] 给你n(n<=10)个字符串. 每个字符串长度最大为1e4; 问你能不能找到一个子串. 使得这个子串,在每个字符串里面都不想交出 ...
- text-align:justify在项目中碰到的问题
最近在项目中,使用了一个新的样式属性:text-align:justigy,这个属性在使用过程中遇到了一些小异常,现在总结下. text-align有一个属性值为justify,为对齐之意.其实现的 ...