nopcommerce 4.1 学习2 -插件之挂件
先了解下nop4.1的一些插件有哪些类型:
1、支付插件 Nop.Plugin.Payments.PayPalStandard Nop.Plugin.Payments.CheckMoneyOrder
2、挂件插件 网站前端的一些小组件: Nop.Plugin.Widgets.GoogleAnalytics Nop.Plugin.Widgets.NivoSlider 都是官方自带的挂件。
3、第三方认证的插件 Nop.Plugin.ExternalAuth.Facebook
4、折扣规则插件 Nop.Plugin.DiscountRules.CustomerRoles
5、配送方式 Nop.Plugin.Shipping.FixedByWeightByTotal
6、税收 Nop.Plugin.Tax.FixedOrByCountryStateZip
7、自提点 Nop.Plugin.Pickup.PickupInStore
8、其他扩展插件
用媒介信任的方式开发一个插件:https://shazwazza.com/post/Developing-a-plugin-framework-in-ASPNET-with-medium-trust.aspx
发布插件的时候需要注意: 直接编辑项目文件代码,发布的地址改成下面的格式,清理也要加。
<Project Sdk="Microsoft.NET.Sdk">
<PropertyGroup>
<TargetFramework>netcoreapp2.1</TargetFramework>
</PropertyGroup>
<PropertyGroup Condition="'$(Configuration)|$(Platform)'=='Release|AnyCPU'">
<OutputPath>..\..\Presentation\Nop.Web\Plugins\PLUGIN_OUTPUT_DIRECTORY</OutputPath>
<OutDir>$(OutputPath)</OutDir>
</PropertyGroup>
<PropertyGroup Condition="'$(Configuration)|$(Platform)'=='Debug|AnyCPU'">
<OutputPath>..\..\Presentation\Nop.Web\Plugins\PLUGIN_OUTPUT_DIRECTORY</OutputPath>
<OutDir>$(OutputPath)</OutDir>
</PropertyGroup>
<!-- This target execute after "Build" target -->
<Target Name="NopTarget" AfterTargets="Build">
<!-- Delete unnecessary libraries from plugins path -->
<MSBuild Projects="$(MSBuildProjectDirectory)\..\..\Build\ClearPluginAssemblies.proj" Properties="PluginPath=$(MSBuildProjectDirectory)\$(OutDir)" Targets="NopClear" />
</Target>
</Project>
Replace “PLUGIN_OUTPUT_DIRECTORY” in the code above with your real plugin output directory name.
下面开始讲下 挂件的创建。
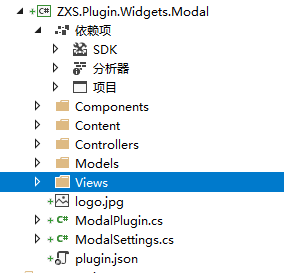
首先创建Widgets项目,并拷贝原本的轮播图插件的文件夹.


添加core 跟services web.framwork的项目引用
我们先保留components 、controllers、models、views、跟 三个文件,logo可以换一个自己的。 plugin.json 必须保留,里面信息先修改

修改 setting 设置
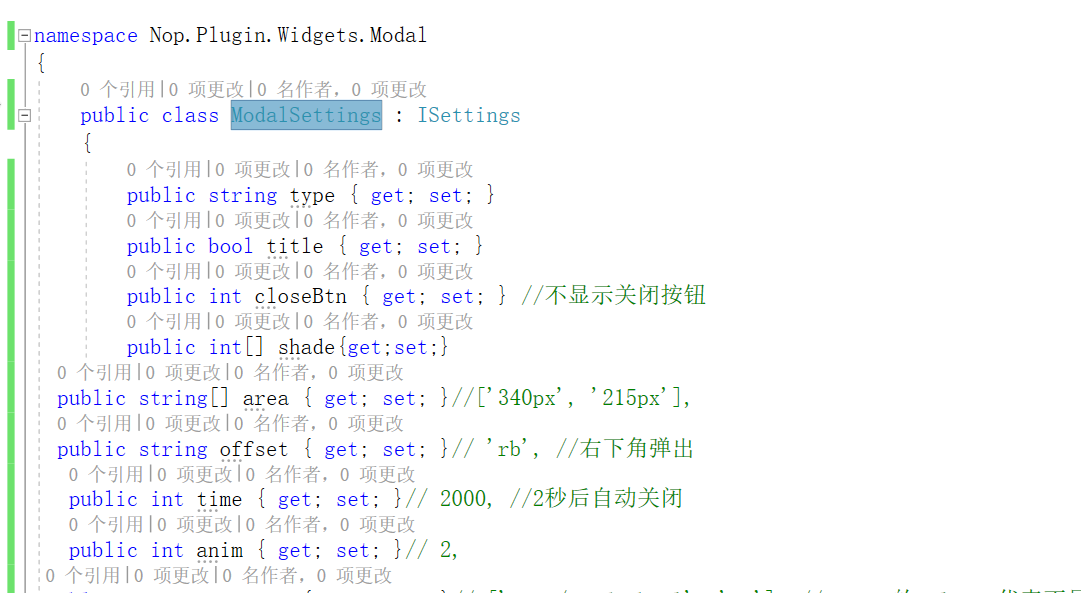
修改plugin
using System.Collections.Generic;

using Nop.Core;

using Nop.Core.Infrastructure;

using Nop.Core.Plugins;

using Nop.Services.Cms;

using Nop.Services.Configuration;

using Nop.Services.Localization;

using Nop.Services.Media;

using Nop.Web.Framework.Infrastructure;

namespace Nop.Plugin.Widgets.Modal

{

    /// <summary>

    /// PLugin

    /// </summary>

    public class ModalPlugin : BasePlugin, IWidgetPlugin

    {

        private readonly ILocalizationService _localizationService;

        private readonly IPictureService _pictureService;

        private readonly ISettingService _settingService;

        private readonly IWebHelper _webHelper;

        private readonly INopFileProvider _fileProvider;

        public ModalPlugin(ILocalizationService localizationService,

            IPictureService pictureService,

            ISettingService settingService,

            IWebHelper webHelper,

            INopFileProvider fileProvider)

        {

            this._localizationService = localizationService;

            this._pictureService = pictureService;

            this._settingService = settingService;

            this._webHelper = webHelper;

            this._fileProvider = fileProvider;

        }

        /// <summary>

        /// 获取挂件的区域位置标识(唯一的id)

        /// </summary>

        /// <returns>Widget zones</returns>

        public IList<string> GetWidgetZones()

        {

            return new List<string> { "home_page_modal"};//PublicWidgetZones.HomePageTop

        }

        /// <summary>

        /// 获取配置页面的url

        /// </summary>

        public override string GetConfigurationPageUrl()

        {

            return _webHelper.GetStoreLocation() + "Admin/WidgetsModal/Configure";

        }

        /// <summary>

        /// 返回要显示的部分视图名称

        /// </summary>

        /// <param name="widgetZone">Name of the widget zone</param>

        /// <returns>View component name</returns>

        public string GetWidgetViewComponentName(string widgetZone)

        {

            return "WidgetsModal";

        }

        /// <summary>

        /// Install plugin

        /// </summary>

        public override void Install()

        {

            //设置

            var settings = new ModalSettings

            {

            };

            _settingService.SaveSetting(settings);

            //设置本地资源缓存

            //_localizationService.AddOrUpdatePluginLocaleResource("Plugins.Widgets.NivoSlider.Picture1", "Picture 1");

            base.Install();

        }

        /// <summary>

        /// Uninstall plugin

        /// </summary>

        public override void Uninstall()

        {

            //settings

            _settingService.DeleteSetting<ModalSettings>();

            //locales

            //_localizationService.DeletePluginLocaleResource("Plugins.Widgets.NivoSlider.Picture1");

            base.Uninstall();

        }

    }

}
然后修改对应的部分视图 WidgetsModalViewComponent
namespace Nop.Plugin.Widgets.Modal.Components

{

    [ViewComponent(Name = "WidgetsModal")]

    public class WidgetsModalViewComponent : NopViewComponent

    {

        private readonly IStoreContext _storeContext;

        private readonly IStaticCacheManager _cacheManager;

        private readonly ISettingService _settingService;

        private readonly IPictureService _pictureService;

        public WidgetsModalViewComponent(IStoreContext storeContext,

            IStaticCacheManager cacheManager,

            ISettingService settingService,

            IPictureService pictureService)

        {

            this._storeContext = storeContext;

            this._cacheManager = cacheManager;

            this._settingService = settingService;

            this._pictureService = pictureService;

        }

        public IViewComponentResult Invoke(string widgetZone, object additionalData)

        {

            var nivoSliderSettings = _settingService.LoadSetting<ModalSettings>(_storeContext.CurrentStore.Id);

            var model = new PublicInfoModel

            {

                Name = "嘿嘿哈哈"

            };

            return View("~/Plugins/Widgets.Modal/Views/PublicInfo.cshtml", model);

        }

        protected string GetPictureUrl(int pictureId)

        {

            //var cacheKey = string.Format(ModelCacheEventConsumer.PICTURE_URL_MODEL_KEY, pictureId);

            //return _cacheManager.Get(cacheKey, () =>

            //{

            //    //little hack here. nulls aren't cacheable so set it to ""

            //    var url = _pictureService.GetPictureUrl(pictureId, showDefaultPicture: false) ?? "";

            //    return url;

            //});

            return "";

        }

    }

}
然后呢 修改下配置文件模型;ConfigurationModel
namespace Nop.Plugin.Widgets.Modal.Models

{

    public class ConfigurationModel : BaseNopModel

    {

        public int ActiveStoreScopeConfiguration { get; set; }

    }

}
修改views里面的配置前端
@model ZXS.Plugin.Widgets.Modal.Models.ConfigurationModel

@{

    Layout = "_ConfigurePlugin";

}

@await Component.InvokeAsync("StoreScopeConfiguration")

<form asp-controller="WidgetsNivoSlider" asp-action="Configure" method="post">

    <div class="panel-group">

       这里是配置页面

        <div class="panel panel-default">

            <div class="panel-body">

                <div class="form-group">

                    <div class="col-md-9 col-md-offset-3">

                        <input type="submit" name="save" class="btn bg-blue" value="@T("Admin.Common.Save")" />

                    </div>

                </div>

            </div>

        </div>

    </div>

</form>
下面是modal的前端
@model ZXS.Plugin.Widgets.Modal.Models.PublicInfoModel

@{

    Layout = "";

    Html.AddScriptParts(ResourceLocation.Footer, "~/Plugins/Widgets.Modal/Content/layui.all.js");

    Html.AddCssFileParts("~/Plugins/Widgets.Modal/Content/css/layui.css");

}

<div class="slider-wrapper theme-custom">

    <div id="nivo-slider" class="nivoSlider">

      <button onclick="loading();">点击弹窗</button>

    </div>

</div>

<script asp-location="Footer">

    //loading层

    function loading() {

        var index = layer.load(, {

            shade: [0.1, '#fff'] //0.1透明度的白色背景

        });

    }

</script>
修改控制器:WidgetsModalController
using System.Linq;

using Microsoft.AspNetCore.Mvc;

using Nop.Core;

using Nop.Core.Caching;

using ZXS.Plugin.Widgets.Modal.Models;

using Nop.Services.Configuration;

using Nop.Services.Localization;

using Nop.Services.Media;

using Nop.Services.Security;

using Nop.Web.Framework;

using Nop.Web.Framework.Controllers;

namespace ZXS.Plugin.Widgets.Modal.Controllers

{

    [Area(AreaNames.Admin)]

    public class WidgetsModalController : BasePluginController

    {

        private readonly IStoreContext _storeContext;

        private readonly IPermissionService _permissionService;

        private readonly IPictureService _pictureService;

        private readonly ISettingService _settingService;

        private readonly ILocalizationService _localizationService;

        public WidgetsModalController(IStoreContext storeContext,

            IPermissionService permissionService,

            IPictureService pictureService,

            ISettingService settingService,

            ICacheManager cacheManager,

            ILocalizationService localizationService)

        {

            this._storeContext = storeContext;

            this._permissionService = permissionService;

            this._pictureService = pictureService;

            this._settingService = settingService;

            this._localizationService = localizationService;

        }

        public IActionResult Configure()

        {

            //权限验证

            //if (!_permissionService.Authorize(StandardPermissionProvider.ManageWidgets))

            //    return AccessDeniedView();

            //load settings for a chosen store scope

            var storeScope = _storeContext.ActiveStoreScopeConfiguration;

            var nivoSliderSettings = _settingService.LoadSetting<ModalSettings>(storeScope);

            var model = new ConfigurationModel

            {

                ActiveStoreScopeConfiguration = storeScope

            };

            if (storeScope > )

            {

            }

            return View("~/Plugins/Widgets.Modal/Views/Configure.cshtml", model);

        }

        [HttpPost]

        public IActionResult Configure(ConfigurationModel model)

        {

            //now clear settings cache

            _settingService.ClearCache();

            SuccessNotification(_localizationService.GetResource("Admin.Plugins.Saved"));

            return Configure();

        }

    }

}
右键项目生成,看看是不是到web项目的插件文件夹了

记得在商城启用控件,然后在home 首页调用它。效果如下
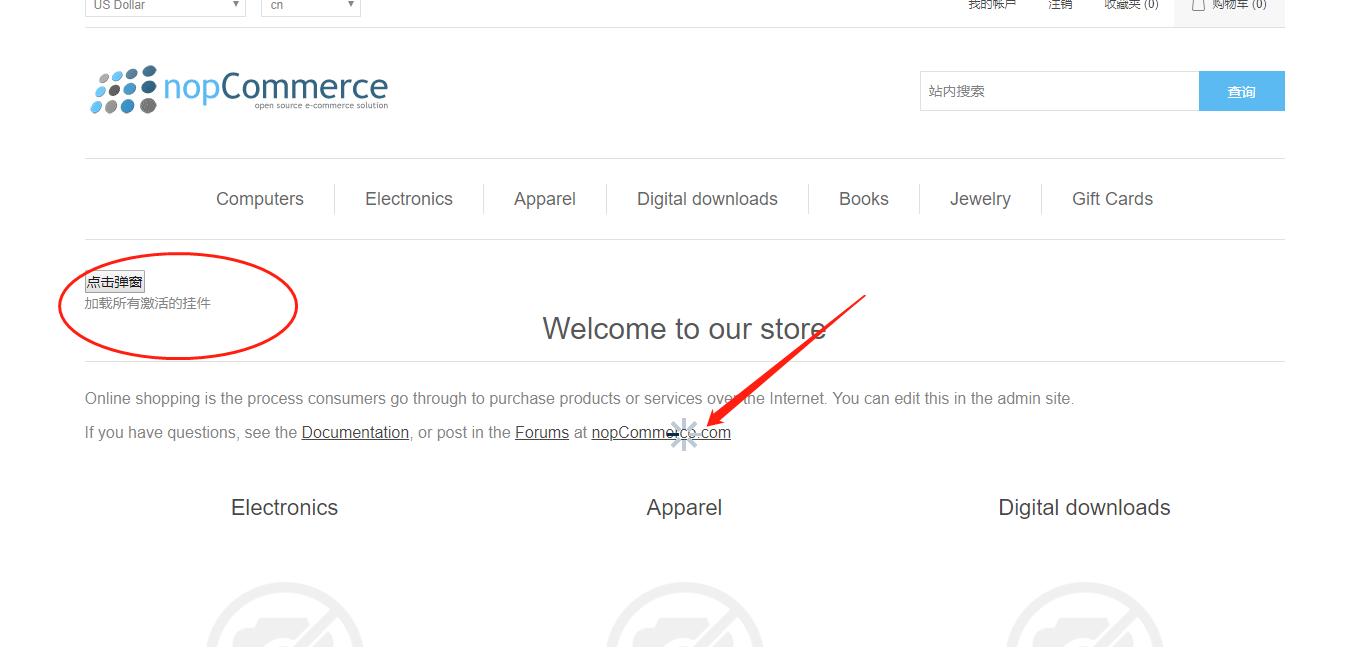
第一次写比较乱,有需要源码的留言。我整理下会放出来
nopcommerce 4.1 学习2 -插件之挂件的更多相关文章
- Elasticsearch学习1--head插件安装
1.简要介绍 elasticsearch-head是一个elasticsearch的集群管理工具,它是完全由html5编写的独立网页程序. 2.最近尝试学习elasticsearch,查了一些资料,但 ...
- 个人学习JQ插件编写成果:little酷炫的图片滑动切换效果
工作一个多月了,好久没来冒冒泡了,看了@wayong的JQ插件教程,自己编写了一个模仿拉勾网首页广告栏滑动特效的JQ插件,现在跟朋友们分享分享! 先上demo链接:http://runjs.cn/de ...
- bootstrap学习笔记 插件概述
Bootstrap插件概览 在前面布局组件章节中所讨论的组件仅仅是个开始.Bootstrap自带的12种jQuery插件,扩展了功能,可以给站点添加更多的互动.即使您不是一名高级的js开发人员, 你也 ...
- bootstrap学习——javascript插件篇
飞近期做的一个小项目须要用到一个模态框和一个图片浏览插件,并把二者结合,刚好bootstrap有相应插件,下面是学习应用流程: 1. 引入js文件: 能够单个引入相应插件文件,或一次所有引入.飞 ...
- mybatis源码学习:插件定义+执行流程责任链
目录 一.自定义插件流程 二.测试插件 三.源码分析 1.inteceptor在Configuration中的注册 2.基于责任链的设计模式 3.基于动态代理的plugin 4.拦截方法的interc ...
- Markdown学习和插件介绍
markdown能干啥 亲们github上的项目首页的 内容+样式,都是项目中README.md文件控制的.将md风格的代码,转化成html. 而且markdown语法非常简单,5-10分钟即可学会! ...
- Maven学习之 插件plugin
Maven本质上是一个执行插件的框架.插件共分两类:build插件和reporting插件. build插件,会在build阶段被执行,应该配置在POM的<build/>元素中. repo ...
- bootstrap学习之三—插件
一.模态框(modal)插件 1)为要触发模态框的组件添加data-toggle="modal",data-target="对应ID" 2)使用一个div实现m ...
- 学习chrome 插件 DHC ,http请求传参方法
DHC的简介 DHC是一款可以帮助用户使用chrome插件模拟HTTP客户端发送测试数据到服务器的谷歌浏览器插件,在chrome中安装了DHC插件以后,就可在服务器端代码初步完成的时候,使用DHC进行 ...
随机推荐
- 杨韬的Python/Jupyter学习笔记
Python语法学习 https://zhuanlan.zhihu.com/p/24162430 Python 安装库 安装Jupyter Notebook 先安装Python cmd 进入K:\Ju ...
- timer控件、三级联动、帐号激活权限设置
一.Timer控件 Timer实际就是一个线程控件. 属性:Enabled 是否被启用 Interval 多长时间执行一次控件中的代码 事件: Tick 事件中放要执行的代码. ...
- 数据库oracle 目录结构
Oracle_Home主目录位于D:\dev\oracle\product\10.2.0(oracle安装路径)下,它包含Oracle软件运行有关的子目录和网络文件以及选定的组件等:若在主机上第一次且 ...
- java框架注意
struts2 数据类型不匹配时会return "input" <result name="input">/WEB-INF/index.jsp< ...
- sqlalchemy orm介绍
ORM介绍 简解:用户会使用ORM时会直接访问对象,对象在通过ORM与数据库进行交互,不需要用户操作sql. 详解:orm英文全称object relational mapping,就是对象映射关系程 ...
- 剑指offer(26)二叉搜索树与双向链表
题目描述 输入一棵二叉搜索树,将该二叉搜索树转换成一个排序的双向链表.要求不能创建任何新的结点,只能调整树中结点指针的指向. 题目分析 要生成排序的双向列表,那么只能是中序遍历,因为中序遍历才能从小到 ...
- 初始Vue
渐进式 JavaScript 框架 通过对框架的了解与运用程度,来决定其在整个项目中的应用范围,最终可以独立以框架方式完成整个web前端项目 走进Vue what -- 什么是Vue 可以独立完成前后 ...
- https://localhost:1158/em运行不正常
1.页面无法打开 一般是由于网站安全问题直接挂掉,可以更换浏览器,如Google Chrome.Fire Fox等.不建议使用IE Google浏览器使用如下, 直接继续 接着以用户sys,密码cha ...
- LaF: Fast Access to Large ASCII Files
貌似可以随机读取dataframe格式的文本文件.
- three.js 创建点 线 面
<html> <head> <title>My first three.js app</title> <style> body { marg ...