linux安装mysql和httpd
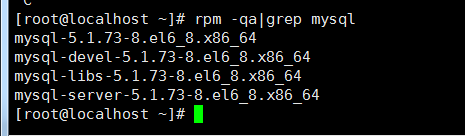
1、安装前检查是否已经安装
[root@localhost1 ~]# rpm -qa |grep mysql
2、安装wget包:
[root@localhost1 ~]# yum -y install wget

下载
[root@localhost data]# wget https://dev.mysql.com/get/mysql57-community-release-el7-9.noarch.rpm
rpm -ivh ***.rpm #其中i表示安装,v表示显示安装过程,h表示显示进度
root@localhost data]# rpm -ivh mysql57-community-release-el7-9.noarch.rpm
警告:mysql57-community-release-el7-9.noarch.rpm: 头V3 DSA/SHA1 Signature, 密钥 ID 5072e1f5: NOKEY
准备中... ################################# [100%]
正在升级/安装...
1:mysql57-community-release-el7-9 ################################# [100%]
[root@localhost data]# yum install mysql-server
[root@localhost data]# systemctl start mysqld
[root@localhost data]# systemctl status mysqld
● mysqld.service - MySQL Server
Loaded: loaded (/usr/lib/systemd/system/mysqld.service; enabled; vendor preset: disabled)
Active: active (running) since 三 2018-12-26 10:55:31 CST; 6s ago
Docs: man:mysqld(8)
http://dev.mysql.com/doc/refman/en/using-systemd.html
Process: 16615 ExecStart=/usr/sbin/mysqld --daemonize --pid-file=/var/run/mysqld/mysqld.pid $MYSQLD_OPTS (code=exited, status=0/SUCCESS)
Process: 16542 ExecStartPre=/usr/bin/mysqld_pre_systemd (code=exited, status=0/SUCCESS)
Main PID: 16619 (mysqld)
CGroup: /system.slice/mysqld.service
└─16619 /usr/sbin/mysqld --daemonize --pid-file=/var/run/mysqld/mysqld.pid
12月 26 10:55:28 localhost.localdomain1 systemd[1]: Starting MySQL Server...
12月 26 10:55:31 localhost.localdomain1 systemd[1]: Started MySQL Server.
启动 MySQL:
systemctl start mysqld
查看 MySQL 运行状态:
systemctl status mysqld
[root@localhost2 ~]# grep "password" /var/log/mysqld.log

--20T08::.467363Z  [Note] A temporary password is generated for root@localhost: ((X)mlE,l8.:
[root@localhost data]# mysql -u root -p
Enter password:
mysql> GRANT ALL PRIVILEGES ON *.* TO 'root'@'%' IDENTIFIED BY 'sjlh123456' WITH GRANT OPTION;
Query OK, 0 rows affected, 1 warning (0.00 sec)
mysql> flush privileges;
Query OK, 0 rows affected (0.00 sec)
修改密码 主从复制配置
创建一个主从复制用户 数据文件/var/lib/mysql 日志文件/var/log

配置中聚日志,
启动slave;
删除主从同步配置:
mysql> change master to master_host=' ';
Query OK, 0 rows affected (0.01 sec)
mysql> reset slave;
Query OK, 0 rows affected (0.01 sec)
mysql> show slave status \G
mysql> ALTER USER 'root'@'localhost' IDENTIFIED BY 'sjlh123456';
[root@localhost3 program]# mysql -u root -p
Enter password:
Welcome to the MySQL monitor. Commands end with ; or \g.
Your MySQL connection id is 2
Server version: 5.7.23
Copyright (c) 2000, 2018, Oracle and/or its affiliates. All rights reserved.
Oracle is a registered trademark of Oracle Corporation and/or its
affiliates. Other names may be trademarks of their respective
owners.
Type 'help;' or '\h' for help. Type '\c' to clear the current input statement.
mysql> set global validate_password_length=1;
Query OK, 0 rows affected (0.00 sec)
mysql> set global validate_password_policy=0;
Query OK, 0 rows affected (0.00 sec)
mysql> set password=password("sjlh123456");
Query OK, 0 rows affected, 1 warning (0.00 sec)
mysql> set global validate_password_length=1;
set global validate_password_policy=0;
mysql> create user repl indentified by 'repl';
GRANT replication slave on *.* TO 'repl'@'%' IDENTIFIED BY 'repl';
[root@localhost3 ~]# vi /etc/my.cnf
[root@localhost2 ~]# system restart mysqld
mysql> show master status;
+------------------+----------+--------------+------------------+-------------------+
| File | Position | Binlog_Do_DB | Binlog_Ignore_DB | Executed_Gtid_Set |
+------------------+----------+--------------+------------------+-------------------+
| mysql-bin.000001 | 682 | | | |
+------------------+----------+--------------+------------------+-------------------+
1 row in set (0.00 sec)
mysql> change master to master_host='192.168.43.114',master_port=3306,master_user='repl',master_password='repl',master_log_file='mysql-bin.000001',master_log_pos=682;
Query OK, 0 rows affected, 2 warnings (0.03 sec)
Query OK, 0 rows affected (0.01 sec)
mysql> show slave status\G
*************************** 1. row ***************************
Slave_IO_State: Waiting for master to send event
Master_Host: 192.168.43.114
Master_User: repl
Master_Port: 3306
Connect_Retry: 60
Master_Log_File: mysql-bin.000001
Read_Master_Log_Pos: 682
Relay_Log_File: slave-relay-bin.000002
Relay_Log_Pos: 320
Relay_Master_Log_File: mysql-bin.000001
Slave_IO_Running: Yes
Slave_SQL_Running: Yes
Replicate_Do_DB:
Replicate_Ignore_DB:
Replicate_Do_Table:
Replicate_Ignore_Table:
Replicate_Wild_Do_Table:
Replicate_Wild_Ignore_Table:
Last_Errno: 0
Last_Error:
Skip_Counter: 0
Exec_Master_Log_Pos: 682
Relay_Log_Space: 527
Until_Condition: None
Until_Log_File:
Until_Log_Pos: 0
Master_SSL_Allowed: No
Master_SSL_CA_File:
Master_SSL_CA_Path:
Master_SSL_Cert:
Master_SSL_Cipher:
Master_SSL_Key:
Seconds_Behind_Master: 0
Master_SSL_Verify_Server_Cert: No
Last_IO_Errno: 0
Last_IO_Error:
Last_SQL_Errno: 0
Last_SQL_Error:
Replicate_Ignore_Server_Ids:
Master_Server_Id: 114
Master_UUID: d967ab50-c001-11e8-abc3-000c290736ce
Master_Info_File: /var/lib/mysql/master.info
SQL_Delay: 0
SQL_Remaining_Delay: NULL
Slave_SQL_Running_State: Slave has read all relay log; waiting for more updates
Master_Retry_Count: 86400
Master_Bind:
Last_IO_Error_Timestamp:
Last_SQL_Error_Timestamp:
Master_SSL_Crl:
Master_SSL_Crlpath:
Retrieved_Gtid_Set:
Executed_Gtid_Set:
Auto_Position: 0
Replicate_Rewrite_DB:
Channel_Name:
Master_TLS_Version:
1 row in set (0.00 sec)
--查看binglog内容
[root@localhost3 mysql]# mysqlbinlog --base64-output=decode-rows -v mysql-bin.000001
检查项
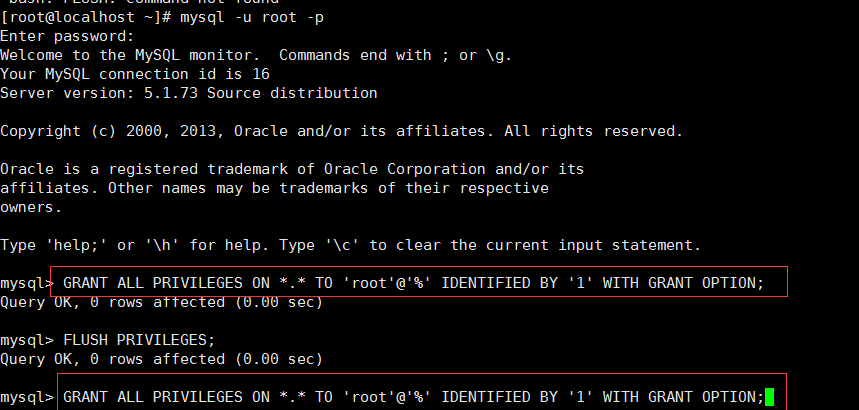
接虚拟机中的mysql时,报本机ip链接不上远程mysql服务器
# mysql -u root -proot
mysql>GRANT ALL PRIVILEGES ON *.* TO 'root'@'%' IDENTIFIED BY '1' WITH GRANT OPTION;
操作完后切记执行以下命令刷新权限
mysql>FLUSH PRIVILEGES;
主从不同步,关闭从服务器服务,重置主服务器,从新同步位置,然后在start slave;
关闭服务
stop slave;
reset master;
linux安装mysql和httpd的更多相关文章
- linux安装mysql后root无法登录 sql 无法登录
linux安装mysql后root无法登录 问题:[root@localhost mysql]# mysql -u root -pEnter password: ERROR 1045 (28000): ...
- linux安装mysql~~~mysql5.6.12
Linux安装mysql服务器 准备: MySQL-client-5.6.12-1.rhel5.i386.rpm MySQL-server-5.6.12-1.rhel5.i386.rpm 首先检查环境 ...
- linux安装mysql全纪录[包括yum和rpm安装,编码,远程连接以及大小写问题]
linux安装mysql全纪录[包括yum和rpm安装,编码,远程连接以及大小写问题] 一.查看mysql是否已经安装 使用“whereis mysql”命令来查看mysql安装路径: [root@h ...
- linux安装mysql服务分两种安装方法:
linux安装mysql服务分两种安装方法: ①源码安装,优点是安装包比较小,只有十多M,缺点是安装依赖的库多,安装编译时间长,安装步骤复杂容易出错: ②使用官方编译好的二进制文件安装,优点是安装速度 ...
- linux安装MySQL后输入mysql显示 ERROR 2002 (HY000): Can't connect to local MySQL server through socket
我是小白,大佬勿喷 *** linux安装MySQL后输入mysql显示 ERROR 2002 (HY000): Can't connect to local MySQL server through ...
- Linux 安装Mysql(图文教程)
原文:Linux 安装Mysql(图文教程) 版权声明:本文为博主原创文章,遵循CC 4.0 BY-SA版权协议,转载请附上原文出处链接和本声明. 本文链接:https://blog.csdn.net ...
- Linux 安装 MySQL 8 数据库(图文详细教程)
本教程手把手教你如何在 Linux 安装 MySQL 数据库,以 CentOS 7为例. 1. 下载并安装 MySQL 官方的 Yum Repository wget -i -c https://re ...
- linux 安装mysql数据库——yum安装法
mysql数据库有多种安装方式,本文只介绍在Linux服务器上最实用.最快捷的mysql server安装方法.一.Linux服务器yum安装(CentOS6.3 64位) 所有在服务器上执行的命令, ...
- 虚拟机下linux安装mysql,apache和php
由于腿伤了,卧床在家折腾下linux,尝试用虚拟机装mysql,apche和php.中间各种波折,装了好几天,觉得有些经验还是要记录下来,让自己别忘了:) 按照下面这篇文章的方法,基本可以顺利安装成功 ...
随机推荐
- sublime text 3 vue 语法高亮
1.下载文件 链接 https://github.com/vuejs/vue-syntax-highlight 2.sublime菜单栏->Preferences->Browse Pack ...
- 将图片嵌入到markdown文档中
转自KFXW的专栏 将图片嵌入Markdown文档中一直是一个比较麻烦的事情.通常的做法是将图片存入本地某个路径或者网络存储空间,使用URL链接的形式插入图片: ![image][url_to_ima ...
- python调用linux的命令
有时候难免需要直接调用Shell命令来完成一些比较简单的操作,比如mount一个文件系统之类的.那么我们使用Python如何调用Linux的Shell命令?下面来介绍几种常用的方法: 1. os 模块 ...
- [蓝桥杯]ALGO-188.算法训练_P0504
Anagrams指的是具有如下特性的两个单词:在这两个单词当中,每一个英文字母(不区分大小写)所出现的次数都是相同的.例如,Unclear和Nuclear.Rimon和MinOR都是Anagrams. ...
- 树莓派apt-get The value '\stable' is invalid for APT 错误
对apt-get进行任何操作都会报错: pi@raspberrypi:~ $ sudo apt-get upgrade Reading package lists... Done E: The val ...
- 20165312 2017-2018-2《Java程序设计》课程总结
20165312 2017-2018-2<Java程序设计>课程总结 每周作业链接汇总 预备作业1:我期望的师生关系 预备作业2:C语言基础调查和java学习展望 预备作业3:Linux安 ...
- 网络共享存储服务NFS
网络共享存储服务NFS 作者:Eric 微信:loveoracle11g 环境准备 服务器系统 角色 IP RHEL 7.5 x86-64 NFS服务端 192.168.10.201 RHEL 7.5 ...
- 【产品设计】【转】APP界面设计规范编写指南(人人都是产品经理)
转自 :http://www.woshipm.com/ucd/608557.html 作者:EID_UX_DESIGN,微信公众号:EID_center 原文地址:http://www.ui.cn/d ...
- AtomicInteger类和int原生类型自增鲜明的对比
AtomicInteger这个类的存在是为了满足在高并发的情况下,原生的整形数值自增线程不安全的问题.比如说 int i = 0 ; i++; 上面的写法是线程不安全的. 有的人可能会说了,可以使 ...
- Android 开发 框架系列 百度语音合成
官方文档:http://ai.baidu.com/docs#/TTS-Android-SDK/6d5d6899 官方百度语音合成控制台:https://cloud.baidu.com/product/ ...