使用注解配置Spring框架自动代理通知
话不多说上代码
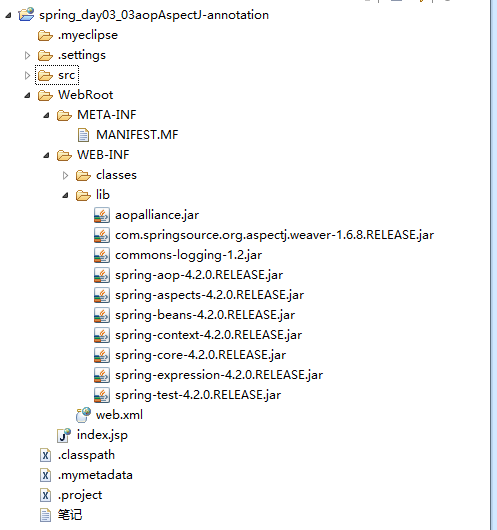
项目架构图及Lib包如下:
第二步创建业务类接口
package cn.happy.day01.entity;

/**

 * 1.业务接口

 * @author Happy

 *

 */

public interface ISomeService {

    //1.1  执行事务

   public void doTransaction();

    //1.2 书写日志

   public String doLog();

}
第三步实现接口重写接口方法
package cn.happy.day01.entity;

public class SomeServiceImpl implements ISomeService {

    @Override

    public void doTransaction() {

        System.out.println("开启事务");

    }

    @Override

    public String doLog() {

        System.out.println("书写日志");

        return "abc";

    }

}
第四步创建aop包定义增强类
package cn.happy.day01.aop;

import org.aspectj.lang.annotation.Aspect;

import org.aspectj.lang.annotation.Before;

@Aspect  //该类为切面

public class MyAspect {

    //前置通知

    @Before(value="execution(public * *(..))")

    public void myBefore(){

        System.out.println("这是前置增强");

    }

}
第五步在applicationContext.xml中配置:
<?xml version="1.0" encoding="UTF-8"?>

<beans xmlns="http://www.springframework.org/schema/beans"

    xmlns:xsi="http://www.w3.org/2001/XMLSchema-instance"

    xmlns:context="http://www.springframework.org/schema/context"

    xmlns:aop="http://www.springframework.org/schema/aop"

     xsi:schemaLocation="

        http://www.springframework.org/schema/beans http://www.springframework.org/schema/beans/spring-beans.xsd

        http://www.springframework.org/schema/context http://www.springframework.org/schema/context/spring-context.xsd

        http://www.springframework.org/schema/aop http://www.springframework.org/schema/aop/spring-aop.xsd">

   <!-- 目标对象 -->

   <bean id="someService" class="cn.happy.day01.entity.SomeServiceImpl"></bean>

   <!-- 切面: -->

   <bean id="myAspect" class="cn.happy.day01.aop.MyAspect"></bean>

  <aop:aspectj-autoproxy/>

</beans>
最后我们写测试类测试
package cn.happy.day01.test;

import org.junit.Test;

import org.junit.runner.RunWith;

import org.springframework.context.ApplicationContext;

import org.springframework.context.support.ClassPathXmlApplicationContext;

import org.springframework.test.context.ContextConfiguration;

import org.springframework.test.context.junit4.SpringJUnit4ClassRunner;

import cn.happy.day01.entity.ISomeService;

public class Spring_01Test {

    @Test

    public void testOne(){

        ApplicationContext ctx=new ClassPathXmlApplicationContext("cn/happy/day01/applicationContext.xml");

        ISomeService service = (ISomeService)ctx.getBean("someService");

        service.doTransaction();

        String result = service.doLog();

        System.out.println(result);

    }

}
ps:
1.切入点表达式
execution(【modifiers-pattern?】 访问修饰符
ret-type-pattern 返回值类型
【declaring-type-pattern?】 全限定性类名
name-pattern(param-pattern) 方法名(参数名)
【throws-pattern?】) 抛出异常类型
切入点表达式要匹配的对象就是目标方法的方法名。所以,execution表达式中明显就是方法的签名。注意:表达式中加[]的部分表示可省略部分,各部分间用空格分开。在其中可以使用以下符号:
符号 意义
* 0至多个任意字符
.. 用在方法参数中,表示任意多个参数
用在包名后,表示当前包及其子包路径
+ 用在类名后,表示当前类及其子类
用在接口后,表示当前接口及其实现类
案例:
execution(public * *(..)) 指定切入点为:任意公共方法
execution(* set*(..)) 指定切入点为:任何一个以"set"开始的方法
ok就这样了试试吧
使用注解配置Spring框架自动代理通知的更多相关文章
- 死磕Spring之AOP篇 - Spring AOP自动代理(二)筛选合适的通知器
该系列文章是本人在学习 Spring 的过程中总结下来的,里面涉及到相关源码,可能对读者不太友好,请结合我的源码注释 Spring 源码分析 GitHub 地址 进行阅读. Spring 版本:5.1 ...
- JAVAEE——spring02:使用注解配置spring、sts插件、junit整合测试和aop演示
一.使用注解配置spring 1.步骤 1.1 导包4+2+spring-aop 1.2 为主配置文件引入新的命名空间(约束) 1.3 开启使用注解代替配置文件 1.4 在类中使用注解完成配置 2.将 ...
- 死磕Spring之AOP篇 - Spring AOP自动代理(三)创建代理对象
该系列文章是本人在学习 Spring 的过程中总结下来的,里面涉及到相关源码,可能对读者不太友好,请结合我的源码注释 Spring 源码分析 GitHub 地址 进行阅读. Spring 版本:5.1 ...
- 使用BeanNameAutoProxyCreator实现spring的自动代理
提到代理,我们可以使用ProxyBeanFactory,并配置proxyInterfaces,target和interceptorNames实现,但如果需要代理的bean很多,无疑会对spring配置 ...
- 死磕Spring之AOP篇 - Spring AOP自动代理(一)入口
该系列文章是本人在学习 Spring 的过程中总结下来的,里面涉及到相关源码,可能对读者不太友好,请结合我的源码注释 Spring 源码分析 GitHub 地址 进行阅读. Spring 版本:5.1 ...
- 注解配置spring
1.为什么使用注解配置Spring基于注解配置的方式也已经逐渐代替xml.这个是不可逆的潮流,所以我们必须要掌握使用注解的方式配置Spring 总结:(1)使用注解配置Spring,注解的作用就是用于 ...
- 使用注解配置Spring
使用注解配置Spring 1.为主配置文件引入新的命名空间(约束) 2.开启使用注解代理配置文件 3.在类中使用注解完成配置 将对象注册到容器 修改对象的作用范围 值类型注入 引用类型注入 注意: 初 ...
- Spring学习笔记(三)—— 使用注解配置spring
一.使用步骤 1.1 导包 1.2 为主配置文件引入新的命名空间(约束) 在applicationContext.xml中引入context约束 1.3 编写相关的类 public class Use ...
- Spring系列之新注解配置+Spring集成junit+注解注入
Spring系列之注解配置 Spring是轻代码而重配置的框架,配置比较繁重,影响开发效率,所以注解开发是一种趋势,注解代替xml配置文件可以简化配置,提高开发效率 你本来要写一段很长的代码来构造一个 ...
随机推荐
- web.config 修改数据库连接
<connectionstrings> </database=数据库名字 ;uid = 登录数据库的名字;Password = 登录数据库的密码;/> </connect ...
- ElasticSearch部署安装
测试版本:elasticsearch-5.1.1 1.Windows环境下安装(win10系统) 1)解压elasticsearch-5.1.1.zip. 2)执行elasticsearch.bat启 ...
- scala getter and setter
package exp { object Main { def main(args: Array[String]): Unit = { B.name ="Fred"; printl ...
- Python future模块
今天看到了Pyhon中的模块__future__,查了一下资料,感觉这个module很有用. 从python2.1开始以后, 当一个新的语言特性首次出现在发行版中时候, 如果该新特性与以前旧版本pyt ...
- MySQL主从同步配置
如果主从配置之前安装了云平台,请停止云平台后在进行mysql主从配置. 1. 登录master数据库,检查数据库端口防火墙设置,允许远程客户连接,如果没有,执行以下操作. 执行命令:iptables ...
- iOS程序 防止动态调试和代码注入
http://ruixiazun.blog.163.com/blog/static/9068791820141173588694/ iPhone真实的运行环境是没有sys/ptrace.h抛出.ptr ...
- 关于silverlight5 打印功能收集
http://www.cnblogs.com/slmk/archive/2012/07/18/2570303.html Silverlight打印解决方案2.1正式发布(支持打印预览.页面设置(横向纵 ...
- 安卓自动化测试:Android studio 自带的 Record Espresso Test || [ Appium & (Android studio || Python|| Eclipse ) ]
1.Android studio 自带的 Record Espresso Test https://developer.android.com/studio/test/espresso-test-r ...
- Paths_Quartz2D
Paths中的几个重要元素 Points void CGContextMoveToPoint ( CGContextRef c, CGFloat x, CGFloat y ); 指定 ...
- curl post
//Post方式实现 $url = "http://localhost/web_services.php"; $post_data = array ("username& ...