【代码笔记】iOS-scrollerView里多个tableView加搜索框
一,效果图。

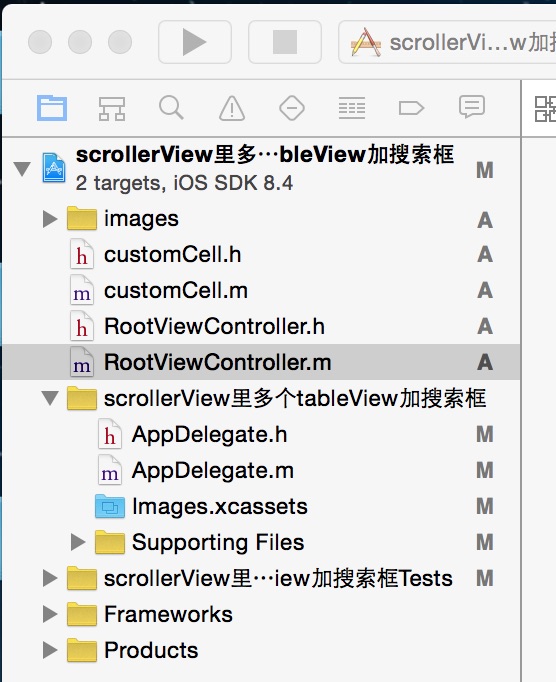
二,工程图。
三,代码。
RootViewController.h

#import <UIKit/UIKit.h>

#import "customCell.h"

@interface RootViewController : UIViewController

<UISearchBarDelegate,UITableViewDelegate,UITableViewDataSource,UIScrollViewDelegate,UISearchDisplayDelegate>

{

    customCell * cell;

    NSMutableArray * dataArray;

    NSMutableArray * imageArray;

    UIScrollView * scrollerView;

    UITableView * tableOneView;

    UITableView * tableTowView;

    UITableView * tableThreeView;

    UITableView * tableFourView;

    UISearchDisplayController * scrollerControl;

}

@end
RootViewController.m
#import "RootViewController.h"

#import "customCell.h"

@interface RootViewController ()

@end

@implementation RootViewController

- (id)initWithNibName:(NSString *)nibNameOrNil bundle:(NSBundle *)nibBundleOrNil

{

    self = [super initWithNibName:nibNameOrNil bundle:nibBundleOrNil];

    if (self) {

        // Custom initialization

    }

    return self;

}

- (void)viewDidLoad

{

    [super viewDidLoad];

    // Do any additional setup after loading the view.

    //初始化背景图

    [self initBackgroundView];

}

-(void)initBackgroundView

{

    self.navigationController.navigationBarHidden=YES;

    dataArray = [[NSMutableArray alloc]initWithObjects:@"热门微博",@"热门话题",@"随便看看",@"二维码",

                 @"周边的微博",@"周边的人",@"微吧",@"微博会员",

                 @"新浪早晚报",@"微公益",@"微博应用",@"游戏",

                 @"微刊",@"手机微博",@"微群",@"微相册",

                 @"名人堂",@"人气草根",@"微博精选",@"猜你喜欢",

                 @"手机新浪网",@"掌中新浪",@"天气通",@"微漫画",

                 @"聊天",@"看点",@"微盘",@"微收藏",

                 @"图钉",@"限免换享",@"淘身边",@"微美食",

                 @"新浪拍客",@"博客",@"充话费",@"MOMO岛",

                 @"网址导航",@"新浪视野",@"微数据",@"新浪彩票",nil];

    imageArray = [[NSMutableArray alloc] initWithObjects:@"0.png",@"1.png",@"2.png",@"3.png",@"4.png",@"5.png",@"6.png",@"7.png",@"8.png",@"9.png",@"10.png",@"11.png",@"12.png",@"13.png",@"14.png",@"15.png",@"16.png",@"17.png",@"18.png",@"19.png",@"20.png",@"21.png",@"22.png",@"23.png",@"24.png",@"25.png",@"26.png",@"27.png",@"28.png",@"29.png",@"30.png",@"31.png",@"32.png",@"33.png",@"34.png",@"35.png",@"36.png",@"37.png",@"38.png",@"39.png", nil];

    //scrollerView

    scrollerView = [[UIScrollView alloc] initWithFrame:CGRectMake(0, 0, 320, 460-44-44)];

    scrollerView.contentSize = CGSizeMake(320*4, 460-44-44);

    scrollerView.bounces = YES;

    scrollerView.tag = 101;

    scrollerView.showsHorizontalScrollIndicator = NO;

    scrollerView.pagingEnabled = YES;

    scrollerView.delegate = self;

    [self.view addSubview:scrollerView];

    //tableOne

    tableOneView = [[UITableView alloc] initWithFrame:CGRectMake(0, 44, 320, 460-44-44-44) style:UITableViewStylePlain];

    tableOneView.delegate = self;

    tableOneView.dataSource = self;

    tableOneView.bounces=NO;

    [tableOneView setSeparatorColor:[UIColor clearColor]];

    //tableTwo

    tableTowView = [[UITableView alloc] initWithFrame:CGRectMake(320, 44, 320, 460-44-44-44) style:UITableViewStylePlain];

    tableTowView.delegate = self;

    tableTowView.dataSource = self;

    tableTowView.bounces=NO;

    [tableTowView setSeparatorColor:[UIColor clearColor]];

    //tableThree

    tableThreeView = [[UITableView alloc]initWithFrame:CGRectMake(320*2, 44, 320, 460-44-44-44) style:UITableViewStylePlain];

    tableThreeView.delegate = self;

    tableThreeView.dataSource = self;

    tableThreeView.bounces=NO;

    [tableThreeView setSeparatorColor:[UIColor clearColor]];

    //tableFour

    tableFourView = [[UITableView alloc] initWithFrame:CGRectMake(320*3, 44, 320, 460-44-44-44) style:UITableViewStylePlain];

    tableFourView.delegate = self;

    tableFourView.dataSource = self;

    tableFourView.bounces=NO;

    [tableFourView setSeparatorColor:[UIColor clearColor]];

    [scrollerView addSubview:tableFourView];

    [scrollerView addSubview:tableThreeView];

    [scrollerView addSubview:tableTowView];

    [scrollerView addSubview:tableOneView];

    //searchbar

    UISearchBar * searchBar = [[UISearchBar alloc]initWithFrame:CGRectMake(0, 0, 320, 44)];

    searchBar.placeholder = @"搜索";

    searchBar.delegate = self;

    searchBar.showsCancelButton = YES;

    [self.view addSubview:searchBar];

    //searchcontroller

    scrollerControl = [[UISearchDisplayController alloc]initWithSearchBar:searchBar contentsController:self];

    scrollerControl.delegate = self;

    scrollerControl.searchResultsDataSource = self;

    scrollerControl.searchResultsDelegate = self;

}

#pragma -mark -UITableViewDelegate

-(NSInteger)tableView:(UITableView *)tableView numberOfRowsInSection:(NSInteger)section

{

    return 3;

}

-(CGFloat)tableView:(UITableView *)tableView heightForRowAtIndexPath:(NSIndexPath *)indexPath

{

    return 100;

}

-(UITableViewCell *)tableView:(UITableView *)tableView cellForRowAtIndexPath:(NSIndexPath *)indexPath

{

    static int i = 0;

    static int j = 0;

    NSString * strID = @"ID";

    cell = [tableView dequeueReusableCellWithIdentifier:strID];

    if (cell == nil) {

        cell = [[customCell alloc] initWithStyle:UITableViewCellStyleValue1 reuseIdentifier:strID];

        cell.selectionStyle = UITableViewCellSelectionStyleNone;

        cell.button1.tag = i++;

        cell.button2.tag = i++;

        cell.button3.tag = i++;

        cell.button4.tag = i++;

        cell.label1.tag = j++;

        cell.label2.tag = j++;

        cell.label3.tag = j++;

        cell.label4.tag = j++;

        if (cell.label1.tag >= 40 || cell.button1.tag >= 40) {

            return cell;

        }

    }

    [cell.label1 setText:[NSString stringWithFormat:@"%@",[dataArray objectAtIndex:cell.label1.tag]]];

    [cell.label2 setText:[NSString stringWithFormat:@"%@",[dataArray  objectAtIndex:cell.label2.tag]]];

    [cell.label3 setText:[NSString stringWithFormat:@"%@",[dataArray objectAtIndex:cell.label3.tag]]];

    [cell.label4 setText:[NSString stringWithFormat:@"%@",[dataArray objectAtIndex:cell.label4.tag]]];

    [cell.button1 setImage:[UIImage imageNamed:[imageArray objectAtIndex:cell.button1.tag]] forState:UIControlStateNormal];

    [cell.button2 setImage:[UIImage imageNamed:[imageArray objectAtIndex:cell.button2.tag]] forState:UIControlStateNormal];

    [cell.button3 setImage:[UIImage imageNamed:[imageArray objectAtIndex:cell.button3.tag]] forState:UIControlStateNormal];

    [cell.button4 setImage:[UIImage imageNamed:[imageArray objectAtIndex:cell.button4.tag]] forState:UIControlStateNormal];

    [cell.button1 addTarget:self action:@selector(doClickButtonAction:) forControlEvents:UIControlEventTouchUpInside];

    [cell.button2 addTarget:self action:@selector(doClickButtonAction:) forControlEvents:UIControlEventTouchUpInside];

    [cell.button3 addTarget:self action:@selector(doClickButtonAction:) forControlEvents:UIControlEventTouchUpInside];

    [cell.button4 addTarget:self action:@selector(doClickButtonAction:) forControlEvents:UIControlEventTouchUpInside];

    return cell;

}

-(void)doClickButtonAction:(UIButton *)btn

{

    NSLog(@"--btn.tag--%i",btn.tag);

}

- (void)didReceiveMemoryWarning

{

    [super didReceiveMemoryWarning];

    // Dispose of any resources that can be recreated.

}
customCell.h
#import <UIKit/UIKit.h>

@interface customCell : UITableViewCell

{

    UIButton * button1;

    UIButton * button2;

    UIButton * button3;

    UIButton * button4;

    UILabel * label1;

    UILabel * label2;

    UILabel * label3;

    UILabel * label4;

}

@property (nonatomic,retain)UIButton * button1;

@property (nonatomic,retain)UIButton * button2;

@property (nonatomic,retain)UIButton * button3;

@property (nonatomic,retain)UIButton * button4;

@property (nonatomic,retain)UILabel * label1;

@property (nonatomic,retain)UILabel * label2;

@property (nonatomic,retain)UILabel * label3;

@property (nonatomic,retain)UILabel * label4;

@end
customCell.m
#import "customCell.h"

@implementation customCell

@synthesize button1;

@synthesize button2;

@synthesize button3;

@synthesize button4;

@synthesize label1;

@synthesize label2;

@synthesize label3;

@synthesize label4;

- (id)initWithStyle:(UITableViewCellStyle)style reuseIdentifier:(NSString *)reuseIdentifier

{

    self = [super initWithStyle:style reuseIdentifier:reuseIdentifier];

    if (self) {

        // Initialization code

        button1 = [UIButton buttonWithType:UIButtonTypeCustom];

        button1.frame = CGRectMake(5, 10, 70, 60);

        button2 = [UIButton buttonWithType:UIButtonTypeCustom];

        button2.frame = CGRectMake(85, 10, 70, 60);

        button3 = [UIButton buttonWithType:UIButtonTypeCustom];

        button3.frame = CGRectMake(165, 10, 70, 60);

        button4 = [UIButton buttonWithType:UIButtonTypeCustom];

        button4.frame = CGRectMake(245, 10, 70, 60);

        [self addSubview:button1];

        [self addSubview:button2];

        [self addSubview:button3];

        [self addSubview:button4];

        label1 = [[UILabel alloc] initWithFrame:CGRectMake(5, 75, 70, 20)];

        label1.font = [UIFont systemFontOfSize:12];

        label1.textAlignment = NSTextAlignmentCenter;

        label2 = [[UILabel alloc] initWithFrame:CGRectMake(85, 75, 70, 20)];

        label2.font = [UIFont systemFontOfSize:12];

        label2.textAlignment = NSTextAlignmentCenter;

        label3 = [[UILabel alloc] initWithFrame:CGRectMake(165, 75, 70, 20)];

        label3.font = [UIFont systemFontOfSize:12];

        label3.textAlignment = NSTextAlignmentCenter;

        label4 = [[UILabel alloc] initWithFrame:CGRectMake(245, 75, 70, 20)];

        label4.font = [UIFont systemFontOfSize:12];

        label4.textAlignment = NSTextAlignmentCenter;

        [self addSubview:label1];

        [self addSubview:label2];

        [self addSubview:label3];

        [self addSubview:label4];

    }

    return self;

}

- (void)awakeFromNib

{

    // Initialization code

}

- (void)setSelected:(BOOL)selected animated:(BOOL)animated

{

    [super setSelected:selected animated:animated];

    // Configure the view for the selected state

}

@end
【代码笔记】iOS-scrollerView里多个tableView加搜索框的更多相关文章
- [iOS微博项目 - 1.2] - 导航栏搜索框
A.导航栏搜索框 1.需求 在“发现”页面,在顶部导航栏NavigationBar上添加一个搜索框 左端带有“放大镜”图标 github: https://github.com/hellovoidwo ...
- 【代码笔记】iOS-UIScrollerView里有两个tableView
一,效果图. 二,工程图. 三,代码. RootViewController.h #import <UIKit/UIKit.h> @interface RootViewController ...
- 【代码笔记】iOS-实现网络图片的异步加载和缓存
代码: - (void)viewDidLoad { [super viewDidLoad]; // Do any additional setup after loading the view. se ...
- ios项目里扒出来的json文件
p.p1 { margin: 0.0px 0.0px 0.0px 0.0px; font: 13.0px Menlo; color: #000000 } p.p2 { margin: 0.0px 0. ...
- IOS开发笔记 IOS如何访问通讯录
IOS开发笔记 IOS如何访问通讯录 其实我是反对这类的需求,你说你读我的隐私,我肯定不愿意的. 幸好ios6.0 以后给了个权限控制.当打开app的时候你可以选择拒绝. 实现方法: [plain] ...
- WWDC 2014 Session笔记 - iOS界面开发的大一统
本文是我的 WWDC 2014 笔记 中的一篇,涉及的 Session 有 What's New in Cocoa Touch Building Adaptive Apps with UIKit Wh ...
- 【hadoop代码笔记】hadoop作业提交之汇总
一.概述 在本篇博文中,试图通过代码了解hadoop job执行的整个流程.即用户提交的mapreduce的jar文件.输入提交到hadoop的集群,并在集群中运行.重点在代码的角度描述整个流程,有些 ...
- 笔记-iOS 视图控制器转场详解(上)
这是一篇长文,详细讲解了视图控制器转场的方方面面,配有详细的示意图和代码,为了使得文章在微信公众号中易于阅读,seedante 辛苦将大量长篇代码用截图的方式呈现,另外作者也在 Github 上附上了 ...
- <Python Text Processing with NLTK 2.0 Cookbook>代码笔记
如下是<Python Text Processing with NLTK 2.0 Cookbook>一书部分章节的代码笔记. Tokenizing text into sentences ...
随机推荐
- 阅读《LEARNING HARD C#学习笔记》知识点总结与摘要三
最近工作较忙,手上有几个项目等着我独立开发设计,所以平时工作日的时候没有太多时间,下班累了就不想动,也就周末有点时间,今天我花了一个下午的时间来继续总结与整理书中要点,在整理的过程中,发现了书中的一些 ...
- ADO.NET基础02
查询和操作数据库 要想从数据库中读取多条记录就必须用到Command对象的ExecuteReader()方法,该方法返回一个DataReader对象,通过其对象的程序就可以访问数据库. 基础知识 ...
- img[src*="same"]{}
假如你有一组图片,你想选择其中一些名字中带有same的图片,那么你就可以用这种写法,这里的意思就是选择所有正确路径下名字中带有same的图片文件. 譬如说:me_same.png,you_same.p ...
- HtmlAgilityPack 删除script、style以及注释标签
foreach(var script in doc.DocumentNode.Descendants("script").ToArray()) script.Remove(); f ...
- ASP.NET MVC 网站开发总结(二)——一个或多个文件的异步或同步上传
简而言之,直接用代码展示如何实现文件的上传,这里需要使用到一个bootstrap的文件上传插件File Input(请自行下载). 前台页面: <!----> <!DOCTYPE h ...
- What Can Java Technology Do?
What Can Java Technology Do? The general-purpose(多用途的), high-level Java programming language is a po ...
- mvc 修改 删除 linq
Models文件夹里面可以Linq,Entity两种映射框架,也允许有ADO的操作,甚至可以ADO代码和映射代码一起操作 控制器当中允许有相同的方法名,类似在做修改时有两个Modify方法,但是MVC ...
- 不可或缺 Windows Native (18) - C++: this 指针, 对象数组, 对象和指针, const 对象, const 指针和指向 const 对象的指针, const 对象的引用
[源码下载] 不可或缺 Windows Native (18) - C++: this 指针, 对象数组, 对象和指针, const 对象, const 指针和指向 const 对象的指针, con ...
- Calling startActivity() from outside of an Activity
在Activity中使用startActivity()方法不会有任何限制,因为Activity重载了Context的startActivity()方法.但是如果是在其他地方(如Widget或Servi ...
- 用xutils3.0进行下载
写的例子比较简单,是用xutils3.0来进行下载项目更新 1.先通过网络请求,判断版本是否要更新 2.若要更新,则弹出一个弹窗,我用的是系统自带的Dialog,将下载的版本号及下载的内容提示展示出来 ...