spring cloud gateway获取response body
网关发起请求后,微服务返回的response的值要经过网关才发给客户端。本文主要讲解在spring cloud gateway 的过滤器中获取微服务的返回值,因为很多情况我们需要对这个返回进行处理。网上有很多例子,但是都没有解决我的实际问题,最后研究了下源码找到了解决方案。
本节内容主要从如下几个方面讲解,首先需要了解我的博文的内容:API网关spring cloud gateway和负载均衡框架ribbon实战 和 spring cloud gateway自定义过滤器 本文也将根据上面两个项目的代码进行扩展。代码见spring-cloud 。
- 新增一个rest接口:我们在三个服务提供者(provider1001、provider1002、provider1003)里面新建一个查询人群信息接口。
本次代码:spring cloud gateway获取response body
一:新增一个rest接口
1,首先在github上面把spring-cloud 克隆到本地。启动三个服务提供者,再启动网关,通过网关能正常访问服务,然后再根据下面的代码进行本节课的学学习。
注意:
- gateway配置文件的 - Auth 最好注释起来,除非使用postman把认证信息传进去,可以参考本节开头提到的两篇博客进行操作。
2,新建一个rest接口,返回大量的数据
注意三个provider里面都要添加一个这样的类,内容
package com.yefengyu.cloud.controller;

import org.springframework.web.bind.annotation.GetMapping;

import org.springframework.web.bind.annotation.RestController;

import java.util.ArrayList;

import java.util.List;

@RestController

public class PersonController {

    @GetMapping("/persons")

    public List<Person> listPerson(){

        List<Person> personList = new ArrayList<>();

        for(int i = 0; i < 100; i++){

            Person person = new Person();

            person.setId(i);

            person.setName("王五" + i);

            person.setAddress("北京" + i);

            personList.add(person);

        }

        return personList;

    }

    public static class Person{

        private Integer id;

        private String name;

        private String address;

        public Integer getId() {

            return id;

        }

        public void setId(Integer id) {

            this.id = id;

        }

        public String getName() {

            return name;

        }

        public void setName(String name) {

            this.name = name;

        }

        public String getAddress() {

            return address;

        }

        public void setAddress(String address) {

            this.address = address;

        }

        @Override

        public String toString() {

            return "Person{" +

                    "id=" + id +

                    ", name='" + name + '\'' +

                    ", address='" + address + '\'' +

                    '}';

        }

    }

}
一模一样,无需区分是哪个provider 返回的,本节重点不是负载均衡。然后先重启三个provider,再重启gateway,通过gateway访问这个接口。在浏览器输入http://localhost:8080/gateway/persons就可以看到结果输出。
至此我们在原有的微服务上面增加了一个接口,并且通过网关能正常访问。
二:需求
现在我们需要新建一个局部或者全局过滤器,在过滤器中获取微服务返回的body。在网上查询的时候,发现很多博文都没有讲清楚,主要体现在以下几点:
- 报文可以在网关的过滤器中获取,但是没有返回到客户端
- 报文体太长,导致返回客户端的报文不全
- 中文乱码
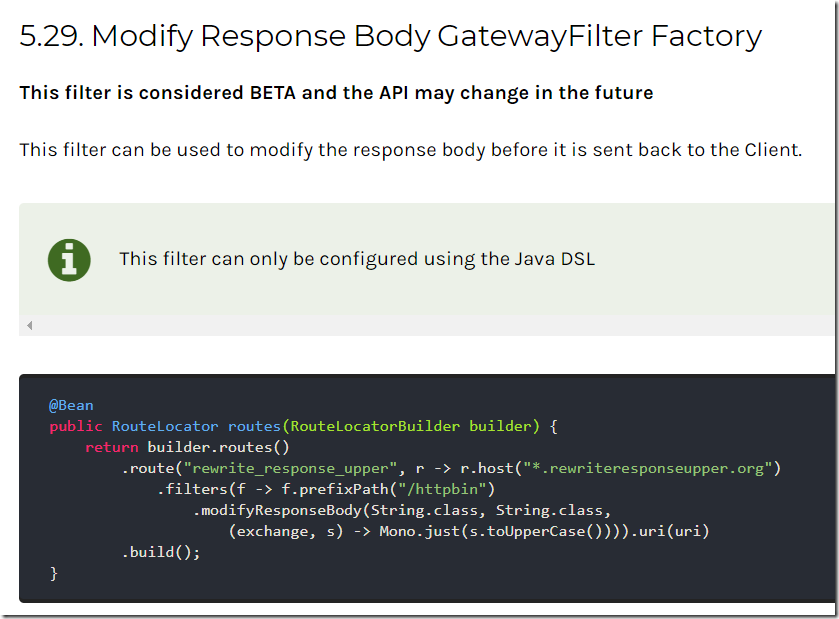
我根据很多博文中的内容进行测试,都无法满足我的需求。于是看了官网的5.29节:说明只可以通过 配置类 的方式来获取返回的body内容。
第一小节我们启动了三个 provider和gateway进行测试,现在为了测试配置类这中形式,我们只启动上面的一个provider1001,然后新建一个简单的gateway,注意此gateway代码我不会上传到GitHub,只是验证官网给的例子是正确的。
1、新建一个工程gateway,添加依赖如下:
<?xml version="1.0" encoding="UTF-8"?>

<project xmlns="http://maven.apache.org/POM/4.0.0"

         xmlns:xsi="http://www.w3.org/2001/XMLSchema-instance"

         xsi:schemaLocation="http://maven.apache.org/POM/4.0.0 http://maven.apache.org/xsd/maven-4.0.0.xsd">

    <modelVersion>4.0.0</modelVersion>

    <groupId>com.yefengyu.cloud</groupId>

    <artifactId>gateway</artifactId>

    <version>1.0-SNAPSHOT</version>
    <dependencies>

        <dependency>

            <groupId>org.springframework.cloud</groupId>

            <artifactId>spring-cloud-starter-gateway</artifactId>

            <version>2.1.0.RELEASE</version>

        </dependency>

    </dependencies>

</project>
2,新建一个启动类GatewayApplication
package com.yefengyu.cloud;

import org.springframework.boot.SpringApplication;

import org.springframework.boot.autoconfigure.SpringBootApplication;

@SpringBootApplication

public class GatewayApplication {

    public static void main(String[] args) {

        SpringApplication.run(GatewayApplication.class);

    }

}
3,新建一个配置文件application.yml
server:

  port: 8000

spring:

  application:

    name: gateway_server

  cloud:

    gateway:

      default-filters:

      routes:

        - id: my_route

          uri: http://localhost:1001

          predicates:

            - Path=/gateway/**

          filters:

            - StripPrefix=1
4、测试:在浏览器访问 http://localhost:8000/gateway/persons 如果可以获取到结果则说明我们通过网关调用到了微服务。
5、使用配置类的形式:我们从官网已经知道,通过配置类的形式可以在代码中获取到返回的body内容。那么我们新建一个配置类:
package com.yefengyu.cloud;

import org.springframework.cloud.gateway.route.RouteLocator;

import org.springframework.cloud.gateway.route.builder.RouteLocatorBuilder;

import org.springframework.context.annotation.Bean;

import org.springframework.context.annotation.Configuration;

import reactor.core.publisher.Mono;

@Configuration

public class MyConfig {

    @Bean

    public RouteLocator routes(RouteLocatorBuilder builder) {

        return builder.routes()

                .route("my_route", r -> r.path("/gateway/**")

                        .filters(f -> f.stripPrefix(1)

                                .modifyResponseBody(String.class, String.class,

                                        (exchange, s) -> {

                                            //TODO: 此处可以获取返回体的所有信息

                                                   System.out.println(s);

                                            return Mono.just(s);

                                        })).uri("http://localhost:1001"))

                .build();

    }

}
特别注意:
- 官网的例子,拷贝过来少了一个括号,在.build的点之前加一个括号,注意对比。
- 官网代码中的host改为了path。
- 对照代码和上面的修改之前的yml文件,可知他们是一一对应的。
6,配置文件需要修改,不需要使用配置文件形式的,只需要配置端口即可
server:

  port: 8000
7,测试:访问 http://localhost:8000/gateway/persons ,不仅浏览器可以返回数据,控制台也可以打印数据,也就是说我们在代码中可以获取到完整的body数据了。
三:更进一步
我们一般喜欢使用配置文件的形式,而不是配置类的形式来配置网关,那么怎么实现呢?这次我们抛弃上面临时新建的gateway工程,那只是验证配置类形式来获取body的。下面我们依然使用从GitHub下载的代码,在那里面来研究。三个provider 无需变动,只要启动就好。
我们思考下:为什么使用配置类的形式就能获取到返回body的数据呢?这是因为spring cloud gateway内部已经实现了这个过滤器(ModifyResponseBodyGatewayFilterFactory),我们要做的是模仿他重新写一个。
1,在我们的网关代码中,我们新建一个局部过滤器ResponseBodyGatewayFilterFactory,并把刚才所有的代码拷贝进去:注意不要拷贝包,并且把ModifyResponseBodyGatewayFilterFactory全部替换为ResponseBodyGatewayFilterFactory。
2,去掉代码中的配置类
public class ModifyResponseBodyGatewayFilterFactory extends

        AbstractGatewayFilterFactory<ModifyResponseBodyGatewayFilterFactory.Config> {
替换为
public class ResponseBodyGatewayFilterFactory extends AbstractGatewayFilterFactory<Object> {
3,删除
    public ResponseBodyGatewayFilterFactory() {

        super(Config.class);

    }

    @Deprecated

    public ResponseBodyGatewayFilterFactory(ServerCodecConfigurer codecConfigurer) {

        this();

    }
4,apply方法更改
    @Override

    public GatewayFilter apply(Config config) {

        ModifyResponseGatewayFilter gatewayFilter = new ModifyResponseGatewayFilter(

                config);

        gatewayFilter.setFactory(this);

        return gatewayFilter;

    }
替换为
    @Override

    public GatewayFilter apply(Object config) {

        return new ModifyResponseGatewayFilter();

    }
注意有错误暂时不管。
5,删除静态内部类Config的所有内容,直到下面的ModifyResponseGatewayFilter类定义处。下面我们来操作ModifyResponseGatewayFilter类内部内容。
6,删除
        private final Config config;

        private GatewayFilterFactory<Config> gatewayFilterFactory;

        public ModifyResponseGatewayFilter(Config config) {

            this.config = config;

        }
7,删除
        @Override

        public String toString() {

            Object obj = (this.gatewayFilterFactory != null) ? this.gatewayFilterFactory

                    : this;

            return filterToStringCreator(obj)

                    .append("New content type", config.getNewContentType())

                    .append("In class", config.getInClass())

                    .append("Out class", config.getOutClass()).toString();

        }

        public void setFactory(GatewayFilterFactory<Config> gatewayFilterFactory) {

            this.gatewayFilterFactory = gatewayFilterFactory;

        }
8,删除无效和错误的依赖引入,特别是:
import static org.springframework.cloud.gateway.support.GatewayToStringStyler.filterToStringCreator;
9,此时还有三处报错,都是config对象引起的。第一二处:
Class inClass = config.getInClass();

Class outClass = config.getOutClass();
改为:
Class inClass = String.class;

Class outClass = String.class;
第三处:
Mono modifiedBody = clientResponse.bodyToMono(inClass)

                            .flatMap(originalBody -> config.rewriteFunction

                                    .apply(exchange, originalBody));
这里最为重要,是我们获取返回报文的地方。改为:
Mono modifiedBody = clientResponse.bodyToMono(inClass)

                            .flatMap(originalBody -> {

                                //TODO:此次可以对返回的body进行操作

                                     System.out.println(originalBody);

                                return Mono.just(originalBody);

                            });
10,配置文件增加这个局部过滤器ResponseBody即可:
filters:

            - StripPrefix=1

#            - Auth

            - IPForbid=0:0:0:0:0:0:0:1

            - ResponseBody
11,将ResponseBodyGatewayFilterFactory注册到容器中,添加一个@Component注解即可。
12,启动网关,访问 http://localhost:8080/gateway/persons ,不仅浏览器可以返回数据,控制台也可以打印数据,也就是说我们在过滤器的代码中可以获取到完整的body数据了。
完整代码如下:
package com.yefengyu.gateway.local;

import org.reactivestreams.Publisher;

import org.springframework.cloud.gateway.support.CachedBodyOutputMessage;

import org.springframework.stereotype.Component;

import reactor.core.publisher.Flux;

import reactor.core.publisher.Mono;

import org.springframework.cloud.gateway.filter.GatewayFilter;

import org.springframework.cloud.gateway.filter.GatewayFilterChain;

import org.springframework.cloud.gateway.filter.NettyWriteResponseFilter;

import org.springframework.cloud.gateway.filter.factory.AbstractGatewayFilterFactory;

import org.springframework.cloud.gateway.support.BodyInserterContext;

import org.springframework.core.Ordered;

import org.springframework.core.io.buffer.DataBuffer;

import org.springframework.http.HttpHeaders;

import org.springframework.http.server.reactive.ServerHttpResponse;

import org.springframework.http.server.reactive.ServerHttpResponseDecorator;

import org.springframework.web.reactive.function.BodyInserter;

import org.springframework.web.reactive.function.BodyInserters;

import org.springframework.web.reactive.function.client.ClientResponse;

import org.springframework.web.server.ServerWebExchange;

import static org.springframework.cloud.gateway.support.ServerWebExchangeUtils.ORIGINAL_RESPONSE_CONTENT_TYPE_ATTR;

@Component

public class ResponseBodyGatewayFilterFactory extends AbstractGatewayFilterFactory<Object> {

    @Override

    public GatewayFilter apply(Object config) {

        return new ModifyResponseGatewayFilter();

    }

    public class ModifyResponseGatewayFilter implements GatewayFilter, Ordered {

        @Override

        public Mono<Void> filter(ServerWebExchange exchange, GatewayFilterChain chain) {

            return chain.filter(exchange.mutate().response(decorate(exchange)).build());

        }

        @SuppressWarnings("unchecked")

        ServerHttpResponse decorate(ServerWebExchange exchange) {

            return new ServerHttpResponseDecorator(exchange.getResponse()) {

                @Override

                public Mono<Void> writeWith(Publisher<? extends DataBuffer> body) {

                    Class inClass = String.class;

                    Class outClass = String.class;

                    String originalResponseContentType = exchange

                            .getAttribute(ORIGINAL_RESPONSE_CONTENT_TYPE_ATTR);

                    HttpHeaders httpHeaders = new HttpHeaders();

                    httpHeaders.add(HttpHeaders.CONTENT_TYPE,

                            originalResponseContentType);

                    ClientResponse clientResponse = ClientResponse

                            .create(exchange.getResponse().getStatusCode())

                            .headers(headers -> headers.putAll(httpHeaders))

                            .body(Flux.from(body)).build();

                    Mono modifiedBody = clientResponse.bodyToMono(inClass)

                            .flatMap(originalBody -> {

                                //TODO:此次可以对返回的body进行操作

                                System.out.println(originalBody);

                                return Mono.just(originalBody);

                            });

                    BodyInserter bodyInserter = BodyInserters.fromPublisher(modifiedBody,

                            outClass);

                    CachedBodyOutputMessage outputMessage = new CachedBodyOutputMessage(

                            exchange, exchange.getResponse().getHeaders());

                    return bodyInserter.insert(outputMessage, new BodyInserterContext())

                            .then(Mono.defer(() -> {

                                Flux<DataBuffer> messageBody = outputMessage.getBody();

                                HttpHeaders headers = getDelegate().getHeaders();

                                if (!headers.containsKey(HttpHeaders.TRANSFER_ENCODING)) {

                                    messageBody = messageBody.doOnNext(data -> headers

                                            .setContentLength(data.readableByteCount()));

                                }

                                return getDelegate().writeWith(messageBody);

                            }));

                }

                @Override

                public Mono<Void> writeAndFlushWith(

                        Publisher<? extends Publisher<? extends DataBuffer>> body) {

                    return writeWith(Flux.from(body).flatMapSequential(p -> p));

                }

            };

        }

        @Override

        public int getOrder() {

            return NettyWriteResponseFilter.WRITE_RESPONSE_FILTER_ORDER - 1;

        }

    }

}
spring cloud gateway获取response body的更多相关文章
- Spring Cloud Gateway 之获取请求体(Request Body)的几种方式
Spring Cloud Gateway 获取请求体 一.直接在全局拦截器中获取,伪代码如下 private String resolveBodyFromRequest(ServerHttpReque ...
- Spring Cloud Gateway中异常处理
最近我们的项目在考虑使用Gateway,考虑使用Spring Cloud Gateway,发现网关的异常处理和spring boot 单体应用异常处理还是有很大区别的.让我们来回顾一下异常. 关于异常 ...
- 微服务网关 Spring Cloud Gateway
1. 为什么是Spring Cloud Gateway 一句话,Spring Cloud已经放弃Netflix Zuul了.现在Spring Cloud中引用的还是Zuul 1.x版本,而这个版本是 ...
- 最全面的改造Zuul网关为Spring Cloud Gateway(包含Zuul核心实现和Spring Cloud Gateway核心实现)
前言: 最近开发了Zuul网关的实现和Spring Cloud Gateway实现,对比Spring Cloud Gateway发现后者性能好支持场景也丰富.在高并发或者复杂的分布式下,后者限流和自定 ...
- 阿里Sentinel支持Spring Cloud Gateway啦
1. 前言 4月25号,Sentinel 1.6.0 正式发布,带来 Spring Cloud Gateway 支持.控制台登录功能.改进的热点限流和注解 fallback 等多项新特性,该出手时就出 ...
- Spring Cloud Gateway 之 AddRequestHeader GatewayFilter Factory
今天我们来学习下GatewayFilter Factory,中文解释就是过滤器工厂. 官方文档对GatewayFilter Factory的介绍: Route filters allow the mo ...
- Spring Cloud Gateway的全局异常处理
Spring Cloud Gateway中的全局异常处理不能直接用@ControllerAdvice来处理,通过跟踪异常信息的抛出,找到对应的源码,自定义一些处理逻辑来符合业务的需求. 网关都是给接口 ...
- Spring Cloud Gateway(十一):全局过滤器GlobalFilter
本文基于 spring cloud gateway 2.0.1 1.简介 GlobalGilter 全局过滤器接口与 GatewayFilter 网关过滤器接口具有相同的方法定义.全局过滤器是一系列特 ...
- Spring Cloud Alibaba学习笔记(20) - Spring Cloud Gateway 内置的全局过滤器
参考:https://cloud.spring.io/spring-cloud-static/Greenwich.SR2/single/spring-cloud.html#_global_filter ...
随机推荐
- vue.js(19)--vue中子组件调用父组件的方法
子组件是不能直接使用父组件中的方法的,需要进行事件绑定(v-on:自定义方法名="父组件方法名"),然后在子组件中再定义一个方法,使用this.$emit('自定义方法名')语句完 ...
- Vue Cli3 TypeScript 搭建工程
Vue Cli3出来也一段时间了,我想尝试下Vue结合TypeScript搭建个工程,感受下Vue下用TS...网上有一篇讲的非常详细的教程 vue-cli3.0 搭建项目模版教程(ts+vuex+ ...
- Scrapy抓取jobbole数据
1.python版本3.6.1 2.python编辑器:JetBrains PyCharm 2.安装virtualenvwrapper-win pip3 install virtualenvwrapp ...
- POJ 2104 区间第k大(主席树)
题目链接:http://poj.org/problem?id=2104 题目大意:给定还有n个数的序列,m个操作,每个操作含有l,r,k,求区间[l,r]第k大 解题思路:线段树只能维护序列的最大值最 ...
- PHP Session 序列化及反序列化处理器设置使用不当带来的安全隐患(转)
PHP Session 序列化及反序列化处理器设置使用不当带来的安全隐患 时间 2014-11-14 15:05:49 WooYun知识库 原文 http://drops.wooyun.org/t ...
- POJ-1390-Blocks (复杂区间DP)
$ POJ~1390~~Blocks: $ (很难想的区间DP) $ solution: $ 很好的一道题目.看起来似乎很简单,当时一直认为可以用二维区间DP来完成,转移 $ n^3 $ . 后来发现 ...
- thinkphp 模板
一. 模板函数 教程https://www.kancloud.cn/manual/thinkphp5/125005 我们往往需要对模板输出变量使用函数,可以使用: {$data.name|md5} ...
- HTML表单(来自MDN的总结)
表单介绍 HTML表单是用户和web站点或应用程序之间交互的主要内容之一.它们允许用户将数据发送到web站点.大多数情况下,数据被发送到web服务器,但是web页面也可以拦截它自己并使用它. HTML ...
- loadrunner 使用
loadrunner给我的感觉很强势吧,第一次接触被安装包吓到了,当时用的是win10安装11版本的,各种安装失败,印象很深刻,那时候全班二三十号人,搞环境搞了两天,后来无奈,重做系统换成win7的了 ...
- ubuntu安装pandas
1 安装依赖包 setuptools Numpy: 1.7.1 or higher python-dateutil: 1.5 or higher pytz: Needed for time zone ...