Solrcloud+tomcat+zookeeper
准备两台服务器,目录结构如下
| 主机名 | IP地址 | tomcat安装路径 | zookeeper安装路径 | solr安装路径 | java安装路径 |
| sht-sgmhadoopnn-01 | 172.16.101.55 | /usr/local/apache-tomcat-6.0.36 | /usr/local/contentplatform/zookeeper | /usr/local/contentplatform/solr/solr | /usr/java/jdk1.6.0_45 |
| sht-sgmhadoopnn-02 | 172.16.101.56 | /usr/local/apache-tomcat-6.0.36 | /usr/local/contentplatform/zookeeper | /usr/local/contentplatform/solr/solr | /usr/java/jdk1.6.0_45 |
软件准备
jdk
http://download.oracle.com/otn/java/jdk/6u45-b06/jdk-6u45-linux-x64.bin
zookeeper
http://archive.apache.org/dist/zookeeper/zookeeper-3.4.6/zookeeper-3.4.6.tar.gz
tomcat
http://archive.apache.org/dist/tomcat/tomcat-6/v6.0.36/bin/apache-tomcat-6.0.36.tar.gz
solr
https://archive.apache.org/dist/lucene/solr/4.4.0/solr-4.4.0.tgz
1.jdk安装
$ echo $JAVA_HOME

/usr/java/jdk1..0_45
2. zookeeper安装
$ wget http://archive.apache.org/dist/zookeeper/zookeeper-3.4.6/zookeeper-3.4.6.tar.gz

$ tar -zxf zookeeper-3.4..tar.gz

$ cd zookeeper-3.4.

$ mkdir data

$ echo  > data/myid

$ cd conf

$ cp zoo_sample.cfg zoo.cfg

$ cat zoo.cfg

tickTime=

initLimit=

syncLimit=

dataDir=/usr/local/contentplatform/zookeeper-3.4./data

clientPort=

server.=sht-sgmhadoopnn-::

server.=sht-sgmhadoopnn-::
将zookeeper目录复制到sht-sgmhadoopnn-02上并将myid值修改为2
$ rsync -az --progress /usr/local/contentplatform/zookeeper-3.4. tnuser@sht-sgmhadoopnn-:/usr/local/contentplatform/
分别启动两个节点的zookeeper
$ /usr/local/contentplatform/zookeeper-3.4./bin/zkServer.sh start
查看两节点的zookeeper角色
$ /usr/local/contentplatform/zookeeper-3.4./bin/zkServer.sh status

JMX enabled by default

Using config: /usr/local/contentplatform/zookeeper-3.4./bin/../conf/zoo.cfg

Mode: follower
$ /usr/local/contentplatform/zookeeper-3.4./bin/zkServer.sh status

JMX enabled by default

Using config: /usr/local/contentplatform/zookeeper-3.4./bin/../conf/zoo.cfg

Mode: leader
3.solr安装
$ wget https://archive.apache.org/dist/lucene/solr/4.4.0/solr-4.4.0.tgz

$ tar -zxf solr-4.4..tgz

$ mkdir solr

$ cp -r solr-4.4./example/* solr/
复制solr目录solr到sht-sgmhadoopnn-02上
$ rsync -az --progress /usr/local/contentplatform/solr tnuser@sht-sgmhadoopnn-:/usr/local/contentplatform/
4. tomcat安装
$ wget http://archive.apache.org/dist/tomcat/tomcat-6/v6.0.36/bin/apache-tomcat-6.0.36.tar.gz

$ tar -zxf apache-tomcat-6.0..tar.gz
5. 配置solr与tomcat
tomcat配置文件catalina.sh,添加zookeeper交互
JAVA_HOME=/usr/java/jdk1..0_45

JAVA_OPTS="$JAVA_OPTS -Xms1000M -Xmx1000M -Duser.language=en -Dsolr.solr.home=/usr/local/contentplatform/solr/solr -DhostContext=solr -Dbootstrap_conf=true -Dhostport=8983 -DzkHost=sht-sgmhadoopnn-01:9983,sht-sgmhadoopnn-01:9983 -DnumShards=2"

echo "Java Options: $JAVA_OPTS"
tomcat配置文件server.xml,修改solr访问端口
    <Connector port="8983" protocol="HTTP/1.1"

               connectionTimeout="20000"

               redirectPort="8443" />
将solr的war包复制到tomcat目录
$ unzip /usr/local/contentplatform/solr/webapps/solr.war -d /usr/local/apache-tomcat-6.0./webapps/solr
添加solr常用的jar包到tomcat
$ cp -r /usr/local/contentplatform/solr-4.4./dist/*.jar /usr/local/apache-tomcat-6.0.36/webapps/solr/WEB-INF/lib/

$ cp -r /usr/local/contentplatform/solr-4.4.0/contrib/velocity/lib/*.jar /usr/local/apache-tomcat-6.0.36/webapps/solr/WEB-INF/lib/

$ cp -r /usr/local/contentplatform/solr-4.4.0/contrib/extraction/lib/*.jar /usr/local/apache-tomcat-6.0.36/webapps/solr/WEB-INF/lib/

$ cp -r /usr/local/contentplatform/solr-4.4.0/example/lib/*.jar /usr/local/apache-tomcat-6.0.36/webapps/solr/WEB-INF/lib/

$ cp -r /usr/local/contentplatform/solr-4.4.0/example/lib/ext/*.jar /usr/local/apache-tomcat-6.0.36/webapps/solr/WEB-INF/lib/
下载常用的mysql、postgresql的jdbc包到tomcat
$ wget https://jdbc.postgresql.org/download/postgresql-42.2.6.jre6.jar

$ wget https://dev.mysql.com/get/Downloads/Connector-J/mysql-connector-java-5.1.48.tar.gz
修改solr/WEB-INF/web.xml,添加solr的home目录
    <env-entry>

       <env-entry-name>solr/home</env-entry-name>

       <env-entry-value>/usr/local/contentplatform/solr/solr</env-entry-value>

       <env-entry-type>java.lang.String</env-entry-type>

    </env-entry>
复制tomcat目录到sht-sgmhadoopnn-02上
$ rsync -az --progress /usr/local/apache-tomcat-6.0. tnuser@sht-sgmhadoopnn-:/usr/local/
启动tomcat
$ /usr/local/apache-tomcat-6.0./bin/catalina.sh start
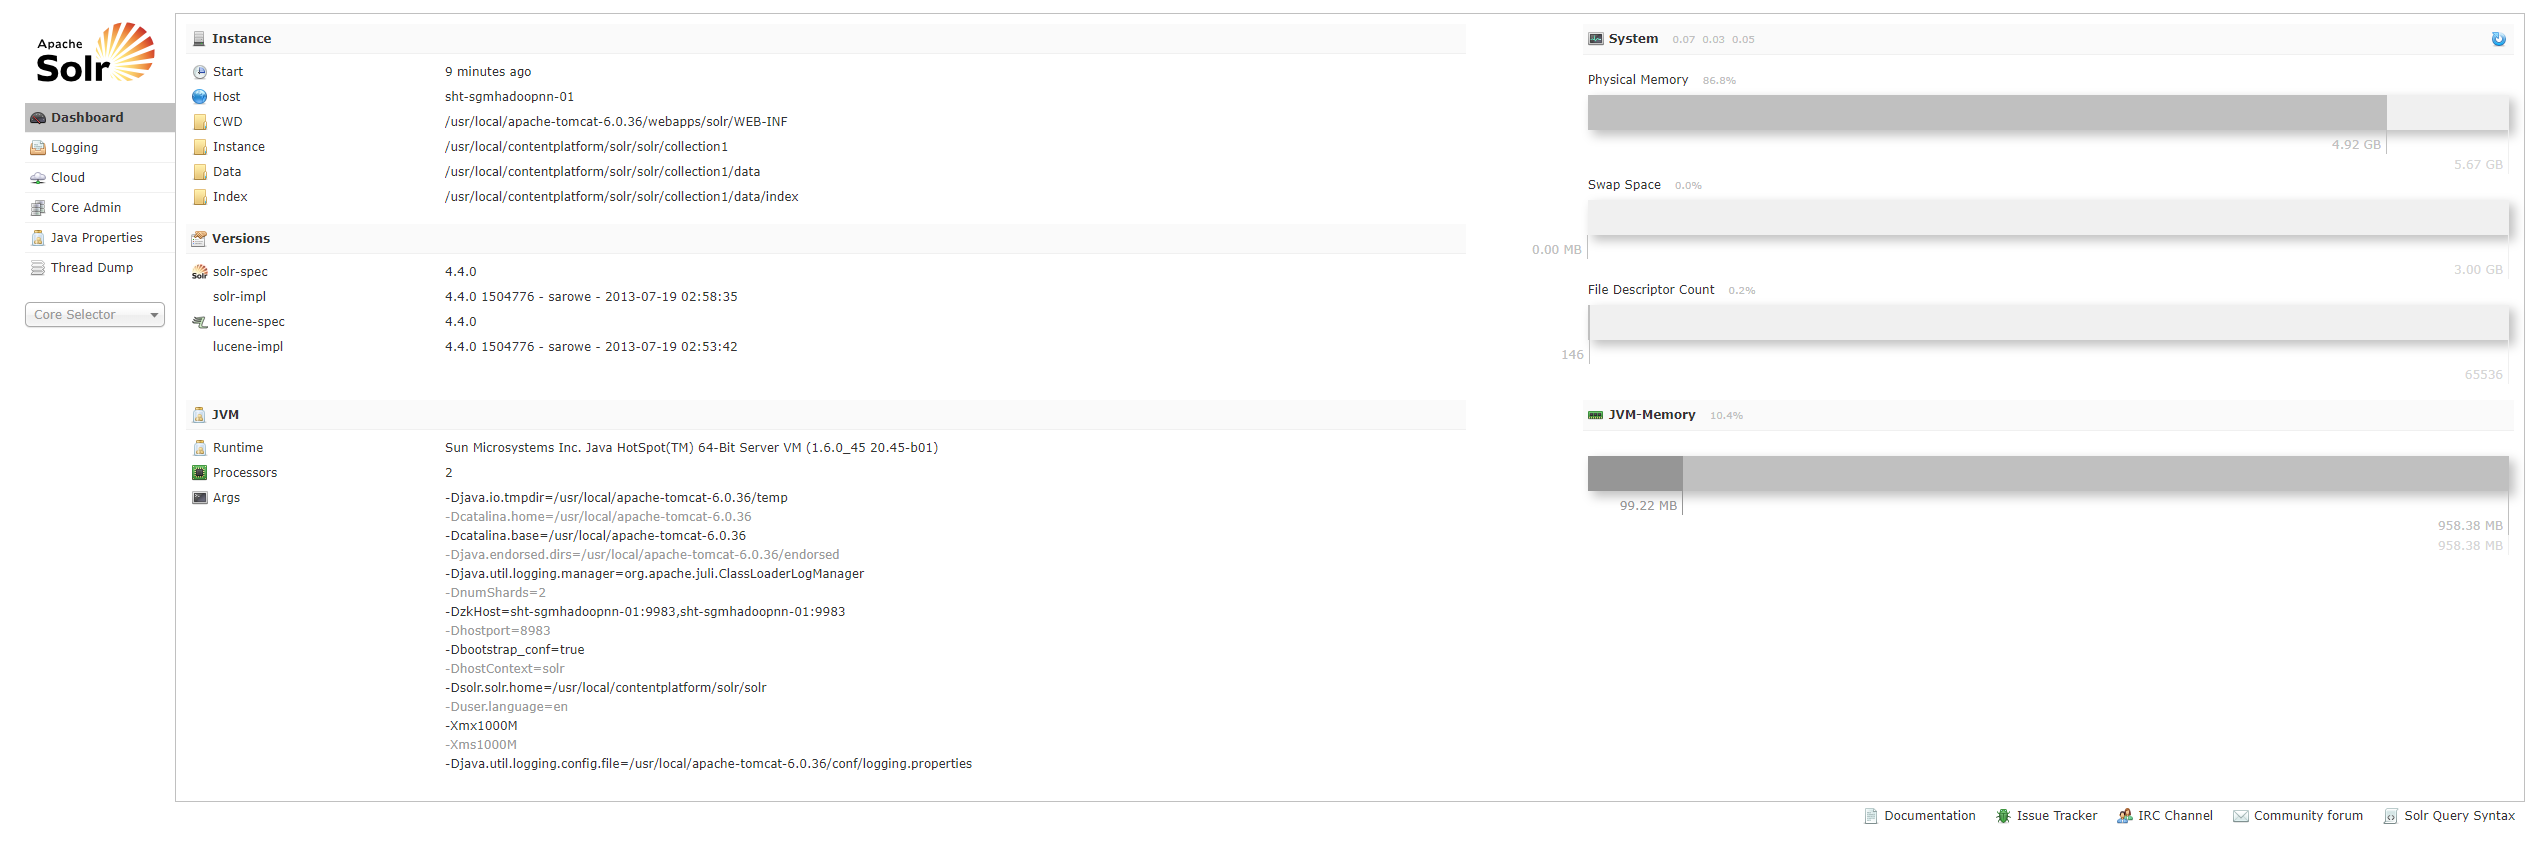
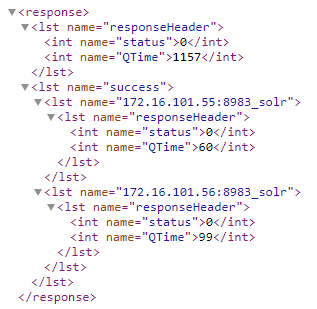
6. 验证solrcloud
http://172.16.101.55:8983/solr
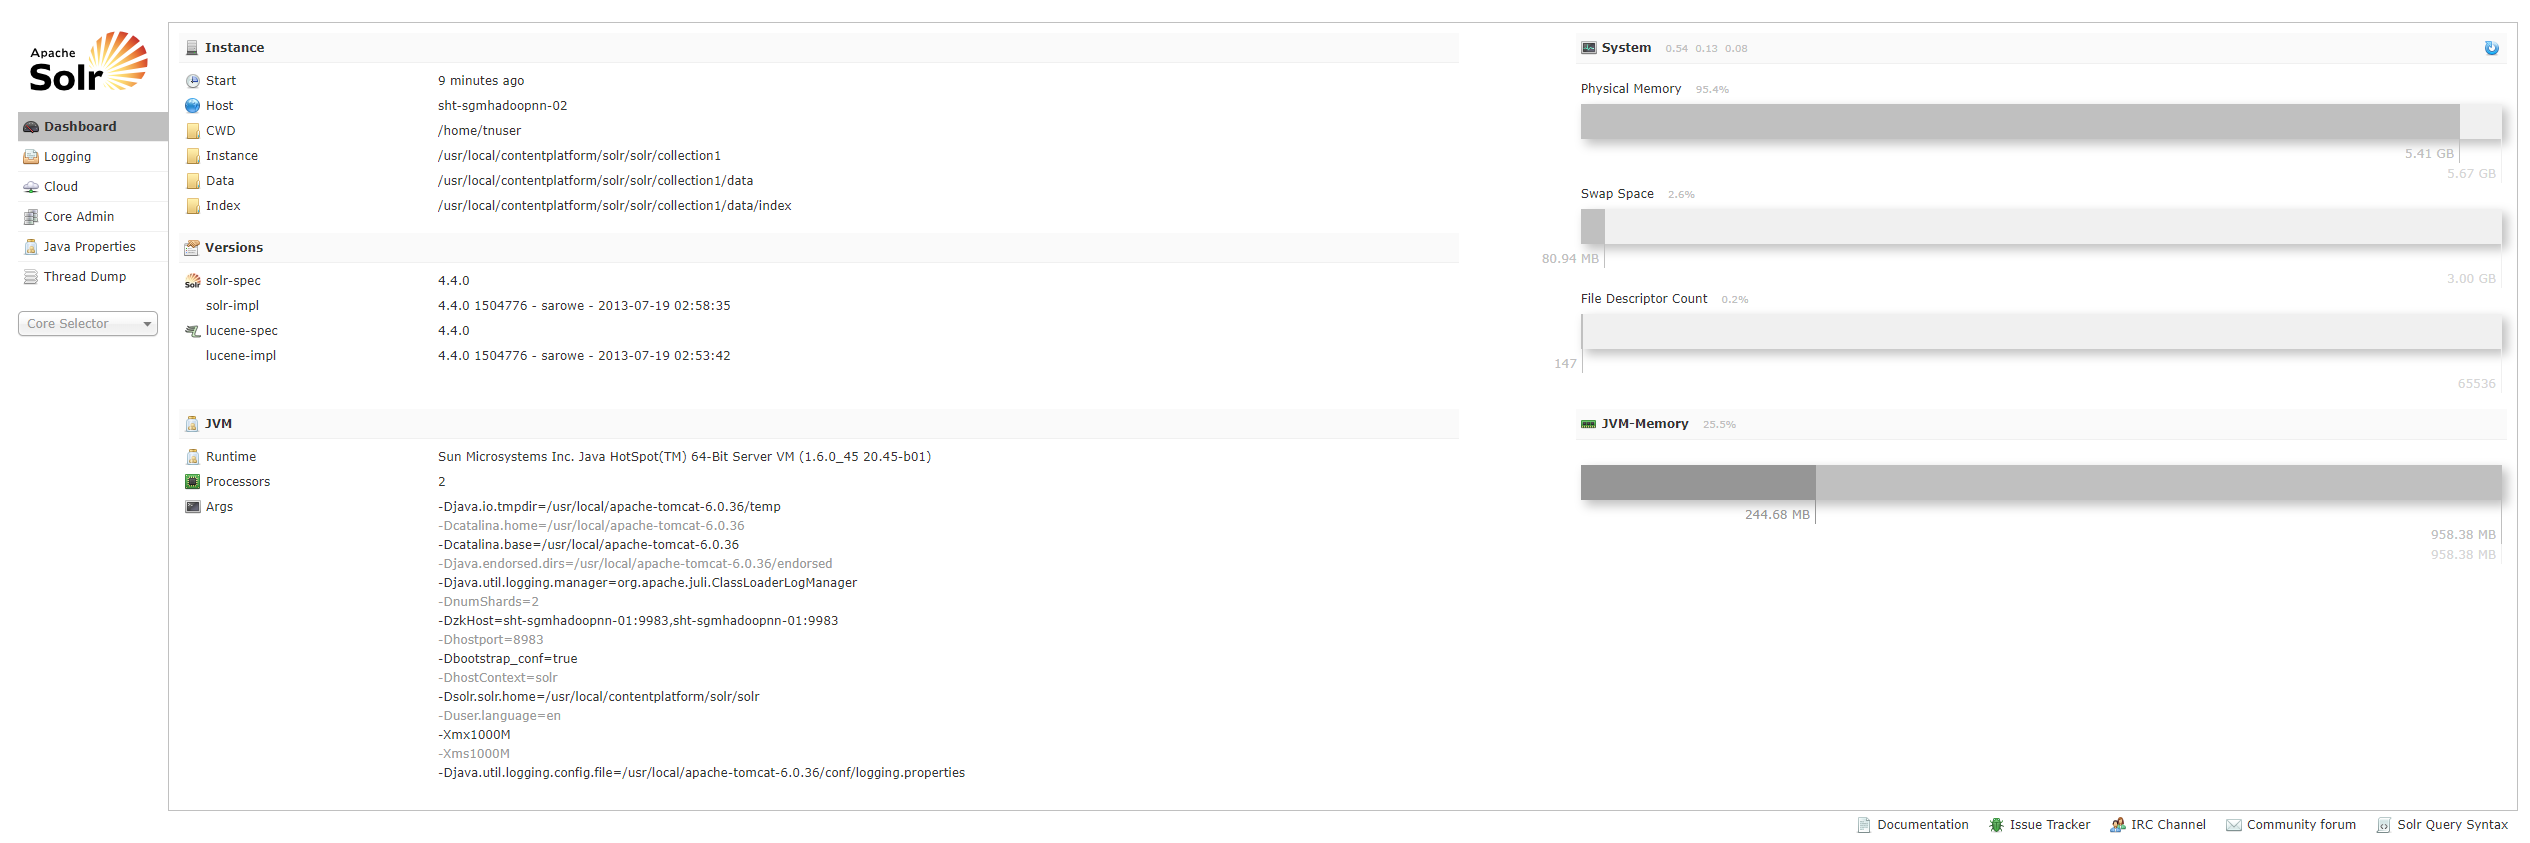
http://172.16.101.56:8983/solr/
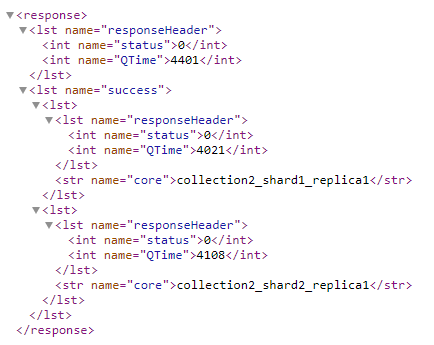
新建collection
http://172.16.101.55:8983/solr/admin/collections?action=CREATE&name=collection2&numShards=2
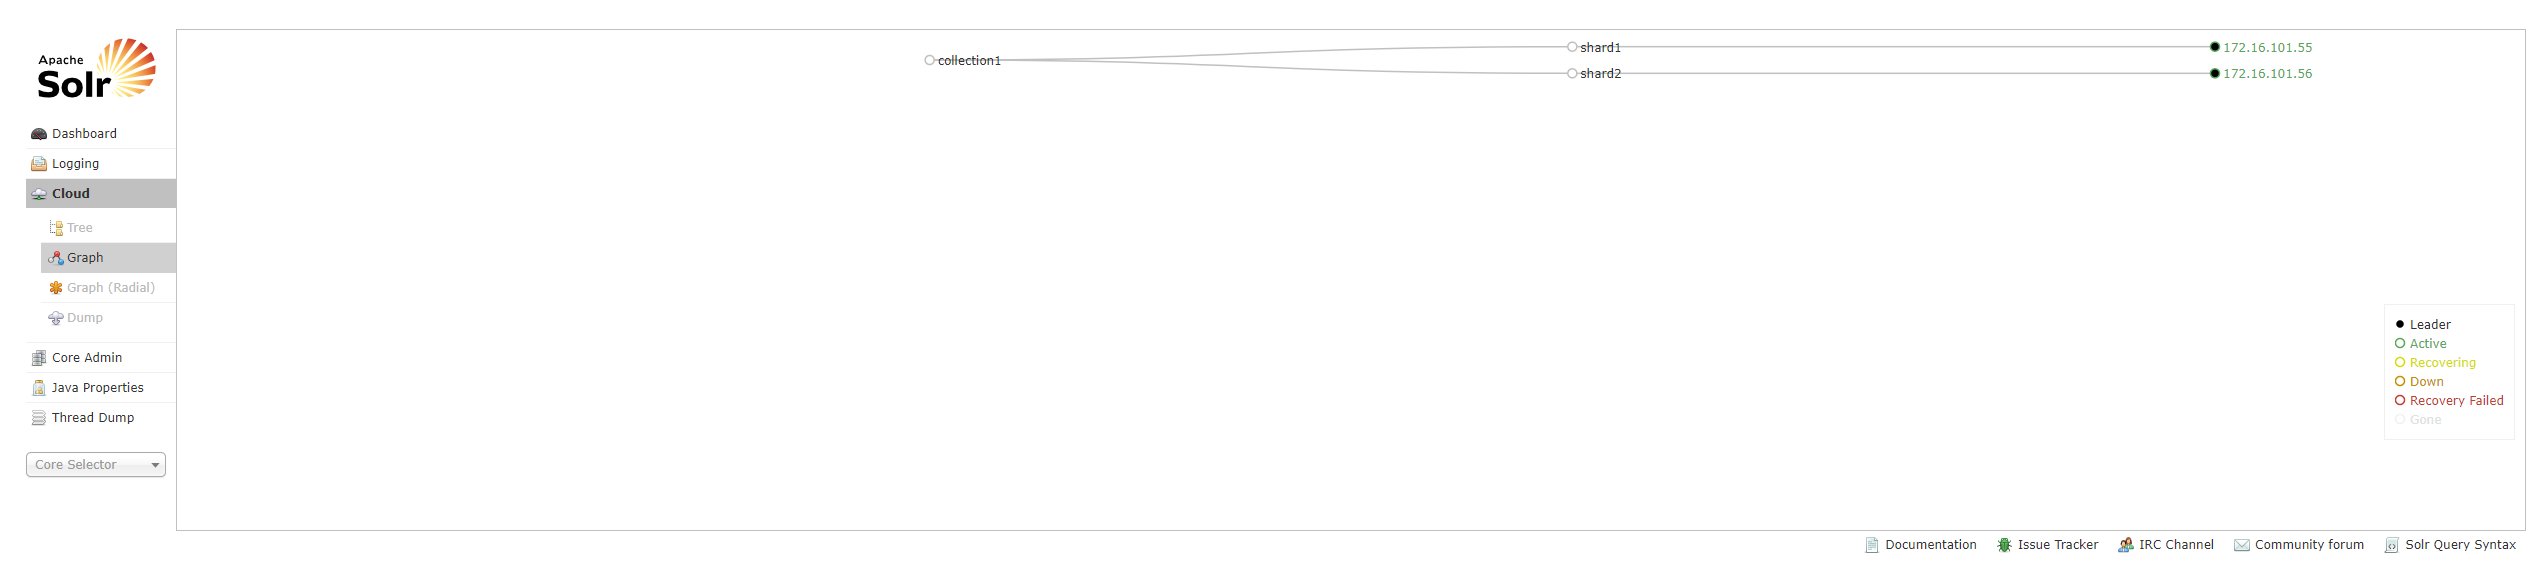
查看新建的collection

删除新建的collection
http://172.16.101.55:8983/solr/admin/collections?action=CREATE&name=content_datar&numShards=2&collection.configName=collection1
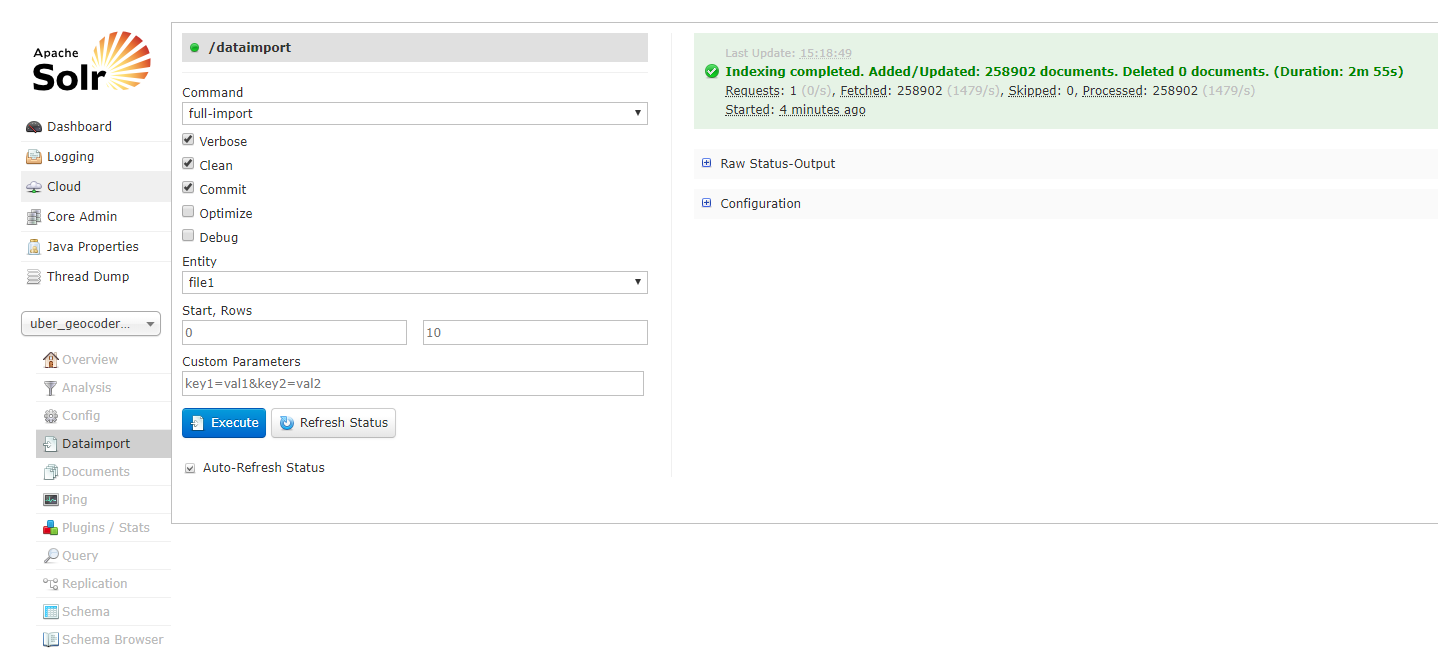
7. 将postgresql表导入到solrcloud
先查看postgresql表结构
uber_geocoder=# \d twn_addr_compact

Table "uber_geocoder_tw_15q3_v2.twn_addr_compact"

        Column        |     Type      | Modifiers

----------------------+---------------+-----------

 id                   | bigint        | not null

 door_range           | text[]        |

 address_points       | public.hstore |

 street_names         | public.hstore |

 country              | public.hstore |

 state                | public.hstore |

 county               | public.hstore |

 city                 | public.hstore |

 locality             | public.hstore |

 sub_locality         | public.hstore |

 neighbourhood        | public.hstore |

 postal_code          | text          |

 rich_postal_code     | text[]        |

 rich_postal_code_lat | text[]        |

 intersected_way_ids  | text          |

 hilbert_key          | bigint        |

 unidb_ids            | bigint[]      |

 md5                  | bigint        |

Indexes:

    "pk_twn_addr_compact" PRIMARY KEY, btree (id)

    "hilbert_uber_geocoder_tw_15q3_v2_twn_addr_compact" btree (hilbert_key)

uber_geocoder=# select count(*) from twn_addr_compact;

 count

--------

 258902

(1 row)
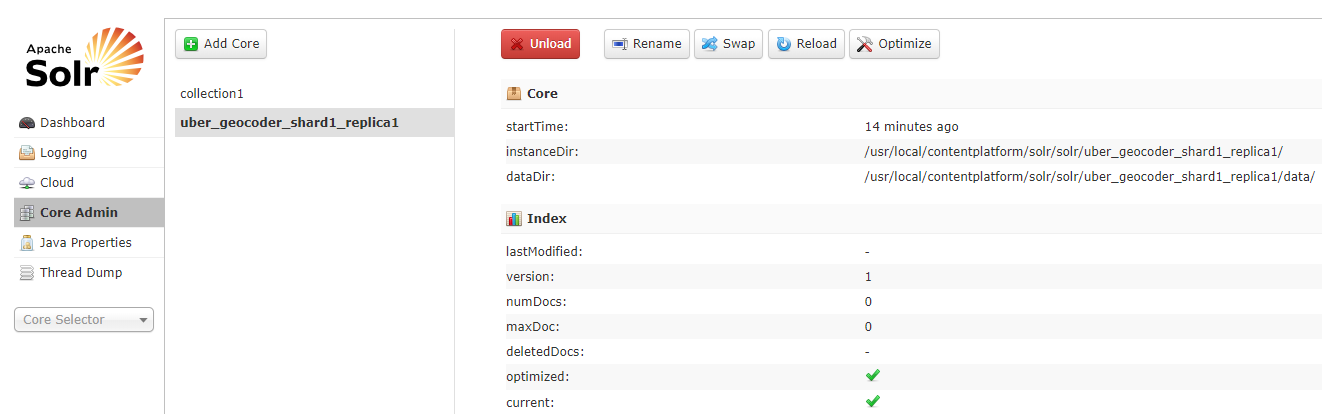
新建collection “uber_geocoder”
http://172.16.101.55:8983/solr/admin/collections?action=CREATE&name=uber_geocoder&numShards=2
sht-sgmhadoopnn-01查看
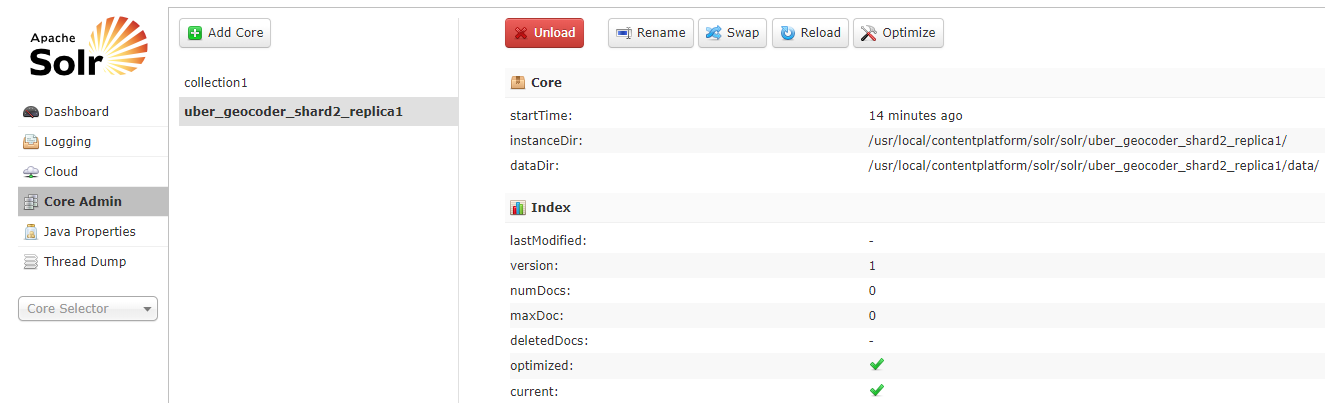
sht-sgmhadoopnn-02查看
将solr home的core collection1目录的conf复制到sht-sgmhadoopnn-01上新建的collection目录
$ cp -r /usr/local/contentplatform/solr/solr/collection1/conf /usr/local/contentplatform/solr/solr/uber_geocoder_shard1_replica1
修改solrconfig.xml文件添加如下
<requestHandler name="/dataimport" class="org.apache.solr.handler.dataimport.DataImportHandler">

    <lst name="defaults">

      <str name="config">data-config.xml</str>

    </lst>

  </requestHandler>
data-config.xml文件内容如下
<dataConfig>

    <dataSource name="source1" type="JdbcDataSource" driver="org.postgresql.Driver" url="jdbc:postgresql://172.16.101.66:5432/uber_geocoder" user="dbadmin" password="88888888" />

     <document>

      <entity name="file1" datasource="source1" query="SELECT * FROM uber_geocoder_tw_15q3_v2.twn_addr_compact">

        <field column="id" name="id" />

        <field column="door_range" name="door_range" />

        <field column="address_points" name="address_points" />

        <field column="street_names" name="street_names" />

        <field column="country" name="country" />

        <field column="state" name="state" />

        <field column="county" name="county" />

        <field column="city" name="city" />

        <field column="locality" name="locality" />

        <field column="sub_locality" name="sub_locality" />

        <field column="neighbourhood" name="neighbourhood" />

        <field column="postal_code" name="postal_code" />

        <field column="rich_postal_code" name="rich_postal_code" />

        <field column="rich_postal_code_lat" name="rich_postal_code_lat" />

        <field column="intersected_way_ids" name="intersected_way_ids" />

        <field column="hilbert_key" name="hilbert_key" />

        <field column="unidb_ids" name="unidb_ids" />

        <field column="md5" name="md5" />

      </entity>

     </document>

</dataConfig>
添加以下到schema.xml文件
   <field name="id" type="string" indexed="true" stored="true" required="true" multiValued="false" />

   <field name="door_range" type="text_general" indexed="true" stored="true"/>

   <field name="address_points" type="text_general" indexed="true" stored="true"/>

   <field name="street_names" type="text_general" indexed="true" stored="true"/>

   <field name="country" type="text_general" indexed="true" stored="true"/>

   <field name="state" type="text_general" indexed="true" stored="true"/>

   <field name="county" type="text_general" indexed="true" stored="true"/>

   <field name="city" type="text_general" indexed="true" stored="true"/>

   <field name="locality" type="text_general" indexed="true" stored="true"/>

   <field name="sub_locality" type="text_general" indexed="true" stored="true"/>

   <field name="neighbourhood" type="text_general" indexed="true" stored="true"/>

   <field name="postal_code" type="int" indexed="true" stored="true"/>

   <field name="rich_postal_code" type="text_general" indexed="true" stored="true"/>

   <field name="rich_postal_code_lat" type="text_general" indexed="true" stored="true"/>

   <field name="intersected_way_ids" type="text_general" indexed="true" stored="true"/>

   <field name="hilbert_key" type="string" indexed="true" stored="true"/>

   <field name="unidb_ids" type="text_general" indexed="true" stored="true"/>

   <field name="md5" type="text_general" indexed="true" stored="true"/>
将conf目录复制到sht-sgmhadoopnn-02,并重启两台机器的tomcat
$ rsync -az --progress conf tnuser@sht-sgmhadoopnn-:/usr/local/contentplatform/solr/solr/uber_geocoder_shard2_replica1/
Solrcloud+tomcat+zookeeper的更多相关文章
- solrCloud+tomcat+zookeeper集群配置
solrcolud安装solrCloud+tomcat+zookeeper部署 转载请出自出处:http://eksliang.iteye.com/blog/2107002 http://eksli ...
- solrCloud+tomcat+zookeeper配置
一.环境准备: Solr版本:4.7.0 下载地址:http://www.apache.org/dyn/closer.cgi/lucene/solr/4.7.0 Tomcat版本:6.0.39 下载地 ...
- JDK+Tomcat+Zookeeper+DubboAdmin安装教程
JDK+Tomcat+Zookeeper+DubboAdmin安装教程 1. 安装内容: JDK 1.8.131 Tomcat 7.0.77 Zookeeper 3.4.9 Dubbo admin 2 ...
- 修改SolrCloud在ZooKeeper中的配置文件操作记录
修改SolrCloud在ZooKeeper中的配置文件操作记录. 命令执行目录: /opt/solr-/server/scripts/cloud-scripts/ 1.下载配置文件 ./zkcli., ...
- CentOS下用Tomcat+Zookeeper+Nginx+Solr完美搭建SolrCloud平台(五)
六.修改 /etc/rc.d/rc.local 文件,设置开机自启动 1.nginx 主机的设置 [root@nginx 桌面]# vi /etc/rc.d/rc.local #!/bin/sh to ...
- Solrcloud,tomcat,外部zookeeper配置
- Solr+Tomcat+zookeeper部署实战
一 .安装solr 环境说明:centos 7.3,solr 6.6,zookeeper3.4,Tomcat8.5,jdk1.8 zookeeper的部署请参考:http://www.cnblogs. ...
- solrcloud编辑zookeeper上的配置文件的方法
solrcloud的配置文件是上传在zookeeper文件系统上的.这样就面临一个问题,每次需要修改配置文件,就没有只有之前本地单机solr那么简单,需要上传. 搭建solrcloud时候提交配置文件 ...
- 利用jenv安装maven, tomcat,zookeeper等
jenv有关的网站: http://jenv.io https://github.com/gcuisinier/jenv 1. 执行jenv安装 $ curl -L -s get.jenv.io | ...
随机推荐
- 对数据劫持 OR 数据代理 的研究------------引用
数据劫持,也叫数据代理. 所谓数据劫持,指的是在访问或者修改对象的某个属性时,通过一段代码拦截这个行为,进行额外的操作或者修改返回结果.比较典型的是 Object.defineProperty() 和 ...
- zabbix-server一键部署
最近想写一个zabbix脚本,自己尝试几次,能够实现,但是太糙了,在github上发现一个很好,谢谢作者脚本作者:火星小刘 web:www.huoxingxiaoliu.com email:xtlyk ...
- C# 两个进程之间通讯(管道通信 )
#region 客户端 NamedPipeClientStream pipeClient = new NamedPipeClientStream("localh ...
- 运行时错误:“stack around the variable…was corrupted”
造冰箱的大熊猫@cnblogs 2018/11/1 引发问题的代码片段如下 WORD var; scanf ( "%d", &var ); 包含上述代码的程序,编译正常,运 ...
- Unity3D_(游戏)贪吃蛇
Unity制作贪吃蛇小游戏 玩家通过“WASD”控制小蛇上下左右移动,蛇头撞倒食物,则食物被吃掉,蛇身体长一节,接着又出现食物,等待蛇来吃,如果蛇在移动中撞到墙或身体交叉蛇头撞倒自己身体游戏结束 可通 ...
- [CSP-S模拟测试]:爬(贪心)
题目传送门(内部题134) 输入格式 第一行两个数$N,L$. 接下来$N$行每行两个数$A_i,B_i$. 接下来$N$行每行一个整数$C_i$. 输出格式 一行一个整数表示答案,无解输出$-1$. ...
- python中的事务
1. 为什么要有事务 事务广泛的运用于订单系统.银行系统等多种场景 例如: A用户和B用户是银行的储户,现在A要给B转账500元,那么需要做以下几件事: 检查A的账户余额>500元: A 账户中 ...
- 左值引用&右值引用实践【TODO】
这篇文章写的很好,下半部分还未完全理解,后续还需要回头来看看20190706(): https://www.cnblogs.com/likaiming/p/9045642.html 简单实践如下: # ...
- tf工程化部署相关
1.TensorFlow 模型保存/载入的两种方法 https://blog.csdn.net/thriving_fcl/article/details/71423039 [讲解清晰,2种方法都有缺陷 ...
- apache访问日志
#错误日志ErrorLog "logs/dummy-host2.example.com-error_log" #访问日志CustomLog "logs/dummy-hos ...