
spring boot快速入门 4: jpa数据库操作 实现增删改查
spring boot jpa逆向生成表 简单实例:
第一步:pom文件:
<?xml version="1.0" encoding="UTF-8"?>

<project xmlns="http://maven.apache.org/POM/4.0.0" xmlns:xsi="http://www.w3.org/2001/XMLSchema-instance"

    xsi:schemaLocation="http://maven.apache.org/POM/4.0.0 http://maven.apache.org/xsd/maven-4.0.0.xsd">

    <modelVersion>4.0.0</modelVersion>

    <groupId>com.payease</groupId>

    <artifactId>girl</artifactId>

    <version>0.0.1-SNAPSHOT</version>

    <packaging>jar</packaging>

    <name>girl</name>

    <description>Demo project for Spring Boot</description>

    <parent>

        <groupId>org.springframework.boot</groupId>

        <artifactId>spring-boot-starter-parent</artifactId>

        <version>1.5.8.RELEASE</version>

        <relativePath/> <!-- lookup parent from repository -->

    </parent>

    <properties>

        <project.build.sourceEncoding>UTF-8</project.build.sourceEncoding>

        <project.reporting.outputEncoding>UTF-8</project.reporting.outputEncoding>

        <java.version>1.8</java.version>

    </properties>

    <dependencies>

        <dependency>

            <groupId>org.springframework.boot</groupId>

            <artifactId>spring-boot-starter-web</artifactId>

        </dependency>

        <dependency>

            <groupId>org.springframework.boot</groupId>

            <artifactId>spring-boot-starter-test</artifactId>

            <scope>test</scope>

        </dependency>

        <!-- 模版引擎 -->

        <dependency>

            <groupId>org.springframework.boot</groupId>

            <artifactId>spring-boot-starter-thymeleaf</artifactId>

        </dependency>

        <!-- spring data jpa -->

        <dependency>

            <groupId>org.springframework.boot</groupId>

            <artifactId>spring-boot-starter-data-jpa</artifactId>

        </dependency>

        <!-- mysql 组件 -->

        <dependency>

            <groupId>mysql</groupId>

            <artifactId>mysql-connector-java</artifactId>

        </dependency>

        <dependency>

            <groupId>javax.persistence</groupId>

            <artifactId>persistence-api</artifactId>

            <version>1.0</version>

        </dependency>

        <dependency>

            <groupId>org.springframework.boot</groupId>

            <artifactId>spring-boot-configuration-processor</artifactId>

            <optional>true</optional>

        </dependency>

    </dependencies>

    <build>

        <plugins>

            <plugin>

                <groupId>org.springframework.boot</groupId>

                <artifactId>spring-boot-maven-plugin</artifactId>

            </plugin>

        </plugins>

    </build>

</project>
第二步:配置文件application.yml。
spring:

 profiles:

   active: dev

 datasource:

   driver-class-name: com.mysql.jdbc.Driver

   url: jdbc:mysql://127.0.0.1:3306/dbgirl

   username: root

   password: 1234

 jpa:

   hibernate:

     ddl-auto: update

   show-sql: true
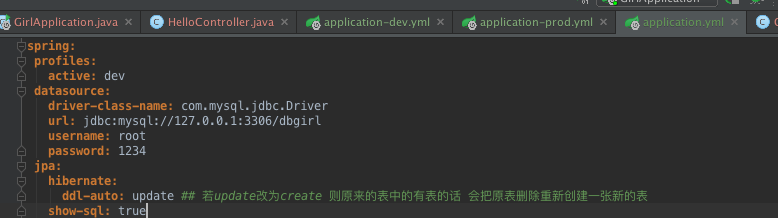
update第一次运行会创建表 若原来有表且有数据会保留原来的数据
第三步:配置问件application-dev.yml
server:

  port: 8080

girl:

  cupSize: B

  age: 18
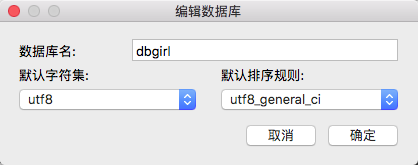
第四步:创建数据库(navigate)
第五步:创建实体类
package com.payease.entity;

import javax.persistence.Entity;

import javax.persistence.GeneratedValue;

import javax.persistence.Id;

/**

 * Created by liuxiaoming on 2017/11/6.

 */

@Entity

public class Girl {

    public int getId() {

        return id;

    }

    public void setId(int id) {

        this.id = id;

    }

    public String getCupSize() {

        return cupSize;

    }

    public void setCupSize(String cupSize) {

        this.cupSize = cupSize;

    }

    public int getAge() {

        return age;

    }

    public void setAge(int age) {

        this.age = age;

    }

    @Id

    @GeneratedValue

    private int id;

    private String cupSize;

    private int age;

}
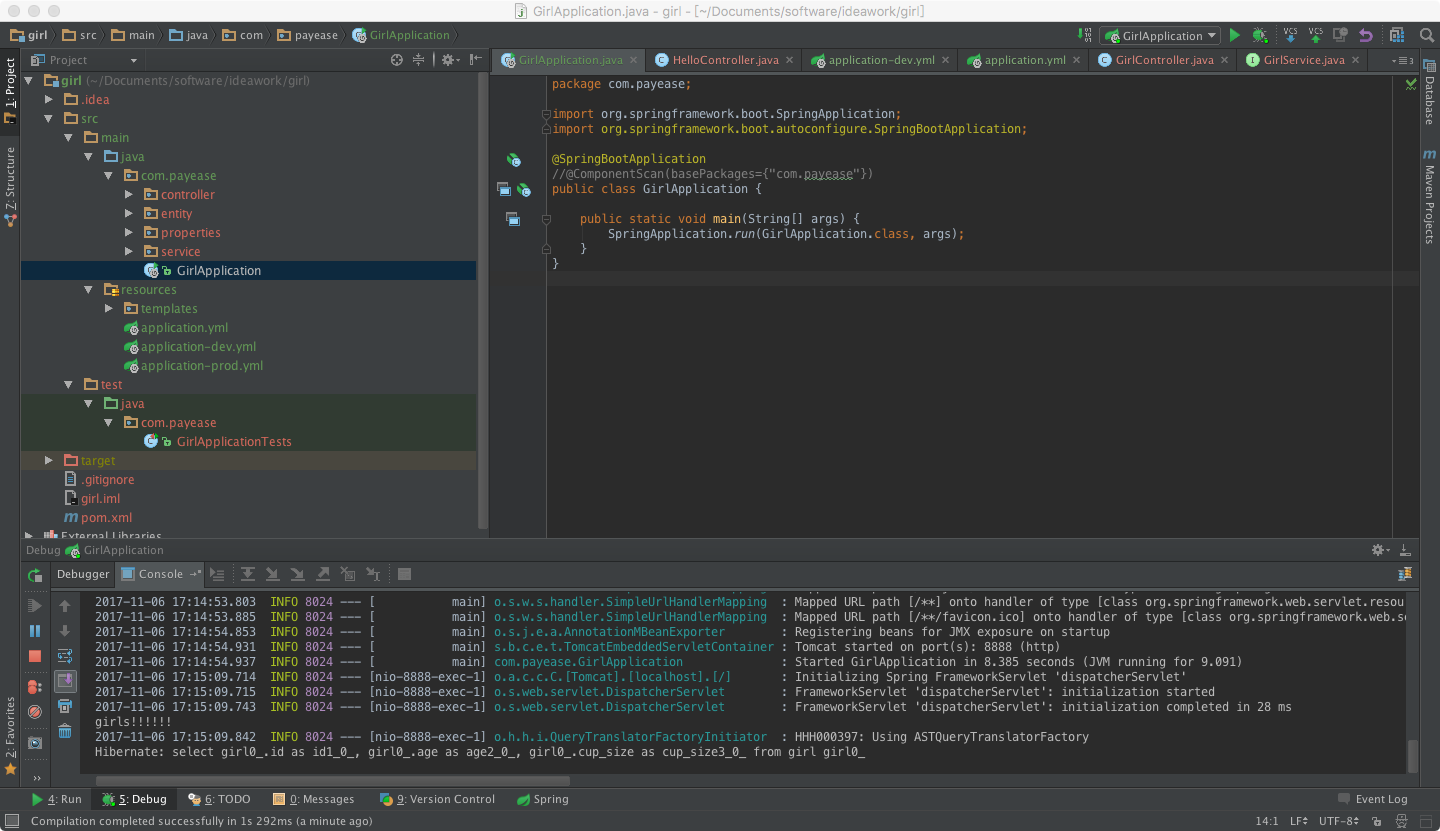
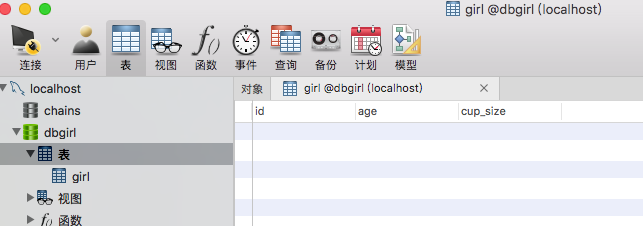
第六步:创建启动文件 并 启动项目
package com.payease;

import org.springframework.boot.SpringApplication;

import org.springframework.boot.autoconfigure.SpringBootApplication;

import org.springframework.context.annotation.ComponentScan;

@SpringBootApplication

//@ComponentScan(basePackages={"com.payease.entity"})

public class GirlApplication {

    public static void main(String[] args) {

        SpringApplication.run(GirlApplication.class, args);

    }

}
根据所创建的表实现简单的增删改查功能:
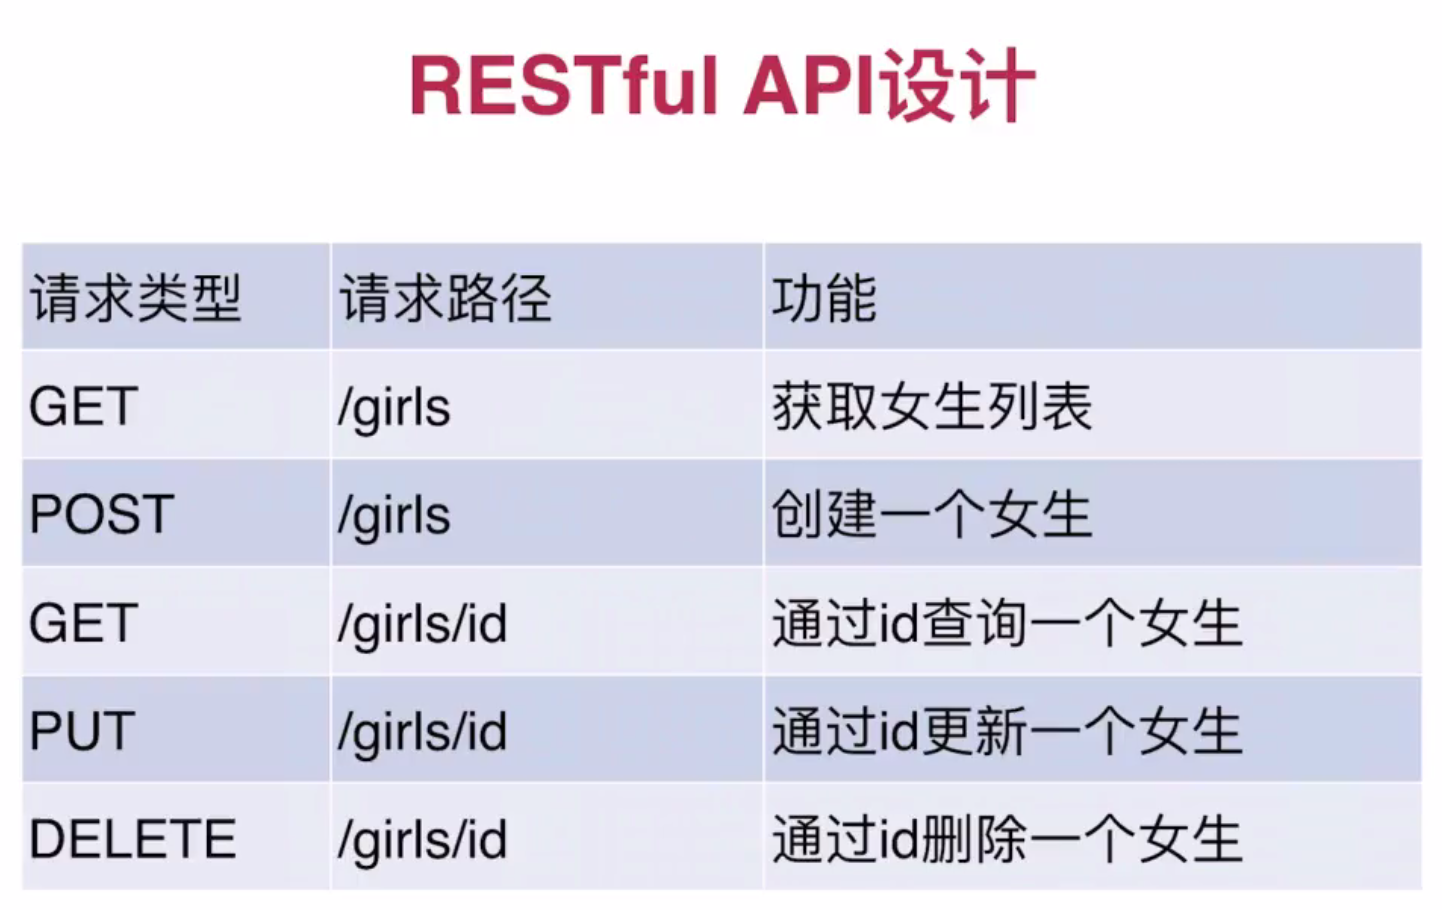
实现第一个接口:
第一步:编写service
package com.payease.service;

import com.payease.entity.Girl;

import org.springframework.data.jpa.repository.JpaRepository;

import org.springframework.stereotype.Repository;

/**

 * Created by liuxiaoming on 2017/11/6.

 */

@Repository

public interface GirlService extends JpaRepository<Girl,Integer>{

}
第二步:编写controller
package com.payease.controller;

import com.payease.entity.Girl;

import com.payease.service.GirlService;

import org.springframework.beans.factory.annotation.Autowired;

import org.springframework.web.bind.annotation.GetMapping;

import org.springframework.web.bind.annotation.RestController;

import java.util.List;

/**

 * Created by liuxiaoming on 2017/11/1.

 */

@RestController

//@RequestMapping("/hello")

public class GirlController {

   @Autowired

   private GirlService girlService;

    @GetMapping("/girls")

    public List<Girl> girls(){

        return girlService.findAll();

    }

}
第三步:启动项目: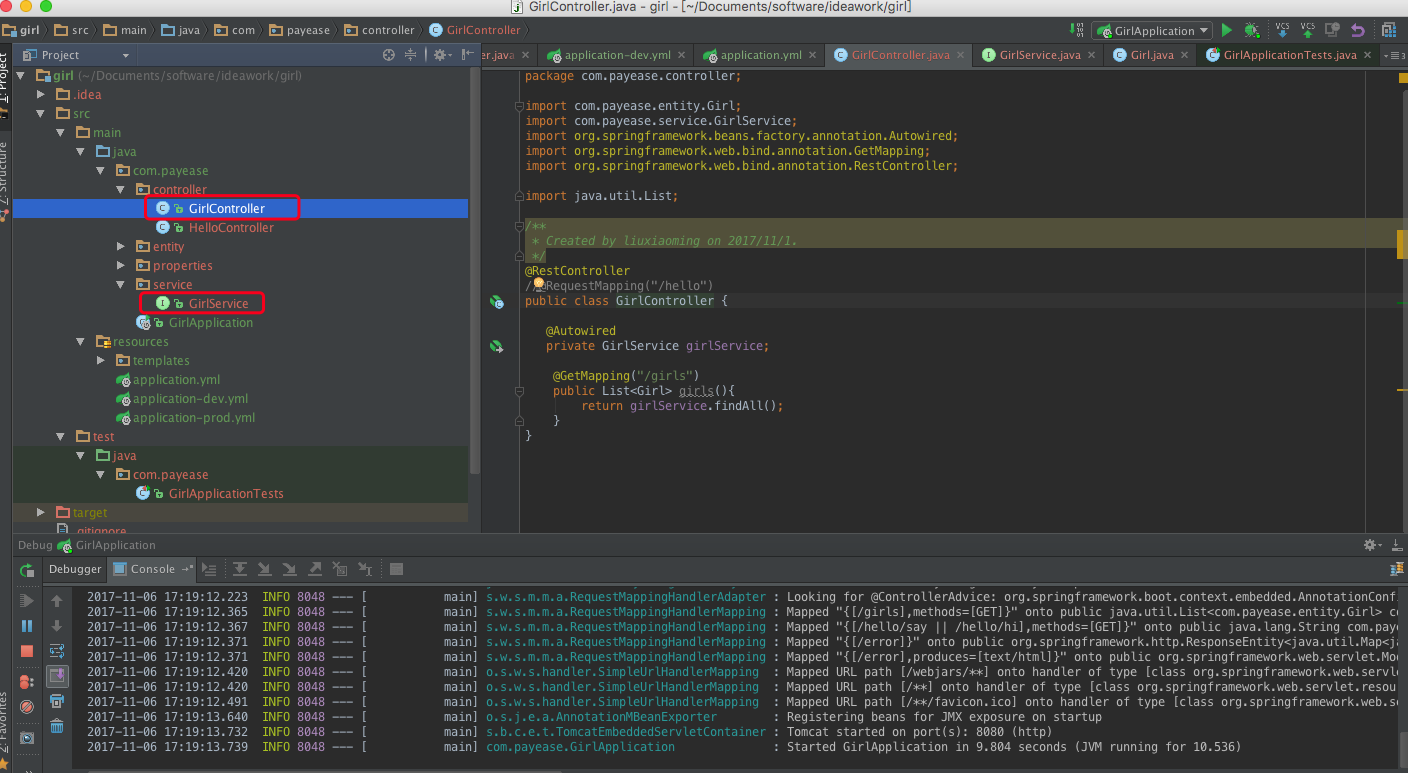
第四步:postman提交
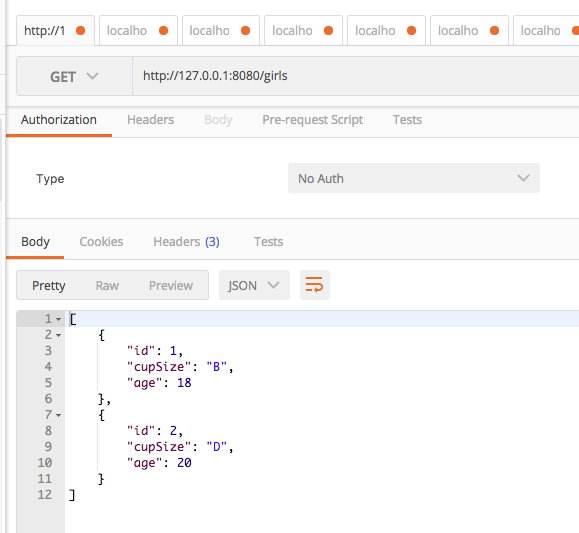
其他接口:
第一步controller:
package com.payease.controller;

import com.payease.entity.Girl;

import com.payease.service.GirlService;

import org.springframework.beans.factory.annotation.Autowired;

import org.springframework.web.bind.annotation.*;

import java.util.List;

/**

 * 查询女生列表

 * Created by liuxiaoming on 2017/11/1.

 */

@RestController

//@RequestMapping("/hello")

public class GirlController {

   @Autowired

   private GirlService girlService;

    @GetMapping("/girls")

    public List<Girl> girls(){

        return girlService.findAll();

    }

    /**

     * 创建一个女生

     */

    @PostMapping("/girls")

    public Girl girlAdd(@RequestParam("cupSize")String cupSize,

                          @RequestParam("age")Integer age){

        Girl girl = new Girl();

        girl.setCupSize(cupSize);

        girl.setAge(age);

        return girlService.save(girl);

    }

    /**

     * 通过ID查询一个女生

     */

    @PostMapping("/girls/{id}")

    public Girl getgirl(@PathVariable("id")Integer id){

        return girlService.findOne(id);

    }

    /**

     * 通过ID更新一个女生

     */

    @PutMapping("/girls/{id}")

    public Girl girlUpdate  (@PathVariable("id")Integer id,

                             @RequestParam("cupSize") String cupSize,

                             @RequestParam("age") Integer age){

        Girl girl = new Girl();

        girl.setId(id);

        girl.setCupSize(cupSize);

        girl.setAge(age);

        return girlService.save(girl);

    }

    /**

     * 通过ID删除一个女生

     */

    @DeleteMapping("/girls/{id}")

    public void girlDelete(@PathVariable("id")Integer id){

         girlService.delete(id);

    }

    /**

     * 通过年龄查询女生列表

     */

    @GetMapping("/girls/age/{age}")

    public List<Girl> girlListByAge(@PathVariable("age")Integer age){

        return girlService.findByAge(age);

    }

}
第二步:扩展方法service:
package com.payease.service;

import com.payease.entity.Girl;

import org.springframework.data.jpa.repository.JpaRepository;

import java.util.List;

/**

 * Created by liuxiaoming on 2017/11/6.

 */

public interface GirlService extends JpaRepository<Girl,Integer>{

    //条件查询: 通过年龄来查询

    public List<Girl> findByAge(Integer age);

}
第三步:项目启动 postman提交:
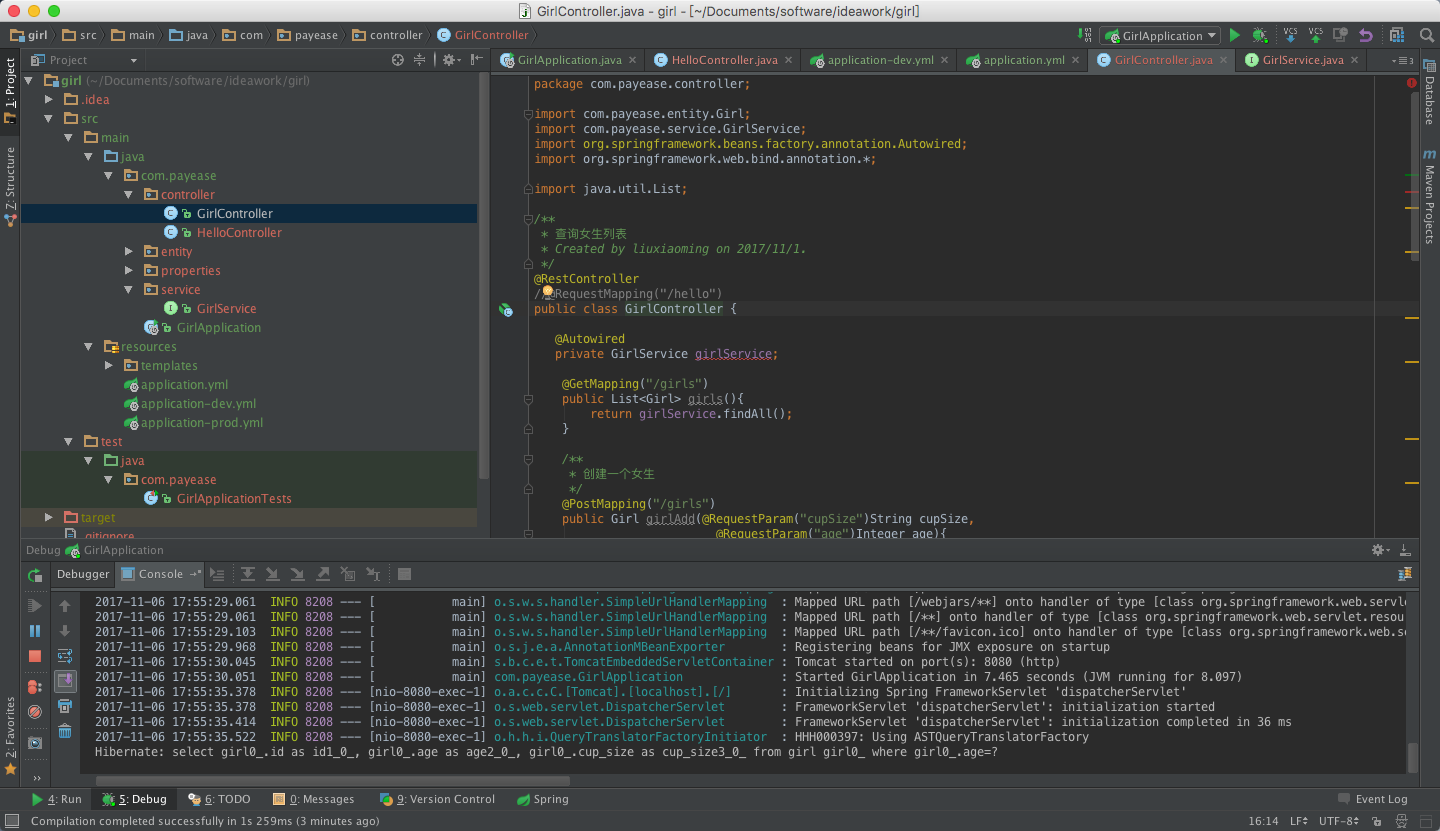
数据库的sql文件:
/*

 Navicat Premium Data Transfer

 Source Server         : localhost

 Source Server Type    : MySQL

 Source Server Version : 50718

 Source Host           : localhost

 Source Database       : dbgirl

 Target Server Type    : MySQL

 Target Server Version : 50718

 File Encoding         : utf-8

 Date: 11/07/2017 09:45:34 AM

*/

SET NAMES utf8mb4;

SET FOREIGN_KEY_CHECKS = 0;

-- ----------------------------

--  Table structure for `girl`

-- ----------------------------

DROP TABLE IF EXISTS `girl`;

CREATE TABLE `girl` (

  `id` int(11) NOT NULL AUTO_INCREMENT,

  `age` int(11) NOT NULL,

  `cup_size` varchar(255) DEFAULT NULL,

  PRIMARY KEY (`id`)

) ENGINE=InnoDB AUTO_INCREMENT=4 DEFAULT CHARSET=utf8;

-- ----------------------------

--  Records of `girl`

-- ----------------------------

BEGIN;

INSERT INTO `girl` VALUES ('1', '18', 'B'), ('2', '20', 'D'), ('3', '20', 'F');

COMMIT;

SET FOREIGN_KEY_CHECKS = 1;
postman提交:
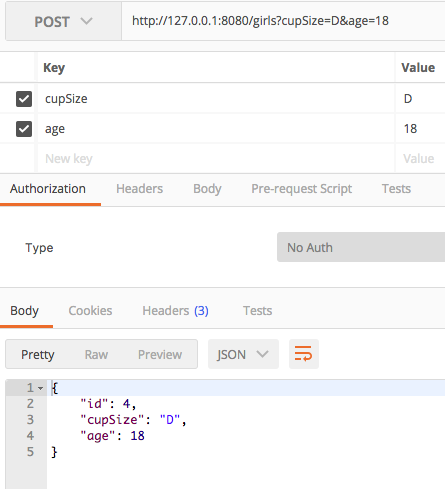
创建一个女生:http://127.0.0.1:8080/girls
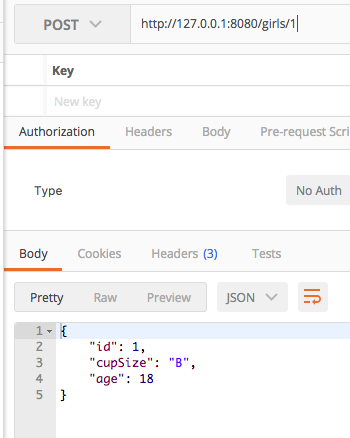
通过ID查询一个女生:http://127.0.0.1:8080/girls/1
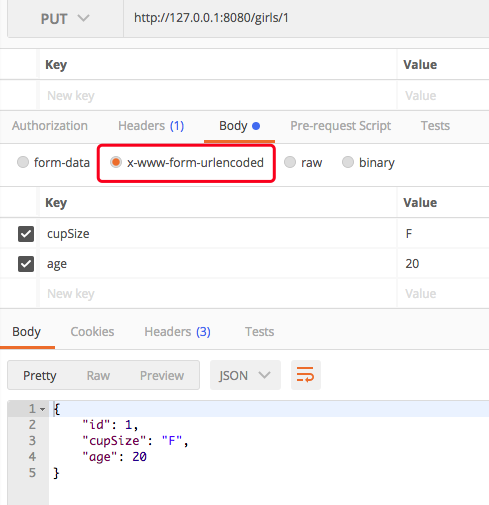
通过ID更新一个女生:http://127.0.0.1:8080/girls/1
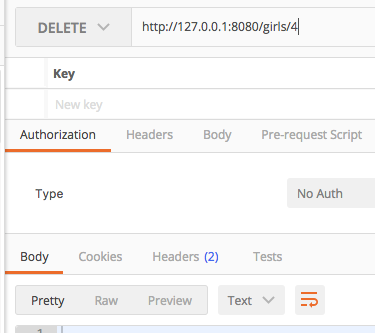
通过ID删除一个女生:http://127.0.0.1:8080/girls/4
数据库原数据:
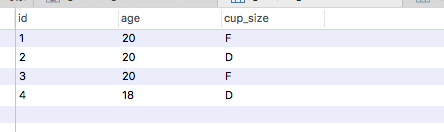
调用方法后的数据:
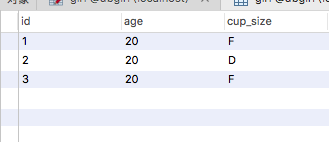
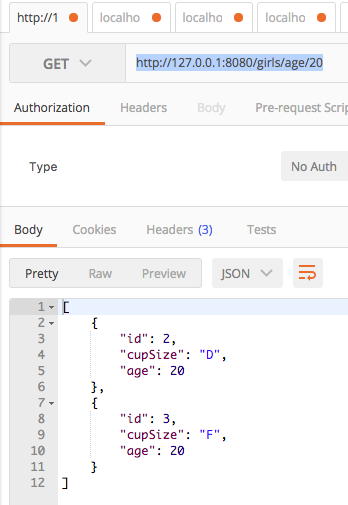
根据年龄来查询女生列表:http://127.0.0.1:8080/girls/age/20
spring boot快速入门 4: jpa数据库操作 实现增删改查的更多相关文章
- 基于renren-fast的快速入门项目实战(实现报表增删改查)
基于renren-fast的快速入门项目实战(实现报表增删改查) 说明:renren-fast是一个开源的基于springboot的前后端分离手脚架,当前版本是3.0 官方开发文档需付费,对于新手而言 ...
- Java Maven:spring boot + Mybatis连接MySQL,通用mapper的增删改查,映射实现多表查询
1. MySQL自带库test添加表user.role 角色表role 用户表user 2. 添加依赖,配置属性 相关依赖:百度即可,此处略 application.properties spring ...
- Linq 数据库操作(增删改查)
Linq数据库增删改查 Linq是一种查询语言,集成包含在formwork中,包含在C#语言中,它的作用是降低查询的门槛,提高开发效率,是我们必须掌握的技术之一,下面是我自己对linq数据库操作的方法 ...
- 初次尝试PHP——一个简单的对数据库操作的增删改查例子
第一次学习PHP,很多人说PHP是最好的语言,学习了一点点,还不敢说这样的话,不过确实蛮好用的. 做了一个简单的对数据库的增删改查的操作,主要是将四种操作写成了独立的函数,之后直接调用函数.以下是代码 ...
- Spring Boot 知识笔记(整合Mybatis续-补充增删改查)
续上篇,补充数据库增删改查的其他场景. 一.Mapper中添加其他场景操作 package net.Eleven.demo.Mapper; import net.Eleven.demo.domain. ...
- flask 数据库操作(增删改查)
数据库操作 现在我们创建了模型,生成了数据库和表,下面来学习常用的数据库操作,数据库操作主要是CRUD,即Create(创建).Read(读取/查询).Update(更新)和Delete(删除). S ...
- MySQL数据库操作:“增删改查”,忘记密码重置等。
[注] 数据库的“增删查改”,参考原作者Wid:http://www.cnblogs.com/mr-wid/archive/2013/05/09/3068229.html#d11.感谢大佬们的技术分享 ...
- ThinkPHP 数据库操作(二) : 增删改查
基本使用 可以直接使用数据库运行原生SQL操作了,支持 query (查询操作)和 execute (写入操作)方法,并且支持参数绑定. Db::query('select * from think_ ...
- Java 数据库操作oracle增删改查,通用封装基于hashmap
pt1:首先安装oracle连接驱动 下载地址:https://pan.baidu.com/s/1jW_ofgU4eJmAn7Y2J5B46A 密码:epkz 1.将ojdbc6.jar导入项目中 ...
随机推荐
- UVa 1025 A Spy in the Metro (DP动态规划)
题意:一个间谍要从第一个车站到第n个车站去会见另一个,在是期间有n个车站,有来回的车站,让你在时间T内时到达n,并且等车时间最短, 也就是尽量多坐车,最后输出最少等待时间. 析:这个挺复杂,首先时间是 ...
- Ansible 笔记 (1) - 安装和配置
本文参考 <Ansible 自动化运维和最佳实践>,这两天刚读这本书,写写总结.主控机环境是 centos 7,被控机均是 centos 6.8 . 确保 python 版本大于 2.6 ...
- PHP(四)表单的基本处理
- .NET基础 (09)常用集合和泛型
常用集合和泛型1 int[]是引用类型还是值类型2 数组之间如何进行转换3 解释泛型的基本原理4 什么是泛型的主要约束和次要约束 常用集合和泛型1 int[]是引用类型还是值类型 数组类型是一族类型, ...
- Android通过xml生成创建View的过程解析
Android的布局方式有两种,一种是通过xml布局,一种是通过java代码布局,两种布局方式各有各的好处,当然也可以相互混合使用.很多人都习惯用xml布局,那xml布局是如何转换成view的呢?本文 ...
- Webservice发布
此文甚好,转载自:http://blog.163.com/java_player@126/blog/static/127930738200981555021925/ 某些地方笔者已经加以改进. 使用工 ...
- Windows和linux通过命令互传文件
下载pscp https://www.chiark.greenend.org.uk/~sgtatham/putty/latest.html 放在Windows的c:windows/system32下 ...
- sharepoint 2013 升级要求
1. 安装过程合理: A. 可以同时在管理中心.两台前端.搜索服务器上安装重新发布的SP1补丁包(所提供的链接) B. 等待所有SP1补丁包安装完成,依次在管理中心.两台前端.搜索服务器上运行配置向导 ...
- 前端基础--css基本语法,选择器
一.css概述 CSS(Cascading Style Sheet)层叠样式表,定义如何显示HTML元素,给HTML设置样式,让它更加美观.当浏览器读到一个样式表,它就会按照这个样式表来对文档进行格式 ...
- C - Oil Deposits(dfs)
点击打开链接 Oil Deposits Time Limit: 2000/1000 MS (Java/Others) Memory Limit: 65536/32768 K (Java/Othe ...