python文本挖掘输出权重,词频等信息,画出3d权重图
# -*- coding: utf-8 -*-

from pandas import read_csv

import numpy as np

from sklearn.datasets.base import Bunch

import pickle  # 导入cPickle包并且取一个别名pickle #持久化类

from sklearn.feature_extraction.text import TfidfVectorizer

import jieba

import operator  # 排序用

from sklearn import metrics

from sklearn.externals import joblib

import xlwt

def importSmallContentdata(file, data, art, label, f, Slast, Snew):

    dataset = read_csv(file)

    Sdata = dataset.values[:, :]

    print(type(Sdata))

    if f == 1:

        for line in Sdata:

            ls = []

            ls.append(line[14])

            ls.append(line[15])

            ls.append(line[16])

            ls.append(line[17])

            Slast.append(ls)

        # print(len(Slast))

        # print("需要对照的小类数据准备完毕")

    '''找到smalli不为0的装入Straindata,把数据分开'''

    for smalli in range(14, 18):

        # print(smalli)

        count = 0

        for line in Sdata:

            count = count + 1

            if line[smalli] != '' and line[smalli] != 0:

                k = 1

                ls = []

                for i in line:

                    if k == 1:

                        #art.append(i)

                        k = k + 1

                        continue

                    if k == 11:  # k为14并不代表是line[14],因为line是从0开始

                        break

                    ls.append(float(i))

                    k = k + 1

                data.append(ls)

                label.append(line[smalli])

                if f == 1:

                    Snew.append(count)

    for line in Sdata:

        art.append(line[0])

    # print("为什么都超限",len(Snew))

def getKvector(train_set, vec, n):

    class obj:

        def __init__(self):

            self.key = 0

            self.weight = 0.0

    nonzero = train_set.tdm.nonzero()

    k = 0

    lis = []

    gather = []

    p = -1

    for i in nonzero[0]:

        p = p + 1

        if k == i:

            a = obj()

            a.key = nonzero[1][p]

            a.weight = train_set.tdm[i, nonzero[1][p]]

            lis.append(a)

        else:

            lis.sort(key=lambda obj: obj.weight, reverse=True)  # 对链表内为类对象的排序

            gather.append(lis)

            while k < i:

                k = k + 1

            lis = []

            a = obj()

            a.key = nonzero[1][p]

            a.weight = train_set.tdm[i, nonzero[1][p]]

            lis.append(a)

    gather.append(lis)  # gather存储的是每条数据的事实描述的特征向量,已经从小到大排好了,只不过每个存既有key又有weight

    # 我们只要key,不再需要weight

    sj = 1

    for i in gather:

        ls = []

        for j in i:

            sj = sj + 1

            ls.append(float(j.key))

        while sj <= n:

            sj = sj + 1

            ls.append(-1)

        sj = 1

        vec.append(ls)

'''读取停用词'''

def _readfile(path):

    with open(path, "rb") as fp:

        content = fp.read()

    return content

''' 读取bunch对象'''

def _readbunchobj(path):

    with open(path, "rb") as file_obj:

        bunch = pickle.load(file_obj)

    return bunch

'''写入bunch对象'''

def _writebunchobj(path, bunchobj):

    with open(path, "wb") as file_obj:

        pickle.dump(bunchobj, file_obj)

def buildtrainbunch(bunch_path, art_train, trainlabel):

    bunch = Bunch(label=[], contents=[])

    for item1 in trainlabel:

        bunch.label.append(item1)

    # trainContentdatasave=[] #存储所有训练和测试数据的分词

    for item2 in art_train:

        item2 = str(item2)

        item2 = item2.replace("\r\n", "")

        item2 = item2.replace(" ", "")

        content_seg = jieba.cut(item2)

        save2 = ''

        for item3 in content_seg:

            if len(item3) > 1 and item3 != '\r\n':

                # trainContentdatasave.append(item3)

                save2 = save2 + "," + item3

        bunch.contents.append(save2)

    with open(bunch_path, "wb") as file_obj:

        pickle.dump(bunch, file_obj)

    print("构建训练数据文本对象结束!!!")

def buildtestbunch(bunch_path, art_test, testlabel):

    bunch = Bunch(label=[], contents=[])

    for item1 in testlabel:

        bunch.label.append(item1)

    # testContentdatasave=[] #存储所有训练和测试数据的分词

    for item2 in art_test:

        item2 = str(item2)

        item2 = item2.replace("\r\n", "")

        item2 = item2.replace(" ", "")

        content_seg = jieba.cut(item2)

        save2 = ''

        for item3 in content_seg:

            if len(item3) > 1 and item3 != '\r\n':

                # testContentdatasave.append(item3)

                save2 = save2 + "," + item3

        bunch.contents.append(save2)

    with open(bunch_path, "wb") as file_obj:

        pickle.dump(bunch, file_obj)

    print("构建测试数据文本对象结束!!!")

def vector_space(stopword_path, bunch_path, space_path):

    stpwrdlst = _readfile(stopword_path).splitlines()  # 读取停用词

    bunch = _readbunchobj(bunch_path)  # 导入分词后的词向量bunch对象

    # 构建tf-idf词向量空间对象

    tfidfspace = Bunch(label=bunch.label, tdm=[], vocabulary={})

    # 权重矩阵tdm,其中,权重矩阵是一个二维矩阵,tdm[i][j]表示,第j个词(即词典中的序号)在第i个类别中的IF-IDF值

    # 使用TfidVectorizer初始化向量空间模型

    vectorizer = TfidfVectorizer(stop_words=stpwrdlst, sublinear_tf=True, max_df=0.5, min_df=0.0001, use_idf=True,

                                 max_features=15000)

    # print(vectorizer)

    # 文本转为词频矩阵,单独保存字典文件

    tfidfspace.tdm = vectorizer.fit_transform(bunch.contents)

    tfidfspace.vocabulary = vectorizer.vocabulary_

    # 创建词袋的持久化

    _writebunchobj(space_path, tfidfspace)

    print("if-idf词向量空间实例创建成功!!!")

def testvector_space(stopword_path, bunch_path, space_path, train_tfidf_path):

    stpwrdlst = _readfile(stopword_path).splitlines()  # 把停用词变成列表

    bunch = _readbunchobj(bunch_path)

    tfidfspace = Bunch(label=bunch.label, tdm=[], vocabulary={})

    # 导入训练集的TF-IDF词向量空间  ★★

    trainbunch = _readbunchobj(train_tfidf_path)

    tfidfspace.vocabulary = trainbunch.vocabulary

    vectorizer = TfidfVectorizer(stop_words=stpwrdlst, sublinear_tf=True, max_df=0.7, vocabulary=trainbunch.vocabulary,

                                 min_df=0.001)

    tfidfspace.tdm = vectorizer.fit_transform(bunch.contents)

    _writebunchobj(space_path, tfidfspace)

    print("if-idf词向量空间实例创建成功!!!")
if __name__=="__main__":

    Stestdata = []

    Stestlabel = []

    Sart_test = []

    Slast = []

    Snew = []

    '''============================先导入数据=================================='''

    file_test = 'F:/goverment/excel operating/all_tocai_train.csv'

    importSmallContentdata(file_test, Stestdata, Sart_test, Stestlabel, 1, Slast, Snew)

    #print(Sart_test)

    # print("Stestlabel" ,len(Stestlabel))

    # print("小类导入数据完毕")

    # print("大类标签导入完毕")#共1329*4

    '''==========================================================tf-idf对Bar进行文本特征提取============================================================================'''

    # 导入分词后的词向量bunch对象

    test_bunch_path = "F:/goverment/excel operating/trainbunch.bat"

    test_space_path = "F:/goverment/excel operating/traintfdifspace.dat"

    stopword_path = "F:/goverment/excel operating/hlt_stop_words.txt"

    '''============================================================tf-idf对Sart进行文本特征提取=============================================================================='''

    buildtestbunch(test_bunch_path, Sart_test, Stestlabel)

    testvector_space(stopword_path, test_bunch_path, test_space_path, test_space_path)

    test_set = _readbunchobj(test_space_path)

    '''测试数据'''

    #获取已知 id 找 文本

    dic={}

    for i in test_set.vocabulary.keys():

        dic[test_set.vocabulary[i]]=i

    #print(dic)
test_set分为三部分

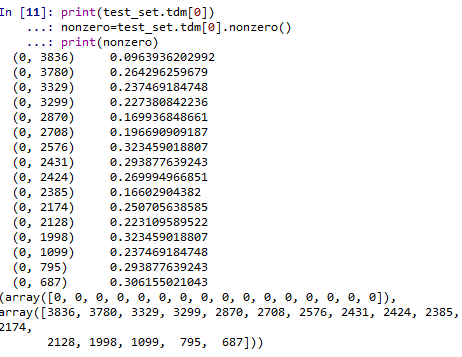
查看test_set.tdm
print(test_set.tdm)

  (0, 3836)     0.0963936202992

  (0, 3780)     0.264296259679

  (0, 3329)     0.237469184748

  (0, 3299)     0.227380842236

  (0, 2870)     0.169936848661

  (0, 2708)     0.196690909187

  (0, 2576)     0.323459018807

  (0, 2431)     0.293877639243

  (0, 2424)     0.269994966851

  (0, 2385)     0.16602904382

  (0, 2174)     0.250705638585

  (0, 2128)     0.223109589522

  (0, 1998)     0.323459018807

  (0, 1099)     0.237469184748

  (0, 795)      0.293877639243

  (0, 687)      0.306155021043

  (1, 4127)     0.158745878875

  (1, 4075)     0.187148908824

  (1, 4066)     0.275285441964

  (1, 3506)     0.325600030259

  (1, 3329)     0.271913955503

  (1, 2512)     0.30263228246

  (1, 2385)     0.190111462595

  (1, 2121)     0.370376566292

  (1, 1555)     0.325600030259

  :     :

  (1437, 790)   0.216605181177

  (1437, 784)   0.30372112351

  (1437, 558)   0.20127256985

  (1438, 4279)  0.240643793924

  (1438, 4276)  0.118606614328

  (1438, 4184)  0.148565457218

  (1438, 4107)  0.185731268834

  (1438, 4014)  0.154101569448

  (1438, 3877)  0.220155031015

  (1438, 3298)  0.245309299377

  (1438, 2933)  0.318303833306

  (1438, 2383)  0.0923818814565

  (1438, 2378)  0.213187531379

  (1438, 2092)  0.263926619628

  (1438, 2091)  0.263926619628

  (1438, 1969)  0.15613334884

  (1438, 1802)  0.144868484461

  (1438, 1714)  0.256704677923

  (1438, 1447)  0.309102127772

  (1438, 1411)  0.226077842579

  (1438, 1010)  0.116062811153

  (1438, 997)   0.263926619628

  (1438, 648)   0.15613334884

  (1438, 640)   0.157728638816

  (1438, 565)   0.232695024234
打印出分词及权重
#各个文本的词语及权重
dataset = read_csv(file_test)
Sdata = dataset.values[:, :]
print(len(Sdata)) #print(nonzero[1]) myexcel = xlwt.Workbook()
sheet = myexcel.add_sheet("sheet1")
for k in range(len(Sdata)):#遍历每一条文本
nonzero=test_set.tdm[k].nonzero()
ls=[]
for i in range(len(nonzero[1])):
b=test_set.tdm[k, nonzero[1][i]]*100 #test_set.tdm[k, nonzero[1][i]]是第k条文本中,第i个权重非零的词权重
a= dic[nonzero[1][i]] +" "+str(round(b,2))+"%"
ls.append(a) for i in range(len(nonzero[1])):
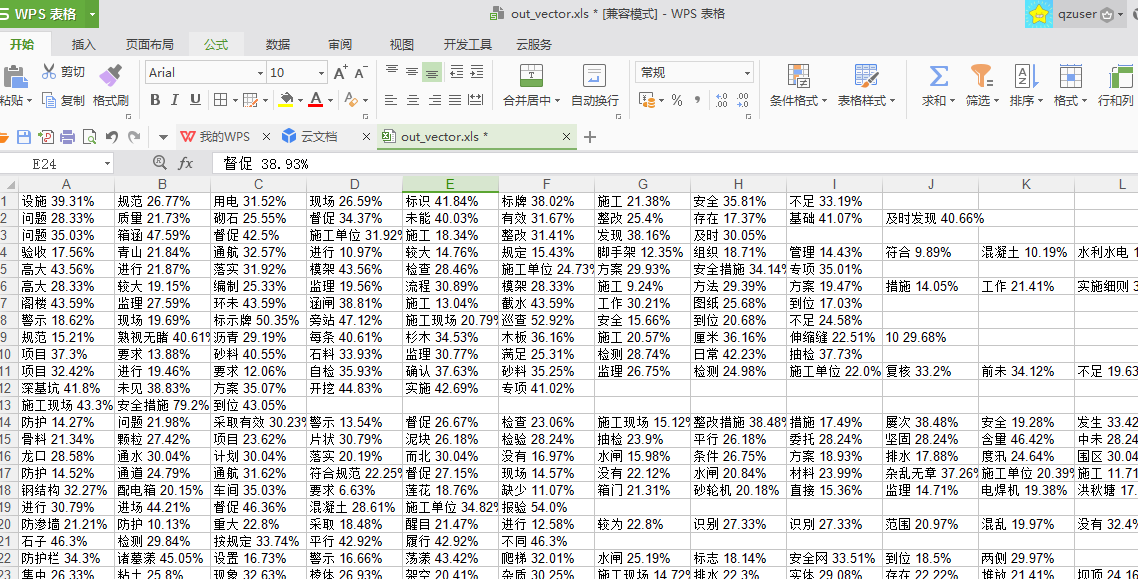
sheet.write(k,i,str(ls[i])) myexcel.save("out_vector.xls")
运行结果如下:
画出3d图:还可以转动呢

python文本挖掘输出权重,词频等信息,画出3d权重图的更多相关文章
- Python 日志输出中添加上下文信息
Python日志输出中添加上下文信息 除了传递给日志记录函数的参数(如msg)外,有时候我们还想在日志输出中包含一些额外的上下文信息.比如,在一个网络应用中,可能希望在日志中记录客户端的特定信息,如: ...
- Caffe 根据log信息画出loss,accuracy曲线
在执行训练的过程中,若指定了生成log信息,log信息包含初始化,网络结构初始化和训练过程随着迭代数的loss信息. 注意生成的log文件可能没有.log后缀,那么自己加上.log后缀.如我的log信 ...
- CSS3简单画出3d图形
1.气球 2.泳圈 1.2两图实现代码分别如下: <html> <head> <meta charset="utf-8"> <meta h ...
- 使用pangolin库画出轨迹
https://github.com/stevenlovegrove/Pangolin cmake_minimum_required(VERSION 2.8) project(chapter3) ) ...
- 【转】Python之向日志输出中添加上下文信息
[转]Python之向日志输出中添加上下文信息 除了传递给日志记录函数的参数(如msg)外,有时候我们还想在日志输出中包含一些额外的上下文信息.比如,在一个网络应用中,可能希望在日志中记录客户端的特定 ...
- 关于python的中国历年城市天气信息爬取
一.主题式网络爬虫设计方案(15分)1.主题式网络爬虫名称 关于python的中国城市天气网爬取 2.主题式网络爬虫爬取的内容与数据特征分析 爬取中国天气网各个城市每年各个月份的天气数据, 包括最高城 ...
- [python] 常用正则表达式爬取网页信息及分析HTML标签总结【转】
[python] 常用正则表达式爬取网页信息及分析HTML标签总结 转http://blog.csdn.net/Eastmount/article/details/51082253 标签: pytho ...
- Python日志输出——logging模块
Python日志输出——logging模块 标签: loggingpythonimportmodulelog4j 2012-03-06 00:18 31605人阅读 评论(8) 收藏 举报 分类: P ...
- python爬虫之12306网站--车站信息查询
python爬虫查询车站信息 目录: 1.找到要查询的url 2.对信息进行分析 3.对信息进行处理 python爬虫查询全拼相同的车站 目录: 1.找到要查询的url 2.对信息进行分析 3.对信息 ...
随机推荐
- HDU 4272 LianLianKan (状压DP+DFS)题解
思路: 用状压DP+DFS遍历查找是否可行.假设一个数为x,那么他最远可以消去的点为x+9,因为x+1~x+4都能被他前面的点消去,所以我们将2进制的范围设为2^10,用0表示已经消去,1表示没有消去 ...
- sqlite的bool字段
简直被坑死了, bool字段更新,只能用0或1,才是正确的更新. 否则select出来的字段是错的 本来用true和false更新的,更新之后,使用sqliteexpert查看,更新结果是对的. 但是 ...
- MyBatis获取SqlSession
package com.ykmimi.dao; import org.apache.ibatis.session.SqlSession; import com.ykmimi.entity.Studen ...
- vapply
尽管 sapply 非常方便和智能,但有时智能可能隐藏着风险.假如我们有一个数字列表:x <- list(c(1, 2), c(2, 3), c(1, 3))如果我们想得到一个向量,其中每个元素 ...
- MOBA游戏学会这些知识,你才算真的入门了!
<英魂之刃口袋版>是一个标准的MOBA游戏,MOBA指的是多人在线战术竞技游戏,游戏模式始于1998年<星际争霸>中的一张自定义地图,经过近20年的优化和调整逐渐演变成了我们现 ...
- Android之微信支付
Android开发中,大多数电商APP都会有支付这么模块,此博客就讲一下微信支付,代码不多,很简单就可以完成,支付宝支付请看博客 Android支付之支付宝封装类 先来看看效果图 微信支付首先要去微信 ...
- poj1459网络流之多源点最大流
这题想了好久,一直认为应该bfs更新后求最小值把发电站最大发电加进去,但是又发现这样求增广路的时候会导致用户更新出错, 加源点和汇点也考虑到了,没想到居然发电量就是超级源到源点的v,居然这么简单@.@ ...
- jstack工具介绍
一.使用场景 当一个java应用CPU的使用比较高或者到达100%以上的时候,需要分析代码哪里有问题.这时候可以使用jstack命令 二.怎么使用 先使用命令ps –ef |grep keyword ...
- 无线基站侧的信令风暴根因——频繁的释放和连接RRC产生大量信令、设备移动导致小区重选信令增加、寻呼信令多
全局思维(核心网和无线基站侧都会有信令风暴): LTE网络系统可能出现信令风暴的原因,大致可以总结出以下几点: 1.网络架构的变化,导致4G核心网信令流量较2G/3G大幅增加 a)架构扁平化:LTE网 ...
- 设置mysql的字符集
ALTER DATABASE test DEFAULT CHARACTER SET utf8; show variables like 'char%';