saltstack SLS
SLS文件定义
SLS(代表SaLt State文件)是Salt State系统的核心。SLS描述了系统的目标状态,由格式简单的数据构成。这经常被称作配置管理
top.sls 是配置管理的入口文件,一切都是从这里开始,在master 主机上,默认存放在/srv/salt/目录.
top.sls 默认从 base 标签开始解析执行,下一级是操作的目标(被控主机),可以通过正则,grain模块,或分组名,来进行匹配,再下一级是要执行的state文件,不包换扩展名。
创建top.sls
(一)被控主机的匹配
#通过正则进行匹配的示例,

base:

  '*':

    - users    #为users.sls或users目录

#通过分组名进行匹配的示例,必须要有 - match: nodegroup

base:

  master1:

    - match: nodegroup

    - users

#通过grain模块匹配的示例,必须要有- match: grain

base:

  'os:CentOS':

    - match: grain

    - users
(二)编写state文件
首先说一下sls的命名空间
A)、SLS文件的扩展名 .sls 被省略。 (例如. webserver.sls 变成 webserver)

B)、子目录可以更好的组织,每个子目录都由一个点来表示.(例如 webserver/dev.sls 可以简称为 webserver.dev)

C)、如果子目录创建一个init.sls的文件,引用的时候仅指定该目录即可. (例如 webserver/init.sls 可以简称为 webserver)

D)、如果一个目录下同时存在webserver.sls 和 webserver/init.sls,那么 webserver/init.sls 将被忽略,SLS文件引用的webserver将只引用webserver.sls
示例:
1)初始化配置
[root@k8s_master salt]# cat /etc/salt/master | grep -v '^#\|^$'

cachedir: /var/cache/salt/master

auto_accept: True

file_recv: True

file_roots:

  base:

    - /srv/salt/

pillar_roots:

  base:

    - /srv/pillar

pillar_opts: True

nodegroups:

   master1: 'L@k8s_master'

   agents: 'L@k8s_node1,k8s_node2'
2)配置grains_module
创建目录并编写脚本
[root@k8s_master salt]#install -d /srv/salt/_grains

[root@k8s_master salt]# cat /srv/salt/_grains/test_grains.py

#!/usr/bin/env python

#-*-coding:utf-8-*-

import os,sys,commands

def get_custom_grains():

    grains = {}

    _open_file=65535

    try:

        getulimit = commands.getstatusoutput('source /etc/profile;ulimit -n')

    except Exception,e:

        print e

    print getulimit,type(getulimit)

    if getulimit[0] == 0:

        _open_file=int(getulimit[1])

    grains['max_open_files'] = _open_file

    return grains
刷新并重载模块
#同步grains模块,运行

[root@k8s_master pillar]#salt '*' saltutil.sync_all

#刷新模块(让minion编译模块)

[root@k8s_master pillar]#salt '*' sys.reload_modules
验证
[root@k8s_master pillar]# salt '*' grains.item max_open_files

k8s_node1:

    ----------

    max_open_files:

        1024

k8s_node2:

    ----------

    max_open_files:

        1024

k8s_master:

    ----------

    max_open_files:

        1024
3)配置pillar
[root@k8s_master pillar]# cat top.sls

base:

  'master1':

    - match: nodegroup

    - master1

  'agents':

    - match: nodegroup

    - agents

[root@k8s_master pillar]# cat master1.sls

nginx:

    root: /www

[root@k8s_master pillar]# cat agents.sls

nginx:

    root: /data
验证
[root@k8s_master pillar]# salt '*' pillar.data nginx

k8s_master:

    ----------

    nginx:

        ----------

        root:

            /www

k8s_node2:

    ----------

    nginx:

        ----------

        root:

            /data

k8s_node1:

    ----------

    nginx:

        ----------

        root:

            /data
4)配置state
[root@k8s_master salt]# cat top.sls

base:

  '*':

    - nginx

[root@k8s_master salt]# cat nginx.sls

nginx:              #state名称

  pkg:              #管理对象类型:pkg(进行软件安装 yum/apt)

   - installed         #pkg要执行的方法: install,如果未安装就进行安装

  file.managed:

   - source: salt://nginx/nginx.conf      #配置模板文件位置

   - name: /etc/nginx/nginx.conf

   - user: root

   - group: root

   - mode: 644

   - template: jinja
   - backup:minion      #备份

   - require:

      - pkg: nginx

  service.running:

   - enable: True        #检查服务是否在开机启动服务队列中

   - reload: True        #表示服务支持reload操作,不加则默认执行restart操作

   - watch:            #检测nginx.conf是否发生变化,如果发生变化会执行reload操作,pkg为确保nginx安装成功

     - file: /etc/nginx/nginx.conf

     - pkg: nginx
nginx.conf配置文件
[root@k8s_master salt]# cat nginx/nginx.conf

user nginx;

worker_processes  {{ grains['num_cpus'] }};  #采用grains获取本地的值,与设备cpu核数一致

{% if grains['num_cpus'] == 2 %}

worker_cpu_affinity 01 10;            #分配cpu

{% elif grains['num_cpus'] == 1 %}

worker_cpu_affinity 0001;

{% elif grains['num_cpus'] == 4 %}

worker_cpu_affinity 1000 0100 0010 0001;

{% elif grains['num_cpus'] >= 8 %}

worker_cpu_affinity 00000001 00000010 00000100 00001000 00010000 00100000 01000000 10000000;

{% else %}

worker_cpu_affinity 1000 0100 0010 0001;

{% endif %}

worker_rlimit_nofile {{ grains['max_open_files'] }};  #文件描述符

error_log  /var/log/nginx/error.log;

#error_log  logs/error.log  notice;

#error_log  logs/error.log  info;

#pid        logs/nginx.pid;

events {

    worker_connections  {{ grains['max_open_files'] }} ; #与文件描述符数量一致

}

http {

    include       mime.types;

    default_type  application/octet-stream;

#    log_format  main  '$remote_addr - $remote_user [$time_local] $http_host $request_method  "$uri" "$query_string"'

 #                      '$status $body_bytes_sent "$http_referer" $upstream_status $upstream_addr $request_time $upstream_response_time'

 #                     '"$http_user_agent" "$http_x_forwarded_for"';

     log_format log_json '{"@timestamp": "$time_iso8601","remote_addr": "$remote_addr","remote_user": "$remote_user","request_method": "$request_method","uri": "$uri","query_string": "$query_string","status": "$status","body_bytes_sent": "$body_bytes_sent","http_referrer": "$http_referer","upstream_status": "$upstream_status","upstream_addr" : "$upstream_addr","request_time": "$request_time","upstream_response_time": "$upstream_response_time","request": "$request","http_user_agent": "$http_user_agent","http_x_forwarded_for": "$http_x_forwarded_for"}';

#   log_format json '{"@timestamp":"$time_iso8601",'

 #                 '"host":"$server_addr",'

  #                '"clientip":"$remote_addr",'

   #               '"remote_user":"$remote_user",'

    #              '"request_method":"$request_method",'

     #             '"request":"$request",'

#		  '"uri":"$uri",'

 #                 '"query_string":"$query_string",'

  #                '"http_user_agent":"$http_user_agent",'

   #               '"size":$body_bytes_sent,'

    #              '"responsetime":$request_time,'

     #             '"upstreamtime":"$upstream_response_time",'

      #            '"upstreamhost":"$upstream_addr",'

       #           '"url":"$uri",'

        #          '"domain":"$host",'

         #         '"client_realip":"$http_x_forwarded_for",'

          #        '"referer":"$http_referer",'

           #       '"status":"$status"}';

    access_log /var/log/nginx/access.log  log_json;

    sendfile        on;

    #tcp_nopush     on;

    #keepalive_timeout  0;

    keepalive_timeout  65;

    #gzip  on;

    server {

        listen       80;

        server_name  {{ grains['ip4_interfaces']['ens33'][0] }};  #获取本地的ip(grains)

	root {{ pillar['nginx']['root'] }};               #获取web目录(pillar里定制)

	index index.php index.html index.htm;

        #charset koi8-r;

        #error_page  404              /404.html;

        # redirect server error pages to the static page /50x.html

        #

        error_page   500 502 503 504  /50x.html;

        location = /50x.html {

            root   html;

        }

	location /ngx_status

    	{

        	stub_status on;

        	access_log off;

    	}

	location ~ ^/(status|ping)$

	{

		include fastcgi_params;

        	fastcgi_pass 127.0.0.1:9000;

        	fastcgi_param SCRIPT_FILENAME $fastcgi_script_name;

	}

        # proxy the PHP scripts to Apache listening on 127.0.0.1:80

        #

        #location ~ \.php$ {

        #    proxy_pass   http://127.0.0.1;

        #}

        # pass the PHP scripts to FastCGI server listening on 127.0.0.1:9000

        #

        #location ~ \.php$ {

        #    root           html;

        #    fastcgi_pass   127.0.0.1:9000;

        #    fastcgi_index  index.php;

        #    fastcgi_param  SCRIPT_FILENAME  /scripts$fastcgi_script_name;

        #    include        fastcgi_params;

        #}

	location ~ \.php$ {

            fastcgi_connect_timeout 300;

            fastcgi_read_timeout 300;

            fastcgi_send_timeout 300;

            fastcgi_buffer_size 128k;

            fastcgi_buffers 32 32k;

            fastcgi_pass   127.0.0.1:9000;

            fastcgi_index  index.php;

            fastcgi_param  SCRIPT_FILENAME  $document_root$fastcgi_script_name;

            include        fastcgi_params;

        }

        # deny access to .htaccess files, if Apache's document root

        # concurs with nginx's one

        #

        #location ~ /\.ht {

        #    deny  all;

        #}

    }

    # another virtual host using mix of IP-, name-, and port-based configuration

    #

    #server {

    #    listen       8000;

    #    listen       somename:8080;

    #    server_name  somename  alias  another.alias;

    #    location / {

    #        root   html;

    #        index  index.html index.htm;

    #    }

    #}

    # HTTPS server

    #

    #server {

    #    listen       443 ssl;

    #    server_name  localhost;

    #    ssl_certificate      cert.pem;

    #    ssl_certificate_key  cert.key;

    #    ssl_session_cache    shared:SSL:1m;

    #    ssl_session_timeout  5m;

    #    ssl_ciphers  HIGH:!aNULL:!MD5;

    #    ssl_prefer_server_ciphers  on;

    #    location / {

    #        root   html;

    #        index  index.html index.htm;

    #    }

    #}

}
执行刷新state配置
[root@k8s_master salt]# pwd

/srv/salt

[root@k8s_master salt]#salt '*' state.highstate
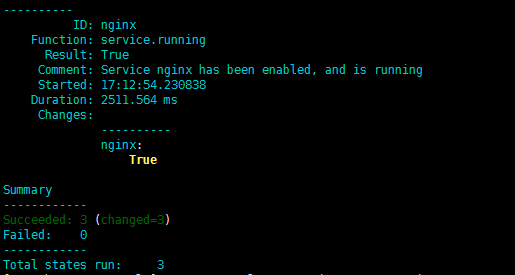
效果图

saltstack SLS的更多相关文章
- saltstack SLS 安装haproxy+nginx实例分析学习
本文主要以实例的形式去熟悉sls的部署流程及相关模块的使用 文件下载:https://github.com/unixhot/saltbook-code 目录结构 [root@k8s_master sa ...
- Saltstack sls文件:批量安装服务
一.使用saltstack 批量安装nginx 1.创建salt目录 mkdir /srv/{salt,pillar} 2.再/srv/salt/下创建sls文件 vim nginx_install. ...
- Saltstack sls文件:批量添加删除计划任务
一.使用sls文件 批量添加计划任务 1.创建salt目录 mkdir /srv/{salt,pillar} 2.再salt目录下创建文件 vim crontab.sls 3.添加内容 # 添加的命令 ...
- Saltstack sls文件:批量替换指定文件
一.创建salt管理配置文件:将所有minion 指定文件替换为master端的文件. 1.创建salt管理目录,并创建salt配置文件规范 # 创建salt文件目录 mkdir /srv/{salt ...
- saltstack pillar
piller组件定义与客户端相关的任何数据(定义在master端),定义好的数据可以被其他组件调用(如state,api) 说通俗了,一句话,就是ansible vars里定义的变量,可以在整个pla ...
- 【04】Saltstack:配置管理
写在前面的话 当我们需要进行一系列可重复且复杂的操作的时候,如果还继续用传统的 cmd.run 来执行显然难以满足我们的需求.这时候就会在想一个问题,我们能不能把这些操作编辑成一个类似脚本的操作,我们 ...
- 死磕salt系列-salt入门
saltstack简介 SaltStack是一种新型的基础设施管理软件,简单易部署,可伸缩的足以管理成千上万的服务器,和足够快的速度控制,与他们交流,以毫秒为单位.SaltStack提供了一个动态基础 ...
- 自动化运维工具SaltStack - 多环境(使用记录【state.sls 与 state.highstate】)
转自:https://segmentfault.com/a/1190000000513137 今天在进行 saltstack 多环境的时候,遇到一个问题,最终得到解决,好记性不如烂笔头,记录. 首先, ...
- saltstack之sls文件配置
state模块 state模块会调用它的sls函数处理一个以.sls结尾的配置文件. sls文件是YAML语言来进行描述的 缩进 不要使用`tab`因为tab是四个空格,而YAML是使用两个空格 冒号 ...
随机推荐
- 5G到来,数据中心如何变革?
导读 5G将要到来,除改变人们的工作生活外,其带宽.延时.连接特性也逼迫着数据中心变革,以满足5G时代需求.具体而言,5G将从形状规模.硬件组成及软件规模三面变革数据中心. 5G带来什么 高带宽.低延 ...
- PHP——判断数组中是否有重复值并找出重复值
可以用来测试需要唯一凭据号码的,是否有重复值,不过一般直接使用uuid了,简单粗暴就解决问题,这个就简单的测试生成的数据是否有重复值吧 <?php /* * @Author: wyy * @Da ...
- Vuex以及axios
Vuex 简介 vuex是一个专门为Vue.js设计的集中式状态管理架构. 状态? 我们把它理解为在data中需要共享给其他组件使用的部分. Vuex和单纯的全局对象有以下不同: 1.Vuex 的状态 ...
- npm 常规错误
Unexpected end of JSON input while parsing near 意外结束.JSON解析期间 解决办法: npm cache clean --force 解释:Force ...
- 爬虫_淘宝(selenium)
总体来说代码还不是太完美 实现了js渲染网页的解析的一种思路 主要是这个下拉操作,不能一下拉到底,数据是在中间加载进来的, 具体过程都有写注释 from selenium import webdriv ...
- 牛客网noip集训4
T1 (A)[https://www.nowcoder.com/acm/contest/175/A] 给出 l, r, k,请从小到大输出所有在 [l, r] 范围内,能表示为 k 的非负整数次方的所 ...
- Java 强制类型转换(类转换注意事项)
将一个类型强制转换成另一个类型的过程被称为类型转换.例如: double x =3.14; int y = (int)x; 将表达式x的值转换成整数类型,舍弃小数部分. 有时候也可能是类的对象引用的转 ...
- Android应用开发资源
Android应用设计和开发人员现在可以参考由Android用户体验(UX)团队官方发布的Android设计指南.该指南提供了开发者应该遵循的基本原则,并列出了很多细节指导,涉及设备与显示.主题.触控 ...
- 【BZOJ4543】Hotel加强版(长链剖分)
[BZOJ4543]Hotel加强版(长链剖分) 题面 BZOJ,没有题面 洛谷,只是普通版本 题解 原来我们的\(O(n^2)\)做法是设\(f[i][j]\)表示以\(i\)为根的子树中,距离\( ...
- Luogu P5285 / LOJ3050 【[十二省联考2019]骗分过样例】
伪提答害死人...(出题人赶快出来挨打!!!) 虽说是考场上全看出来是让干嘛了,然而由于太菜以及不会打表所以GG了,只拿了\(39\)... 经测试,截至\(2019.4.18-11:33\),这份接 ...