ElasticSearch(七):ElasticSearch集群的搭建
由于资源有限,使用是一台机器上安装三个elasticSearch服务端组成的集群。
1. 安装elasticSearch6.3.2
将原本安装的elasticSearch6.3.2复制两份,分别重新命名,如下:

2. 修改配置文件
进入elasticSearch的config目录,打开 elasticsearch.yml文件,修改如下信息:
需要注意的是:
默认所有节点都会存储数据。
如果你是一台机器上多个es服务器,那么必须指定不同的tcp端口。
# ======================== Elasticsearch Configuration =========================

#

# NOTE: Elasticsearch comes with reasonable defaults for most settings.

#       Before you set out to tweak and tune the configuration, make sure you

#       understand what are you trying to accomplish and the consequences.

#

# The primary way of configuring a node is via this file. This template lists

# the most important settings you may want to configure for a production cluster.

#

# Please consult the documentation for further information on configuration options:

# https://www.elastic.co/guide/en/elasticsearch/reference/index.html

#

# ---------------------------------- Cluster -----------------------------------

#

# Use a descriptive name for your cluster: 集群名,其余节点都是通过这个名字来找到集群

cluster.name: zskj

#

# ------------------------------------ Node ------------------------------------

# Use a descriptive name for the node:

# 节点名

node.name: node

#

# Add custom attributes to the node:

#

#node.attr.rack: r1

#

# ----------------------------------- Paths ------------------------------------

#

# Path to directory where to store the data (separate multiple locations by comma):

#

#path.data: /path/to/data

#

# Path to log files:

#

#path.logs: /path/to/logs

#

# ----------------------------------- Memory -----------------------------------

#

# Lock the memory on startup:

#

#bootstrap.memory_lock: true

#

# Make sure that the heap size is set to about half the memory available

# on the system and that the owner of the process is allowed to use this

# limit.

#

# Elasticsearch performs poorly when the system is swapping the memory.

#

# ---------------------------------- Network -----------------------------------

#

# Set the bind address to a specific IP (IPv4 or IPv6):

# 节点的ip地址

network.host: 127.0.0.1

#

# Set a custom port for HTTP:

# 端口

http.port: 9200

# tcp端口。

transport.tcp.port: 9300

#

# For more information, consult the network module documentation.

#

# --------------------------------- Discovery ----------------------------------

#

# Pass an initial list of hosts to perform discovery when new node is started:

# The default list of hosts is ["127.0.0.1", "[::1]"]

# elasticSearch集群的地址。这里使用的是一台机器的不同端口。

discovery.zen.ping.unicast.hosts: ["127.0.0.1:9300", "127.0.0.1:9301", "127.0.0.1:9302"]

#

# Prevent the "split brain" by configuring the majority of nodes (total number of master-eligible nodes / 2 + 1):

# 预防脑裂,建议为总集群数一半 + 1

discovery.zen.minimum_master_nodes: 2

#

# For more information, consult the zen discovery module documentation.

#

# ---------------------------------- Gateway -----------------------------------

#

# Block initial recovery after a full cluster restart until N nodes are started:

#

#gateway.recover_after_nodes: 3

#

# For more information, consult the gateway module documentation.

#

# ---------------------------------- Various -----------------------------------

#

# Require explicit names when deleting indices:

#

#action.destructive_requires_name: true

# 跨域

http.cors.enabled: true

http.cors.allow-origin: "*"
需要特别注意的是:
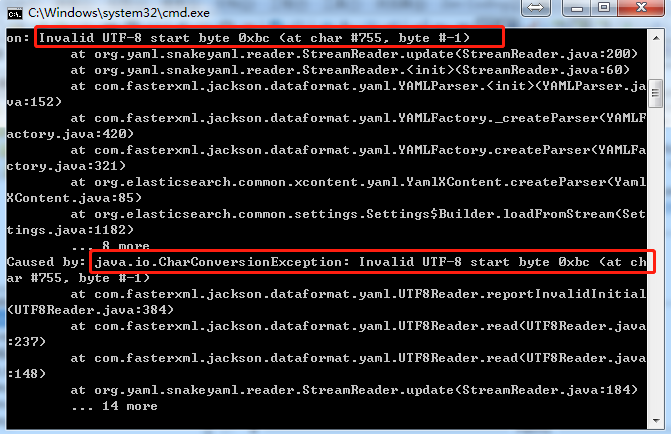
1. 如果你的elasticSearch节点在 elasticsearch.yml中添加了中文之后,导致elasticSearch无法启动,就必须把yml文件中的中文删除,然后就可以重启启动了。报错信息如下:
2. 配置文件书写的时候需要注意:属性必须定格写,之后是一个“:”,之后空格,然后是属性值。不能使用tab键。
3. 启动集群
分别启动三个elasticSearch节点即可启动集群。
4. 一个小的技巧
如果你也是和我一样,使用的是一台机器的三个elasticSearch服务端,每次都需要点到文件中,点击elasticsearch.bat,确实挺麻烦,那么你可以试试批处理。
右键创建一个文件,命名为xxxx.bat即可。使用记事本打开,然后写入如下命令,保存即可。
@echo off

title ES集群启动工具

REM 切换命令行目录为当前BAT所在目录

cd /d E:\ElasticSearch\elasticsearch-6.3.2\bin

start elasticsearch.bat

echo elasticsearch1正在启动。。。

cd /d E:\ElasticSearch\elasticsearch-6.3.2_02\bin

start elasticsearch.bat

echo elasticsearch2正在启动。。。

cd /d E:\ElasticSearch\elasticsearch-6.3.2_03\bin

start elasticsearch.bat

echo elasticsearch3正在启动。。。
作用就是:分别自动切换到三个elasticSearch的目录,然后自动点击 elasticsearch.bat,启动服务端。
如果你还安装了head插件,每次点开启动也挺麻烦,可以直接在批处理后面添加语句即可:当elasticSearch服务端完全启动之后,点击任意键启动head插件
echo 任意键继续启动head插件

pause

cd /d E:\ElasticSearch\head

call grunt server
综上:你只需要双击你的批处理工具 xxxx.bat就可以完成集群的启动了,如果你在多台服务器上,那么还是一个一个启动吧。
ElasticSearch(七):ElasticSearch集群的搭建的更多相关文章
- ElasticSearch高可用集群环境搭建和分片原理
1.ES是如何实现分布式高并发全文检索 2.简单介绍ES分片Shards分片技术 3.为什么ES主分片对应的备分片不在同一台节点存放 4.索引的主分片定义好后为什么不能做修改 5.ES如何实现高可用容 ...
- hadoop(七) - hadoop集群环境搭建
一. 前言: hadoop2.0已经公布了稳定版本号了,添加了非常多特性,比方HDFS HA.YARN等.最新的hadoop-2.4.1又添加了YARN HA 注意:apache提供的hadoop-2 ...
- ElasticSearch 集群环境搭建,安装ElasticSearch-head插件,安装错误解决
ElasticSearch-5.3.1集群环境搭建,安装ElasticSearch-head插件,安装错误解决 说起来甚是惭愧,博主在写这篇文章的时候,还没有系统性的学习一下ES,只知道可以拿来做全文 ...
- 全文搜索引擎 Elasticsearch 入门:集群搭建
本文主要介绍什么是 ElasticSearch 以及为什么需要它,如何在本机安装部署 ElasticSearch 实例,同时会演示安装 ElasticSearch 插件,以及如何在本地部署多实例集群, ...
- Elasticsearch(ES)集群的搭建
1. 概述 Elasticsearch(ES)集群支持分片和副本,能够很容易的实现负载均衡.扩容.容灾.高可用. 今天我们就来聊一下,Elasticsearch(ES)集群是如何搭建的. 2. 场景介 ...
- Elasticsearch高级之-集群搭建,数据分片
目录 Elasticsearch高级之-集群搭建,数据分片 一 广播方式 二 单播方式 三 选取主节点 四 什么是脑裂 五 错误识别 Elasticsearch高级之-集群搭建,数据分片 es使用两种 ...
- 原创 | 手摸手带您学会 Elasticsearch 单机、集群、插件安装(图文教程)
欢迎关注笔者的公众号: 小哈学Java, 每日推送 Java 领域干货文章,关注即免费无套路附送 100G 海量学习.面试资源哟!! 个人网站: https://www.exception.site/ ...
- Elasticsearch系列---生产集群部署(上)
概要 本篇开始介绍Elasticsearch生产集群的搭建及相关参数的配置. ES集群的硬件特性 我们从开始编程就接触过各种各样的组件,而每种功能的组件,对硬件要求的特性都不太相同,有的需要很强的CP ...
- 1.ElasticSearch系列之集群部署
第一步:安装JDK JDK要求jdk1.8+,不安装也可以,ES自带JDK 第二步:系统配置 2.1 禁用交换区 sudo swapoff -a 2.2 开最大文件数的限制 编辑文件 /etc/sec ...
- 使用Spring Data ElasticSearch+Jsoup操作集群数据存储
使用Spring Data ElasticSearch+Jsoup操作集群数据存储 1.使用Jsoup爬取京东商城的商品数据 1)获取商品名称.价格以及商品地址,并封装为一个Product对象,代码截 ...
随机推荐
- iOS进阶_Socket(Socket简介&代码演练)
网络通讯三要素 TCP & UDP 三次握手 断开连接的四次握手 Socket套接字 了解了上面的概念,我们开始演练一下Socket #import "ViewController. ...
- 算法笔记--sg函数详解及其模板
算法笔记 参考资料:https://wenku.baidu.com/view/25540742a8956bec0975e3a8.html sg函数大神详解:http://blog.csdn.net/l ...
- NotifyIcon实现托盘程序
NotifyIcon 控件的常用属性属性:Icon类型:System.Drawing.Icon说明:将在系统任务栏中显示的图标.可以在设计时指定,也可在运行时动态指定.属性:Text类型:String ...
- 雷林鹏分享:C# 多态性
C# 多态性 多态性意味着有多重形式.在面向对象编程范式中,多态性往往表现为"一个接口,多个功能". 多态性可以是静态的或动态的.在静态多态性中,函数的响应是在编译时发生的.在动态 ...
- 3.2 x86体系结构
计算机组成 3 指令系统体系结构 3.2 x86体系结构 X86是商业上最为成功,影响力最大的一种体系结构.但从技术的角度看,它又存在着很多的问题,那我们就来一起分析X86这种体系结构的特点. 要探讨 ...
- Ubuntu18.04配置静态ip遇到的报错
说明: 因为很多测试环境在这个Ubuntu系统上装着,却由于虚拟服务器的重启.断电,每次Ip发生变化,就得更新环境,所以需要把该环境的ip配置成静态的,一劳永逸. 根据以往配置Ubuntu静态ip的经 ...
- python-day52--前端html、css
一.html需掌握的: 1. img标签 属性:src alt title width height 2. a标签 属性:href target 3. ul 标签及li 标签,二者都是块级标签 ul ...
- FREETEXTBOX
本文转自http://blog.csdn.net/JOHNCOOLS/archive/2006/04/08/655553.aspx感谢作者们的付出---------------版本: FreeText ...
- 33. 81. Search in Rotated Sorted Array *HARD*
Suppose a sorted array is rotated at some pivot unknown to you beforehand. (i.e., 0 1 2 4 5 6 7 migh ...
- dubbo的ExtensionLoader
了解4个概念:接口,实现类,wrapper,adaptive. 扩展是接口实现类被wrap之后的对象,adaptive扩展是动态生成的类(例如Dubbo$Adaptive类). dubbo框架为接口指 ...