SpringBoot------注解把配置文件自动映射到属性和实体类
1.映射到属性
package top.ytheng.demo.controller;

import org.springframework.beans.factory.annotation.Value;

import org.springframework.context.annotation.PropertySource;

import org.springframework.stereotype.Controller;

import org.springframework.web.bind.annotation.RequestMapping;

import org.springframework.web.bind.annotation.ResponseBody;

@Controller

@RequestMapping("/file")

@PropertySource({"classpath:application.properties"})

public class FileController {

    @Value("${web.file.path}")

    private String filePath;

    @RequestMapping("/testpath")

    @ResponseBody

    private Object testPath() {

        return filePath;

    }

}
2.映射到类
(1)添加类
package top.ytheng.demo.entity;

import org.springframework.beans.factory.annotation.Value;

import org.springframework.boot.context.properties.ConfigurationProperties;

import org.springframework.context.annotation.PropertySource;

import org.springframework.stereotype.Component;

@Component

//使用该注解时,表示添加前缀,得把@Value注解去掉

//@ConfigurationProperties(prefix="serversettings")

@PropertySource({"classpath:application.properties"})

public class ServerSettings {

    @Value("${serversettings.name}")

    private String name;

    @Value("${serversettings.domain}")

    private String domain;

    public String getName() {

        return name;

    }

    public void setName(String name) {

        this.name = name;

    }

    public String getDomain() {

        return domain;

    }

    public void setDomain(String domain) {

        this.domain = domain;

    }

}
(2)添加控制器
package top.ytheng.demo.controller;

import org.springframework.beans.factory.annotation.Autowired;

import org.springframework.web.bind.annotation.GetMapping;

import org.springframework.web.bind.annotation.RestController;

import top.ytheng.demo.entity.ServerSettings;

@RestController

public class UserController {

    @Autowired

    private ServerSettings serverSettings;

    @GetMapping("/testproperties")

    public Object testProperties() {

        return serverSettings;

    }

}
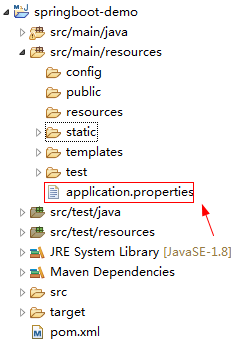
3.添加application.properties配置文件
#自定义文件上传路径

web.file.path=C:\\Users\\chenchao\\eclipse-workspace\\springboot-demo\\src\\main\\resources\\static\\images\\

#端口号

server.port=8090

#测试实体类配置

serversettings.name=www.spring.io

serversettings.domain=springboot
4.添加启动类
package top.ytheng.demo;

import javax.servlet.MultipartConfigElement;

import org.springframework.boot.SpringApplication;

import org.springframework.boot.autoconfigure.SpringBootApplication;

import org.springframework.boot.web.servlet.MultipartConfigFactory;

@SpringBootApplication //等于下面3个

//@SpringBootConfiguration

//@EnableAutoConfiguration

//@ComponentScan

public class DemoApplication {

    public static void main(String[] args) {

        SpringApplication.run(DemoApplication.class, args);

    }

    //文件大小配置

    public MultipartConfigElement multipartConfigElement() {

        MultipartConfigFactory factory = new MultipartConfigFactory();

        //单个文件最大

        factory.setMaxFileSize("10240KB");

        //设置总上传数据总大小

        factory.setMaxRequestSize("102400KB");

        return factory.createMultipartConfig();

    }

}
5.测试路径
http://localhost:8090/file/testpath

http://localhost:8090/testproperties
SpringBoot------注解把配置文件自动映射到属性和实体类的更多相关文章
- SpringBoot注解把配置文件自动映射到属性和实体类实战
SpringBoot注解把配置文件自动映射到属性和实体类实战 简介:讲解使用@value注解配置文件自动映射到属性和实体类 1.配置文件加载 方式一 1.Controller上面配置 @Propert ...
- 小D课堂-SpringBoot 2.x微信支付在线教育网站项目实战_2-7.接口配置文件自动映射到属性和实体类配置
笔记 7.接口配置文件自动映射到属性和实体类配置 简介:使用@value注解配置文件自动映射到属性和实体类 1.添加 @Component或者Configuration 注解: ...
- SpringBoot配置文件自动映射到属性和实体类(8)
一.配置文件加载 1.Controller中配置并指向文件 @Controller @PropertySource(value = { "application.properties&quo ...
- 利用在线工具根据JSon数据自动生成对应的Java实体类
如果你希望根据JSon数据自动生成对应的Java实体类,并且希望能进行变量的重命名,那么“JSON To Java”一定适合你.(下面的地址需要FQ) https://jsontojava.appsp ...
- T4 模板自动生成带注释的实体类文件
T4 模板自动生成带注释的实体类文件 - 只需要一个 SqlSugar.dll 生成实体就是这么简单,只要建一个T4文件和 文件夹里面放一个DLL. 使用T4模板教程 步骤1 创建T4模板 如果你没有 ...
- EF自动创建数据库步骤之一(实体类写法)
文章演示使用EF自动创建数据库第一个步骤创建实体类. 一.创建表映射实体类 using System; using System.Collections.Generic; using System.C ...
- springboot自定义属性文件与bean映射注入属性值
主要有几点: 一.导入依赖 springboot的包和: <dependency> <groupId>org.springframework.boot</groupId& ...
- hibernate 数据库列别名自动映射pojo属性名
package com.pccw.business.fcm.common.hibernate; import java.lang.reflect.Field; import java.math.Big ...
- T4 模板自动生成带注释的实体类文件 - 只需要一个 SqlSugar.dll
生成实体就是这么简单,只要建一个T4文件和 文件夹里面放一个DLL. 使用T4模板教程 步骤1 创建T4模板 ,一定要自已新建,把T4代码复制进去,好多人因为用我现成的T4报错(原因不明) 点击添加文 ...
随机推荐
- 【驱动】——错误: 初始值设定项里有未知的字段‘ioctl’
这个错误网上搜索发现3.0.0.15版本内核 file_operation结构体已经删除了ioctl函数,取代的是: long (*unlocked_ioctl) (struct file *, un ...
- Java 应该被记住的8位大人物
这里列举了 8 个 Java 人物,他们创建了对 Java 社区贡献很大的框架.产品.工具和图书,也因此改变了 Java 的编码方法. 8. Tomcat 和 Ant 创办人 James Duncan ...
- 关于Unity中天空盒的使用
天空盒 是一个盒子,一个正方形的盒子.其实本身也是一种shader,需要材质球做载体. 1: 一个场景是由6幅正方形的纹理图无缝拼接而成, 在视野看来位于真实的视野一样;2: 两种天空盒: 场景天空盒 ...
- android下通过app名字打开程序(activity)链接
Version:0.9 StartHTML:-1 EndHTML:-1 StartFragment:00000099 EndFragment:00004599 1.手机遥控器模拟快捷键启动app 刚开 ...
- ubuntu运行命令tee显示和保存为log
一般有三种需求: 假如我要执行一个py文件 python class.py 1:将命令输出结果保存到文件log.log python class.py |tee log.log 结果就是:屏幕输出和直 ...
- 初试PyOpenGL二 (Python+OpenGL)基本地形生成与高度检测
在上文中,讲述了PyOpenGL的基本配置,以及网格,球形的生成,以及基本的漫游.现在利用上一篇的内容,来利用高程图实现一个基本的地形,并且,利用上文中的第三人称漫游,以小球为视角,来在地形上前后左右 ...
- 使用Photoshop实现弹簧字效果
一.准备工作 软件环境:PhotoshopCS6 目的:使用路径实现弹簧字效果 二.实验步骤 1,新建画布 2,背景改为黑色,快捷键 Alt+Delete 3,键入文字,发现文字显示不出来,这时选择左 ...
- MongoDB MapReduce 小例子
var map = function(){ if (this.gscode == "ZTJB"){ ymd = this.ymd; emit("maxymd", ...
- 转:用法总结:NSNumber、NSString、NSDate、NSCalendarDate、NSData(待续)
NSNumber + (NSNumber *)numberWithInt:(int)value; + (NSNumber *)numberWithDouble:(double)value; - (in ...
- Redis系列-php怎么通过redis扩展使用redis
From: http://blog.csdn.net/love__coder/article/details/8691679 通过前面几篇blog,我们应该对redis有个大致的认识,这里再讲解下,p ...