luffy
Luffy
本项目使用Vue+Vite+Django+DRF+Elementui-Plus编写
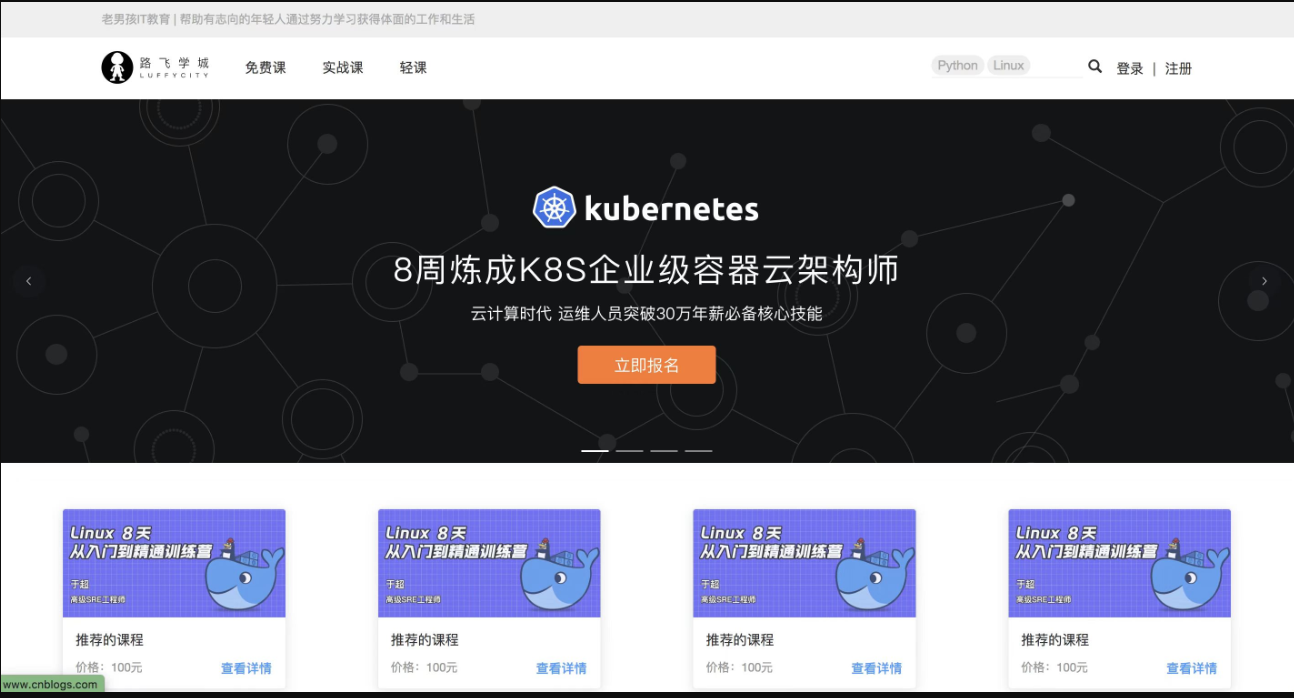
项目需求介绍
# 线上销售课程的
-商城
-知识付费类
# 需求
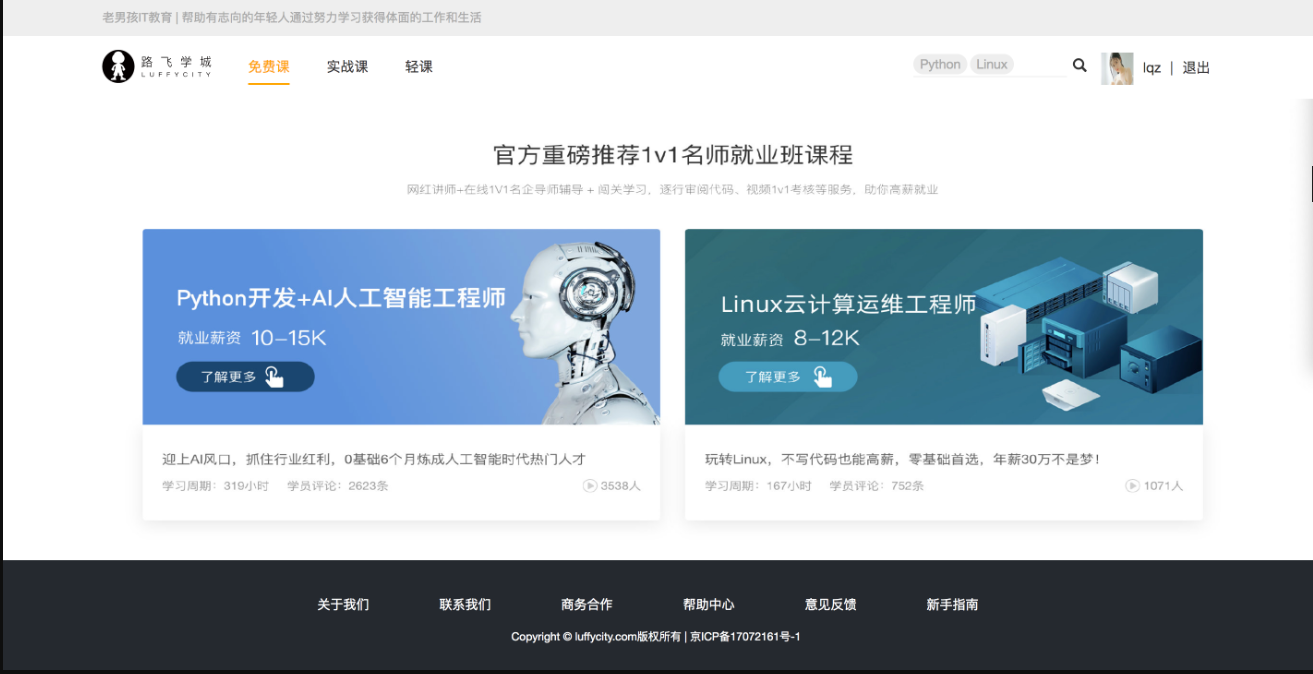
-首页功能
-轮播图接口
-推荐课程接口
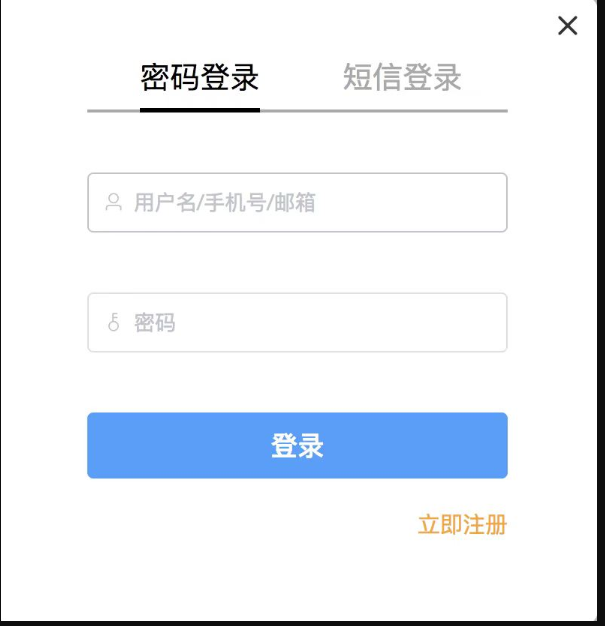
-用户功能
-用户名密码登录
-手机号验证码登录
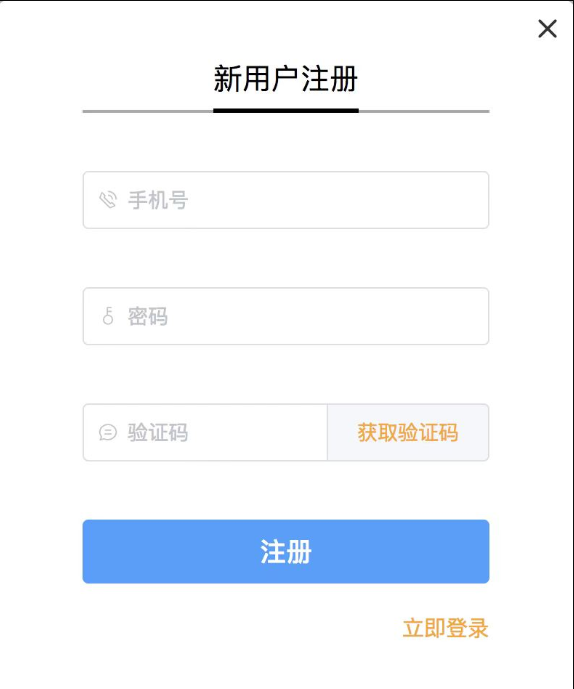
-发送手机验证码
-验证手机号是否注册过
-注册接口
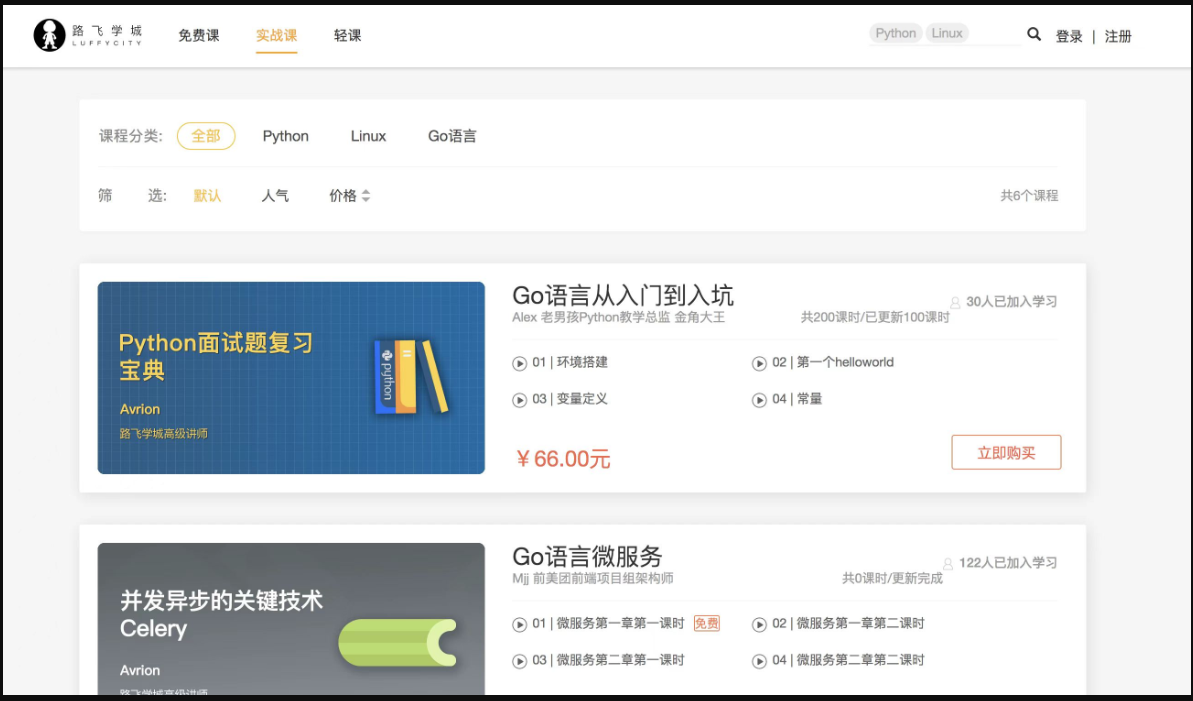
-课程列表功能
-课程列表接口
-排序,过滤,分页
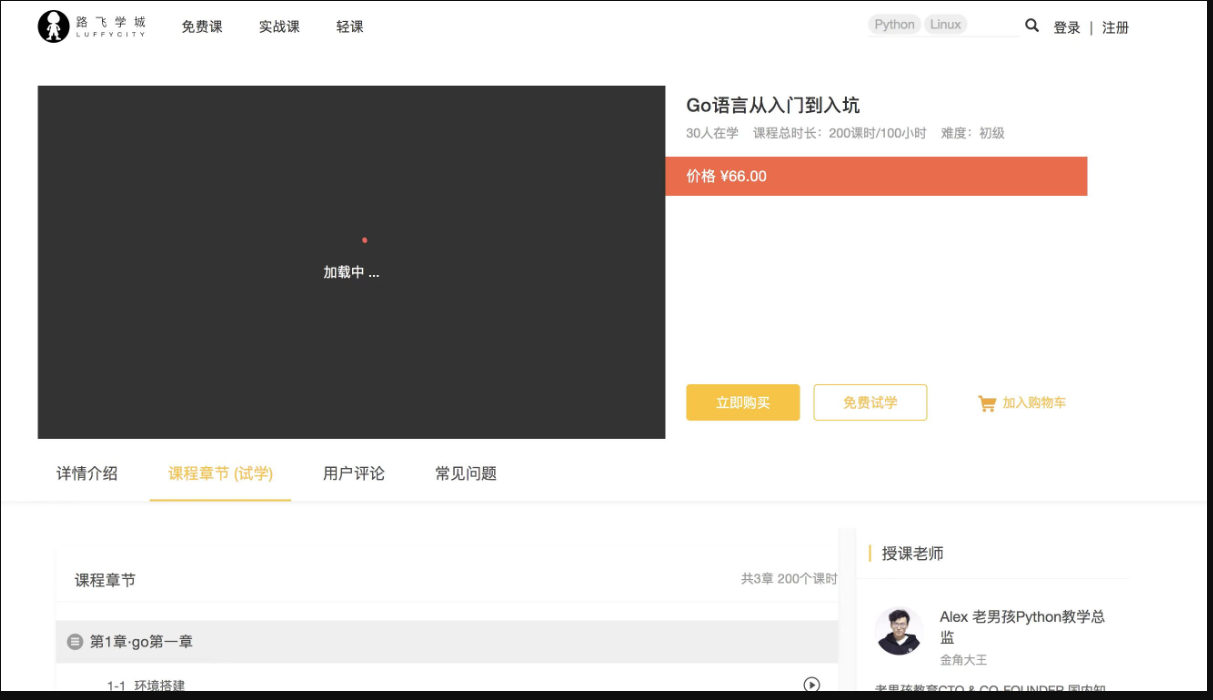
-课程详情
-课程详情接口
-视频播放功能
-视频托管(第三方,自己平台)
-下单功能
-支付宝支付:生成支付链接,付款,回调修改订单状态
-购买成功功能

pip换源
文件管理器文件路径地址栏敲:%APPDATA% 回车,快速进入 C:\Users\电脑用户\AppData\Roaming 文件夹中

新建 pip 文件夹并在文件夹中新建 pip.ini 配置文件

新增 pip.ini 配置文件内容
[global]

index-url = https://mirrors.aliyun.com/pypi/simple

[install]

use-mirrors =true

mirrors =https://mirrors.aliyun.com/pypi/simple

trusted-host =mirrors.aliyun.com
虚拟环境
使用mkvirtualenv前提是需要下载模块
配置详细 转载至:https://www.cnblogs.com/alice-cj/p/11642744.html
pip install virtualenvwrapper

pip install virtualenvwrapper-win  #Windows使用该命令
mkvirtualenv -p python3 luffy
pip install django==4.2.13
创建后端项目 使用命令
django-admin startproject 项目名
python中打开创建的项目,配置虚拟解释器环境
项目目录以及后端配置
目录结构
├── luffy_api
├── logs/ # 项目运行时/开发时日志目录 - 包
├── manage.py # 脚本文件
├── luffy_api/ # 项目主应用,开发时的代码保存 - 包
├── apps/ # 开发者的代码保存目录,以模块[子应用]为目录保存 - 包
├── libs/ # 第三方类库的保存目录[第三方组件、模块] - 包
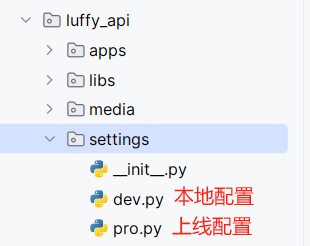
├── settings/ # 配置目录 - 包
├── dev.py # 项目开发时的本地配置
└── prod.py # 项目上线时的运行配置
├── asgi.py # 项目上线
├── media/ # 放图片
├── wsgi.py # 项目上线用
├── urls.py # 总路由
└── utils/ # 多个模块[子应用]的公共函数类库[自己开发的组件]
└── scripts/ # 保存项目运营时,测试的脚本文件 - 文件夹
创建app
python ../../manage.py startapp user
在django中注册app的时候,会报错,因为从环境变量找不到
No module named 'user'
把把apps目录加入到环境变量,以后注册app,只需要写名字即可
import sys,os

# BASE_DIR 是 小luffy_api

BASE_DIR = Path(__file__).resolve().parent.parent

apps=os.path.join(BASE_DIR, 'apps')

sys.path.insert(0,apps) # 把apps目录加入到环境变量

sys.path.insert(0,str(BASE_DIR)) # 把小luffy_api目录加入到环境变量

# 以后我们导入项目中的模块和包,只需要从 apps 开始导起或 小luffy_api 目录开始导起 或 大 luffy_api

# 优先相对导入-->使用绝对导入,尽量从最短路径开始导起
settings文件夹中,修改一个本地配置文件和上线配置文件 dev pro
还需要修改manage.py配置
os.environ.setdefault('DJANGO_SETTINGS_MODULE', 'luffy_api.settings.dev'
上线配置需要在 asig.py 和 wsgi.py 里修改
os.environ.setdefault('DJANGO_SETTINGS_MODULE', 'luffy_api.settings.pro')
国际化(中文)
LANGUAGE_CODE = 'zh-hans'

TIME_ZONE = 'Asia/Shanghai'

USE_I18N = True

USE_TZ = False
开启media访问
在settings/dev.py中开启media访问
MEDIA_URL = '/media/'

MEDIA_ROOT = os.path.join(BASE_DIR, 'media')
在总路由中配置
这样就可以访问到了
path('media/<path:path>', serve, {'document_root': settings.MEDIA_ROOT})

# 这里访问路径就是 http://127.0.0.1:8000/media/ 后面的路径自己定
记录日志
settings/dev.py
# 真实项目上线后,日志文件打印级别不能过低,因为一次日志记录就是一次文件io操作

LOGGING = {

    'version': 1,

    'disable_existing_loggers': False,

    'formatters': {

        'verbose': {

            'format': '%(levelname)s %(asctime)s %(module)s %(lineno)d %(message)s'

        },

        'simple': {

            'format': '%(levelname)s %(module)s %(lineno)d %(message)s'

        },

    },

    'filters': {

        'require_debug_true': {

            '()': 'django.utils.log.RequireDebugTrue',

        },

    },

    'handlers': {

        'console': {

            # 实际开发建议使用WARNING

            'level': 'DEBUG',

            'filters': ['require_debug_true'],

            'class': 'logging.StreamHandler',

            'formatter': 'simple'

        },

        'file': {

            # 实际开发建议使用ERROR

            'level': 'INFO',

            'class': 'logging.handlers.RotatingFileHandler',

            # 日志位置,日志文件名,日志保存目录必须手动创建,注:这里的文件路径要注意BASE_DIR代表的是小luffyapi

            'filename': os.path.join(os.path.dirname(BASE_DIR), "logs", "luffy.log"),

            # 日志文件的最大值,这里我们设置300M

            'maxBytes': 300 * 1024 * 1024,

            # 日志文件的数量,设置最大日志数量为10

            'backupCount': 10,

            # 日志格式:详细格式

            'formatter': 'verbose',

            # 文件内容编码

            'encoding': 'utf-8'

        },

    },

    # 日志对象

    'loggers': {

        'django': {

            'handlers': ['console', 'file'],

            'propagate': True, # 是否让日志信息继续冒泡给其他的日志处理系统

        },

    }

}
使用
创建一个common_logger.py文件 放入
import logging

logger = logging.getLogger('django')
导入使用
from utils.common_logger import logger

class UserView(GenericViewSet):

    def list(self, request):

        logger.info('你好heart')

        return Response({'code': 100, "msg": 'ok'})
loguru
pip install loguru
from loguru import logger

logger = logger.opt()
logger.debug('这是一条debug日志')

logger.info("这是一条信息日志")

logger.warning("这是一条警告日志")

logger.error("这是一条错误日志")
日志级别 7级
| 等级 | 方法 |
|---|---|
| TRACE | logger.trace() |
| DEBUG | logger.debug() |
| INFO | logger.info() |
| SUCESS | logger.sucess() |
| WARNING | logger.warnning() |
| ERROR | logger.error() |
| CRITICAL | logger.critical() |
数据库创建
给每个项目创建一个数据库用户,即使当前项目的用户数据泄露,只会泄露当前项目中的库中的表
创建普通用户,给这个用户只授权 某个 库的权限
#1 创建luffy库,给项目使用
# 在mysql8中的utf8 就是utf8mb3
create database luffy default charset=utf8mb4;
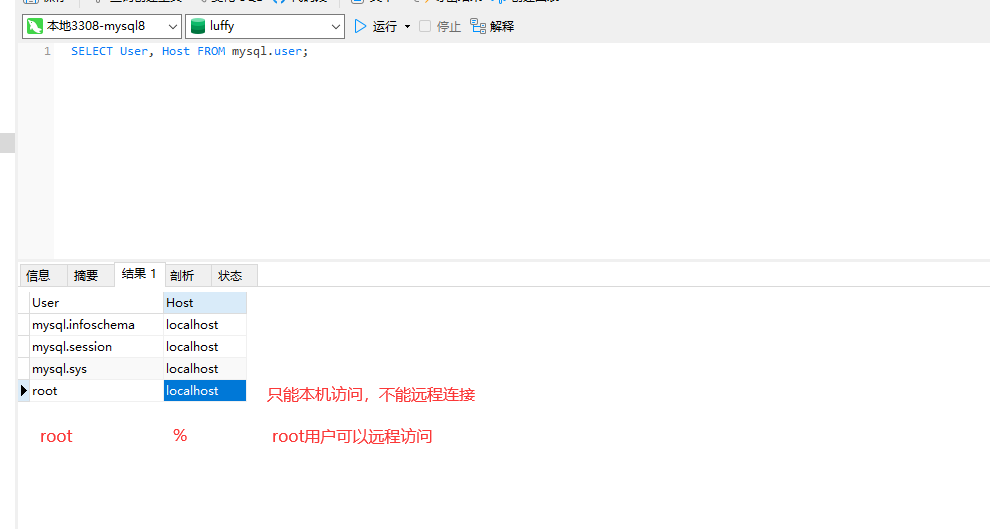
#2 查看用户
SELECT User, Host FROM mysql.user;
#3 创建用户
CREATE USER 'luffy'@'localhost' IDENTIFIED BY '***heart***'; # 当然不是真的 ^_^
CREATE USER 'luffy'@'%' IDENTIFIED BY '***heart***'; # 当然不是真的 :)
GRANT ALL PRIVILEGES ON luffy.* TO 'luffy'@'localhost' WITH GRANT OPTION;
GRANT ALL PRIVILEGES ON luffy.* TO 'luffy'@'%' WITH GRANT OPTION;
连接数据库
user = os.environ.get('MYSQL_USER', 'luffy')

password = os.environ.get('MYSQL_PASSWORD', '***heart***') # 不告诉你真的 A_A

DATABASES = {

    "default": {

        "ENGINE": "django.db.backends.mysql",

        "NAME": "luffy",

        "HOST": '127.0.0.1',

        'PORT': 3307,

        'USER': user,

        "PASSWORD": password

    }

}
models表创建
User
安装pillow
pip install pillow
from django.db import models

from django.contrib.auth.models import AbstractUser

class User(AbstractUser):

    mobile = models.CharField(max_length=11, unique=True)

    # 需要pillow包的支持

    # 默认使用 media/icon/default.png 这个图片

    icon = models.ImageField(upload_to='icon', default='icon/default.png')

    class Meta:

        db_table = 'luffy_user' # 自定义表名

        verbose_name = '用户表' # admin后台显示的名字

        verbose_name_plural = verbose_name

    def __str__(self):

        return self.username
settings/dev.py
配置auth表
AUTH_USER_MODEL='user.User'
封装全局异常
utils/common_exception.py
from rest_framework.views import exception_handler as drf_exception_handler

from rest_framework.response import Response

from utils.common_response import APIResponse

from utils.common_logger import logger

# 自定义异常类

class PasswordException(Exception):

    pass

def exception_handler(exc, context):

    res = drf_exception_handler(exc, context)

    request = context.get("request")

    view = context.get("view")

    ip = request.META.get("REMOTE_ADDR")

    path = request.get_full_path()

    method = request.method

    user_id = request.user.id or "匿名用户"

    logger.error(

        f"操作出错!{str(exc)},视图类:{str(view)},ip:{ip},请求地址:{path},请求方式:{method},用户id:{user_id}"

    )

    if res:

        # drf异常

        if isinstance(res.data, dict):

            err = res.data.get("detail")

        elif isinstance(res.data, list):

            err = res.data[0]

        else:

            err = "服务异常,请稍后再尝试,[drf]"

            response = APIResponse(code=4000, msg=err)

    else:

        # 非drf异常

        if isinstance(exc, ZeroDivisionError):

            err = "数据操作出错,除以0了"

            code = 4001

        elif isinstance(exc, PasswordException):

            err = "密码错误!"

            code = 4002

        else:

            err = f"系统错误:{str(exc)}"

            code = 4004

        response = APIResponse(code=code, msg=err)

    return response
封装APIResponse
from rest_framework.response import Response

class APIResponse(Response):

    def __init__(self, code=100, msg="成功!", headers=None, status=None, **kwargs):

        data = {"code": code, "msg": msg}

        if kwargs:

            data.update(kwargs)

        super().__init__(data=data, status=status, headers=headers)
前端项目创建
npm create vite@latest
前端配置
axios
cnpm install axios -S
elementui
cnpm install element-ui -S
cookies
cnpm install vue-cookies -S
src/main.js
provide 和 inject
import { createApp } from 'vue'

import './style.css'

import App from './App.vue'

import router from "./router/index.js";

import {createPinia} from 'pinia'

import ElementPlus from 'element-plus'

import 'element-plus/dist/index.css'

import cookies from 'vue-cookies'

import settings from "./assets/js/settings";

import './assets/css/global.css'

const pinia = createPinia()

createApp(App).use(router).use(pinia).use(ElementPlus).provide('$cookies', cookies).provide('$settings',settings).mount('#app')
assets/js/settings.js
const BASE_URL='http://127.0.0.1:8000/api/v1/'

export default {

    test:BASE_URL+'user/test/',

}
组件中使用
views/HomeView.vue
inject
<script setup>

import axios from 'axios';

import { inject } from 'vue'

const settings = inject('$settings')

axios.get(settings.test).then(

    res => {

        console.log(res)

    }

)

</script>
global.css
去掉默认样式,声明全局样式和项目的初始化样式
body, h1, h2, h3, h4, h5, h6, p, table, tr, td, ul, li, a, form, input, select, option, textarea {

        margin: 0;

        padding: 0;

        font-size: 15px;

    }

    a {

        text-decoration: none;

        color: #333;

    }

    ul {

        list-style: none;

    }

    table {

        border-collapse: collapse; /* 合并边框 */

    }
跨域问题详解
1 浏览器同源策略

	-同源策略(Same origin policy)是一种约定,它是浏览器最核心也最基本的安全功能

    -请求的url地址,必须与浏览器上的url地址处于同域上,也就是域名(www.xx.com),端口(80,8080),协议(ftp,https,http)相同.

	-浏览器上就会报错,这个就是同源策略的保护

2 浏览器的安全策略

	-访问一个跨域[域名,端口,协议不同]接口---》后端正常执行--》浏览器拦截了

    -只有web端需要处理跨域,小程序,app都不需要

3 解决跨域问题

	-cors :咱们使用的,后端配置

    -JSONP:忽略

    -nginx代理跨域(服务器代理)

    -vue 代理(开发阶段)

4 CORS(跨域资源共享)简介

    CORS需要浏览器和服务器【响应头加东西】同时支持。目前,所有浏览器都支持该功能

    整个CORS通信过程,都是浏览器自动完成,不需要用户参与。对于开发者来说,CORS通信与同源的AJAX通信没有差别,代码完全一样。浏览器一旦发现AJAX请求跨源,就会自动添加一些附加的头信息,有时还会多出一次附加的请求,但用户不会有感觉。

    因此,实现CORS通信的关键是服务器。只要服务器实现了CORS接口,就可以跨源通信

5 cors 两种请求

	-简单请求:请求一次--》直接发送--》服务的处理了cors--》顺利返回--》如果服务的没处理就报错

    -非简单请求:先发一次options请求--》服务的如果处理了cors--》再发真正的请求-》如果服务端没处理,它就不发了

6 简单和非简单区别

	# 符合下面两个条件就是简单请求

	- 请求方法是以下三种方法之一:

        HEAD

        GET

        POST

    - HTTP的头信息不超出以下几种字段:

        Accept

        Accept-Language

        Content-Language

        Last-Event-ID

        Content-Type:只限于三个值application/x-www-form-urlencoded、multipart/form-data、text/plain
方式一
写中间件解决跨域
# -*- coding: utf-8 -*-

# author : heart

# blog_url : https://www.cnblogs.com/ssrheart/

# time : 2024/5/10

from django.utils.deprecation import MiddlewareMixin

from utils.common_response import APIResponse

class MiddlewareTest(MiddlewareMixin):

    def process_response(self, request, response):

        response['Access-Control-Allow-Origin'] = '*'

        if request.method == 'OPTIONS':

            response['Access-Control-Allow-Methods'] = '*'

            response['Access-Control-Allow-Headers'] = '*'

        return response
settings/dev.py
MIDDLEWARE = [

    "utils.common_middleware.MiddlewareTest"

]
方式二
利用第三方 corsheaders
pip install django-cors-headers
INSTALLED_APPS = [

    "corsheaders",

]

MIDDLEWARE = [

    "corsheaders.middleware.CorsMiddleware",

]

CORS_ORIGIN_ALLOW_ALL = True

CORS_ALLOW_METHODS = (

	'DELETE',

	'GET',

	'OPTIONS',

	'PATCH',

	'POST',

	'PUT',

	'VIEW',

)

CORS_ALLOW_HEADERS = (

	'XMLHttpRequest',

	'X_FILENAME',

	'accept-encoding',

	'authorization',

	'content-type',

	'dnt',

	'origin',

	'user-agent',

	'x-csrftoken',

	'x-requested-with',

	'Pragma',

    # 额外允许的请求头

	'token',

)
后端功能
BaseModel
创建一个虚拟表,做为继承的基类
from django.db import models

class BaseModel(models.Model):

    created_time = models.DateTimeField(auto_now_add=True, verbose_name='创建时间')

    updated_time = models.DateTimeField(auto_now=True, verbose_name='最后更新时间')

    is_delete = models.BooleanField(default=False, verbose_name='是否删除')

    is_show = models.BooleanField(default=True, verbose_name='是否上架')

    orders = models.IntegerField(verbose_name='优先级')

    class Meta:

        abstract=True # 只用来继承,不在数据库中生成表
轮播图接口
banner表
class Banner(BaseModel):

    title = models.CharField(max_length=16, unique=True, verbose_name='名称')

    image = models.ImageField(upload_to='banner', verbose_name='图片')

    # 跳转有两种情况:

    # 1 外链

    # 2 自己的页面

    link = models.CharField(max_length=64, verbose_name='跳转链接')

    info = models.TextField(verbose_name='详情')
serializer
from rest_framework import serializers

from .models import Banner

class Bannerserializer(serializers.ModelSerializer):

    class Meta:

        model = Banner

        fields = ["title", "link"]
views
from django.shortcuts import render

from rest_framework.viewsets import GenericViewSet

from django.conf import settings

from utils.common_mixin import APIListModelMixin

from .models import Banner

from .serializer import Bannerserializer

from django.conf import settings

from utils.common_response import APIResponse

from utils.common_logger import logger

from django.core.cache import cache

from rest_framework.mixins import ListModelMixin

class BannerView(GenericViewSet, APIListModelMixin):

    queryset = Banner.objects.all().filter(is_delete=False, is_show=True).order_by("orders")[0: settings.BANNER_COUNT]

    serializer_class = Bannerserializer

    # 2024/5/15 增加了接口缓存

    def list(self, request, *args, **kwargs):

        banner_list = cache.get('banner_list')

        if not banner_list:

            res = ListModelMixin.list(self, request, *args, **kwargs)

            banner_list = res.data

            cache.set('banner_list', banner_list)

        return APIResponse(results=banner_list)

# 2024 5/16 接口缓存版本

# views.py

class BannerView(GenericViewSet, CacheListModelMixin):

    cache_key = "banner_list"

    queryset = (

        Banner.objects.all()

        .filter(is_delete=False, is_show=True)

        .order_by("orders")[0 : settings.BANNER_COUNT]

    )

    serializer_class = Bannerserializer

# common_mixin.py

class CacheListModelMixin(ListModelMixin):

    cache_key = None

    def list(self, request, *args, **kwargs):

        assert self.cache_key, APIException(

            "如果继承CacheListModelMixin,必须要加cache_key!"

        )

        results = cache.get(self.cache_key)

        if not results:

            logger.info("走了数据库")

            res = super().list(request, *args, **kwargs)

            results = res.data

            cache.set(self.cache_key, results)

        return APIResponse(results=results)
common_mixin
封装原有的五个视图类 让返回格式是我们自己写的APIResponse
from rest_framework.mixins import (

    CreateModelMixin,

    ListModelMixin,

    UpdateModelMixin,

    DestroyModelMixin,

    RetrieveModelMixin,

)

from utils.common_response import APIResponse

class APIListModelMixin(ListModelMixin):

    def list(self, request, *args, **kwargs):

        res = super().list(request, *args, **kwargs)

        return APIResponse(results=res.data)
自定义配置
luffy_api/settings 下新建 common_settings.py
BANNER_COUNT = 3 # 设置轮播图数量为3
在dev 和 pro中导入公共配置 开发或上线环境都会用
from .common_settings import *
在任意位置,导入django配置文件
from django.conf import settings

queryset = Banner.objects.all().filter(is_delete=False, is_show=True).order_by("orders")[0: settings.BANNER_COUNT]
校验手机号是否存在接口
GET - http://127.0.0.1:8000/api/v1/user/mobile/check_mobile/?mobile=
views
class UserMobileView(GenericViewSet):

    @action(methods=['GET'], detail=False)

    def check_mobile(self, request, *args, **kwargs):

        mobile = request.query_params.get('mobile')

        user = User.objects.filter(mobile=mobile).first()

        assert user, '手机号不存在!'

        return APIResponse(msg='手机号存在!')
apps/user/urls
from django.contrib import admin

from django.urls import path, include

from rest_framework.routers import SimpleRouter

from .views import UserMobileView

router = SimpleRouter()

router.register("mobile", UserMobileView, "mobile")

urlpatterns = [

    path("", include(router.urls)),

]
多方式登录接口
POST - http://127.0.0.1:8000/api/v1/user/mul_login/multiple_login/
views
class UserView(GenericViewSet):

    serializer_class = LoginSerializer

    @action(methods=['POST'], detail=False)

    def mul_login(self, request, *args, **kwargs):

        # 1 把校验逻辑写在序列化类中

        serializer: LoginSerializer = self.get_serializer(data=request.data)

        serializer.is_valid(raise_exception=True)

        token = serializer.context.get('token')

        username = serializer.context.get('username')

        icon = serializer.context.get('icon')

        return APIResponse(token=token, username=username, icon=icon)
LoginSerializer
class LoginSerializer(serializers.ModelSerializer):

    username = serializers.CharField()

    class Meta:

        model = User

        fields = ['username', 'password', 'icon']

        extra_kwargs = {

            'password': {'write_only': True}  # 它不做序列化

        }

    def _get_user(self, attrs):

        username = attrs.get('username')

        password = attrs.get('password')

        if re.match(r'^1[3-9][0-9]{9}$', username):

            user = User.objects.filter(mobile=username).first()

        elif re.match('^[a-zA-Z0-9_-]+@[a-zA-Z0-9_-]+(\.[a-zA-Z0-9_-]+)+$', username):

            user = User.objects.filter(email=username).first()

        else:

            user = User.objects.filter(username=username).first()

        if user and user.check_password(password):

            return user

        else:

            raise ValidationError('用户名或密码错误')

    def _get_token(self, user):

        refresh = RefreshToken.for_user(user)

        return str(refresh.access_token)

    def _pre_data(self, token, user):

        self.context['token'] = token

        self.context['username'] = user.username

        # self.instance=user # 当前用户,放到instance中了

        self.context['icon'] = settings.BACKEND_URL + "media/" + str(user.icon)  # 不带 域名前缀的

    def validate(self, attrs):

        # 1 取出用户名(手机号,邮箱)和密码

        user = self._get_user(attrs)

        # 2 如果存在:签发token,返回

        token = self._get_token(user)

        # 3 把token,用户名和icon放入context

        self._pre_data(token, user)

        return attrs
utils/common_exception
from rest_framework.views import exception_handler as drf_exception_handler

from rest_framework.response import Response

from utils.common_response import APIResponse

from utils.common_logger import logger

# 自定义异常类

class PasswordException(Exception):

    pass

def exception_handler(exc, context):

    res = drf_exception_handler(exc, context)

    request = context.get("request")

    view = context.get("view")

    ip = request.META.get("REMOTE_ADDR")

    path = request.get_full_path()

    method = request.method

    user_id = request.user.id or "匿名用户"

    logger.error(

        f"操作出错!{str(exc)},视图类:{str(view)},ip:{ip},请求地址:{path},请求方式:{method},用户id:{user_id}"

    )

    if res:

        # drf异常

        if isinstance(res.data, dict):

            err = res.data.get("detail") or res.data.get('non_field_errors') or '请正确输入!'

        elif isinstance(res.data, list):

            err = res.data[0]

        else:

            err = "服务异常,请稍后再尝试,[drf]"

        response = APIResponse(code=4000, msg=err)

    else:

        # 非drf异常

        if isinstance(exc, ZeroDivisionError):

            err = "数据操作出错,除以0了"

            code = 4001

        elif isinstance(exc, PasswordException):

            err = "密码错误!"

            code = 4002

        else:

            err = f"{str(exc)}"

            code = 4004

        response = APIResponse(code=code, msg=err)

    return response
腾讯云短信封装
发送短信
# -*- coding: utf-8 -*-

from tencentcloud.common import credential

from tencentcloud.common.exception.tencent_cloud_sdk_exception import TencentCloudSDKException

from tencentcloud.sms.v20210111 import sms_client, models

from tencentcloud.common.profile.client_profile import ClientProfile

from tencentcloud.common.profile.http_profile import HttpProfile

try:

    # SecretId、SecretKey 查询: https://console.cloud.tencent.com/cam/capi

    cred = credential.Credential("123123", "123123")

    httpProfile = HttpProfile()

    httpProfile.reqMethod = "POST"  # post请求(默认为post请求)

    httpProfile.reqTimeout = 30    # 请求超时时间,单位为秒(默认60秒)

    httpProfile.endpoint = "sms.tencentcloudapi.com"  # 指定接入地域域名(默认就近接入)

    # 非必要步骤:

    # 实例化一个客户端配置对象,可以指定超时时间等配置

    clientProfile = ClientProfile()

    clientProfile.signMethod = "TC3-HMAC-SHA256"  # 指定签名算法

    clientProfile.language = "en-US"

    clientProfile.httpProfile = httpProfile

    # 实例化要请求产品(以sms为例)的client对象

    # 第二个参数是地域信息,可以直接填写字符串ap-guangzhou,支持的地域列表参考 https://cloud.tencent.com/document/api/382/52071#.E5.9C.B0.E5.9F.9F.E5.88.97.E8.A1.A8

    client = sms_client.SmsClient(cred, "ap-guangzhou", clientProfile)

    req = models.SendSmsRequest()

    # 应用 ID 可前往 [短信控制台](https://console.cloud.tencent.com/smsv2/app-manage) 查看

    req.SmsSdkAppId = "123123"

    # 短信签名内容: 使用 UTF-8 编码,必须填写已审核通过的签名

    # 签名信息可前往 [国内短信](https://console.cloud.tencent.com/smsv2/csms-sign) 或 [国际/港澳台短信](https://console.cloud.tencent.com/smsv2/isms-sign) 的签名管理查看

    req.SignName = "123123"

    # 模板 ID: 必须填写已审核通过的模板 ID

    # 模板 ID 可前往 [国内短信](https://console.cloud.tencent.com/smsv2/csms-template) 或 [国际/港澳台短信](https://console.cloud.tencent.com/smsv2/isms-template) 的正文模板管理查看

    req.TemplateId = "123123"

    # 模板参数: 模板参数的个数需要与 TemplateId 对应模板的变量个数保持一致,,若无模板参数,则设置为空

    req.TemplateParamSet = ["8888",'5']

    # 下发手机号码,采用 E.164 标准,+[国家或地区码][手机号]

    # 示例如:+8613711112222, 其中前面有一个+号 ,86为国家码,13711112222为手机号,最多不要超过200个手机号

    req.PhoneNumberSet = ["+8615666777888"]

    # 用户的 session 内容(无需要可忽略): 可以携带用户侧 ID 等上下文信息,server 会原样返回

    req.SessionContext = ""

    # 短信码号扩展号(无需要可忽略): 默认未开通,如需开通请联系 [腾讯云短信小助手]

    req.ExtendCode = ""

    # 国内短信无需填写该项;国际/港澳台短信已申请独立 SenderId 需要填写该字段,默认使用公共 SenderId,无需填写该字段。注:月度使用量达到指定量级可申请独立 SenderId 使用,详情请联系 [腾讯云短信小助手](https://cloud.tencent.com/document/product/382/3773#.E6.8A.80.E6.9C.AF.E4.BA.A4.E6.B5.81)。

    req.SenderId = ""

    resp = client.SendSms(req)

    # 输出json格式的字符串回包

    print(resp.to_json_string(indent=2))

except TencentCloudSDKException as err:

    print(err)
封装成包
# 1 包结构 libs

	-tx_sms

    	-__init__.py #给外部使用的,在这注册

        -settings.py # 配置

        -sms.py      # 核心
settings
SECRET_ID = ''

SECRET_KEY = ''

SMS_SDK_APPID = ""

SIGN_NAME = ''

TEMPLATE_ID = ""
sms
from tencentcloud.common import credential

from tencentcloud.common.exception.tencent_cloud_sdk_exception import TencentCloudSDKException

from tencentcloud.sms.v20210111 import sms_client, models

from tencentcloud.common.profile.client_profile import ClientProfile

from tencentcloud.common.profile.http_profile import HttpProfile

from .settings import *

import random

# 生成n位数字的随机验证码

def get_code(num=4):

    code = ''

    for i in range(num):

        r = random.randint(0, 9)

        code += str(r)

    return code

# 发送短信函数

def send_sms(mobile, code):

    try:

        cred = credential.Credential(SECRET_ID, SECRET_KEY)

        httpProfile = HttpProfile()

        httpProfile.reqMethod = "POST"  # post请求(默认为post请求)

        httpProfile.reqTimeout = 30  # 请求超时时间,单位为秒(默认60秒)

        httpProfile.endpoint = "sms.tencentcloudapi.com"  # 指定接入地域域名(默认就近接入)

        # 非必要步骤:

        # 实例化一个客户端配置对象,可以指定超时时间等配置

        clientProfile = ClientProfile()

        clientProfile.signMethod = "TC3-HMAC-SHA256"  # 指定签名算法

        clientProfile.language = "en-US"

        clientProfile.httpProfile = httpProfile

        # 实例化要请求产品(以sms为例)的client对象

        # 第二个参数是地域信息,可以直接填写字符串ap-guangzhou,支持的地域列表参考 https://cloud.tencent.com/document/api/382/52071#.E5.9C.B0.E5.9F.9F.E5.88.97.E8.A1.A8

        client = sms_client.SmsClient(cred, "ap-guangzhou", clientProfile)

        req = models.SendSmsRequest()

        # 应用 ID 可前往 [短信控制台](https://console.cloud.tencent.com/smsv2/app-manage) 查看

        req.SmsSdkAppId = SMS_SDK_APPID

        # 短信签名内容: 使用 UTF-8 编码,必须填写已审核通过的签名

        # 签名信息可前往 [国内短信](https://console.cloud.tencent.com/smsv2/csms-sign) 或 [国际/港澳台短信](https://console.cloud.tencent.com/smsv2/isms-sign) 的签名管理查看

        req.SignName = SIGN_NAME

        # 模板 ID: 必须填写已审核通过的模板 ID

        # 模板 ID 可前往 [国内短信](https://console.cloud.tencent.com/smsv2/csms-template) 或 [国际/港澳台短信](https://console.cloud.tencent.com/smsv2/isms-template) 的正文模板管理查看

        req.TemplateId = TEMPLATE_ID

        # 模板参数: 模板参数的个数需要与 TemplateId 对应模板的变量个数保持一致,,若无模板参数,则设置为空

        req.TemplateParamSet = [code, '1']

        # 下发手机号码,采用 E.164 标准,+[国家或地区码][手机号]

        req.PhoneNumberSet = [f"+86{mobile}"]

        # 用户的 session 内容(无需要可忽略): 可以携带用户侧 ID 等上下文信息,server 会原样返回

        req.SessionContext = ""

        # 短信码号扩展号(无需要可忽略): 默认未开通,如需开通请联系 [腾讯云短信小助手]

        req.ExtendCode = ""

        # 国内短信无需填写该项;国际/港澳台短信已申请独立 SenderId 需要填写该字段,默认使用公共 SenderId,无需填写该字段。注:月度使用量达到指定量级可申请独立 SenderId 使用,详情请联系 [腾讯云短信小助手](https://cloud.tencent.com/document/product/382/3773#.E6.8A.80.E6.9C.AF.E4.BA.A4.E6.B5.81)。

        req.SenderId = ""

        resp = client.SendSms(req)

        # 输出json格式的字符串回包

        res = resp.to_json_string(indent=2)

        if res.get('SendStatusSet')[0].get('Code') == 'Ok':

            return True

        else:

            return False

    except TencentCloudSDKException as err:

        print(err)

        return False

if __name__ == '__main__':

    print(get_code(3))
发送短信接口
GET - http://127.0.0.1:8000/api/v1/user/mobile/send_sms/?mobile=
views
class UserMobileView(GenericViewSet):

    @action(methods=['GET'], detail=False)

    def send_sms(self, request, *args, **kwargs):

        mobile = request.query_params.get('mobile')

        code = get_code()

        print(code)

        cache.set(f'cache_code_{mobile}', code)

        # 发送短信 - 同步发送

        # res=sms(mobile,code)

        # 返回给前端

        # if res:

        #     return APIResponse(msg='短信发送成功')

        # else:

        #     return APIResponse(code=101,msg='发送短信失败,请稍后再试')

        t = Thread(target=sms, args=[mobile, code])

        t.start()

        return APIResponse(msg='短信已发送')
短信登陆接口
POST - http://127.0.0.1:8000/api/v1/user/mul_login/sms_login/
之前写过多方式登录,代码一样,可以抽出来做成公用的
views
class UserLoginView(GenericViewSet):

    serializer_class = LoginSerializer

    def get_serializer_class(self):

        if self.action == 'sms_login':

            return SMSLoginSerializer

        else:

            return LoginSerializer

    def _login(self, request, *args, **kwargs):

        serializer = self.get_serializer(data=request.data)

        serializer.is_valid(raise_exception=True)

        token = serializer.context.get('token')

        username = serializer.context.get('username')

        icon = serializer.context.get('icon')

        return APIResponse(token=token, username=username, icon=icon)

    @action(methods=['POST'], detail=False)

    def multiple_login(self, request, *args, **kwargs):

        return self._login(request, *args, **kwargs)

    @action(methods=['POST'], detail=False)

    def sms_login(self, request, *args, **kwargs):

        return self._login(request, *args, **kwargs)
SMSLoginSerializer
这个地方一样,序列化类也可以抽出来
class CommonLoginSerializer():

    def _get_user(self, attrs):

        raise Exception('这个方法必须被重写')

    def _get_token(self, user):

        refresh = RefreshToken.for_user(user)

        return str(refresh.access_token)

    def _pre_data(self, token, user):

        self.context['token'] = token

        self.context['username'] = user.username

        # self.instance=user # 当前用户,放到instance中了

        self.context['icon'] = settings.BACKEND_URL + "media/" + str(user.icon)  # 不带 域名前缀的

    def validate(self, attrs):

        # 1 取出用户名(手机号,邮箱)和密码

        user = self._get_user(attrs)

        # 2 如果存在:签发token,返回

        token = self._get_token(user)

        # 3 把token,用户名和icon放入context

        self._pre_data(token, user)

        return attrs

class SMSLoginSerializer(CommonLoginSerializer, serializers.Serializer):

    code = serializers.CharField()

    mobile = serializers.CharField()

    def _get_user(self, attrs):

        mobile = attrs.get('mobile')

        code = attrs.get('code')

        old_code = cache.get(f'cache_code_{mobile}')

        assert old_code == code or (settings.DEBUG and code == '8888'), ValidationError('验证码错误')

        user = User.objects.filter(mobile=mobile).first()

        assert user, ValidationError('该手机号未注册!')

        return user
短信注册接口
POST - http://127.0.0.1:8000/api/v1/user/register/
views
class UserRegisterView(GenericViewSet):

    serializer_class = RegisterSerializer

    def create(self, request, *args, **kwargs):

        serializer = self.get_serializer(data=request.data)

        serializer.is_valid(raise_exception=True)

        serializer.save()

        return APIResponse(msg='注册成功')
RegisterSerializer
class RegisterSerializer(serializers.ModelSerializer):

    code = serializers.CharField()

    class Meta:

        model = User

        fields = ['mobile', 'password', 'code']

    def validate(self, attrs):

        code = attrs.pop("code")

        mobile = attrs.get('mobile')

        old_code = cache.get(f'cache_code_{mobile}')

        assert old_code == code or (settings.DEBUG and code == '8888'), ValidationError('验证码错误')

        attrs['username'] = mobile

        return attrs

    def create(self, validated_data):

        user = User.objects.create_user(**validated_data)

        return user
课程(分类、列表、详情)接口
内有课程分类、课程列表、课程详情接口及序列化
views
from django.shortcuts import render

from rest_framework.viewsets import GenericViewSet

from .models import CourseCategory, Course, CourseChapter, Teacher, CourseSection

from .serializer import (

    CourseCategorySerializer,

    CourseSerializer,

    CourseDetailSerializer,

    CourseChapterSerializer,

)

from utils.common_response import APIResponse

from utils.common_mixin import APIListModelMixin, APIRetrieveModelMixin

from .pagination import CommonPageNumberPagination

from rest_framework.mixins import ListModelMixin

from rest_framework.filters import OrderingFilter

from django_filters.rest_framework import DjangoFilterBackend

from rest_framework.decorators import action

# 课程分类接口

class CourseCategoryView(GenericViewSet, APIListModelMixin):

    queryset = (

        CourseCategory.objects.all()

        .filter(is_delete=False, is_show=True)

        .order_by("-orders")

    )

    serializer_class = CourseCategorySerializer

# 课程列表接口 查询所有课程 带过滤 带分页 关联表数据也要返回

class CourseView(GenericViewSet, ListModelMixin, APIRetrieveModelMixin):

    queryset = Course.objects.all().filter(is_delete=False, is_show=True)

    serializer_class = CourseSerializer

    # 分页

    pagination_class = CommonPageNumberPagination

    # 过滤 排序

    filter_backends = [OrderingFilter, DjangoFilterBackend]

    ordering_fields = ["id", "students", "price"]

    filterset_fields = ["course_category"]

    def list(self, request, *args, **kwargs):

        res = super().list(request, *args, **kwargs)

        return APIResponse(

            count=res.data.get("count"),

            next=res.data.get("next"),

            previous=res.data.get("previous"),

            results=res.data.get("results"),

        )

# 章节

class CourseChapterView(GenericViewSet, APIListModelMixin, APIRetrieveModelMixin):

    queryset = CourseChapter.objects.all().filter(is_delete=False, is_show=True)

    serializer_class = CourseChapterSerializer  # 全部的章节数据,里面带课时数据

    filter_backends = [DjangoFilterBackend]

    filterset_fields = ["course"]  # 按课程id过滤
serializer
from rest_framework import serializers

from .models import CourseCategory, Course, Teacher, CourseChapter, CourseSection

# 分类

class CourseCategorySerializer(serializers.ModelSerializer):

    class Meta:

        model = CourseCategory

        fields = ["id", "name"]

# 老师

class TeacherSerializer(serializers.ModelSerializer):

    role_name = serializers.CharField(source="get_role_display", read_only=True)

    class Meta:

        model = Teacher

        fields = ["name", "role_name", "title", "signature", "image", "brief"]  # 重写

# 课程

class CourseSerializer(serializers.ModelSerializer):

    course_type_name = serializers.CharField(

        source="get_course_type_display", read_only=True

    )

    level_name = serializers.CharField(source="get_level_display", read_only=True)

    status_name = serializers.CharField(source="get_status_display", read_only=True)

    teacher = TeacherSerializer()

    class Meta:

        model = Course

        fields = [

            "id",

            "name",

            "course_img",

            "price",  # 价格

            "students",

            "pub_sections",  # 发布多少课时

            "sections",  # 总课时数量

            # 列表页面不显示,详情接口会显示

            "period",  # 建议学习周期

            "brief",

            "attachment_path",  # 文档地址

            # choice字段,定制返回格式--》表模型中写

            "course_type_name",

            "level_name",

            "status_name",

            # 关联表

            "teacher",  # teacher 所有数据---》子序列化

            "section_list",  # 返回课时:如果总课时数,大于4,就返回4条,如果小于4,有多少返回多少--表模型

        ]

# 课时

class CourseSectionSerializer(serializers.ModelSerializer):

    class Meta:

        model = CourseSection

        fields = ["id", "name", "orders", "section_link", "duration", "free_trail"]

# 章节

class CourseChapterSerializer(serializers.ModelSerializer):

    coursesections = CourseSectionSerializer(many=True)

    class Meta:

        model = CourseChapter

        fields = ["id", "name", "chapter", "summary", "coursesections"]

# 课程详情

class CourseDetailSerializer(serializers.ModelSerializer):

    course_type_name = serializers.CharField(

        source="get_course_type_display", read_only=True

    )

    level_name = serializers.CharField(source="get_level_display", read_only=True)

    status_name = serializers.CharField(source="get_status_display", read_only=True)

    teacher = TeacherSerializer()

    coursechapters = CourseChapterSerializer(many=True)

    class Meta:

        model = Course

        fields = [

            "id",

            "name",

            "course_img",

            "price",  # 价格

            "students",

            "pub_sections",  # 发布多少课时

            "sections",  # 总课时数量

            # 列表页面不显示,详情接口会显示

            "period",  # 建议学习周期

            "brief",

            "attachment_path",  # 文档地址

            # choice字段,定制返回格式--》表模型中写

            "course_type_name",

            "level_name",

            "status_name",

            # 关联表

            "teacher",  # teacher 所有数据---》子序列化

            "coursechapters",

        ]
models
from django.db import models

from utils.common_models import BaseModel

# 课程分类表

class CourseCategory(BaseModel):

    name = models.CharField(max_length=64, unique=True, verbose_name="分类名称")

    class Meta:

        db_table = "luffy_course_category"

        verbose_name = "分类"

        verbose_name_plural = verbose_name

    def __str__(self):

        return "%s" % self.name

# 课程表

class Course(BaseModel):

    course_type = (

        (0, "付费"),

        (1, "VIP专享"),

    )

    level_choices = (

        (0, "初级"),

        (1, "中级"),

        (2, "高级"),

    )

    status_choices = (

        (0, "上线"),

        (1, "下线"),

        (2, "预上线"),

    )

    name = models.CharField(max_length=128, verbose_name="课程名称")

    course_img = models.ImageField(

        upload_to="courses",

        max_length=255,

        verbose_name="封面图片",

        blank=True,

        null=True,

    )

    course_type = models.SmallIntegerField(

        choices=course_type, default=0, verbose_name="付费类型"

    )

    brief = models.TextField(

        max_length=2048, verbose_name="详情介绍", null=True, blank=True

    )

    level = models.SmallIntegerField(

        choices=level_choices, default=0, verbose_name="难度等级"

    )

    pub_date = models.DateField(verbose_name="发布日期", auto_now_add=True)

    period = models.IntegerField(verbose_name="建议学习周期(day)", default=7)

    attachment_path = models.FileField(

        upload_to="attachment",

        max_length=128,

        verbose_name="课件路径",

        blank=True,

        null=True,

    )

    status = models.SmallIntegerField(

        choices=status_choices, default=0, verbose_name="课程状态"

    )

    students = models.IntegerField(verbose_name="学习人数", default=0)

    sections = models.IntegerField(verbose_name="总课时数量", default=0)

    pub_sections = models.IntegerField(verbose_name="课时更新数量", default=0)

    price = models.DecimalField(

        max_digits=6, decimal_places=2, verbose_name="课程原价", default=0

    )

    # on_delete 可以选择

    # db_constraint

    teacher = models.ForeignKey(

        "Teacher",

        on_delete=models.DO_NOTHING,  # 当关联的对象被删除时,不执行任何操作

        null=True,

        blank=True,

        verbose_name="授课老师",

    )

    course_category = models.ForeignKey(

        "CourseCategory",

        on_delete=models.SET_NULL,  # 将外键字段设为 NULL。前提是该字段允许 NULL 值。

        db_constraint=False,

        null=True,

        blank=True,

        verbose_name="课程分类",

    )

    class Meta:

        db_table = "luffy_course"

        verbose_name = "课程"

        verbose_name_plural = "课程"

    def __str__(self):

        return "%s" % self.name

    def section_list(self):

        # 如果总课时数大于4,就返回4条,如果小于4,有多少返回多少

        l = []

        for course_chapter in self.coursechapters.all():  # type: ignore

            for course_section in course_chapter.coursesections.all():

                l.append(

                    {

                        "name": course_section.name,

                        "section_link": course_section.section_link,

                        "duration": course_section.duration,

                        "free_trail": course_section.free_trail,

                    }

                )

                if len(l) == 4:

                    return l

        return l

# 老师表

class Teacher(BaseModel):

    role_choices = (

        (0, "讲师"),

        (1, "导师"),

        (2, "班主任"),

    )

    name = models.CharField(max_length=32, verbose_name="导师名")

    role = models.SmallIntegerField(

        choices=role_choices, default=0, verbose_name="导师身份"

    )

    title = models.CharField(max_length=64, verbose_name="职位、职称")

    signature = models.CharField(

        max_length=255,

        verbose_name="导师签名",

        help_text="导师签名",

        blank=True,

        null=True,

    )

    image = models.ImageField(upload_to="teacher", null=True, verbose_name="导师封面")

    brief = models.TextField(max_length=1024, verbose_name="导师描述")

    class Meta:

        db_table = "luffy_teacher"

        verbose_name = "导师"

        verbose_name_plural = verbose_name

    def __str__(self):

        return "%s" % self.name

# 章节表

class CourseChapter(BaseModel):

    # related_name

    course = models.ForeignKey(

        "Course",

        related_name="coursechapters",

        on_delete=models.CASCADE,

        verbose_name="课程名称",

    )

    chapter = models.SmallIntegerField(verbose_name="第几章", default=1)

    name = models.CharField(max_length=128, verbose_name="章节标题")

    summary = models.TextField(verbose_name="章节介绍", blank=True, null=True)

    pub_date = models.DateField(verbose_name="发布日期", auto_now_add=True)

    class Meta:

        db_table = "luffy_course_chapter"

        verbose_name = "章节"

        verbose_name_plural = verbose_name

    def __str__(self):

        return "%s:(第%s章)%s" % (self.course, self.chapter, self.name)

# 课时表

class CourseSection(BaseModel):

    section_type_choices = ((0, "文档"), (1, "练习"), (2, "视频"))

    chapter = models.ForeignKey(

        "CourseChapter",

        related_name="coursesections",

        on_delete=models.CASCADE,

        verbose_name="课程章节",

    )

    name = models.CharField(max_length=128, verbose_name="课时标题")

    orders = models.PositiveSmallIntegerField(verbose_name="课时排序")

    section_type = models.SmallIntegerField(

        default=2, choices=section_type_choices, verbose_name="课时种类"

    )

    section_link = models.CharField(

        max_length=255,

        blank=True,

        null=True,

        verbose_name="课时链接",

        help_text="若是video,填vid,若是文档,填link",

    )

    duration = models.CharField(

        verbose_name="视频时长", blank=True, null=True, max_length=32

    )  # 仅在前端展示使用

    pub_date = models.DateTimeField(verbose_name="发布时间", auto_now_add=True)

    free_trail = models.BooleanField(verbose_name="是否可试看", default=False)

    class Meta:

        db_table = "luffy_course_section"

        verbose_name = "课时"

        verbose_name_plural = verbose_name

    def __str__(self):

        return "%s-%s" % (self.chapter, self.name)
pagination
from rest_framework.pagination import PageNumberPagination

class CommonPageNumberPagination(PageNumberPagination):

    page_size = 2

    page_query_param = "page"

    page_size_query_param = "page_size"

    max_page_size = 5
admin
from django.contrib import admin

from .models import Course, CourseCategory, CourseChapter, CourseSection, Teacher

admin.site.register(Course)

admin.site.register(CourseCategory)

admin.site.register(CourseChapter)

admin.site.register(CourseSection)

admin.site.register(Teacher)
课程相关数据
INSERT INTO luffy_teacher(id, orders, is_show, is_delete, created_time, updated_time, name, role, title, signature, image, brief) VALUES (1, 1, 1, 0, '2022-07-14 13:44:19.661327', '2022-07-14 13:46:54.246271', 'Alex', 1, '老男孩Python教学总监', '金角大王', 'teacher/alex_icon.png', '老男孩教育CTO & CO-FOUNDER 国内知名PYTHON语言推广者 51CTO学院2016\2017年度最受学员喜爱10大讲师之一 多款开源软件作者 曾任职公安部、飞信、中金公司、NOKIA中国研究院、华尔街英语、ADVENT、汽车之家等公司');

INSERT INTO luffy_teacher(id, orders, is_show, is_delete, created_time, updated_time, name, role, title, signature, image, brief) VALUES (2, 2, 1, 0, '2022-07-14 13:45:25.092902', '2022-07-14 13:45:25.092936', 'Mjj', 0, '前美团前端项目组架构师', NULL, 'teacher/mjj_icon.png', '是马JJ老师, 一个集美貌与才华于一身的男人,搞过几年IOS,又转了前端开发几年,曾就职于美团网任高级前端开发,后来因为不同意王兴(美团老板)的战略布局而出家做老师去了,有丰富的教学经验,开起车来也毫不含糊。一直专注在前端的前沿技术领域。同时,爱好抽烟、喝酒、烫头(锡纸烫)。 我的最爱是前端,因为前端妹子多。');

INSERT INTO luffy_teacher(id, orders, is_show, is_delete, created_time, updated_time, name, role, title, signature, image, brief) VALUES (3, 3, 1, 0, '2022-07-14 13:46:21.997846', '2022-07-14 13:46:21.997880', 'Lyy', 0, '老男孩Linux学科带头人', NULL, 'teacher/lyy_icon.png', 'Linux运维技术专家,老男孩Linux金牌讲师,讲课风趣幽默、深入浅出、声音洪亮到爆炸');

-- 分类表

INSERT INTO luffy_course_category(id, orders, is_show, is_delete, created_time, updated_time, name) VALUES (1, 1, 1, 0, '2022-07-14 13:40:58.690413', '2022-07-14 13:40:58.690477', 'Python');

INSERT INTO luffy_course_category(id, orders, is_show, is_delete, created_time, updated_time, name) VALUES (2, 2, 1, 0, '2022-07-14 13:41:08.249735', '2022-07-14 13:41:08.249817', 'Linux');

-- 课程表

INSERT INTO luffy_course(id, orders, is_show, is_delete, created_time, updated_time, name, course_img, course_type, brief, level, pub_date, period, attachment_path, status, students, sections, pub_sections, price, course_category_id, teacher_id) VALUES (1, 1, 1, 0, '2022-07-14 13:54:33.095201', '2022-07-14 13:54:33.095238', 'Python开发21天入门', 'courses/alex_python.png', 0, 'Python从入门到入土&&&Python从入门到入土&&&Python从入门到入土&&&Python从入门到入土&&&Python从入门到入土&&&Python从入门到入土&&&Python从入门到入土&&&Python从入门到入土&&&Python从入门到入土&&&Python从入门到入土&&&Python从入门到入土&&&Python从入门到入土', 0, '2022-07-14', 21, '', 0, 231, 120, 120, 0.00, 1, 1);

INSERT INTO luffy_course(id, orders, is_show, is_delete, created_time, updated_time, name, course_img, course_type, brief, level, pub_date, period, attachment_path, status, students, sections, pub_sections, price, course_category_id, teacher_id) VALUES (2, 2, 1, 0, '2022-07-14 13:56:05.051103', '2022-07-14 13:56:05.051142', 'Python项目实战', 'courses/mjj_python.png', 0, '', 1, '2022-07-14', 30, '', 0, 340, 120, 120, 99.00, 1, 2);

INSERT INTO luffy_course(id, orders, is_show, is_delete, created_time, updated_time, name, course_img, course_type, brief, level, pub_date, period, attachment_path, status, students, sections, pub_sections, price, course_category_id, teacher_id) VALUES (3, 3, 1, 0, '2022-07-14 13:57:21.190053', '2022-07-14 13:57:21.190095', 'Linux系统基础5周入门精讲', 'courses/lyy_linux.png', 0, '', 0, '2022-07-14', 25, '', 0, 219, 100, 100, 39.00, 2, 3);

-- 章节表

INSERT INTO luffy_course_chapter(id, orders, is_show, is_delete, created_time, updated_time, chapter, name, summary, pub_date, course_id) VALUES (1, 1, 1, 0, '2022-07-14 13:58:34.867005', '2022-07-14 14:00:58.276541', 1, '计算机原理', '', '2022-07-14', 1);

INSERT INTO luffy_course_chapter(id, orders, is_show, is_delete, created_time, updated_time, chapter, name, summary, pub_date, course_id) VALUES (2, 2, 1, 0, '2022-07-14 13:58:48.051543', '2022-07-14 14:01:22.024206', 2, '环境搭建', '', '2022-07-14', 1);

INSERT INTO luffy_course_chapter(id, orders, is_show, is_delete, created_time, updated_time, chapter, name, summary, pub_date, course_id) VALUES (3, 3, 1, 0, '2022-07-14 13:59:09.878183', '2022-07-14 14:01:40.048608', 1, '项目创建', '', '2022-07-14', 2);

INSERT INTO luffy_course_chapter(id, orders, is_show, is_delete, created_time, updated_time, chapter, name, summary, pub_date, course_id) VALUES (4, 4, 1, 0, '2022-07-14 13:59:37.448626', '2022-07-14 14:01:58.709652', 1, 'Linux环境创建', '', '2022-07-14', 3);

-- 课时表

INSERT INTO luffy_course_Section(id, is_show, is_delete, created_time, updated_time, name, orders, section_type, section_link, duration, pub_date, free_trail, chapter_id) VALUES (1, 1, 0, '2022-07-14 14:02:33.779098', '2022-07-14 14:02:33.779135', '计算机原理上', 1, 2, NULL, NULL, '2022-07-14 14:02:33.779193', 1, 1);

INSERT INTO luffy_course_Section(id, is_show, is_delete, created_time, updated_time, name, orders, section_type, section_link, duration, pub_date, free_trail, chapter_id) VALUES (2, 1, 0, '2022-07-14 14:02:56.657134', '2022-07-14 14:02:56.657173', '计算机原理下', 2, 2, NULL, NULL, '2022-07-14 14:02:56.657227', 1, 1);

INSERT INTO luffy_course_Section(id, is_show, is_delete, created_time, updated_time, name, orders, section_type, section_link, duration, pub_date, free_trail, chapter_id) VALUES (3, 1, 0, '2022-07-14 14:03:20.493324', '2022-07-14 14:03:52.329394', '环境搭建上', 1, 2, NULL, NULL, '2022-07-14 14:03:20.493420', 0, 2);

INSERT INTO luffy_course_Section(id, is_show, is_delete, created_time, updated_time, name, orders, section_type, section_link, duration, pub_date, free_trail, chapter_id) VALUES (4, 1, 0, '2022-07-14 14:03:36.472742', '2022-07-14 14:03:36.472779', '环境搭建下', 2, 2, NULL, NULL, '2022-07-14 14:03:36.472831', 0, 2);

INSERT INTO luffy_course_Section(id, is_show, is_delete, created_time, updated_time, name, orders, section_type, section_link, duration, pub_date, free_trail, chapter_id) VALUES (5, 1, 0, '2022-07-14 14:04:19.338153', '2022-07-14 14:04:19.338192', 'web项目的创建', 1, 2, NULL, NULL, '2022-07-14 14:04:19.338252', 1, 3);

INSERT INTO luffy_course_Section(id, is_show, is_delete, created_time, updated_time, name, orders, section_type, section_link, duration, pub_date, free_trail, chapter_id) VALUES (6, 1, 0, '2022-07-14 14:04:52.895855', '2022-07-14 14:04:52.895890', 'Linux的环境搭建', 1, 2, NULL, NULL, '2022-07-14 14:04:52.895942', 1, 4);
-- 课程

INSERT INTO `luffy_course` VALUES (4, '2022-04-28 12:06:36.564933', '2022-04-28 12:36:04.812789', 0, 1, 4, 'DRF从入门到放弃', 'courses/drf.png', 0, 'drf很牛逼', 4, '2022-04-28', 7, '', 0, 399, 0, 0, 77.00, 1, 1);

INSERT INTO `luffy_course` VALUES (5, '2022-04-28 12:35:44.319734', '2022-04-28 12:35:44.319757', 0, 1, 5, 'Go语言从入门到入坑', 'courses/msbd.png', 0, 'Go语言从入门到入坑Go语言从入门到入坑Go语言从入门到入坑Go语言从入门到入坑', 0, '2022-04-28', 20, '', 0, 30, 200, 100, 66.00, 3, 1);

INSERT INTO `luffy_course` VALUES (6, '2022-04-28 12:39:55.562716', '2022-04-28 12:39:55.562741', 0, 1, 6, 'Go语言微服务', 'courses/celery.png', 0, 'Go语言微服务Go语言微服务Go语言微服务Go语言微服务', 4, '2022-04-28', 7, '', 0, 122, 0, 0, 299.00, 3, 2);

-- 分类

INSERT INTO `luffy_course_category` VALUES (3, '2022-04-28 12:07:33.314057', '2022-04-28 12:07:33.314088', 0, 1, 3, 'Go语言');

-- 章节

INSERT INTO `luffy_course_chapter` VALUES (5, '2022-04-28 12:08:36.679922', '2022-04-28 12:08:36.680014', 0, 1, 2, 2, 'Linux5周第二章', 'Linux5周第二章Linux5周第二章Linux5周第二章Linux5周第二章Linux5周第二章', '2022-04-28', 3);

INSERT INTO `luffy_course_chapter` VALUES (6, '2022-04-28 12:09:19.324504', '2022-04-28 12:09:19.324533', 0, 1, 2, 2, 'py实战项目第二章', 'py实战项目第二章py实战项目第二章py实战项目第二章py实战项目第二章', '2022-04-28', 2);

INSERT INTO `luffy_course_chapter` VALUES (7, '2022-04-28 12:09:32.532905', '2022-04-29 10:11:57.546455', 0, 1, 3, 3, 'py实战项目第三章', 'py实战项目第三章py实战项目第三章py实战项目第三章', '2022-04-28', 2);

INSERT INTO `luffy_course_chapter` VALUES (8, '2022-04-28 12:09:55.496622', '2022-04-28 12:09:55.496686', 0, 1, 1, 1, 'drf入门1', 'drf入门1drf入门1drf入门1', '2022-04-28', 4);

INSERT INTO `luffy_course_chapter` VALUES (9, '2022-04-28 12:10:08.490618', '2022-04-28 12:10:08.490642', 0, 1, 2, 2, 'drf入门2', 'drf入门drf入门1drf入门1drf入门1drf入门1', '2022-04-28', 4);

INSERT INTO `luffy_course_chapter` VALUES (10, '2022-04-28 12:10:22.088684', '2022-04-28 12:10:22.088710', 0, 1, 3, 3, 'drf入门3', 'drf入门1drf入门1drf入门1drf入门1drf入门1drf入门1', '2022-04-28', 4);

INSERT INTO `luffy_course_chapter` VALUES (11, '2022-04-28 12:10:33.564141', '2022-04-28 12:10:33.564177', 0, 1, 4, 4, 'drf入门4', 'drf入门1drf入门1drf入门1drf入门1', '2022-04-28', 4);

INSERT INTO `luffy_course_chapter` VALUES (12, '2022-04-28 12:10:43.242918', '2022-04-28 12:10:43.242947', 0, 1, 5, 5, 'drf入门5', 'drf入门1drf入门1drf入门1drf入门1', '2022-04-28', 4);

INSERT INTO `luffy_course_chapter` VALUES (13, '2022-04-28 12:36:58.508995', '2022-04-28 12:36:58.509020', 0, 1, 1, 1, 'go第一章', 'go第一章', '2022-04-28', 5);

INSERT INTO `luffy_course_chapter` VALUES (14, '2022-04-28 12:37:08.588265', '2022-04-28 12:37:08.588287', 0, 1, 2, 2, 'go第二章', 'go第一章go第一章go第一章', '2022-04-28', 5);

INSERT INTO `luffy_course_chapter` VALUES (15, '2022-04-28 12:37:19.219405', '2022-04-28 12:37:19.219426', 0, 1, 3, 3, 'go第三章', 'go第一章go第一章go第一章', '2022-04-28', 5);

INSERT INTO `luffy_course_chapter` VALUES (16, '2022-04-28 12:40:11.445750', '2022-04-28 12:40:11.445774', 0, 1, 1, 1, '微服务第一章', '微服务第一章', '2022-04-28', 6);

INSERT INTO `luffy_course_chapter` VALUES (17, '2022-04-28 12:40:22.811647', '2022-04-28 12:40:22.811670', 0, 1, 2, 2, '微服务第二章', '微服务第二章微服务第二章微服务第二章', '2022-04-28', 6);

-- 课时

INSERT INTO `luffy_course_section` VALUES (7, '2022-04-28 12:12:01.304920', '2022-04-28 12:12:01.304994', 0, 1, '文件操作', 2, 2, NULL, NULL, '2022-04-28 12:12:01.305074', 0, 5);

INSERT INTO `luffy_course_section` VALUES (8, '2022-04-28 12:12:11.287759', '2022-04-28 12:12:11.287884', 0, 1, '软件操作', 2, 2, NULL, NULL, '2022-04-28 12:12:11.288079', 0, 5);

INSERT INTO `luffy_course_section` VALUES (9, '2022-04-28 12:12:26.326077', '2022-04-28 12:12:26.326112', 0, 1, '请求响应', 1, 2, NULL, NULL, '2022-04-28 12:12:26.326174', 0, 8);

INSERT INTO `luffy_course_section` VALUES (10, '2022-04-28 12:12:36.364356', '2022-04-28 12:12:36.364391', 0, 1, '序列化类', 2, 2, NULL, NULL, '2022-04-28 12:12:36.364446', 0, 8);

INSERT INTO `luffy_course_section` VALUES (11, '2022-04-28 12:12:48.306119', '2022-04-28 12:12:48.306187', 0, 1, '三大认证', 1, 2, NULL, NULL, '2022-04-28 12:12:48.306396', 0, 9);

INSERT INTO `luffy_course_section` VALUES (12, '2022-04-28 12:13:06.882558', '2022-04-28 12:13:06.882620', 0, 1, '认证', 2, 2, NULL, NULL, '2022-04-28 12:13:06.882826', 0, 9);

INSERT INTO `luffy_course_section` VALUES (13, '2022-04-28 12:13:15.799043', '2022-04-28 12:13:15.799084', 0, 1, 'jwt认证', 1, 2, NULL, NULL, '2022-04-28 12:13:15.799146', 0, 10);

INSERT INTO `luffy_course_section` VALUES (14, '2022-04-28 12:13:27.852981', '2022-04-28 12:13:27.853011', 0, 1, 'jwt认证2', 3, 2, NULL, NULL, '2022-04-28 12:13:27.853066', 0, 10);

INSERT INTO `luffy_course_section` VALUES (15, '2022-04-28 12:13:37.292779', '2022-04-28 12:13:37.292806', 0, 1, '后台管理', 1, 2, NULL, NULL, '2022-04-28 12:13:37.292855', 0, 11);

INSERT INTO `luffy_course_section` VALUES (16, '2022-04-28 12:13:51.194585', '2022-04-28 12:13:51.194612', 0, 1, '后台管理2', 2, 2, NULL, NULL, '2022-04-28 12:13:51.194660', 0, 11);

INSERT INTO `luffy_course_section` VALUES (17, '2022-04-28 12:14:05.334836', '2022-04-28 12:14:05.334902', 0, 1, 'rbac1', 1, 2, NULL, NULL, '2022-04-28 12:14:05.335053', 0, 12);

INSERT INTO `luffy_course_section` VALUES (18, '2022-04-28 12:14:14.039605', '2022-04-28 12:14:14.039770', 0, 1, 'rbac2', 2, 2, NULL, NULL, '2022-04-28 12:14:14.039895', 0, 12);

INSERT INTO `luffy_course_section` VALUES (19, '2022-04-28 12:37:34.682049', '2022-04-28 12:37:34.682072', 0, 1, '环境搭建', 1, 2, NULL, NULL, '2022-04-28 12:37:34.682116', 0, 13);

INSERT INTO `luffy_course_section` VALUES (20, '2022-04-28 12:37:46.317414', '2022-04-28 12:37:46.317440', 0, 1, '第一个helloworld', 2, 2, NULL, NULL, '2022-04-28 12:37:46.317483', 0, 13);

INSERT INTO `luffy_course_section` VALUES (21, '2022-04-28 12:37:54.200236', '2022-04-28 12:37:54.200257', 0, 1, '变量定义', 1, 2, NULL, NULL, '2022-04-28 12:37:54.200297', 0, 14);

INSERT INTO `luffy_course_section` VALUES (22, '2022-04-28 12:38:03.465663', '2022-04-28 12:38:03.465686', 0, 1, '常量', 2, 2, NULL, NULL, '2022-04-28 12:38:03.465731', 0, 14);

INSERT INTO `luffy_course_section` VALUES (23, '2022-04-28 12:38:13.144613', '2022-04-28 12:38:13.144636', 0, 1, 'go结构体', 1, 2, NULL, NULL, '2022-04-28 12:38:13.144679', 0, 15);

INSERT INTO `luffy_course_section` VALUES (24, '2022-04-28 12:38:26.312273', '2022-04-28 12:38:26.312306', 0, 1, 'go接口', 2, 2, NULL, NULL, '2022-04-28 12:38:26.312380', 0, 15);

INSERT INTO `luffy_course_section` VALUES (25, '2022-04-28 12:40:36.531566', '2022-04-29 10:12:42.497098', 0, 1, '微服务第一章第一课时', 1, 2, NULL, NULL, '2022-04-28 12:40:36.531625', 1, 16);

INSERT INTO `luffy_course_section` VALUES (26, '2022-04-28 12:40:45.120568', '2022-04-28 12:41:14.341536', 0, 1, '微服务第一章第二课时', 2, 2, NULL, NULL, '2022-04-28 12:40:45.120627', 0, 16);

INSERT INTO `luffy_course_section` VALUES (27, '2022-04-28 12:40:57.477026', '2022-04-28 12:40:57.477048', 0, 1, '微服务第二章第一课时', 1, 2, NULL, NULL, '2022-04-28 12:40:57.477088', 0, 17);

INSERT INTO `luffy_course_section` VALUES (28, '2022-04-28 12:41:04.673613', '2022-04-28 12:41:04.673634', 0, 1, '微服务第二章第二课时', 2, 2, NULL, NULL, '2022-04-28 12:41:04.673673', 0, 17);
搜索功能接口
views
class CourseSearchView(GenericViewSet, APIListModelMixin):

    queryset = (

        Course.objects.all().filter(is_delete=False, is_show=True).order_by("orders")

    )

    serializer_class = CourseSerializer

    pagination_class = CommonPageNumberPagination

    # 过滤 模糊匹配

    filter_backends = [SearchFilter]

    search_fields = ["name"]

    # 咱么目前搜索接口:只能搜索 实战课

    # 后期要能搜索:实战课,免费课,轻课

    # 甚至更强大:输入老师名字搜到老师

    # 搜索接口后期可以返回很多数据--》结合原型图

    # 有个性化推荐

    # def list(self, request, *args, **kwargs):

    #     # 实战课

    #     res=super().list(request, *args, **kwargs)

    #     search=request.query_params.get('search')

    #     # 根据search=高级 去老师表中,根据名字或老师介绍---》推荐几个老师

    #     # 搜名字或老师介绍中有 ---》mysql--》介绍--》文字很多 like =%高级%-->效率非常低

    #         # 可以使用专业的搜索引擎:es  全文检索

    #     # 个性化推荐:用户画像---》通过打标签:青年  本科  单身  宅

    #     return APIResponse(actual_course_list=res.results,teacher_list=[])
下单接口
models
# 1 创建一个新的app,order

# 2 表模型有

# 用户在前端点击立即购买---》触发我们后端下单接口---》下单接口返回给前端支付地址---》前端跳转到支付链接---》用户去付款

# 表分析

	-1 订单表

    -2 订单详情表 :一个订单有多个订单详情
from django.db import models

from user.models import User

from course.models import Course

# 订单表

class Order(models.Model):

    status_choices = (

        (0, "未支付"),

        (1, "已支付"),

        (2, "已取消"),

        (3, "超时取消"),

    )

    pay_choices = (

        (1, "支付宝"),

        (2, "微信支付"),

    )

    subject = models.CharField(max_length=150, verbose_name="订单标题")

    total_amount = models.DecimalField(

        max_digits=10, decimal_places=2, verbose_name="订单总价", default=0

    )  # type: ignore

    # 咱们生成的---全局唯一

    out_trade_no = models.CharField(max_length=64, verbose_name="订单号", unique=True)

    # 支付宝付款后会返回这个号---》支付宝流水号

    trade_no = models.CharField(max_length=64, null=True, verbose_name="流水号")

    order_status = models.SmallIntegerField(

        choices=status_choices, default=0, verbose_name="订单状态"

    )

    pay_type = models.SmallIntegerField(

        choices=pay_choices, default=1, verbose_name="支付方式"

    )

    # 支付宝会返回支付时间

    pay_time = models.DateTimeField(null=True, verbose_name="支付时间")

    user = models.ForeignKey(

        User,

        related_name="order_user",

        on_delete=models.DO_NOTHING,

        db_constraint=False,

        verbose_name="下单用户",

    )

    # 下单时间

    created_time = models.DateTimeField(auto_now_add=True, verbose_name="创建时间")

    class Meta:

        db_table = "luffy_order"

        verbose_name = "订单记录"

        verbose_name_plural = "订单记录"

    def __str__(self):

        return "%s - ¥%s" % (self.subject, self.total_amount)

# 订单详情表

class OrderDetail(models.Model):

    # 跟订单一对多,关联字段写在多的一方

    order = models.ForeignKey(

        Order,

        related_name="order_courses",

        on_delete=models.CASCADE,

        db_constraint=False,

        verbose_name="订单",

    )

    # 课程和订单详情,一对多,一个课程,可以对应多个订单详情

    course = models.ForeignKey(

        Course,

        related_name="course_orders",

        on_delete=models.CASCADE,

        db_constraint=False,

        verbose_name="课程",

    )

    price = models.DecimalField(max_digits=6, decimal_places=2, verbose_name="课程原价")

    real_price = models.DecimalField(

        max_digits=6, decimal_places=2, verbose_name="课程实价"

    )

    class Meta:

        db_table = "luffy_order_detail"

        verbose_name = "订单详情"

        verbose_name_plural = "订单详情"

    def __str__(self):

        try:

            return "%s的订单:%s" % (self.course.name, self.order.out_trade_no)

        except:

            return super().__str__()
urls
from django.contrib import admin

from django.urls import path, include

from rest_framework.routers import SimpleRouter

from .views import OrderPayView, OrderSuccessView

router = SimpleRouter()

router.register("pay", OrderPayView, "pay")

router.register("success", OrderSuccessView, "success")

urlpatterns = [

    path("", include(router.urls)),

]
views
from django.shortcuts import render

from rest_framework.viewsets import GenericViewSet, ViewSet

from rest_framework_simplejwt.authentication import JWTAuthentication

from rest_framework.permissions import IsAuthenticated

from utils.common_response import APIResponse

from .serializer import OrderPaySerializer

from .models import Order

# 订单支付

class OrderPayView(GenericViewSet):

    authentication_classes = [JWTAuthentication]

    permission_classes = [IsAuthenticated]

    serializer_class = OrderPaySerializer

    def create(self, request, *args, **kwargs):

        serializer = self.get_serializer(

            data=request.data, context={"request": request}

        )

        serializer.is_valid(raise_exception=True)

        serializer.save()

        pay_url = serializer.context.get("pay_url")

        return APIResponse(pay_url=pay_url)

# 支付成功前端回调

class OrderSuccessView(ViewSet):

    def list(self, request, *args, **kwargs):

        # 给咱们前端用

        # 1 取出订单号

        out_trade_no = request.query_params.get("out_trade_no")

        # 2 去数据库查询

        order = Order.objects.filter(out_trade_no=out_trade_no, order_status=1).first()

        if order:  # 说明支付宝的post回调回来了,修改了订单状态

            return APIResponse(msg="支付成功,请去学习吧")

        else:

            return APIResponse(code=101, msg="暂未收到您的付款,请稍后刷新再试")

    # 这个地方还得写一个post,给支付宝回调用,但是现在测试的时候搞不了
serializer
from rest_framework import serializers

from .models import Order, OrderDetail

from course.models import Course

from rest_framework.exceptions import APIException

import uuid

from libs.ali_pay import alipay, GATEWAY

from django.conf import settings

# 1 校验--》{'courses':[1,],'total_amount':0.1,'subject':课程名,'pay_type':1}

# 2 反序列化的保存

class OrderPaySerializer(serializers.ModelSerializer):

    # courses 重写

    # courses 本来是 [1,4,5]--->会去Course.objects.all() 数据集中映射---》变成 --》[course1对象,course4对象,course5对象,]

    courses = serializers.PrimaryKeyRelatedField(

        queryset=Course.objects.all(), many=True

    )

    class Meta:

        model = Order

        fields = [

            "courses",  # 不是表中字段,需要重写

            "total_amount",

            "subject",

            "pay_type",

        ]

    # {'courses':[1,],'total_amount':0.1,'subject':课程名,'pay_type':1}

    def _get_price_total(self, attrs):

        courses = attrs.get("courses")

        real_count = 0

        total_amount = attrs.get("total_amount")

        for course in courses:

            real_count += course.price

        if real_count != total_amount:

            raise APIException("课程价格有误")

        return total_amount

    def _get_order_id(self):

        out_trade_no = str(uuid.uuid4()).replace("-", "")

        return out_trade_no

    def _get_user(self):

        return self.context.get("request").user  # type: ignore

    def _get_pay_url(self, out_trade_no, total_amount, subject):

        order_string = alipay.api_alipay_trade_page_pay(

            out_trade_no=out_trade_no,

            total_amount=float(total_amount),  # 只有生成支付宝链接时,不能用Decimal

            subject=subject,

            return_url=settings.RETURN_URL,  # get 回调 --》前端

            notify_url=settings.NOTIFY_URL,  # post 回调--》后端

        )

        pay_url = GATEWAY + "?" + order_string

        # 将支付链接存入,传递给views

        self.context["pay_url"] = pay_url

    def _before_create(self, attrs, user, out_trade_no):

        # attrs ={'courses':[对象,],'total_amount':0.1,'subject':课程名,'pay_type':1}

        attrs["user"] = user

        attrs["out_trade_no"] = out_trade_no

    def validate(self, attrs):

        # 1 校验数据是否正确[订单总价校验]--》total_amount 和 courses 比较价格是否正确

        total_amount = self._get_price_total(attrs=attrs)

        # 2 生成订单号--》唯一的--》

        out_trade_no = self._get_order_id()

        # 3 获取支付人 --》当前登录用户

        user = self._get_user()

        # 4 获取支付链接--》

        self._get_pay_url(out_trade_no, total_amount, attrs.get("subject"))

        # 5 入库(两个表)的信息准备

        self._before_create(attrs, user, out_trade_no)

        return attrs

    def create(self, validated_data):

        # validated_data = {'courses': [对象, ], 'total_amount': 0.1, 'subject': 课程名, 'pay_type': 1,user:对象,out_trade_no:3333}

        # 存两个表

        courses = validated_data.pop("courses")

        order = Order.objects.create(**validated_data)

        for course in courses:

            OrderDetail.objects.create(

                order=order, course=course, price=course.price, real_price=course.price

            )

        return order
utils
common_mixin
from rest_framework.mixins import (

    CreateModelMixin,

    ListModelMixin,

    UpdateModelMixin,

    DestroyModelMixin,

    RetrieveModelMixin,

)

from utils.common_response import APIResponse

from django.core.cache import cache

from utils.common_logger import logger

from rest_framework.exceptions import APIException

class APIListModelMixin(ListModelMixin):

    def list(self, request, *args, **kwargs):

        res = super().list(request, *args, **kwargs)

        return APIResponse(results=res.data)

class CacheListModelMixin(ListModelMixin):

    cache_key = None

    def list(self, request, *args, **kwargs):

        assert self.cache_key, APIException(

            "如果继承CacheListModelMixin,必须要加cache_key!"

        )

        results = cache.get(self.cache_key)

        if not results:

            logger.info("走了数据库")

            res = super().list(request, *args, **kwargs)

            results = res.data

            cache.set(self.cache_key, results)

        return APIResponse(results=results)

class APIRetrieveModelMixin(RetrieveModelMixin):

    def retrieve(self, request, *args, **kwargs):

        res = super().retrieve(request, *args, **kwargs)

        return APIResponse(result=res.data)
common_exception
from rest_framework.views import exception_handler as drf_exception_handler

from rest_framework.response import Response

from utils.common_response import APIResponse

from utils.common_logger import logger

# 自定义异常类

class PasswordException(Exception):

    pass

def exception_handler(exc, context):

    res = drf_exception_handler(exc, context)

    request = context.get("request")

    view = context.get("view")

    ip = request.META.get("REMOTE_ADDR")

    path = request.get_full_path()

    method = request.method

    user_id = request.user.id or "匿名用户"

    logger.error(

        f"操作出错!{str(exc)},视图类:{str(view)},ip:{ip},请求地址:{path},请求方式:{method},用户id:{user_id}"

    )

    if res:

        # drf异常

        if isinstance(res.data, dict):

            err = res.data.get("detail") or res.data.get('non_field_errors') or '请正确输入!'

        elif isinstance(res.data, list):

            err = res.data[0]

        else:

            err = "服务异常,请稍后再尝试,[drf]"

        response = APIResponse(code=4000, msg=err)

    else:

        # 非drf异常

        if isinstance(exc, ZeroDivisionError):

            err = "数据操作出错,除以0了"

            code = 4001

        elif isinstance(exc, PasswordException):

            err = "密码错误!"

            code = 4002

        else:

            err = f"{str(exc)}"

            code = 4004

        response = APIResponse(code=code, msg=err)

    return response
common_logger
# -*- coding: utf-8 -*-

# author : heart

# blog_url : https://www.cnblogs.com/ssrheart/

# time : 2024/5/9

from loguru import logger

import os

LOG_PATH = os.path.join("logs", "luffy.log")

def configure_logger():

    # logger.remove()  # 清除默认的日志处理器

    # logger.level("CRITICAL")

    logger.add(f"{LOG_PATH}", rotation="300 MB", level="ERROR")
common_middleware
# -*- coding: utf-8 -*-

# author : heart

# blog_url : https://www.cnblogs.com/ssrheart/

# time : 2024/5/10

from django.utils.deprecation import MiddlewareMixin

from utils.common_response import APIResponse

class MiddlewareTest(MiddlewareMixin):

    def process_response(self, request, response):

        response['Access-Control-Allow-Origin'] = '*'

        if request.method == 'OPTIONS':

            response['Access-Control-Allow-Methods'] = '*'

            response['Access-Control-Allow-Headers'] = '*'

        return response
common_models
from django.db import models

class BaseModel(models.Model):

    created_time = models.DateTimeField(auto_now_add=True, verbose_name="创建时间")

    updated_time = models.DateTimeField(auto_now=True, verbose_name="最后更新时间")

    is_delete = models.BooleanField(default=False, verbose_name="是否删除")

    is_show = models.BooleanField(default=True, verbose_name="是否上架")

    orders = models.IntegerField(verbose_name="优先级")

    class Meta:

        abstract = True  # 只用来继承,不在数据库中生成表
common_pool
# -*- coding: utf-8 -*-

# author : heart

# blog_url : https://www.cnblogs.com/ssrheart/

# time : 2024/5/15

import redis

POOL = redis.ConnectionPool(max_connections=10,host='127.0.0.1', port=6379, decode_responses=True)
common_response
from rest_framework.response import Response

class APIResponse(Response):

    def __init__(self, code=100, msg="成功!", headers=None, status=None, **kwargs):

        data = {"code": code, "msg": msg}

        if kwargs:

            data.update(kwargs)

        super().__init__(data=data, status=status, headers=headers)
settings
common_settings
BANNER_COUNT = 3

CELERY_BROKER_URL = "redis://127.0.0.1:6379/1"

# BACKEND配置,使用redis

CELERY_RESULT_BACKEND = "redis://127.0.0.1:6379/2"

CELERY_ACCEPT_CONTENT = ["json"]

CELERY_TASK_SERIALIZER = "json"

# 结果序列化方案

CELERY_RESULT_SERIALIZER = "json"

# 任务结果过期时间,秒

CELERY_TASK_RESULT_EXPIRES = 60 * 60 * 24

# 时区配置

CELERY_TIMEZONE = "Asia/Shanghai"
dev
from datetime import timedelta

from pathlib import Path

import sys, os

BASE_DIR = Path(__file__).resolve().parent.parent

apps = os.path.join(BASE_DIR, "apps")

sys.path.insert(0, apps)

sys.path.insert(0, str(BASE_DIR))

SECRET_KEY = "django-insecure-l@v+^w$odfsfht7+58(6ps0o!%$fsod=pf**zc(9ir(9e_=8#o"

DEBUG = True

ALLOWED_HOSTS = []

INSTALLED_APPS = [

    "simpleui",

    "django.contrib.admin",

    "django.contrib.auth",

    "django.contrib.contenttypes",

    "django.contrib.sessions",

    "django.contrib.messages",

    "django.contrib.staticfiles",

    "rest_framework",

    "corsheaders",

    "django_celery_beat",

    "django_celery_results",

    "django_filters",

    "user",

    "home",

    "course",

    "order",

]

MIDDLEWARE = [

    "django.middleware.security.SecurityMiddleware",

    "django.contrib.sessions.middleware.SessionMiddleware",

    "django.middleware.common.CommonMiddleware",

    "django.middleware.csrf.CsrfViewMiddleware",

    "django.contrib.auth.middleware.AuthenticationMiddleware",

    "django.contrib.messages.middleware.MessageMiddleware",

    "django.middleware.clickjacking.XFrameOptionsMiddleware",

    "corsheaders.middleware.CorsMiddleware",

]

ROOT_URLCONF = "luffy_api.urls"

TEMPLATES = [

    {

        "BACKEND": "django.template.backends.django.DjangoTemplates",

        "DIRS": [],

        "APP_DIRS": True,

        "OPTIONS": {

            "context_processors": [

                "django.template.context_processors.debug",

                "django.template.context_processors.request",

                "django.contrib.auth.context_processors.auth",

                "django.contrib.messages.context_processors.messages",

            ],

        },

    },

]

WSGI_APPLICATION = "luffy_api.wsgi.application"

user = os.environ.get("MYSQL_USER", "luffy")

password = os.environ.get("MYSQL_PASSWORD", "Luffy123?")

DATABASES = {

    "default": {

        "ENGINE": "django.db.backends.mysql",

        "NAME": "luffy",

        "HOST": "127.0.0.1",

        "PORT": 3307,

        "USER": user,

        "PASSWORD": password,

    }

}

AUTH_PASSWORD_VALIDATORS = [

    {

        "NAME": "django.contrib.auth.password_validation.UserAttributeSimilarityValidator",

    },

    {

        "NAME": "django.contrib.auth.password_validation.MinimumLengthValidator",

    },

    {

        "NAME": "django.contrib.auth.password_validation.CommonPasswordValidator",

    },

    {

        "NAME": "django.contrib.auth.password_validation.NumericPasswordValidator",

    },

]

LANGUAGE_CODE = "zh-hans"

TIME_ZONE = "Asia/Shanghai"

USE_I18N = True

USE_TZ = True

STATIC_URL = "static/"

# 用于指定模型中自动生成主键字段的默认类型

# 如果没有在模型中明确指定主键字段类型,Django 将使用 BigAutoField 作为默认类型。

DEFAULT_AUTO_FIELD = "django.db.models.BigAutoField"

# 设置auth表

AUTH_USER_MODEL = "user.User"

# 开启media

MEDIA_URL = "/media/"

MEDIA_ROOT = os.path.join(BASE_DIR, "media")

# 日志

from utils import common_logger

common_logger.configure_logger()

# 异常捕获

REST_FRAMEWORK = {

    "EXCEPTION_HANDLER": "utils.common_exception.exception_handler",

}

# 跨域

CORS_ORIGIN_ALLOW_ALL = True

CORS_ALLOW_HEADERS = (

    "accept",

    "accept-encoding",

    "authorization",

    "content-type",

    "dnt",

    "origin",

    "user-agent",

    "x-csrftoken",

    "x-requested-with",

    # 额外允许的请求头

    "token",

)

from .common_settings import *

# 头像拼接路径

BACKEND_URL = "http://127.0.0.1:8000/"

# django缓存 配置到redis上

CACHES = {

    "default": {

        "BACKEND": "django_redis.cache.RedisCache",

        "LOCATION": "redis://127.0.0.1:6379",

        "OPTIONS": {

            "CLIENT_CLASS": "django_redis.client.DefaultClient",

            "CONNECTION_POOL_KWARGS": {"max_connections": 100},

            # "PASSWORD": "123",

        },

    }

}

# beat定时任务调度

CELERY_BEAT_SCHEDULE = {

    "every_1_minutes": {

        "task": "home.tasks.add",

        "schedule": timedelta(seconds=30),

        "args": (1, 2),

    },

}

# admin手动任务调度

# CELERY_BEAT_SCHEDULER = 'django_celery_beat.schedulers.DatabaseScheduler'

# CELERY_RESULT_BACKEND = 'django-db'

# 邮箱

# django发送邮件配置

EMAIL_BACKEND = "django.core.mail.backends.smtp.EmailBackend"

EMAIL_HOST = "smtp.qq.com"  # 如果是 163 改成 smtp.163.com

EMAIL_PORT = 465

EMAIL_HOST_USER = "446367977@qq.com"  # 帐号

EMAIL_HOST_PASSWORD = "juccqzxuiddrcbci"  # 密码

DEFAULT_FROM_EMAIL = EMAIL_HOST_USER

EMAIL_USE_SSL = True  # 使用ssl

# EMAIL_USE_TLS = True  # 使用tls

# EMAIL_USE_SSL 和 EMAIL_USE_TLS 是互斥的,即只能有一个为 True

# 前端基URL

LUFFY_URL = "http://localhost:5173"

# 支付宝同步异步回调接口配置

# 后端异步回调接口

NOTIFY_URL = BACKEND_URL + "api/v1/order/success/"

# 前端同步回调接口,没有/结尾

RETURN_URL = LUFFY_URL + "#/pay/success"

# JWT配置

SIMPLE_JWT = {

    "ACCESS_TOKEN_LIFETIME": timedelta(days=7),  # Access Token的有效期

}
urls 总路由
from django.contrib import admin

from django.urls import path, include

from django.conf import settings

from django.views.static import serve

urlpatterns = [

    path("admin/", admin.site.urls),

    path("media/<path:path>", serve, {"document_root": settings.MEDIA_ROOT}),

    path("api/v1/user/", include("user.urls")),

    path("api/v1/home/", include("home.urls")),

    path("api/v1/course/", include("course.urls")),

    path("api/v1/order/", include("order.urls")),

]
前端实现
轮播图前端
HomeView.vue
<template>

    <Headers></Headers>

    <Banner></Banner>

    <div class="course">

        <el-row>

            <el-col :span="6" v-for="(o, index) in 8" :key="o" class="course_detail">

                <el-card :body-style="{ padding: '0px' }">

                    <img src="http://photo.liuqingzheng.top/2023%2002%2022%2021%2057%2011%20/image-20230222215707795.png"

                         class="image">

                    <div style="padding: 14px;">

                        <span>推荐课程</span>

                        <div class="bottom clearfix">

                            <time class="time">价格:999</time>

                            <el-button type="primary" key="text" class="button" link>查看详情</el-button>

                        </div>

                    </div>

                </el-card>

            </el-col>

        </el-row>

    </div>

    <img src="http://photo.liuqingzheng.top/2023%2003%2001%2016%2010%2034%20/1.png" alt="" width="100%" height="500px">

    <Footer></Footer>

</template>

<script setup>

import axios from 'axios';

import {inject, reactive} from 'vue'

import Headers from '../components/Headers.vue'

import Footer from "../components/Footer.vue";

import Banner from "../components/Banner.vue";

</script>

<style scoped>

.time {

    font-size: 13px;

    color: #999;

}

.bottom {

    margin-top: 13px;

    line-height: 12px;

}

.button {

    padding: 0;

    float: right;

}

.image {

    width: 100%;

    display: block;

}

.clearfix:before,

.clearfix:after {

    display: table;

    content: "";

}

.clearfix:after {

    clear: both

}

.course_detail {

    padding: 50px;

}

</style>
Header.vue
<template>

    <div class="header">

        <div class="slogan">

            <p>老男孩IT教育 | 帮助有志向的年轻人通过努力学习获得体面的工作和生活</p>

        </div>

        <div class="nav">

            <ul class="left-part">

                <li class="logo">

                    <router-link to="/">

                        <img src="../assets/img/head-logo.svg" alt="">

                    </router-link>

                </li>

                <li class="ele">

                    <span @click="goPage('/free')" :class="{active: url_path === '/free'}">免费课</span>

                </li>

                <li class="ele">

                    <span @click="goPage('/actual')"

                          :class="{active: url_path === '/actual'}">实战课</span>

                </li>

                <li class="ele">

                    <span @click="goPage('/light')" :class="{active: url_path === '/light'}">轻课</span>

                </li>

            </ul>

            <div class="right-part">

                <div>

                    <span>登录</span>

                    <span class="line">|</span>

                    <span>注册</span>

                </div>

            </div>

        </div>

    </div>

</template>

<script setup>

import {ref} from 'vue';

import router from "../router/index.js";

const url_path = ref(sessionStorage.url_path || '/')

const goPage = (url_path) => {

    if (url_path !== url_path.value) {

        router.push(url_path)

    }

    sessionStorage.url_path = url_path;

}

// router.currentRoute.value.path 是当前路由的路径

sessionStorage.url_path = router.currentRoute.value.path;

url_path.value = router.currentRoute.value.path;

</script>

<style scoped>

.header {

    background-color: white;

    box-shadow: 0 0 5px 0 #aaa;

}

.header:after {

    content: "";

    display: block;

    clear: both;

}

.slogan {

    background-color: #eee;

    height: 40px;

}

.slogan p {

    width: 1200px;

    margin: 0 auto;

    color: #aaa;

    font-size: 13px;

    line-height: 40px;

}

.nav {

    background-color: white;

    user-select: none;

    width: 1200px;

    margin: 0 auto;

}

.nav ul {

    padding: 15px 0;

    float: left;

}

.nav ul:after {

    clear: both;

    content: '';

    display: block;

}

.nav ul li {

    float: left;

}

.logo {

    margin-right: 20px;

}

.ele {

    margin: 0 20px;

}

.ele span {

    display: block;

    font: 15px/36px '微软雅黑';

    border-bottom: 2px solid transparent;

    cursor: pointer;

}

.ele span:hover {

    border-bottom-color: orange;

}

.ele span.active {

    color: orange;

    border-bottom-color: orange;

}

.right-part {

    float: right;

}

.right-part .line {

    margin: 0 10px;

}

.right-part span {

    line-height: 68px;

    cursor: pointer;

}

</style>
Footer.vue
<template>

    <div class="footer">

        <ul>

            <li>关于我们</li>

            <li>联系我们</li>

            <li>商务合作</li>

            <li>帮助中心</li>

            <li>意见反馈</li>

            <li>新手指南</li>

        </ul>

        <p>Copyright  luffycity.com版权所有 | 京ICP备17072161号-1</p>

    </div>

</template>

<script setup>

</script>

<style scoped>

.footer {

    width: 100%;

    height: 128px;

    background: #25292e;

    color: #fff;

}

.footer ul {

    margin: 0 auto 16px;

    padding-top: 38px;

    width: 810px;

}

.footer ul li {

    float: left;

    width: 112px;

    margin: 0 10px;

    text-align: center;

    font-size: 14px;

}

.footer ul::after {

    content: "";

    display: block;

    clear: both;

}

.footer p {

    text-align: center;

    font-size: 12px;

}

</style>
Banner.vue
<template>

    <div class="banner">

        <el-carousel height="400px">

            <el-carousel-item v-for="(item,index) in bannerList.results" :key="index">

                <template v-if="item.link.indexOf('https://') >= 0">

                    <a :href="item.link">

                        <img :src="item.image" :alt="item.title">

                    </a>

                </template>

                <template v-else>

                    <router-link :to="item.link">

                        <img :src="item.image" :alt="item.title">

                    </router-link>

                </template>

            </el-carousel-item>

        </el-carousel>

    </div>

</template>

<script setup>

import {reactive, inject} from "vue";

import axios from "axios";

import {ElMessage} from "element-plus";

const settings = inject('$settings')

const bannerList = reactive({results: []})

axios.get(settings.banner).then(res => {

    if (res.data.code == 100) {

        bannerList.results = res.data.results

    } else {

        ElMessage.error(res.data.msg)

    }

}).catch(err => {

    ElMessage.error('服务器异常,请联系管理员')

})

</script>

<style scoped>

.el-carousel__item {

    height: 400px;

    min-width: 1200px;

}

.el-carousel__item img {

    height: 400px;

    margin-left: calc(50% - 1920px / 2);

}

</style>
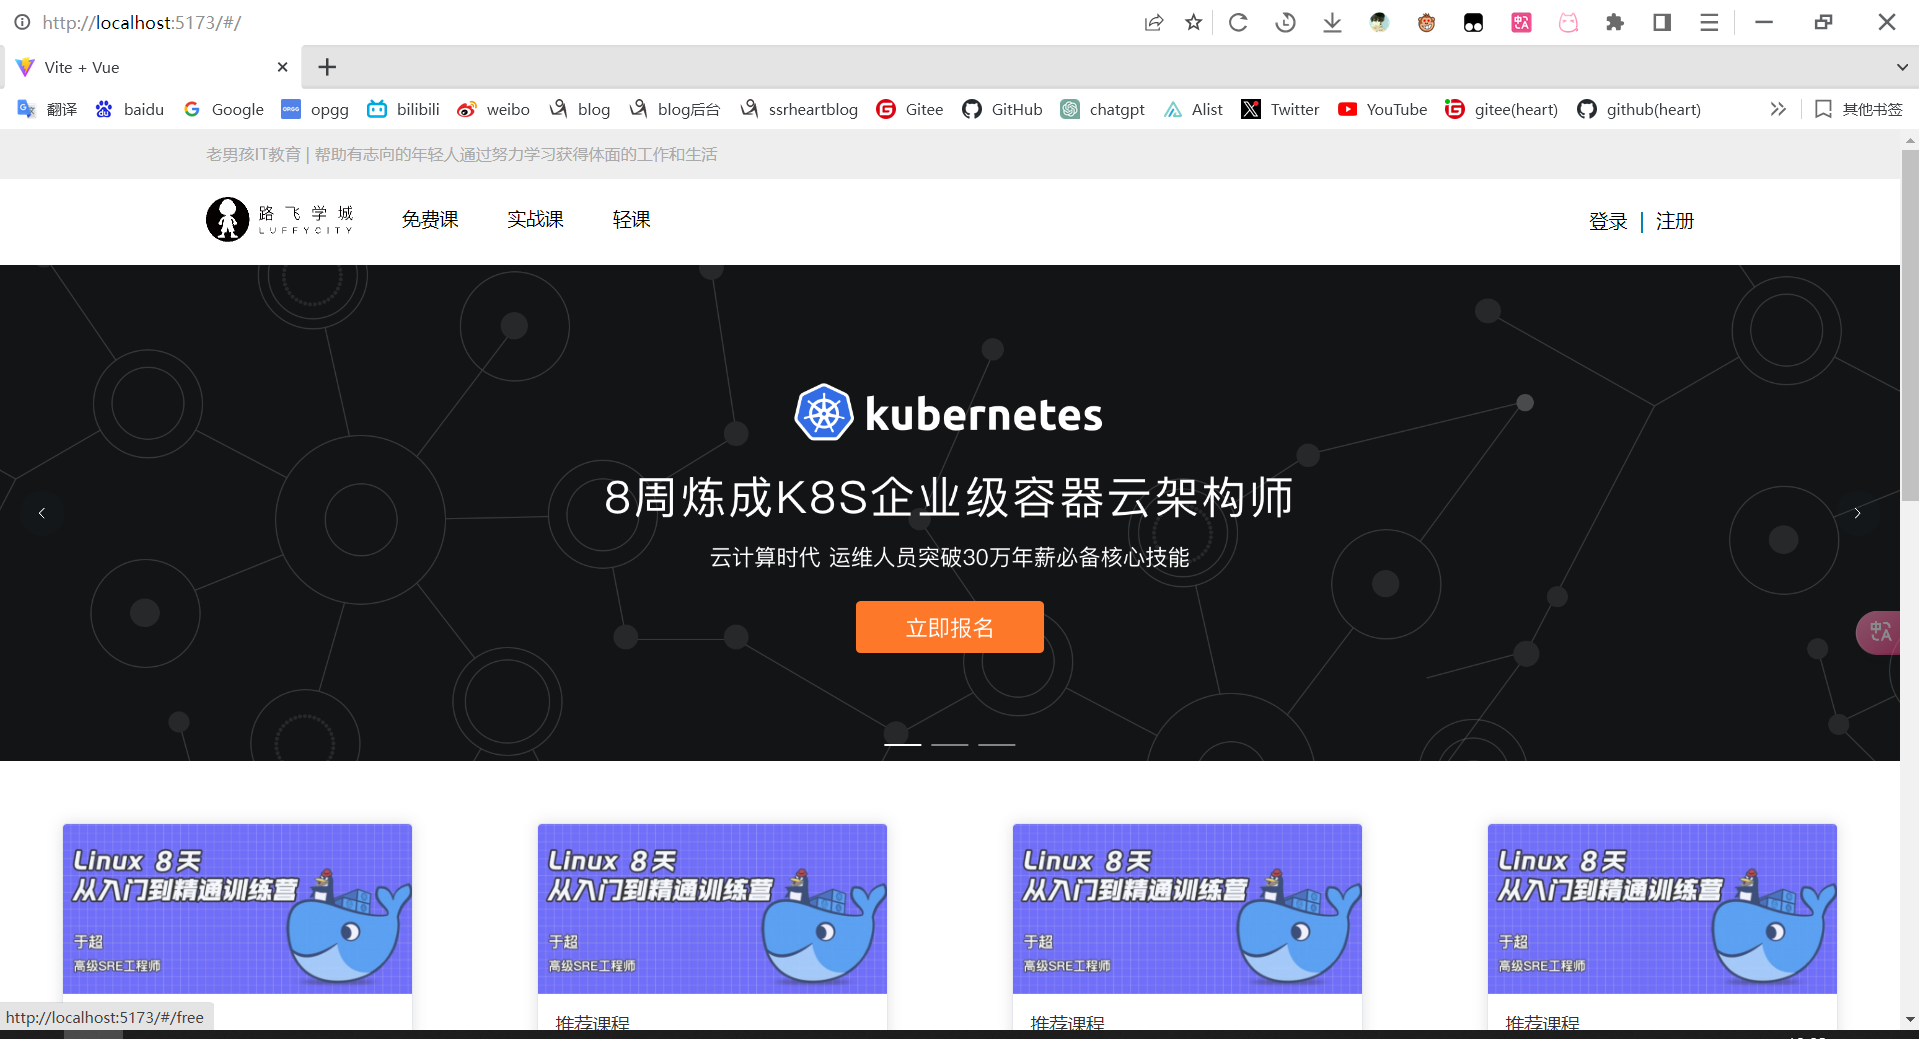
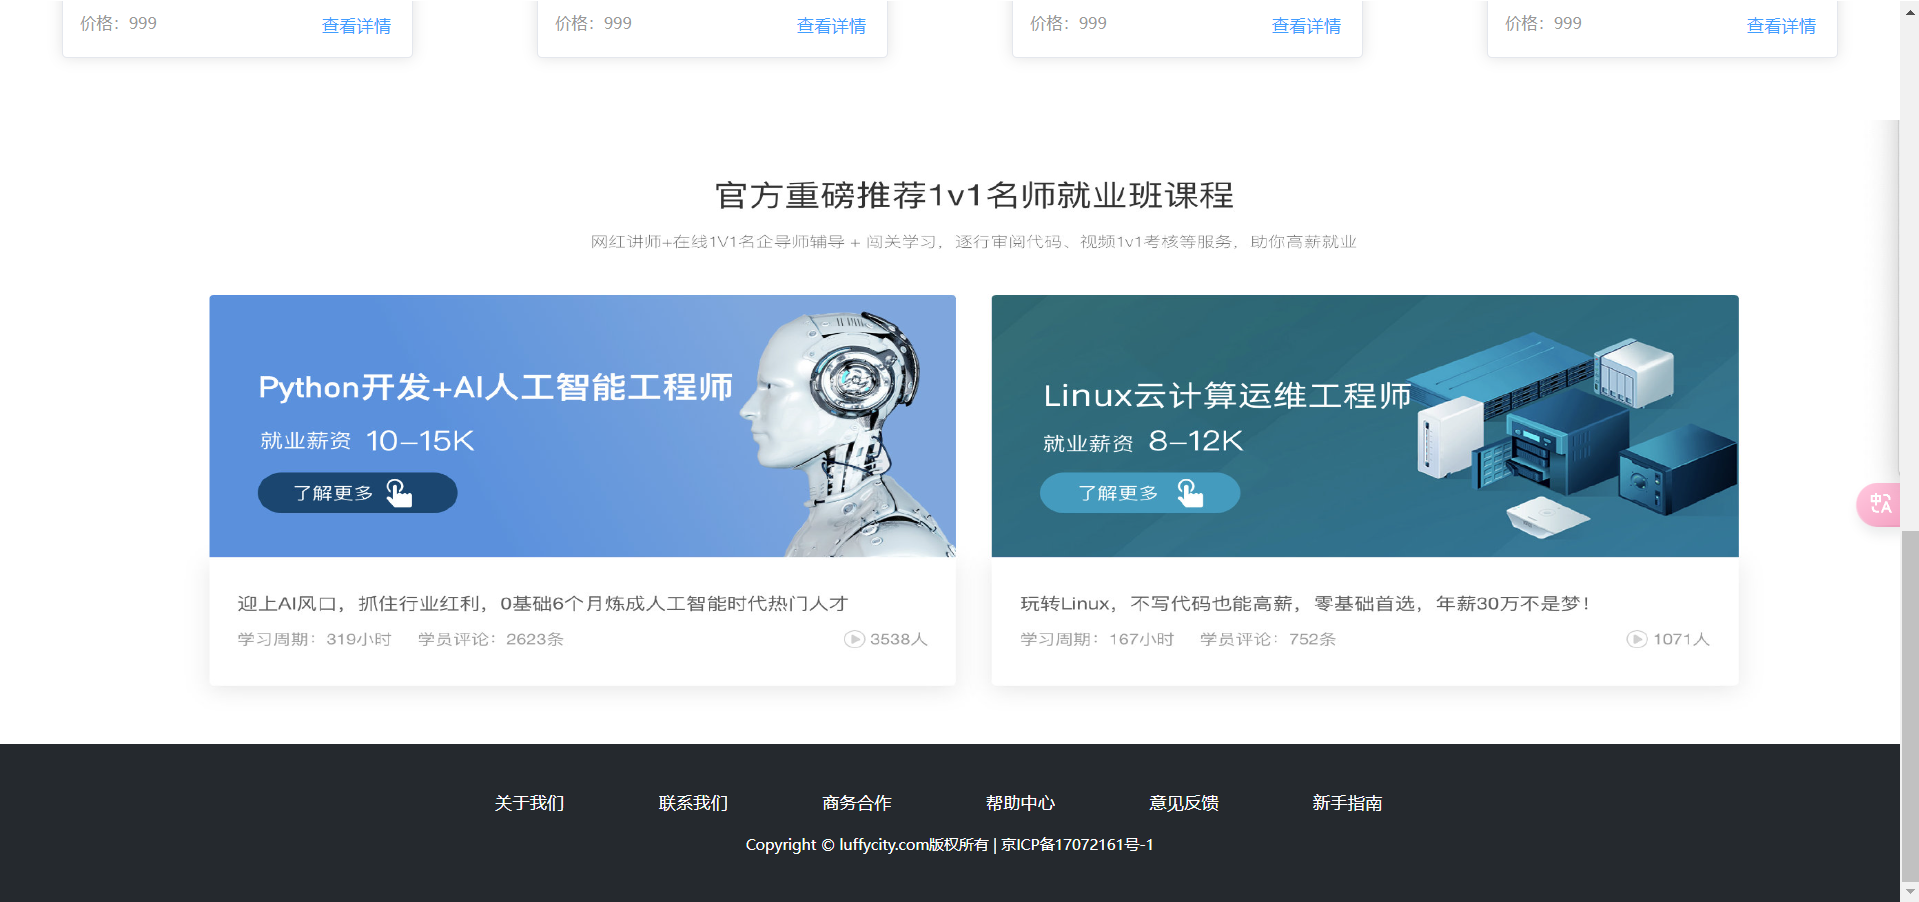
多方式登录前端 & 短信登录
LoginView.vue
<template>

    <div class="login">

        <div class="box">

            <i class='el-icon-close' @click="close_login">

                <el-icon>

                    <Close/>

                </el-icon>

            </i>

            <div class="content">

                <div class="nav">

                    <span :class="{active: login_method === 'is_pwd'}"

                          @click="change_login_method('is_pwd')">密码登录</span>

                    <span :class="{active: login_method === 'is_sms'}"

                          @click="change_login_method('is_sms')">短信登录</span>

                </div>

                <el-form v-if="login_method === 'is_pwd'">

                    <el-input

                            placeholder="用户名/手机号/邮箱"

                            :prefix-icon="User"

                            v-model="username"

                            clearable>

                    </el-input>

                    <el-input

                            placeholder="密码"

                            :prefix-icon="Key"

                            v-model="password"

                            clearable

                            show-password>

                    </el-input>

                    <el-button type="primary" @click="handleLogin">登录</el-button>

                </el-form>

                <el-form v-if="login_method === 'is_sms'">

                    <el-input

                            placeholder="手机号"

                            :prefix-icon="Iphone"

                            v-model="mobile"

                            clearable

                            @blur="check_mobile">

                    </el-input>

                    <el-input

                            placeholder="验证码"

                            :prefix-icon="ChatLineRound"

                            v-model="sms"

                            clearable>

                        <template #append>

                            <span class="sms" @click="send_sms">{{ sms_interval }}</span>

                        </template>

                    </el-input>

                    <el-button type="primary" @click="handleSMSLogin">登录</el-button>

                </el-form>

                <div class="foot">

                    <span @click="go_register">立即注册</span>

                </div>

            </div>

        </div>

    </div>

</template>

<script setup>

import {inject, defineEmits, ref} from "vue";

import {User, Key, Close, Iphone, ChatLineRound} from '@element-plus/icons-vue'

import {ElMessage} from 'element-plus'

import axios from "axios";

// 配置

const emits = defineEmits('close','go');

const settings = inject('$settings')

const cookies = inject('$cookies')

// 定义响应式变量

const login_method = ref("is_pwd")

const username = ref('')

const password = ref('')

const mobile = ref('')

const sms = ref('')

const sms_interval = ref("获取验证码")

const is_send = ref(false)

// 改变模态框登录方式

const change_login_method = (method) => {

    login_method.value = method

}

// 关闭模态框

const close_login = () => {

    emits('close');

}

//多方式登录

const handleLogin = () => {

    if (username.value && password.value) {

        axios.post(settings.multiple_login, {

            username: username.value,

            password: password.value

        }).then(res => {

            if (res.data.code == 100) {

                ElMessage({

                    message: '登录成功!',

                    type: 'success',

                })

                cookies.set('token', res.data.token, '7d')

                cookies.set('username', res.data.username, '7d')

                cookies.set('icon', res.data.icon, '7d')

                emits('close')

            } else {

                ElMessage({

                    message: res.data.msg[0] + '!',

                    type: 'error',

                })

            }

        }).catch(err => {

            ElMessage({

                message: err,

                type: 'error',

            })

        })

    }

}

// 校验手机号是否存在

const check_mobile = () => {

    if (!mobile.value) return;

    if (!mobile.value.match(/^1[3-9][0-9]{9}$/)) {

        ElMessage({

            message: '手机号有误',

            type: 'error',

            duration: 1000,

            onClose: () => {

                mobile.value = '';

            }

        });

        return false;

    }

    axios.get(settings.check_mobile, {

        params: {

            mobile: mobile.value

        }

    }).then(res => {

        if (res.data.code == 100) {

            ElMessage({type: "success", message: '手机号正确,可以正常发送!'})

            is_send.value = true; // 发送验证码可以点击

        } else {

            // 手机号,后端没有,让它注册

            ElMessage({type: "error", message: '手机号不存在,请先注册!'})

            mobile.value = ''

        }

    })

}

// 发送验证码短信

const send_sms = () => {

    if (!is_send.value) return;

    is_send.value = false; // 发送短信按钮不能点击了

    let sms_interval_time = 60;

    sms_interval.value = "发送中...";

    const timer = setInterval(() => {

        if (sms_interval_time <= 1) {

            clearInterval(timer);

            sms_interval.value = "获取验证码";

            is_send.value = true; // 重新回复点击发送功能的条件

        } else {

            sms_interval_time -= 1;

            sms_interval.value = `${sms_interval_time}秒后再发`;

        }

    }, 1000);

    // 发送短信

    axios.get(settings.send_sms, {

        params: {

            mobile: mobile.value

        }

    }).then(res => {

        if (res.data.code == 100) {

            ElMessage({

                message: '短信发送成功!',

                type: 'success',

            })

        }

    }).catch(err => {

        ElMessage({

            message: err,

            type: 'error',

        })

    });

};

// 短信验证码登录

const handleSMSLogin = () => {

    if (mobile.value && sms.value) {

        axios.post(settings.sms_login, {

            mobile: mobile.value,

            code: sms.value,

        }).then(

            res => {

                if (res.data.code == 100) {

                    ElMessage({type: 'success', message:'登录成功!'})

                    cookies.set('token', res.data.token, '7d')

                    cookies.set('username', res.data.username, '7d')

                    cookies.set('icon', res.data.icon, '7d')

                    emits('close')

                } else {

                    ElMessage({type: 'error', message: res.data.msg})

                }

            }

        ).catch(err => {

            ElMessage({type: 'error', message: err})

        })

    } else {

        ElMessage({type: 'error', message: '手机号和验证码不能为空'})

    }

}

const go_register=()=>{

    emits('go')

}

</script>

<style scoped>

.login {

    width: 100vw;

    height: 100vh;

    position: fixed;

    top: 0;

    left: 0;

    z-index: 10;

    background-color: rgba(0, 0, 0, 0.3);

}

.box {

    width: 400px;

    height: 420px;

    background-color: white;

    border-radius: 10px;

    position: relative;

    top: calc(50vh - 210px);

    left: calc(50vw - 200px);

}

.el-icon-close {

    position: absolute;

    font-weight: bold;

    font-size: 20px;

    top: 10px;

    right: 10px;

    cursor: pointer;

}

.el-icon-close:hover {

    color: darkred;

}

.content {

    position: absolute;

    top: 40px;

    width: 280px;

    left: 60px;

}

.nav {

    font-size: 20px;

    height: 38px;

    border-bottom: 2px solid darkgrey;

}

.nav > span {

    margin: 0 20px 0 35px;

    color: darkgrey;

    user-select: none;

    cursor: pointer;

    padding-bottom: 10px;

    border-bottom: 2px solid darkgrey;

}

.nav > span.active {

    color: black;

    border-bottom: 3px solid black;

    padding-bottom: 9px;

}

.el-input, .el-button {

    margin-top: 40px;

}

.el-button {

    width: 100%;

    font-size: 18px;

}

.foot > span {

    float: right;

    margin-top: 20px;

    color: orange;

    cursor: pointer;

}

.sms {

    color: orange;

    cursor: pointer;

    display: inline-block;

    width: 70px;

    text-align: center;

    user-select: none;

}

</style>
Headers.vue
<template>

    <div class="header">

        <div class="slogan">

            <p>老男孩IT教育 | 帮助有志向的年轻人通过努力学习获得体面的工作和生活</p>

        </div>

        <div class="nav">

            <ul class="left-part">

                <li class="logo">

                    <router-link to="/">

                        <img src="../assets/img/head-logo.svg" alt="">

                    </router-link>

                </li>

                <li class="ele">

                    <span @click="goPage('/free')" :class="{active: url_path === '/free'}">免费课</span>

                </li>

                <li class="ele">

                    <span @click="goPage('/actual')"

                          :class="{active: url_path === '/actual'}">实战课</span>

                </li>

                <li class="ele">

                    <span @click="goPage('/light')" :class="{active: url_path === '/light'}">轻课</span>

                </li>

            </ul>

            <div class="right-part">

                <div v-if="username && username.length>0">

                    <span>{{ username }}</span>

                    <span class="line">|</span>

                    <span @click="handleLogout">注销</span>

                </div>

                <div v-else>

                    <span @click="handleLogin">登录</span>

                    <span class="line">|</span>

                    <span @click="put_register">注册</span>

                </div>

            </div>

            <LoginView v-if="is_login" @close="close_login" @go="put_register"></LoginView>

            <RegisterView v-if="is_register" @close_reg="close_register" @go="put_login"></RegisterView>

        </div>

    </div>

</template>

<script setup>

import {ref, inject} from 'vue';

import router from "../router/index.js";

import LoginView from "../views/LoginView.vue";

import RegisterView from '../views/RegisterView.vue'

const username = ref('')

const is_login = ref(false)

const url_path = ref(sessionStorage.url_path || '/')

const cookies = inject("$cookies")

const is_register = ref(false)

const goPage = (url_path) => {

    if (url_path !== url_path.value) {

        router.push(url_path)

    }

    sessionStorage.url_path = url_path;

}

// router.currentRoute.value.path 是当前路由的路径

sessionStorage.url_path = router.currentRoute.value.path;

url_path.value = router.currentRoute.value.path;

const handleLogin = () => {

    is_login.value = true

}

const close_login = () => {

    is_login.value = false

    username.value = cookies.get('username')

}

username.value = cookies.get('username')

const handleLogout = () => {

    username.value = ''

    cookies.remove('username')

    cookies.remove('icon')

    cookies.remove('token')

}

const put_register = () => {

    is_login.value = false;

    is_register.value = true;

}

const put_login=()=>{

    is_login.value = true;

    is_register.value = false;

}

const close_register = () => {

    is_register.value = false

}

</script>

<style scoped>

.header {

    background-color: white;

    box-shadow: 0 0 5px 0 #aaa;

}

.header:after {

    content: "";

    display: block;

    clear: both;

}

.slogan {

    background-color: #eee;

    height: 40px;

}

.slogan p {

    width: 1200px;

    margin: 0 auto;

    color: #aaa;

    font-size: 13px;

    line-height: 40px;

}

.nav {

    background-color: white;

    user-select: none;

    width: 1200px;

    margin: 0 auto;

}

.nav ul {

    padding: 15px 0;

    float: left;

}

.nav ul:after {

    clear: both;

    content: '';

    display: block;

}

.nav ul li {

    float: left;

}

.logo {

    margin-right: 20px;

}

.ele {

    margin: 0 20px;

}

.ele span {

    display: block;

    font: 15px/36px '微软雅黑';

    border-bottom: 2px solid transparent;

    cursor: pointer;

}

.ele span:hover {

    border-bottom-color: orange;

}

.ele span.active {

    color: orange;

    border-bottom-color: orange;

}

.right-part {

    float: right;

}

.right-part .line {

    margin: 0 10px;

}

.right-part span {

    line-height: 68px;

    cursor: pointer;

}

</style>
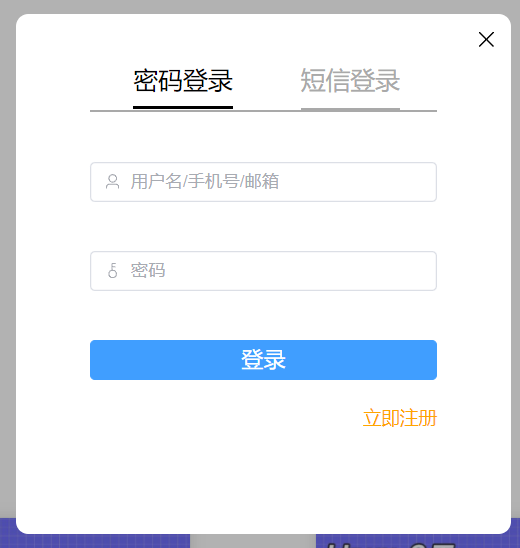
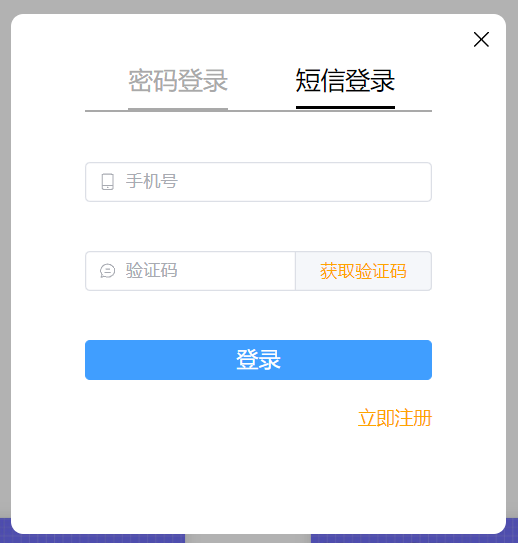
注册前端
RegisterView.vue
<template>

    <div class="register">

        <div class="box">

            <i class="el-icon-close" @click="close_register">

                <el-icon>

                    <Close/>

                </el-icon>

            </i>

            <div class="content">

                <div class="nav">

                    <span class="active">新用户注册</span>

                </div>

                <el-form>

                    <el-input

                            placeholder="手机号"

                            :prefix-icon="Iphone"

                            v-model="mobile"

                            clearable

                            @blur="check_mobile">

                    </el-input>

                    <el-input

                            placeholder="密码"

                            :prefix-icon="Key"

                            v-model="password"

                            clearable

                            show-password>

                    </el-input>

                    <el-input

                            placeholder="验证码"

                            :prefix-icon="ChatLineRound"

                            v-model="sms"

                            clearable>

                        <template #append>

                            <span class="sms" @click="send_sms">{{ sms_interval }}</span>

                        </template>

                    </el-input>

                    <el-button type="primary" @click="handleRegister">注册</el-button>

                </el-form>

                <div class="foot">

                    <span @click="go_login">立即登录</span>

                </div>

            </div>

        </div>

    </div>

</template>

<script setup>

import {ChatLineRound, Close, Iphone, Key} from "@element-plus/icons-vue";

import {ref, defineEmits, inject} from 'vue'

import {ElMessage} from "element-plus";

import axios from "axios";

const settings = inject('$settings')

// 配置

const emits = defineEmits('close_reg','go');

// 定义响应式变量

const mobile = ref('')

const password = ref('')

const sms = ref('')

const sms_interval = ref('获取验证码')

const is_send = ref(false)

// 方法

const close_register = () => {

    emits('close_reg')

}

// 校验手机号是否存在

const check_mobile = () => {

    if (!mobile.value) return;

    if (!mobile.value.match(/^1[3-9][0-9]{9}$/)) {

        ElMessage({

            message: '手机号有误',

            type: 'error',

            duration: 1000,

            onClose: () => {

                mobile.value = '';

            }

        });

        return false;

    }

    axios.get(settings.check_mobile, {

        params: {

            mobile: mobile.value

        }

    }).then(res => {

        if (res.data.code == 100) {

            ElMessage({type: "error", message: '手机号已注册,请登录!'})

            mobile.value = ''

        } else {

            ElMessage({type: "success", message: '手机号尚未注册!'})

            is_send.value = true; // 发送验证码可以点击

        }

    })

}

// 发送短信

const send_sms = () => {

    if (!is_send.value) return; // 如果 is_send 的值为 false,则立即退出当前函数,不再执行后续的代码

    is_send.value = false; // 发送短信按钮不能点击了

    let sms_interval_time = 60;

    sms_interval.value = "发送中...";

    const timer = setInterval(() => {

        if (sms_interval_time <= 1) {

            clearInterval(timer);

            sms_interval.value = "获取验证码";

            is_send.value = true; // 重新回复点击发送功能的条件

        } else {

            sms_interval_time -= 1;

            sms_interval.value = `${sms_interval_time}秒后再发`;

        }

    }, 1000);

    // 发送短信

    axios.get(settings.send_sms, {

        params: {

            mobile: mobile.value

        }

    }).then(res => {

        if (res.data.code == 100) {

            ElMessage({

                message: '短信发送成功!',

                type: 'success',

            })

        }

    }).catch(err => {

        ElMessage({

            message: err,

            type: 'error',

        })

    });

};

// 注册

const handleRegister = () => {

    if (mobile.value && password.value && sms.value) {

        axios.post(settings.register, {

            mobile: mobile.value,

            code: sms.value,

            password: password.value

        }).then(res => {

            if (res.data.code == 100){

                ElMessage({type:'success',message:'注册成功!'})

            }

        })

    }

}

const go_login = () => {

    emits('go')

}

</script>

<style scoped>

.register {

    width: 100vw;

    height: 100vh;

    position: fixed;

    top: 0;

    left: 0;

    z-index: 10;

    background-color: rgba(0, 0, 0, 0.3);

}

.box {

    width: 400px;

    height: 480px;

    background-color: white;

    border-radius: 10px;

    position: relative;

    top: calc(50vh - 240px);

    left: calc(50vw - 200px);

}

.el-icon-close {

    position: absolute;

    font-weight: bold;

    font-size: 20px;

    top: 10px;

    right: 10px;

    cursor: pointer;

}

.el-icon-close:hover {

    color: darkred;

}

.content {

    position: absolute;

    top: 40px;

    width: 280px;

    left: 60px;

}

.nav {

    font-size: 20px;

    height: 38px;

    border-bottom: 2px solid darkgrey;

}

.nav > span {

    margin-left: 90px;

    color: darkgrey;

    user-select: none;

    cursor: pointer;

    padding-bottom: 10px;

    border-bottom: 2px solid darkgrey;

}

.nav > span.active {

    color: black;

    border-bottom: 3px solid black;

    padding-bottom: 9px;

}

.el-input, .el-button {

    margin-top: 40px;

}

.el-button {

    width: 100%;

    font-size: 18px;

}

.foot > span {

    float: right;

    margin-top: 20px;

    color: orange;

    cursor: pointer;

}

.sms {

    color: orange;

    cursor: pointer;

    display: inline-block;

    width: 70px;

    text-align: center;

    user-select: none;

}

</style>
课程列表前端
ActualView.vue
<template>
<div class="course">
<Headers></Headers>
<div class="main">
<!-- 筛选条件 -->
<div class="condition">
<ul class="cate-list">
<li class="title">课程分类:</li>
<li :class="filter.course_category == 0 ? 'this' : ''" @click="filter.course_category = 0">全部</li>
<li :class="filter.course_category == category.id ? 'this' : ''"
v-for="category in category_list.result" @click="filter.course_category = category.id"
:key="category.name">{{ category.name }}
</li>
</ul>
<div class="ordering">
<ul>
<li class="title">筛 选:</li>
<li class="default" :class="(filter.ordering == 'id' || filter.ordering == '-id') ? 'this' : ''"
@click="filter.ordering = '-id'">默认
</li>
<li class="hot"
:class="(filter.ordering == 'students' || filter.ordering == '-students') ? 'this' : ''"
@click="filter.ordering = (filter.ordering == '-students' ? 'students' : '-students')">人气
</li>
<li class="price"
:class="filter.ordering == 'price' ? 'price_up this' : (filter.ordering == '-price' ? 'price_down this' : '')"
@click="filter.ordering = (filter.ordering == '-price' ? 'price' : '-price')">价格
</li>
</ul>
<p class="condition-result">共{{ course_total }}个课程</p>
</div>
</div>
<!-- 课程列表 -->
<div class="course-list">
<div class="course-item" v-for="course in course_list.result" :key="course.name">
<div class="course-image">
<img :src="course.course_img" alt="">
</div>
<div class="course-info">
<h3>
<router-link :to="'/actual/detail/' + course.id">{{ course.name }}</router-link>
<span><img src="../assets/img/avatar1.svg" alt="">{{ course.students }}人已加入学习</span>
</h3>
<p class="teather-info">
{{ course.teacher.name }} {{ course.teacher.title }} {{ course.teacher.signature }}
<span v-if="course.sections > course.pub_sections">共{{ course.sections }}课时/已更新{{
course.pub_sections }}课时</span>
<span v-else>共{{ course.sections }}课时/更新完成</span>
</p>
<ul class="section-list">
<li v-for="(section, key) in course.section_list" :key="section.name"><span
class="section-title">0{{ key + 1 }} | {{ section.name }}</span>
<span class="free" v-if="section.free_trail">免费</span>
</li>
</ul>
<div class="pay-box">
<div v-if="course.discount_type">
<span class="discount-type">{{ course.discount_type }}</span>
<span class="discount-price">¥{{ course.real_price }}元</span>
<span class="original-price">原价:{{ course.price }}元</span>
</div>
<span v-else class="discount-price">¥{{ course.price }}元</span>
<span class="buy-now">立即购买</span>
</div>
</div>
</div>
</div>
<div class="course_pagination block">
<el-pagination @size-change="handleSizeChange" @current-change="handleCurrentChange"
:current-page.sync="filter.page" :page-sizes="[2, 3, 5, 10]" :page-size="filter.page_size"
layout="sizes, prev, pager, next" :total="course_total">
</el-pagination>
</div>
</div>
<Footer></Footer>
</div>
</template>
<script setup>
import Headers from "../components/Headers.vue";
import Footer from "../components/Footer.vue";
import { ref, reactive, watch } from "vue";
import axios from "axios";
import settings from "../assets/js/settings";
let course_total = ref(0)
let category_list = reactive({ result: [] })
let course_list = reactive({ result: [] })
let filter = reactive({ course_category: 0, ordering: '-id', page_size: 2, page: 1 })
const get_category = () => {
// 获取课程分类信息
axios.get(settings.category).then(res => {
category_list.result = res.data.results
}).catch(() => {
ElMessage({
message: '获取课程分类信息有误,请联系客服工作人员',
type: 'message',
})
})
}
const get_course = () => {
// 排序
let filters = {
ordering: filter.ordering, // 排序
};
// 判决是否进行分类课程的展示
if (filter.course_category > 0) {
filters.course_category = filter.course_category;
}
// 设置单页数据量
if (filter.page_size > 0) {
filters.page_size = filter.page_size;
} else {
filters.page_size = 5;
}
// 设置当前页码
if (filter.page > 1) {
filters.page = filter.page;
} else {
filters.page = 1;
}
// 获取课程列表信息
axios.get(settings.actual, {
params: filters
}).then(res => {
course_list.result = res.data.results;
course_total.value = res.data.count;
}).catch(() => {
ElMessage({
message: '获取课程分类信息有误,请联系客服工作人员',
type: 'message',
})
})
}
get_category()
get_course()
watch(() => filter.course_category, () => {
filter.page = 1;
get_course();
});
watch(() => filter.ordering, () => {
get_course();
});
watch(() => filter.page_size, () => {
get_course();
});
watch(() => filter.page, () => {
get_course();
});
const handleSizeChange = val => {
// 每页数据量发生变化时执行的方法
filter.page = 1;
filter.page_size = val;
// console.log(filter)
}
const handleCurrentChange = val => {
// 页码发生变化时执行的方法
filter.page = val;
}
</script>
<style scoped>
.course {
background: #f6f6f6;
}
.course .main {
width: 1100px;
margin: 35px auto 0;
}
.course .condition {
width: 1100px;
margin-bottom: 35px;
padding: 25px 30px 25px 20px;
background: #fff;
border-radius: 4px;
box-shadow: 0 2px 4px 0 #f0f0f0;
}
.course .cate-list {
border-bottom: 1px solid #333;
border-bottom-color: rgba(51, 51, 51, .05);
padding-bottom: 18px;
margin-bottom: 17px;
}
.course .cate-list::after {
content: "";
display: block;
clear: both;
}
.course .cate-list li {
float: left;
font-size: 16px;
padding: 6px 15px;
line-height: 16px;
margin-left: 14px;
position: relative;
transition: all .3s ease;
cursor: pointer;
color: #4a4a4a;
border: 1px solid transparent;
/* transparent 透明 */
}
.course .cate-list .title {
color: #888;
margin-left: 0;
letter-spacing: .36px;
padding: 0;
line-height: 28px;
}
.course .cate-list .this {
color: #ffc210;
border: 1px solid #ffc210 !important;
border-radius: 30px;
}
.course .ordering::after {
content: "";
display: block;
clear: both;
}
.course .ordering ul {
float: left;
}
.course .ordering ul::after {
content: "";
display: block;
clear: both;
}
.course .ordering .condition-result {
float: right;
font-size: 14px;
color: #9b9b9b;
line-height: 28px;
}
.course .ordering ul li {
float: left;
padding: 6px 15px;
line-height: 16px;
margin-left: 14px;
position: relative;
transition: all .3s ease;
cursor: pointer;
color: #4a4a4a;
}
.course .ordering .title {
font-size: 16px;
color: #888;
letter-spacing: .36px;
margin-left: 0;
padding: 0;
line-height: 28px;
}
.course .ordering .this {
color: #ffc210;
}
.course .ordering .price {
position: relative;
}
.course .ordering .price::before,
.course .ordering .price::after {
cursor: pointer;
content: "";
display: block;
width: 0px;
height: 0px;
border: 5px solid transparent;
position: absolute;
right: 0;
}
.course .ordering .price::before {
border-bottom: 5px solid #aaa;
margin-bottom: 2px;
top: 2px;
}
.course .ordering .price::after {
border-top: 5px solid #aaa;
bottom: 2px;
}
.course .ordering .price_up::before {
border-bottom-color: #ffc210;
}
.course .ordering .price_down::after {
border-top-color: #ffc210;
}
.course .course-item:hover {
box-shadow: 4px 6px 16px rgba(0, 0, 0, .5);
}
.course .course-item {
width: 1100px;
background: #fff;
padding: 20px 30px 20px 20px;
margin-bottom: 35px;
border-radius: 2px;
cursor: pointer;
box-shadow: 2px 3px 16px rgba(0, 0, 0, .1);
/* css3.0 过渡动画 hover 事件操作 */
transition: all .2s ease;
}
.course .course-item::after {
content: "";
display: block;
clear: both;
}
/* 顶级元素 父级元素 当前元素{} */
.course .course-item .course-image {
float: left;
width: 423px;
height: 210px;
margin-right: 30px;
}
.course .course-item .course-image img {
max-width: 100%;
max-height: 210px;
}
.course .course-item .course-info {
float: left;
width: 596px;
}
.course-item .course-info h3 a {
font-size: 26px;
color: #333;
font-weight: normal;
margin-bottom: 8px;
}
.course-item .course-info h3 span {
font-size: 14px;
color: #9b9b9b;
float: right;
margin-top: 14px;
}
.course-item .course-info h3 span img {
width: 11px;
height: auto;
margin-right: 7px;
}
.course-item .course-info .teather-info {
font-size: 14px;
color: #9b9b9b;
margin-bottom: 14px;
padding-bottom: 14px;
border-bottom: 1px solid #333;
border-bottom-color: rgba(51, 51, 51, .05);
}
.course-item .course-info .teather-info span {
float: right;
}
.course-item .section-list::after {
content: "";
display: block;
clear: both;
}
.course-item .section-list li {
float: left;
width: 44%;
font-size: 14px;
color: #666;
padding-left: 22px;
/* background: url("路径") 是否平铺 x轴位置 y轴位置 */
background: url("/src/assets/img/play-icon-gray.svg") no-repeat left 4px;
margin-bottom: 15px;
}
.course-item .section-list li .section-title {
/* 以下3句,文本内容过多,会自动隐藏,并显示省略符号 */
text-overflow: ellipsis;
overflow: hidden;
white-space: nowrap;
display: inline-block;
max-width: 200px;
}
.course-item .section-list li:hover {
background-image: url("/src/assets/img/play-icon-yellow.svg");
color: #ffc210;
}
li {
line-height: 1.4;
}
.course-item .section-list li .free {
width: 34px;
height: 20px;
color: #fd7b4d;
vertical-align: super;
margin-left: 10px;
margin-bottom: 10px;
border: 1px solid #fd7b4d;
border-radius: 2px;
text-align: center;
font-size: 13px;
white-space: nowrap;
}
.course-item .section-list li:hover .free {
color: #ffc210;
border-color: #ffc210;
}
.course-item {
position: relative;
}
.course-item .pay-box {
position: absolute;
bottom: 20px;
width: 600px;
}
.course-item .pay-box::after {
content: "";
display: block;
clear: both;
}
.course-item .pay-box .discount-type {
padding: 6px 10px;
font-size: 16px;
color: #fff;
text-align: center;
margin-right: 8px;
background: #fa6240;
border: 1px solid #fa6240;
border-radius: 10px 0 10px 0;
float: left;
}
.course-item .pay-box .discount-price {
font-size: 24px;
color: #fa6240;
float: left;
}
.course-item .pay-box .original-price {
text-decoration: line-through;
font-size: 14px;
color: #9b9b9b;
margin-left: 10px;
float: left;
margin-top: 10px;
}
.course-item .pay-box .buy-now {
width: 120px;
height: 38px;
background: transparent;
color: #fa6240;
font-size: 16px;
border: 1px solid #fd7b4d;
border-radius: 3px;
transition: all .2s ease-in-out;
float: right;
text-align: center;
line-height: 38px;
position: absolute;
right: 0;
bottom: 5px;
}
.course-item .pay-box .buy-now:hover {
color: #fff;
background: #ffc210;
border: 1px solid #ffc210;
}
.course .course_pagination {
margin-bottom: 60px;
text-align: center;
}
</style>
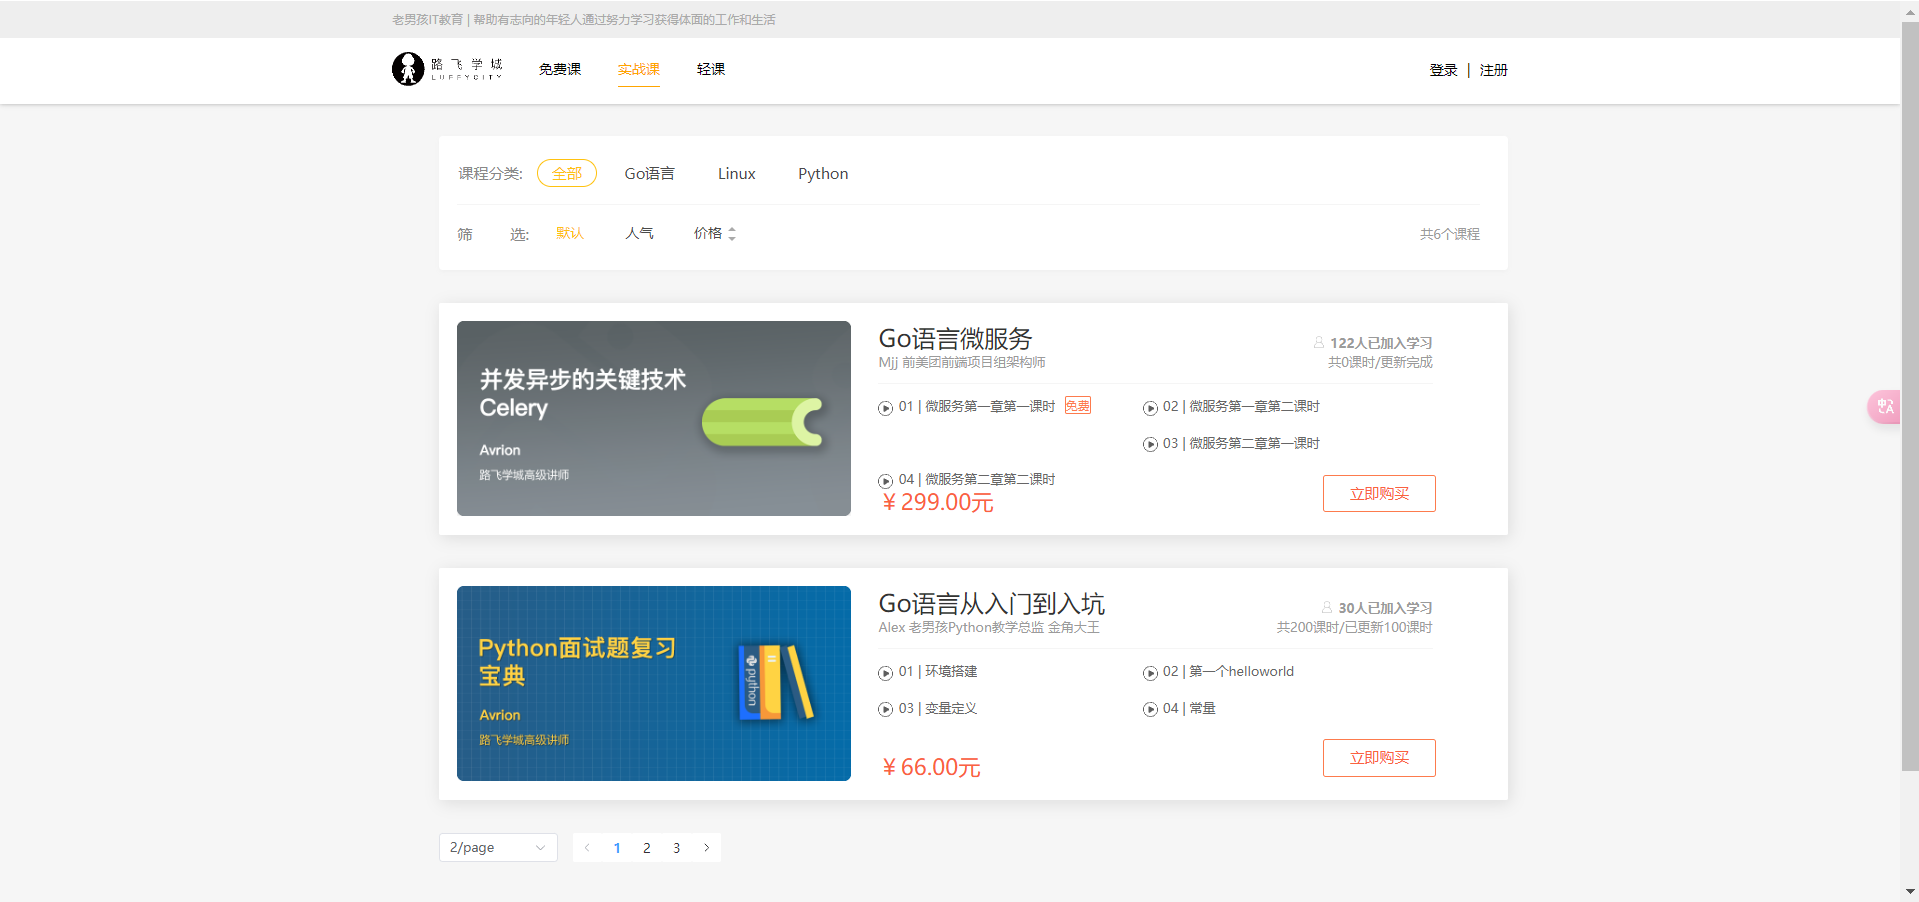
课程详情前端
ActualDetailView.vue
<template lang="">
<div class="detail">
<Headers></Headers>
<div class="main">
<div class="course-info">
<div class="wrap-left">
<video-player class="video-player vjs-custom-skin"
ref="videoPlayer"
:playsinline="true"
:options="playerOptions">
</video-player>
</div>
<div class="wrap-right">
<h3 class="course-name">{{ course_info.result.name }}</h3>
<p class="data">
{{ course_info.students }}人在学 课程总时长:{{
course_info.sections
}}课时/{{ course_info.result.pub_sections }}小时 难度:{{ course_info.result.level_name }}</p>
<div class="sale-time">
<p class="sale-type">价格 <span class="original_price">¥{{ course_info.result.price }}</span></p>
<p class="expire"></p>
</div>
<div class="buy">
<div class="buy-btn">
<button class="buy-now">立即购买</button>
<button class="free">免费试学</button>
</div>
<!--<div class="add-cart" @click="add_cart(course_info.id)">-->
<!--<img src="@/assets/img/cart-yellow.svg" alt="">加入购物车-->
<!--</div>-->
</div>
</div>
</div>
<div class="course-tab">
<ul class="tab-list">
<li :class="tabIndex==1?'active':''" @click="tabIndex=1">详情介绍</li>
<li :class="tabIndex==2?'active':''" @click="tabIndex=2">课程章节 <span :class="tabIndex!=2?'free':''">(试学)</span>
</li>
<li :class="tabIndex==3?'active':''" @click="tabIndex=3">用户评论</li>
<li :class="tabIndex==4?'active':''" @click="tabIndex=4">常见问题</li>
</ul>
</div>
<div class="course-content">
<div class="course-tab-list">
<div class="tab-item" v-if="tabIndex==1">
<div class="course-brief" v-html="course_info.result.brief"></div>
</div>
<div class="tab-item" v-if="tabIndex==2">
<div class="tab-item-title">
<p class="chapter">课程章节</p>
<p class="chapter-length">共{{ course_chapters.result.length }}章 {{ course_info.result.sections }}个课时</p>
</div>
<div class="chapter-item" v-for="chapter in course_chapters.result" :key="chapter.name">
<p class="chapter-title"><img src="../assets/img/enum.svg"
alt="">第{{ chapter.chapter }}章·{{ chapter.name }}
</p>
<ul class="section-list">
<li class="section-item" v-for="section in chapter.coursesections" :key="section.name">
<p class="name"><span class="index">{{ chapter.chapter }}-{{ section.orders }}</span>
{{ section.name }}<span class="free" v-if="section.free_trail">免费</span></p>
<p class="time">{{ section.duration }} <img src="../assets/img/chapter-player.svg"></p>
<button class="try" v-if="section.free_trail">立即试学</button>
<button class="try" v-else>立即购买</button>
</li>
</ul>
</div>
</div>
<div class="tab-item" v-if="tabIndex==3">
用户评论
</div>
<div class="tab-item" v-if="tabIndex==4">
常见问题
</div>
</div>
<div class="course-side">
<div class="teacher-info">
<h4 class="side-title"><span>授课老师</span></h4>
<div class="teacher-content">
<div class="cont1">
<img :src="course_info.result.teacher.image">
<div class="name">
<p class="teacher-name">{{ course_info.result.teacher.name }}
{{ course_info.result.teacher.title }}</p>
<p class="teacher-title">{{ course_info.result.teacher.signature }}</p>
</div>
</div>
<p class="narrative">{{ course_info.result.teacher.brief }}</p>
</div>
</div>
</div>
</div>
</div>
<Footer></Footer>
</div>
</template>
<script setup>
import Headers from "../components/Headers.vue";
import Footer from "../components/Footer.vue";
import { ref, reactive, watch } from "vue";
import axios from "axios";
import settings from "../assets/js/settings";
import "video.js/dist/video-js.css";
import VueVideoPlayer from "vue-video-player";
import { useRoute } from 'vue-router';
const route = useRoute();
const playUrl = ref('https://video.pearvideo.com/mp4/short/20240517/cont-1794270-71106842-hd.mp4')
const playerOptions = {
autoplay: false,//自动播放
muted: true, //静音播放
loop: true, //循环播放
preload: "none", //预加载
language: "zh-CN", //语言
aspectRatio: "16:9", //宽高比
fluid: true, //父容器的大小而自适应
sources: [
{
type: "",
src: playUrl.value,
},
],
notSupportedMessage: "此视频暂无法播放,请稍后再试",
controls: true, // 视频播放器的控制条
controlBar: {
timeDivider: true,
durationDisplay: true,
remainingTimeDisplay: false,
fullscreenToggle: true, // 全屏播放
playToggle: true, // 播放/暂停
volumePanel: true, // 音量控制
qualitySelector: true, // 清晰度选择
},
qualitySelector: {
default: "high", // 默认的清晰度
options: [
{ value: "high", label: "高清" },
{ value: "ultra", label: "超清" },
],
},
};
let tabIndex = ref(2)
let course_id = ref(2)
let course_info = reactive({ result: {} });
let course_chapters = reactive({ result: [] });
const get_course_id = () => {
// 获取地址栏上面的课程ID
course_id.value = route.params.pk
if (course_id.value < 1) {
alert("对不起,当前视频不存在!", "警告", {
callback() {
route.go(-1);
}
});
}
}
const get_course_data = () => {
axios.get(settings.actual + course_id.value + '/').then(res => {
course_info.result = res.data.result
}).catch(() => {
ElMessage({
message: "对不起,访问页面出错!请联系客服工作人员!",
type: 'error',
})
})
}
const get_chapter = () => {
// 获取当前课程对应的章节课时信息
axios.get(settings.chapter, {
params: {
course: course_id.value
}
}).then(res => {
course_chapters.result = res.data.results;
}).catch(err => {
ElMessage({
message: "对不起,访问页面出错!请联系客服工作人员!",
type: 'error',
})
})
}
get_course_id()
get_course_data()
get_chapter()
</script>
<style scoped>
.main {
background: #fff;
padding-top: 30px;
}
.course-info {
width: 1200px;
margin: 0 auto;
overflow: hidden;
}
.wrap-left {
float: left;
width: 690px;
height: 388px;
background-color: #000;
}
.wrap-right {
float: left;
position: relative;
height: 388px;
}
.course-name {
font-size: 20px;
color: #333;
padding: 10px 23px;
letter-spacing: .45px;
}
.data {
padding-left: 23px;
padding-right: 23px;
padding-bottom: 16px;
font-size: 14px;
color: #9b9b9b;
}
.sale-time {
width: 464px;
background: #fa6240;
font-size: 14px;
color: #4a4a4a;
padding: 10px 23px;
overflow: hidden;
}
.sale-type {
font-size: 16px;
color: #fff;
letter-spacing: .36px;
float: left;
}
.sale-time .expire {
font-size: 14px;
color: #fff;
float: right;
}
.sale-time .expire .second {
width: 24px;
display: inline-block;
background: #fafafa;
color: #5e5e5e;
padding: 6px 0;
text-align: center;
}
.course-price {
background: #fff;
font-size: 14px;
color: #4a4a4a;
padding: 5px 23px;
}
.discount {
font-size: 26px;
color: #fa6240;
margin-left: 10px;
display: inline-block;
margin-bottom: -5px;
}
.original {
font-size: 14px;
color: #9b9b9b;
margin-left: 10px;
text-decoration: line-through;
}
.buy {
width: 464px;
padding: 0px 23px;
position: absolute;
left: 0;
bottom: 20px;
overflow: hidden;
}
.buy .buy-btn {
float: left;
}
.buy .buy-now {
width: 125px;
height: 40px;
border: 0;
background: #ffc210;
border-radius: 4px;
color: #fff;
cursor: pointer;
margin-right: 15px;
outline: none;
}
.buy .free {
width: 125px;
height: 40px;
border-radius: 4px;
cursor: pointer;
margin-right: 15px;
background: #fff;
color: #ffc210;
border: 1px solid #ffc210;
}
.add-cart {
float: right;
font-size: 14px;
color: #ffc210;
text-align: center;
cursor: pointer;
margin-top: 10px;
}
.add-cart img {
width: 20px;
height: 18px;
margin-right: 7px;
vertical-align: middle;
}
.course-tab {
width: 100%;
background: #fff;
margin-bottom: 30px;
box-shadow: 0 2px 4px 0 #f0f0f0;
}
.course-tab .tab-list {
width: 1200px;
margin: auto;
color: #4a4a4a;
overflow: hidden;
}
.tab-list li {
float: left;
margin-right: 15px;
padding: 26px 20px 16px;
font-size: 17px;
cursor: pointer;
}
.tab-list .active {
color: #ffc210;
border-bottom: 2px solid #ffc210;
}
.tab-list .free {
color: #fb7c55;
}
.course-content {
width: 1200px;
margin: 0 auto;
background: #FAFAFA;
overflow: hidden;
padding-bottom: 40px;
}
.course-tab-list {
width: 880px;
height: auto;
padding: 20px;
background: #fff;
float: left;
box-sizing: border-box;
overflow: hidden;
position: relative;
box-shadow: 0 2px 4px 0 #f0f0f0;
}
.tab-item {
width: 880px;
background: #fff;
padding-bottom: 20px;
box-shadow: 0 2px 4px 0 #f0f0f0;
}
.tab-item-title {
justify-content: space-between;
padding: 25px 20px 11px;
border-radius: 4px;
margin-bottom: 20px;
border-bottom: 1px solid #333;
border-bottom-color: rgba(51, 51, 51, .05);
overflow: hidden;
}
.chapter {
font-size: 17px;
color: #4a4a4a;
float: left;
}
.chapter-length {
float: right;
font-size: 14px;
color: #9b9b9b;
letter-spacing: .19px;
}
.chapter-title {
font-size: 16px;
color: #4a4a4a;
letter-spacing: .26px;
padding: 12px;
background: #eee;
border-radius: 2px;
display: -ms-flexbox;
display: flex;
-ms-flex-align: center;
align-items: center;
}
.chapter-title img {
width: 18px;
height: 18px;
margin-right: 7px;
vertical-align: middle;
}
.section-list {
padding: 0 20px;
}
.section-list .section-item {
padding: 15px 20px 15px 36px;
cursor: pointer;
justify-content: space-between;
position: relative;
overflow: hidden;
}
.section-item .name {
font-size: 14px;
color: #666;
float: left;
}
.section-item .index {
margin-right: 5px;
}
.section-item .free {
font-size: 12px;
color: #fff;
letter-spacing: .19px;
background: #ffc210;
border-radius: 100px;
padding: 1px 9px;
margin-left: 10px;
}
.section-item .time {
font-size: 14px;
color: #666;
letter-spacing: .23px;
opacity: 1;
transition: all .15s ease-in-out;
float: right;
}
.section-item .time img {
width: 18px;
height: 18px;
margin-left: 15px;
vertical-align: text-bottom;
}
.section-item .try {
width: 86px;
height: 28px;
background: #ffc210;
border-radius: 4px;
font-size: 14px;
color: #fff;
position: absolute;
right: 20px;
top: 10px;
opacity: 0;
transition: all .2s ease-in-out;
cursor: pointer;
outline: none;
border: none;
}
.section-item:hover {
background: #fcf7ef;
box-shadow: 0 0 0 0 #f3f3f3;
}
.section-item:hover .name {
color: #333;
}
.section-item:hover .try {
opacity: 1;
}
.course-side {
width: 300px;
height: auto;
margin-left: 20px;
float: right;
}
.teacher-info {
background: #fff;
margin-bottom: 20px;
box-shadow: 0 2px 4px 0 #f0f0f0;
}
.side-title {
font-weight: normal;
font-size: 17px;
color: #4a4a4a;
padding: 18px 14px;
border-bottom: 1px solid #333;
border-bottom-color: rgba(51, 51, 51, .05);
}
.side-title span {
display: inline-block;
border-left: 2px solid #ffc210;
padding-left: 12px;
}
.teacher-content {
padding: 30px 20px;
box-sizing: border-box;
}
.teacher-content .cont1 {
margin-bottom: 12px;
overflow: hidden;
}
.teacher-content .cont1 img {
width: 54px;
height: 54px;
margin-right: 12px;
float: left;
}
.teacher-content .cont1 .name {
float: right;
}
.teacher-content .cont1 .teacher-name {
width: 188px;
font-size: 16px;
color: #4a4a4a;
padding-bottom: 4px;
}
.teacher-content .cont1 .teacher-title {
width: 188px;
font-size: 13px;
color: #9b9b9b;
white-space: nowrap;
}
.teacher-content .narrative {
font-size: 14px;
color: #666;
line-height: 24px;
}
</style>
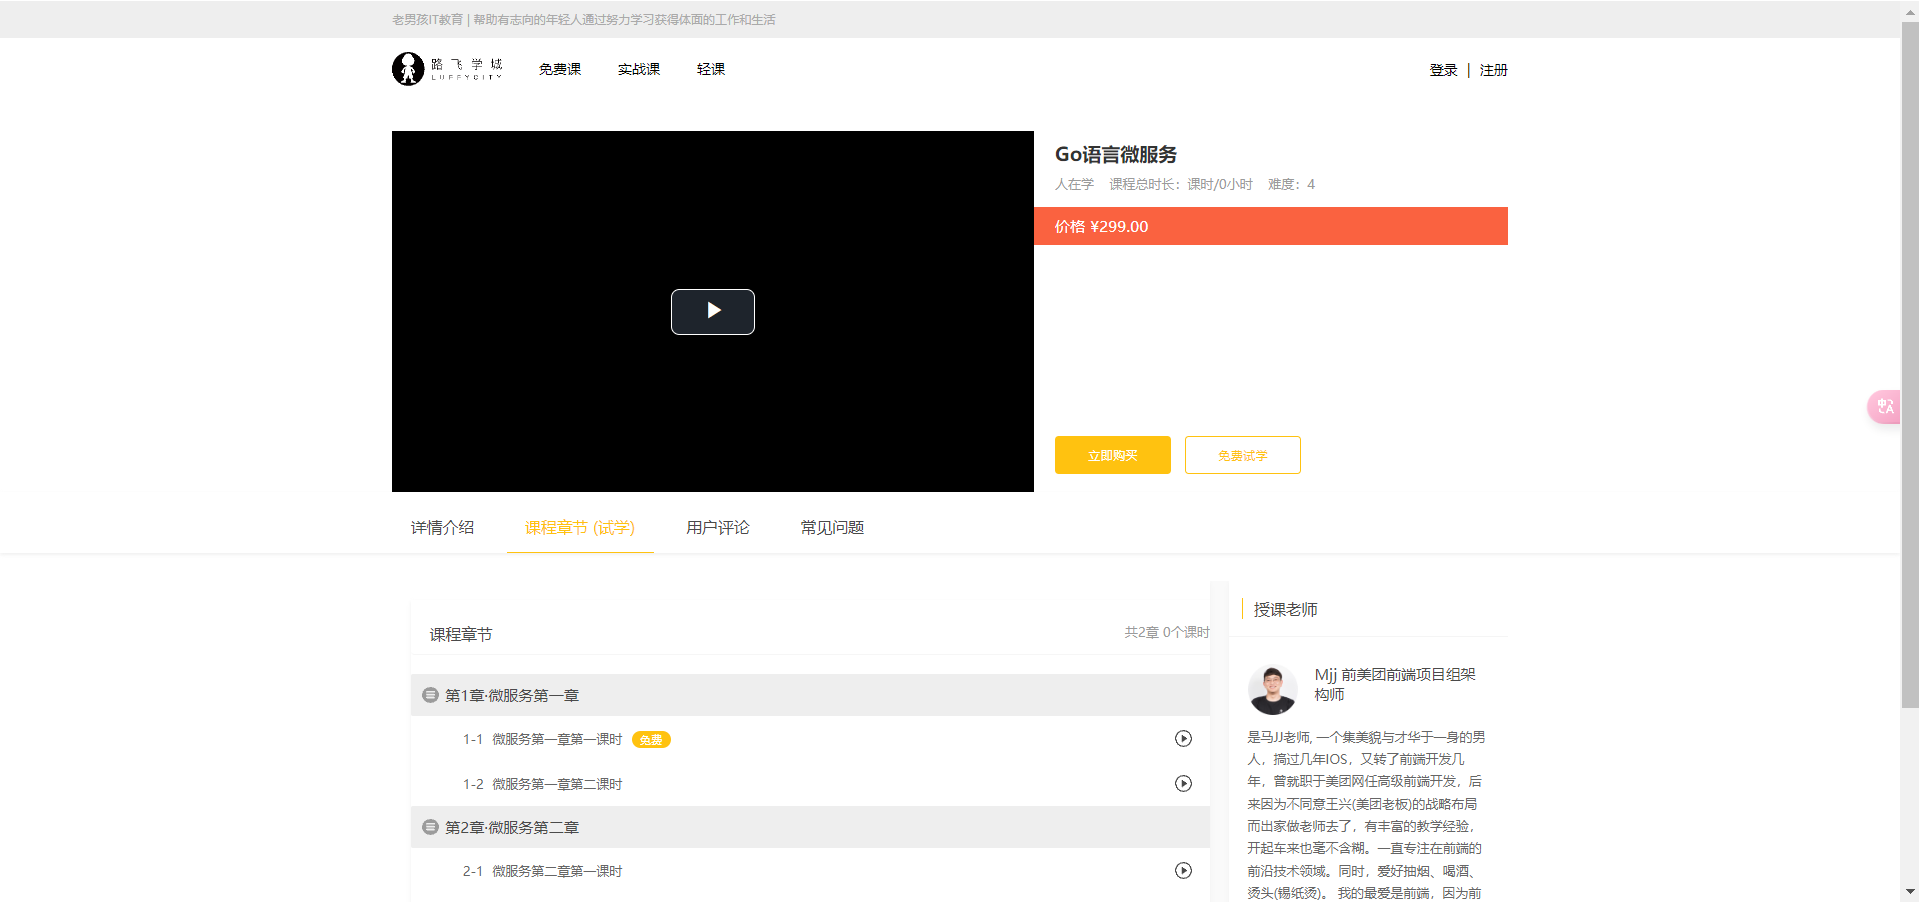
搜索功能前端
components/Headers.vue
<template>

    <div class="header">

        <div class="slogan">

            <p>老男孩IT教育 | 帮助有志向的年轻人通过努力学习获得体面的工作和生活</p>

        </div>

        <div class="nav">

            <ul class="left-part">

                <li class="logo">

                    <router-link to="/">

                        <img src="../assets/img/head-logo.svg" alt="">

                    </router-link>

                </li>

                <li class="ele">

                    <span @click="goPage('/free')" :class="{ active: url_path === '/free' }">免费课</span>

                </li>

                <li class="ele">

                    <span @click="goPage('/actual')" :class="{ active: url_path === '/actual' }">实战课</span>

                </li>

                <li class="ele">

                    <span @click="goPage('/light')" :class="{ active: url_path === '/light' }">轻课</span>

                </li>

            </ul>

            <div class="right-part">

                <div v-if="username && username.length > 0">

                    <span>{{ username }}</span>

                    <span class="line">|</span>

                    <span @click="handleLogout">注销</span>

                </div>

                <div v-else>

                    <span @click="handleLogin">登录</span>

                    <span class="line">|</span>

                    <span @click="put_register">注册</span>

                </div>

            </div>

            <LoginView v-if="is_login" @close="close_login" @go="put_register"></LoginView>

            <RegisterView v-if="is_register" @close_reg="close_register" @go="put_login"></RegisterView>

            <!-- 搜索框 -->

            <form class="search">

                <div class="tips" v-if="is_search_tip">

                    <span @click="search_action('Python')">Python</span>

                    <span @click="search_action('Linux')">Linux</span>

                </div>

                <input type="text" :placeholder="search_placeholder" @focus="on_search" @blur="off_search"

                    v-model="search_word">

                <el-button @click="search_action(search_word)">

                    <el-icon>

                        <Search />

                    </el-icon>

                </el-button>

            </form>

        </div>

    </div>

</template>

<script setup>

import { ref, inject } from 'vue';

import router from "../router/index.js";

import LoginView from "../views/LoginView.vue";

import RegisterView from '../views/RegisterView.vue'

import { Search } from '@element-plus/icons-vue'

import { ElMessage } from 'element-plus'

import {useRouter,useRoute} from 'vue-router'

let routers = useRouter()

let route = useRoute()

const username = ref('')

const is_login = ref(false)

const url_path = ref(sessionStorage.url_path || '/')

const cookies = inject("$cookies")

const is_register = ref(false)

const is_search_tip = ref(true)

const search_placeholder = ref('')

const search_word = ref('')

const search_action = search_word => {

    if (!search_word) {

        ElMessage({

            message: '请输入要搜索的课程!',

            type: 'warning',

        })

        return

    }

    if (search_word !== route.query.word) {

        routers.push({name: 'about', query: {word: search_word}})

        routers.push(`/course/search?word=${search_word}`);

    }

    // search_word.value = ''

}

const on_search = () => {

    search_placeholder.value = '请输入想搜索的课程';

    is_search_tip.value = false;

}

const off_search = () => {

    search_placeholder.value = '';

    is_search_tip.value = true;

}

const goPage = (url_path) => {

    if (url_path !== url_path.value) {

        router.push(url_path)

    }

    sessionStorage.url_path = url_path;

}

// router.currentRoute.value.path 是当前路由的路径

sessionStorage.url_path = router.currentRoute.value.path;

url_path.value = router.currentRoute.value.path;

const handleLogin = () => {

    is_login.value = true

}

const close_login = () => {

    is_login.value = false

    username.value = cookies.get('username')

}

username.value = cookies.get('username')

const handleLogout = () => {

    username.value = ''

    cookies.remove('username')

    cookies.remove('icon')

    cookies.remove('token')

}

const put_register = () => {

    is_login.value = false;

    is_register.value = true;

}

const put_login = () => {

    is_login.value = true;

    is_register.value = false;

}

const close_register = () => {

    is_register.value = false

}

</script>

<style scoped>

.header {

    background-color: white;

    box-shadow: 0 0 5px 0 #aaa;

}

.header:after {

    content: "";

    display: block;

    clear: both;

}

.slogan {

    background-color: #eee;

    height: 40px;

}

.slogan p {

    width: 1200px;

    margin: 0 auto;

    color: #aaa;

    font-size: 13px;

    line-height: 40px;

}

.nav {

    background-color: white;

    user-select: none;

    width: 1200px;

    margin: 0 auto;

}

.nav ul {

    padding: 15px 0;

    float: left;

}

.nav ul:after {

    clear: both;

    content: '';

    display: block;

}

.nav ul li {

    float: left;

}

.logo {

    margin-right: 20px;

}

.ele {

    margin: 0 20px;

}

.ele span {

    display: block;

    font: 15px/36px '微软雅黑';

    border-bottom: 2px solid transparent;

    cursor: pointer;

}

.ele span:hover {

    border-bottom-color: orange;

}

.ele span.active {

    color: orange;

    border-bottom-color: orange;

}

.right-part {

    float: right;

}

.right-part .line {

    margin: 0 10px;

}

.right-part span {

    line-height: 68px;

    cursor: pointer;

}

.search {

    float: right;

    position: relative;

    margin-top: 22px;

    margin-right: 10px;

}

.search input,

.search button {

    border: none;

    outline: none;

    background-color: white;

}

.search input {

    border-bottom: 1px solid #eeeeee;

}

.search input:focus {

    border-bottom-color: orange;

}

.search input:focus+button {

    color: orange;

}

.search .tips {

    position: absolute;

    top: 2px;

}

.search .tips span {

    border-radius: 11px;

    background-color: #eee;

    line-height: 22px;

    display: inline-block;

    padding: 0 7px;

    margin-right: 3px;

    cursor: pointer;

    color: #aaa;

    font-size: 14px;

}

.search .tips span:hover {

    color: orange;

}

</style>
搜索结果页面前端
SearchView.vue
<template lang="">

<div class="search-course course">

    <Headers></Headers>

    <!-- 课程列表 -->

    <div class="main">

      <div v-if="course_list.result.length > 0" class="course-list">

        <div class="course-item" v-for="course in course_list.result" :key="course.name">

          <div class="course-image">

            <img :src="course.course_img" alt="">

          </div>

          <div class="course-info">

            <h3>

              <router-link :to="'/free/detail/'+course.id">{{course.name}}</router-link>

              <span><img src="../assets/img/avatar1.svg" alt="">{{course.students}}人已加入学习</span></h3>

            <p class="teather-info">

              {{course.teacher.name}} {{course.teacher.title}} {{course.teacher.signature}}

              <span v-if="course.sections>course.pub_sections">共{{course.sections}}课时/已更新{{course.pub_sections}}课时</span>

              <span v-else>共{{course.sections}}课时/更新完成</span>

            </p>

            <ul class="section-list">

              <li v-for="(section, key) in course.section_list" :key="section.name"><span

                  class="section-title">0{{key+1}}  |  {{section.name}}</span>

                <span class="free" v-if="section.free_trail">免费</span></li>

            </ul>

            <div class="pay-box">

              <div v-if="course.discount_type">

                <span class="discount-type">{{course.discount_type}}</span>

                <span class="discount-price">¥{{course.real_price}}元</span>

                <span class="original-price">原价:{{course.price}}元</span>

              </div>

              <span v-else class="discount-price">¥{{course.price}}元</span>

              <span class="buy-now">立即购买</span>

            </div>

          </div>

        </div>

      </div>

      <div v-else style="text-align: center; line-height: 60px">

        没有搜索结果

      </div>

      <div class="course_pagination block">

        <el-pagination

            @size-change="handleSizeChange"

            @current-change="handleCurrentChange"

            :current-page.sync="filter.page"

            :page-sizes="[2, 3, 5, 10]"

            :page-size="filter.page_size"

            layout="sizes, prev, pager, next"

            :total="course_total">

        </el-pagination>

      </div>

    </div>

  </div>

</template>

<script setup>

import Headers from '../components/Headers.vue'

import settings from '../assets/js/settings'

import { reactive, ref, watch } from 'vue'

import { useRoute } from 'vue-router';

import axios from 'axios';

const route = useRoute()

const course_list = reactive({ result: [] })

const course_total = ref(0)

const filter = reactive({

  page_size: 10,

  page: 1,

  search: '',

})

watch(

  () => route.query,  // 监听整个 query 对象

  () => {

    get_course()

  }

)

const handleSizeChange = val => {

  filter.page = 1;

  filter.page_size = val;

}

const handleCurrentChange = val => {

  // 页码发生变化时执行的方法

  filter.page = val;

}

const get_course = () => {

  // 获取搜索的关键字

  filter.search = route.query.word

  // 获取课程列表信息

  axios.get(settings.search, {

    params: filter

  }).then(res => {

    // 如果后台不分页,数据在response.data中;如果后台分页,数据在response.data.results中

    course_list.result = res.data.results.results;

    course_total.value = res.data.results.count;

  }).catch(() => {

    ElMessage({

      message: "获取课程信息有误,请联系客服工作人员",

      type: 'error',

    })

  })

}

get_course()

</script>

<style scoped>

.course {

  background: #f6f6f6;

}

.course .main {

  width: 1100px;

  margin: 35px auto 0;

}

.course .condition {

  margin-bottom: 35px;

  padding: 25px 30px 25px 20px;

  background: #fff;

  border-radius: 4px;

  box-shadow: 0 2px 4px 0 #f0f0f0;

}

.course .cate-list {

  border-bottom: 1px solid #333;

  border-bottom-color: rgba(51, 51, 51, .05);

  padding-bottom: 18px;

  margin-bottom: 17px;

}

.course .cate-list::after {

  content: "";

  display: block;

  clear: both;

}

.course .cate-list li {

  float: left;

  font-size: 16px;

  padding: 6px 15px;

  line-height: 16px;

  margin-left: 14px;

  position: relative;

  transition: all .3s ease;

  cursor: pointer;

  color: #4a4a4a;

  border: 1px solid transparent;

  /* transparent 透明 */

}

.course .cate-list .title {

  color: #888;

  margin-left: 0;

  letter-spacing: .36px;

  padding: 0;

  line-height: 28px;

}

.course .cate-list .this {

  color: #ffc210;

  border: 1px solid #ffc210 !important;

  border-radius: 30px;

}

.course .ordering::after {

  content: "";

  display: block;

  clear: both;

}

.course .ordering ul {

  float: left;

}

.course .ordering ul::after {

  content: "";

  display: block;

  clear: both;

}

.course .ordering .condition-result {

  float: right;

  font-size: 14px;

  color: #9b9b9b;

  line-height: 28px;

}

.course .ordering ul li {

  float: left;

  padding: 6px 15px;

  line-height: 16px;

  margin-left: 14px;

  position: relative;

  transition: all .3s ease;

  cursor: pointer;

  color: #4a4a4a;

}

.course .ordering .title {

  font-size: 16px;

  color: #888;

  letter-spacing: .36px;

  margin-left: 0;

  padding: 0;

  line-height: 28px;

}

.course .ordering .this {

  color: #ffc210;

}

.course .ordering .price {

  position: relative;

}

.course .ordering .price::before,

.course .ordering .price::after {

  cursor: pointer;

  content: "";

  display: block;

  width: 0px;

  height: 0px;

  border: 5px solid transparent;

  position: absolute;

  right: 0;

}

.course .ordering .price::before {

  border-bottom: 5px solid #aaa;

  margin-bottom: 2px;

  top: 2px;

}

.course .ordering .price::after {

  border-top: 5px solid #aaa;

  bottom: 2px;

}

.course .ordering .price_up::before {

  border-bottom-color: #ffc210;

}

.course .ordering .price_down::after {

  border-top-color: #ffc210;

}

.course .course-item:hover {

  box-shadow: 4px 6px 16px rgba(0, 0, 0, .5);

}

.course .course-item {

  width: 1100px;

  background: #fff;

  padding: 20px 30px 20px 20px;

  margin-bottom: 35px;

  border-radius: 2px;

  cursor: pointer;

  box-shadow: 2px 3px 16px rgba(0, 0, 0, .1);

  /* css3.0 过渡动画 hover 事件操作 */

  transition: all .2s ease;

}

.course .course-item::after {

  content: "";

  display: block;

  clear: both;

}

/* 顶级元素 父级元素  当前元素{} */

.course .course-item .course-image {

  float: left;

  width: 423px;

  height: 210px;

  margin-right: 30px;

}

.course .course-item .course-image img {

  max-width: 100%;

  max-height: 210px;

}

.course .course-item .course-info {

  float: left;

  width: 596px;

}

.course-item .course-info h3 a {

  font-size: 26px;

  color: #333;

  font-weight: normal;

  margin-bottom: 8px;

}

.course-item .course-info h3 span {

  font-size: 14px;

  color: #9b9b9b;

  float: right;

  margin-top: 14px;

}

.course-item .course-info h3 span img {

  width: 11px;

  height: auto;

  margin-right: 7px;

}

.course-item .course-info .teather-info {

  font-size: 14px;

  color: #9b9b9b;

  margin-bottom: 14px;

  padding-bottom: 14px;

  border-bottom: 1px solid #333;

  border-bottom-color: rgba(51, 51, 51, .05);

}

.course-item .course-info .teather-info span {

  float: right;

}

.course-item .section-list::after {

  content: "";

  display: block;

  clear: both;

}

.course-item .section-list li {

  float: left;

  width: 44%;

  font-size: 14px;

  color: #666;

  padding-left: 22px;

  /* background: url("路径") 是否平铺 x轴位置 y轴位置 */

  background: url("/src/assets/img/play-icon-gray.svg") no-repeat left 4px;

  margin-bottom: 15px;

}

.course-item .section-list li .section-title {

  /* 以下3句,文本内容过多,会自动隐藏,并显示省略符号 */

  text-overflow: ellipsis;

  overflow: hidden;

  white-space: nowrap;

  display: inline-block;

  max-width: 200px;

}

.course-item .section-list li:hover {

  background-image: url("/src/assets/img/play-icon-yellow.svg");

  color: #ffc210;

}

.course-item .section-list li .free {

  width: 34px;

  height: 20px;

  color: #fd7b4d;

  vertical-align: super;

  margin-left: 10px;

  border: 1px solid #fd7b4d;

  border-radius: 2px;

  text-align: center;

  font-size: 13px;

  white-space: nowrap;

}

.course-item .section-list li:hover .free {

  color: #ffc210;

  border-color: #ffc210;

}

.course-item {

  position: relative;

}

.course-item .pay-box {

  position: absolute;

  bottom: 20px;

  width: 600px;

}

.course-item .pay-box::after {

  content: "";

  display: block;

  clear: both;

}

.course-item .pay-box .discount-type {

  padding: 6px 10px;

  font-size: 16px;

  color: #fff;

  text-align: center;

  margin-right: 8px;

  background: #fa6240;

  border: 1px solid #fa6240;

  border-radius: 10px 0 10px 0;

  float: left;

}

.course-item .pay-box .discount-price {

  font-size: 24px;

  color: #fa6240;

  float: left;

}

.course-item .pay-box .original-price {

  text-decoration: line-through;

  font-size: 14px;

  color: #9b9b9b;

  margin-left: 10px;

  float: left;

  margin-top: 10px;

}

.course-item .pay-box .buy-now {

  width: 120px;

  height: 38px;

  background: transparent;

  color: #fa6240;

  font-size: 16px;

  border: 1px solid #fd7b4d;

  border-radius: 3px;

  transition: all .2s ease-in-out;

  float: right;

  text-align: center;

  line-height: 38px;

  position: absolute;

  right: 0;

  bottom: 5px;

}

.course-item .pay-box .buy-now:hover {

  color: #fff;

  background: #ffc210;

  border: 1px solid #ffc210;

}

.course .course_pagination {

  margin-bottom: 60px;

  text-align: center;

}

</style>
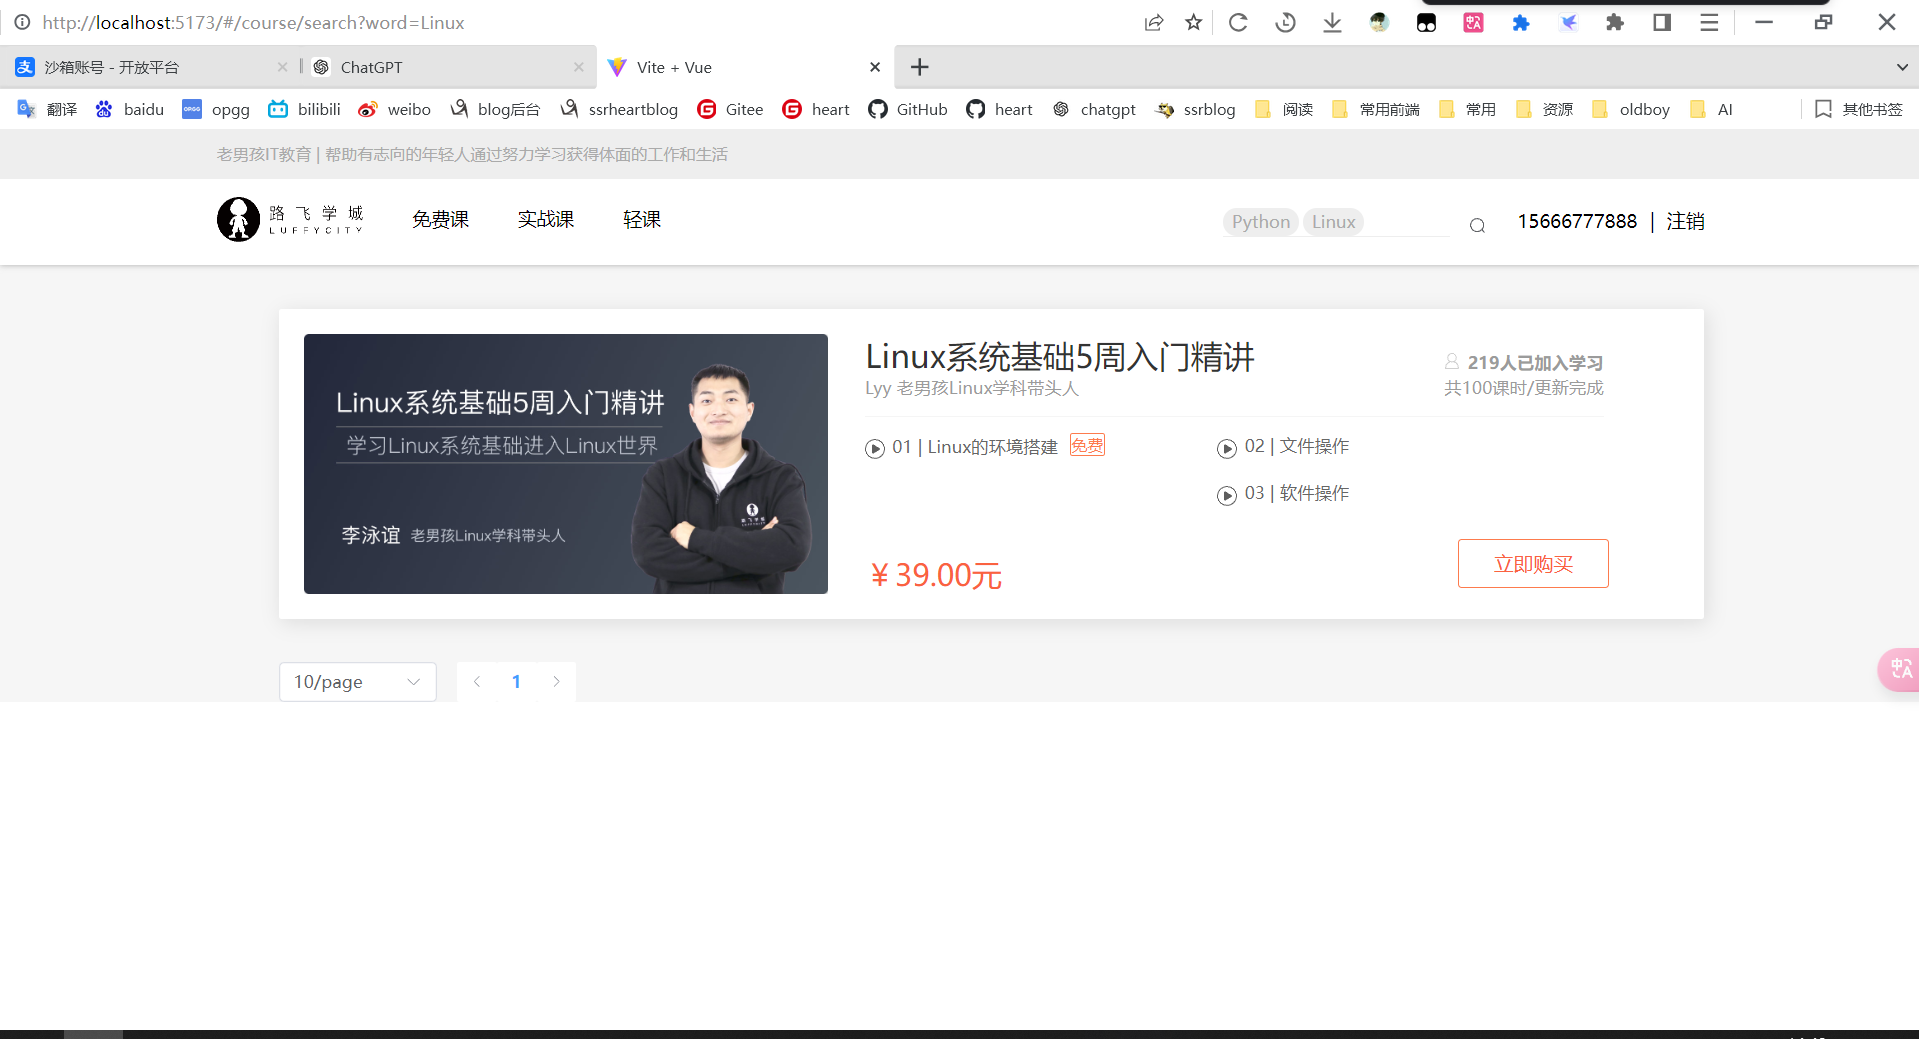
支付成功回调前端
要在后端dev中配置前端回调地址
# 前端基URL

LUFFY_URL = "http://localhost:5173"

# 支付宝同步异步回调接口配置

# 后端异步回调接口

NOTIFY_URL = BACKEND_URL + "api/v1/order/success/"

# 前端同步回调接口,没有/结尾

RETURN_URL = LUFFY_URL + "#/pay/success"
PaySuccessView.vue
{

    path: '/pay/success',

    name: 'success',

    component: PaySuccessView

}

<template>

    <div class="pay-success">

        <!--如果是单独的页面,就没必要展示导航栏(带有登录的用户)-->

        <Headers></Headers>

        <div class="main">

            <div class="title">

                <div class="success-tips">

                    <p class="tips">您已成功购买 1 门课程!</p>

                </div>

            </div>

            <div class="order-info">

                <p class="info"><b>订单号:</b><span>{{ result.result.out_trade_no }}</span></p>

                <p class="info"><b>交易号:</b><span>{{ result.result.trade_no }}</span></p>

                <p class="info"><b>付款时间:</b><span><span>{{ result.result.timestamp }}</span></span></p>

            </div>

            <div class="study">

                <span>立即学习</span>

            </div>

        </div>

    </div>

</template>

<script setup>

import { reactive, onMounted } from 'vue'

import Headers from '../components/Headers.vue'

import axios from 'axios'

import settings from '../assets/js/settings'

import { ElMessage } from 'element-plus'

const result = reactive({result:[]})

const hash = window.location.hash

const queryString = hash.substring(hash.indexOf('?') + 1)

onMounted(() => {

    // 解析URL参数

    const params = new URLSearchParams(hash)

    params.forEach((value, key) => {

        result.result[key] = decodeURIComponent(value)

    })

    // 把地址栏上面的支付结果,再get请求转发给后端

    axios.get(settings.success + '?' + queryString).then(res => {

        ElMessage({

            type: 'success',

            message: res.data.msg,

        })

    })

        .catch(() => {

            console.log('支付结果同步失败')

        })

})

</script>

<style scoped>

.main {

    padding: 60px 0;

    margin: 0 auto;

    width: 1200px;

    background: #fff;

}

.main .title {

    display: flex;

    -ms-flex-align: center;

    align-items: center;

    padding: 25px 40px;

    border-bottom: 1px solid #f2f2f2;

}

.main .title .success-tips {

    box-sizing: border-box;

}

.title img {

    vertical-align: middle;

    width: 60px;

    height: 60px;

    margin-right: 40px;

}

.title .success-tips {

    box-sizing: border-box;

}

.title .tips {

    font-size: 26px;

    color: #000;

}

.info span {

    color: #ec6730;

}

.order-info {

    padding: 25px 48px;

    padding-bottom: 15px;

    border-bottom: 1px solid #f2f2f2;

}

.order-info p {

    display: -ms-flexbox;

    display: flex;

    margin-bottom: 10px;

    font-size: 16px;

}

.order-info p b {

    font-weight: 400;

    color: #9d9d9d;

    white-space: nowrap;

}

.study {

    padding: 25px 40px;

}

.study span {

    display: block;

    width: 140px;

    height: 42px;

    text-align: center;

    line-height: 42px;

    cursor: pointer;

    background: #ffc210;

    border-radius: 6px;

    font-size: 16px;

    color: #fff;

}

</style>
settings.js
const BASE_URL = 'http://127.0.0.1:8000/api/v1/'

export default {

    banner: BASE_URL + 'home/banner/',

    multiple_login: BASE_URL + 'user/mul_login/multiple_login/',

    send_sms: BASE_URL + 'user/mobile/send_sms/',

    check_mobile: BASE_URL + 'user/mobile/check_mobile/',

    sms_login: BASE_URL + 'user/mul_login/sms_login/',

    register: BASE_URL + 'user/register/',

    category: BASE_URL + 'course/category/',

    actual: BASE_URL + 'course/actual/',

    chapter: BASE_URL + 'course/chapter/',

    search: BASE_URL + 'course/search/',

    pay: BASE_URL + 'order/pay/',

    success:BASE_URL + 'order/success/'

}
router/index.js
import {createRouter, createWebHashHistory} from 'vue-router'

import HomeView from '../views/HomeView.vue';

import AboutView from "../views/AboutView.vue";

import FreeView from "../views/FreeView.vue";

import ActualView from "../views/ActualView.vue";

import LightView from "../views/LightView.vue";

import SeckillView from "../views/SeckillView.vue";

import ActualDetailView from "../views/ActualDetailView.vue"

import SearchView from "../views/SearchView.vue"

import PaySuccessView from '../views/PaySuccessView.vue'

const routes = [

    {

        path: '/',

        name: 'home',

        component: HomeView

    },

    {

        path: '/about',

        name: 'about',

        component: AboutView

    },

    {

        path: '/free',

        name: 'free',

        component: FreeView

    },

    {

        path: '/actual',

        name: 'actual',

        component: ActualView

    },

    {

        path: '/actual/detail/:pk',

        name: 'actualdetail',

        component: ActualDetailView

    },

    {

        path: '/light',

        name: 'light',

        component: LightView

    },

    {

        path: '/seckill',

        name: 'seckill',

        component: SeckillView

    },

    {

        path: '/course/search',

        name: 'search',

        component: SearchView

    },

    {

        path: '/pay/success',

        name: 'success',

        component: PaySuccessView

    }

]

const router = createRouter({

    history: createWebHashHistory(),

    routes

})

export default router
main.js
import { createApp } from 'vue'

import './style.css'

import App from './App.vue'

import router from "./router/index.js";

import {createPinia} from 'pinia'

import ElementPlus from 'element-plus'

import 'element-plus/dist/index.css'

import cookies from 'vue-cookies'

import settings from "./assets/js/settings";

import './assets/css/global.css'

const pinia = createPinia()

import VueVideoPlayer from 'vue-video-player';

import 'video.js/dist/video-js.css';

createApp(App).use(router).use(pinia).use(ElementPlus).use(VueVideoPlayer).provide('$cookies', cookies).provide('$settings',settings).mount('#app')
项目上线
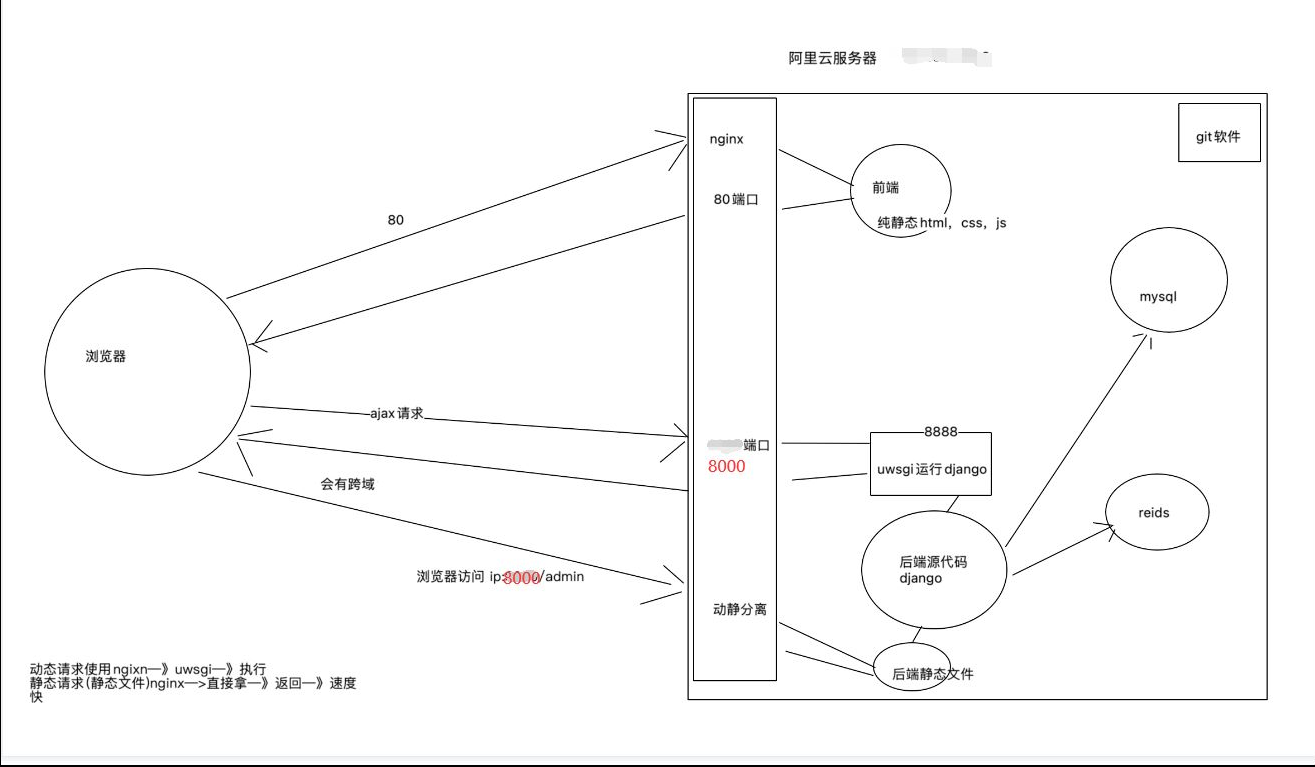
服务器安装git
# 装git 和一些其它软件(开发会用到的)

yum -y groupinstall "Development tools"

# 装一些 依赖:执行下面这条(后续咱么需要装其他软件,需要有些依赖,装依赖)

yum install openssl-devel bzip2-devel expat-devel gdbm-devel readline-devel sqlite-devel psmisc libffi-devel -y
安装mysql
mysql5.7
# mysql 5.7

# 前往用户根目录

cd

# 1 下载mysql57

wget http://dev.mysql.com/get/mysql57-community-release-el7-10.noarch.rpm

# ls  查看当前目录下的文件和文件夹

# 2 安装mysql57

 yum -y install mysql57-community-release-el7-10.noarch.rpm

 yum install mysql-community-server --nogpgcheck -y

# 3 启动mysql57并查看启动状态

systemctl start mysqld  # 启动mysql服务

systemctl status mysqld  # 查看mysql状态

# 4 查看默认密码并登录(第一次安装,root密码是随机的)

# 去/var/log/mysqld.log 中过滤出包含 password 的多行

grep "password" /var/log/mysqld.log   # 7n5hchTomp++

mysql -uroot -p

# 5 修改root密码

ALTER USER 'root'@'localhost' IDENTIFIED BY 'Lqz12345?';

grant all privileges on *.* to 'root'@'%' identified by 'Lqz12345?';

# 如果还连不上,就是mysql 3306的安全组没开---》防火墙端口没开

# 6 远程连接:win---》navicate--》

	连接成功
mysql8.0
# 官方yum源

https://dev.mysql.com/downloads/repo/yum/

# 下载对应版本mysql源到本地,如果系统是centos7,这里选择el7版本

# no architecture的缩写,说明这个包可以在各个不同的cpu上使用

选择 mysql80-community-release-el7-7.noarch.rpm

# 或者直接来到:https://repo.mysql.com/

找到相应版本下载,我们下载

mysql80-community-release-el7-7.noarch.rpm

# 1 下载rpm包

wget https://repo.mysql.com/mysql80-community-release-el7-7.noarch.rpm

# 2 安装rpm包

yum install mysql80-community-release-el7-7.noarch.rpm -y

# 3 开始安装

yum install mysql-community-server --nogpgcheck -y  # 会自动把客户端装上

# 4 启动,查看状态

systemctl start mysqld

systemctl status mysqld

# 5 查看默认密码并登录

grep "password" /var/log/mysqld.log  # QtrhuwBiO2)s

# 6 修改密码

mysql -uroot -p

ALTER USER 'root'@'localhost' IDENTIFIED BY 'SSrheart-2001';

# 7 查看mysql版本

mysql -V

# 后面上线项目时应该做的 现在直接做了

# 1 创建luffy库

create database luffy default charset=utf8;

# 2 查看用户

SELECT User, Host FROM mysql.user;

# 3 创建用户

CREATE USER 'luffy'@'localhost' IDENTIFIED BY 'Luffy123?';

CREATE USER 'luffy'@'%' IDENTIFIED BY 'Luffy123?';

GRANT ALL PRIVILEGES ON luffy.* TO 'luffy'@'localhost' WITH GRANT OPTION;

GRANT ALL PRIVILEGES ON luffy.* TO 'luffy'@'%' WITH GRANT OPTION;

# 使用navicat 使用luffy用户链接

如果链接不上,就是安全组没开
安装redis
# 1 官方提供的:https://redis.io/downloads/

redis-7.2.4.tar.gz # 源码包是c的代码,不能运行,需要编译可执行文件才能运行

redis-stack-server-7.2.0-v8.rhel7.x86_64.tar.gz # 编译过后的可执行文件,解压即用
直接安装包(redis-stack-server)
# 1 下载源码包,在当前平台,编译---》就能在当前平台运行了

wget https://packages.redis.io/redis-stack/redis-stack-server-7.2.0-v8.rhel7.x86_64.tar.gz

# 2 解压

tar -xzvf redis-stack-server-7.2.0-v8.rhel7.x86_64.tar.gz

# 3 进入到 redis  bin 目录--》redis-server

# 4 运行redis

redis-server 配置文件

# 5 把软件包赋值到 /usr/local  加入环境变量

cp -r redis-stack-server-7.2.0-v8 /usr/local/redis7.2

# /usr/local/redis7.2/bin 有 redis-server 和 redis-cli

# 6 制作软链接---》在任意路径下敲redis-server都能把服务运行

# 因为/usr/bin/ 在环境变量

ln -s /usr/local/redis7.2/bin/redis-server /usr/bin/redis-server

ln -s /usr/local/redis7.2/bin/redis-cli /usr/bin/redis-cli

# 7 在任意路径启动

redis-server 可以启动了

redis-cli 可以链接了

# 8 查看redis 是否启动

#查看是否创建软连接成功

ll /usr/bin |grep redis

# 9 查看redis 是否启动

ps aux |grep redis

# 10 启动redis服务,后台运行

redis-server &
源码编译安装(redis-7.2.4.tar.gz)
#1  下载7.2.4.tar.gz

wget https://github.com/redis/redis/archive/refs/tags/7.2.4.tar.gz

#2 解压安装包

tar -xf 7.2.4.tar.gz

#3  进入目标文件

mv redis-7.2.4 redis7

cd redis7

#4  编译环境 gcc   在src路径下把源码编译出  redis-cli  reidis-server

make  #编译,项目目录下执行

#5 在 src目录下就会多出 可执行文件

redis-server

redis-cli

#6  复制环境到指定路径完成安装

cp -r ~/redis7 /usr/local/redis

#7 配置redis可以后台启动:修改下方内容

# 在redis路径里:

mv redis.conf redis.conf.bak # 做备份

vim /usr/local/redis/redis.conf # 修改文件

daemonize yes

# 完成配置修改

esc

:wq

#8  建立软连接

# /usr/local/redis/src/不在环境变量,在任意路径下敲 redis-server找不到的

# 如果建立软连接----》/usr/bin/新建了一个redis-server指向了/usr/local/redis/src/

# 而/usr/bin/ 是在环境变量的,所有以后任意路径敲redis-server都能找到

ln -s /usr/local/redis/src/redis-server /usr/bin/redis-server7

ln -s /usr/local/redis/src/redis-cli /usr/bin/redis-cli7

## 查看软连接情况

ll /usr/bin/ |grep redis

#8 后台运行redis

cd /usr/local/redis

redis-server7 ./redis.conf  # 在后台运行

# redis-server7 /usr/local/redis/redis.conf

#9  测试redis环境

redis-cli7

#10 关闭redis服务

redis-cli7  shutdown
安装python
# 1 所有linux和mac--》都会自带python2

	-他们系统上有很多系统服务 使用python2写的---》必须要有解释器环境

# 2 cento 7.9 默认

	-python    pip    ---》python2.7

    -python3   pip3   ---》python3.6.8

# 3 自己装3.10---》python3.10--->pip3.10
安装openssl
# 安装依赖包 openssl

#1

yum install zlib-devel bzip2-devel openssl-devel ncurses-devel sqlite-devel readline-devel tk-devel gcc make libffi-devel perl-Test-Simple -y

#2 回家

cd

#3 下载

wget https://github.com/openssl/openssl/releases/download/OpenSSL_1_1_1w/openssl-1.1.1w.tar.gz

# 4 解压

tar -zxvf openssl-1.1.1w.tar.gz

# 5 进入

cd openssl-1.1.1w/

# 6 配置

./config shared --prefix=/usr/local/openssl --openssldir=/usr/local/openssl

# 7 安装

make && make install

#8 查看之前老的

# openssl version

OpenSSL 1.0.2k-fips  26 Jan 2017

# 9 备份系统自带的openssl

mv /usr/bin/openssl /usr/bin/openssl.bak

# 10 软连接,放到环境变量

ln -s /usr/local/openssl/bin/openssl /usr/bin/openssl

ln -s /usr/local/openssl/lib/libssl.so.1.1 /usr/lib/libssl.so.1.1

ln -s /usr/local/openssl/lib/libcrypto.so.1.1 /usr/lib/libcrypto.so.1.1

#11 配置

sudo echo "/usr/local/lib64/" >> /etc/ld.so.conf

sudo ldconfig

# 12  openssl version

OpenSSL 1.1.1w  11 Sep 2023
安装python3.10
# 1 下载python3

# 官方

# wget https://www.python.org/ftp/python/3.10.13/Python-3.10.13.tgz

# 镜像站

# https://registry.npmmirror.com/binary.html?path=python/

wget https://registry.npmmirror.com/-/binary/python/3.10.14/Python-3.10.14.tgz

# 2 解压并进入

tar xf Python-3.10.14.tgz

cd Python-3.10.14

#3  编译安装python配置ssl

./configure prefix=/usr/local/python310 -C --with-openssl=/usr/local/openssl --with-openssl-rpath=auto

make && make install

# 4 建立软链接

ln -s /usr/local/python310/bin/python3 /usr/bin/python3.10

ln -s /usr/local/python310/bin/pip3 /usr/bin/pip3.10

# 5 以后,机器有三个python解释器环境

	-python    pip       ---》python2.7

    -python3   pip3      ---》python3.6.8

    -python3.10 pip3.10  ---》3.10.14
虚拟环境
### 虚拟环境:pip3.10 去安装---》python3.10上

#1 安装依赖

pip3.10 install virtualenv

pip3.10 install virtualenvwrapper

# pip3.10 install -i https://pypi.tuna.tsinghua.edu.cn/simple some-package virtualenv

# pip3.10 install -i https://pypi.tuna.tsinghua.edu.cn/simple some-package virtualenvwrapper

# 2 建立虚拟环境软连接

ln -s /usr/local/python310/bin/virtualenv /usr/bin/virtualenv

#3  配置虚拟环境:填入下方内容

# ~/ 表示用户家路径:root用户,就是在/root/.bash_profile

>: vi ~/.bash_profile

# 放在export上面 夹在中间

VIRTUALENVWRAPPER_PYTHON=/usr/bin/python3.10

source /usr/local/python310/bin/virtualenvwrapper.sh

esc

:wq

#4  更新配置文件内容

source ~/.bash_profile

#5 创建虚拟环境

mkvirtualenv -p python3.10 luffy

# 退出

deactivate

# 虚拟环境默认根目录:

/root/.virtualenvs

# 源码安装

wget https://www.openssl.org/source/openssl-1.1.1n.tar.gz --no-check-certificate

tar -zxvf openssl-1.1.1n.tar.gz

cd openssl-1.1.1n

./config --prefix=/usr/local/openssl

make && make install

ln -s /usr/local/openssl/bin/openssl /usr/bin/openssl
安装nginx
# nginx 软件

	-web反向代理服务器--》运行在服务器上--》监听端口【默认80】---》nginx启动了,访问服务器的80端口---》http请求--》就被nginx接到了---》后续干啥,需要改ngixn的配置文件【配置文件很重要】

    -能够干

    	1 请求转发

        2 负载均衡

        3 静态文件代理

# 部署前端【就是一堆静态文件】,需要使用nginx

# 1 前往用户根目录

cd ~

# 2 下载nginx1.13.7

# 官网http://nginx.org

wget http://nginx.org/download/nginx-1.26.0.tar.gz

# 3 解压安装包

tar -xf nginx-1.26.0.tar.gz

# 4 进入目标文件

cd nginx-1.26.0

# 5 配置安装路径:/usr/local/nginx

./configure --prefix=/usr/local/nginx

# 6 编译并安装

make && make install

# 7 建立软连接:终端命令 nginx

ln -s /usr/local/nginx/sbin/nginx /usr/bin/nginx

# 8  测试Nginx环境,服务器运行nginx,本地访问服务器ip

# 启动nginx服务

nginx

# 启动nginx服务,监听80端口----》公网ip 80 端口就能看到页面了

# 9 静态文件放的路径

/usr/local/nginx/html

# 10 查看进程

ps aux | grep nginx

# 11 关闭和启动

关闭:nginx -s stop

重新加载配置:nginx -s reload

启动:nginx
部署前端
# 1 前端是用vue写的,最终要编译成html,css,js静态资源

# 2 把编译后的放到服务器上某个位置

# 3 使用ngixn代理即可

	-修改nginx配置文件

# 4 前端ajax请求的地址改一下(没有域名就用地址)

// const BASE_URL = 'http://8.133.192.155:8000/api/v1/'

const BASE_URL = 'http://www.liuqingzheng.top:8000/api/v1/'

# 5 编译vue---》项目根路径下生成一个dist文件夹--》编译过后的

npm run build

# 6 上线只用 dist文件夹下的资源,弄成压缩包,放在桌面

# 7 把dist.zip 传到服务器上去

# 8 服务器安装

yum install lrzsz -y  # 上传下载文件的

yum install unzip -y  # 解压zip的

# 9 上传

rz

# 10 解压

unzip dist.zip

# 11 移动并重命名

mv ./dist /html

# 12 修改nginx配置--》配置nginx 静态代理--->nginx 默认会去/usr/local/nginx/html拿静态文件

cd  /usr/local/nginx/conf   # nginx.conf   配置文件

mv nginx.conf nginx.conf.bak

vi nginx.conf

# 按 a  粘贴下面代码

events {

    worker_connections  1024;

}

http {

    include       mime.types;

    default_type  application/octet-stream;

    sendfile        on;

    server {

        listen 80;

        server_name  www.ssrheart.top;

        charset utf-8;

        location / {

            root /html;

            index index.html;

        }

    }

}

# 按 esc  :wq  回车

#13  重启nginx

nginx -s reload
安装uwsgi
# 1 我们部署django

	-不用  python manage.py runserver  运行---》使用wsgiref,性能低

    -使用 uwsgi  web服务器部署---》只能部署python的web项目:flask,django

# 2 安装步骤

1)在真实环境下安装(退出虚拟环境)

pip3.10 install uwsgi  # 会有个uwsgi的可执行文件,但是不在环境变量,所以需要加软连接

#安装到了python38的安装路径的bin路径下了

2)建立软连接

ln -s /usr/local/python310/bin/uwsgi /usr/bin/uwsgi
部署后端
# 1 修改配置文件 pro.py   前端和后端的基地址,都是云服务器地址

BACKEND_URL='http://www.ssrheart.top:8000/'

LUFFY_URL = 'http://www.ssrheart.top'

# 2 修改项目中wsgi.py,asgi.py  用uwsgi运行wsgi.py

os.environ.setdefault('DJANGO_SETTINGS_MODULE', 'luffy_api.settings.pro')

# 3 导出项目依赖

pip3 freeze > requirements.txt

#4 推到远端

# 5 服务器上拉取下来: /home/project/luffy_api

git clone https://gitee.com/heart99999/luffy_api.git

# 6 在虚拟环境中安装依赖

	workon luffy

    pip install -r requirements.txt # 报错

    # 把requirements.txt 的mysql-client先注释掉,把别的先装上

    # 单独装mysql-client

    # 查看虚拟环境中模块

    pip list

# 7 单独装mysqlclient

yum install python3-devel -y

yum install mysql-devel --nogpgcheck -y

pip install mysqlclient

# 8 在虚拟环境中,也要装uwsgi

pip install uwsgi

# 9 创建luffy库,用户,授权--》做过了

# 10 迁移文件,把表迁移到数据库中 ---》manage的配置文件必须是线上配置文件

python manage.py makemigrations

python manage.py migrate

# 11 使用uwsgi运行django,uwsgi配置文件 :项目根路径下新建:luffy_api.xml

<uwsgi>

    <socket>127.0.0.1:8888</socket> # 本地的8888端口跑django

    <chdir>/home/project/luffy_api/</chdir>

    <module>luffy_api.wsgi</module>

    <processes>2</processes>

    <daemonize>uwsgi.log</daemonize>

</uwsgi>

# 12 使用uwsgi运行(使用uwsgi运行django--》等同于之前的python manage.py runserver )

uwsgi -x luffy_api.xml

# 查看uwsgi进程

ps aux |grep uwsgi

# 关闭uwsgi

pkill -9 uwsgi

# 13 配置nginx 转发--新增一个server

cd /usr/local/nginx/

cd conf/

vi nginx.conf

server {

    listen 8000;

    server_name  www.ssrheart.top;

    charset utf-8;

    location / {

        include uwsgi_params;

        uwsgi_pass 127.0.0.1:8888;

        uwsgi_param UWSGI_SCRIPT luffy_api.wsgi;

        uwsgi_param UWSGI_CHDIR /home/project/luffy_api/;

    }

}

# 14 重启nginx

nginx -s reload

# 5 访问:测试--->数据能回来,表示通了   # 表中没数据   样式没有

http://www.ssrheart.top:8000/api/v1/home/banner/

# 6 表中数据--》admin中录入---》直接把sql导入

	-导出原来测试的sql

    -导入到线上库

# 7 访问 www.ssrheart.top 正常操作即可

	-如果有问题:按日志排查

    	1 nginx 日志:/usr/local/nginx/logs

        2 uwsgi 日志:/home/project/luffy_api/uwsg.log

        3 项目日志 :/home/project/luffy_api/logs/luffy.log
修改manage.py中的dev为pro(第十步)
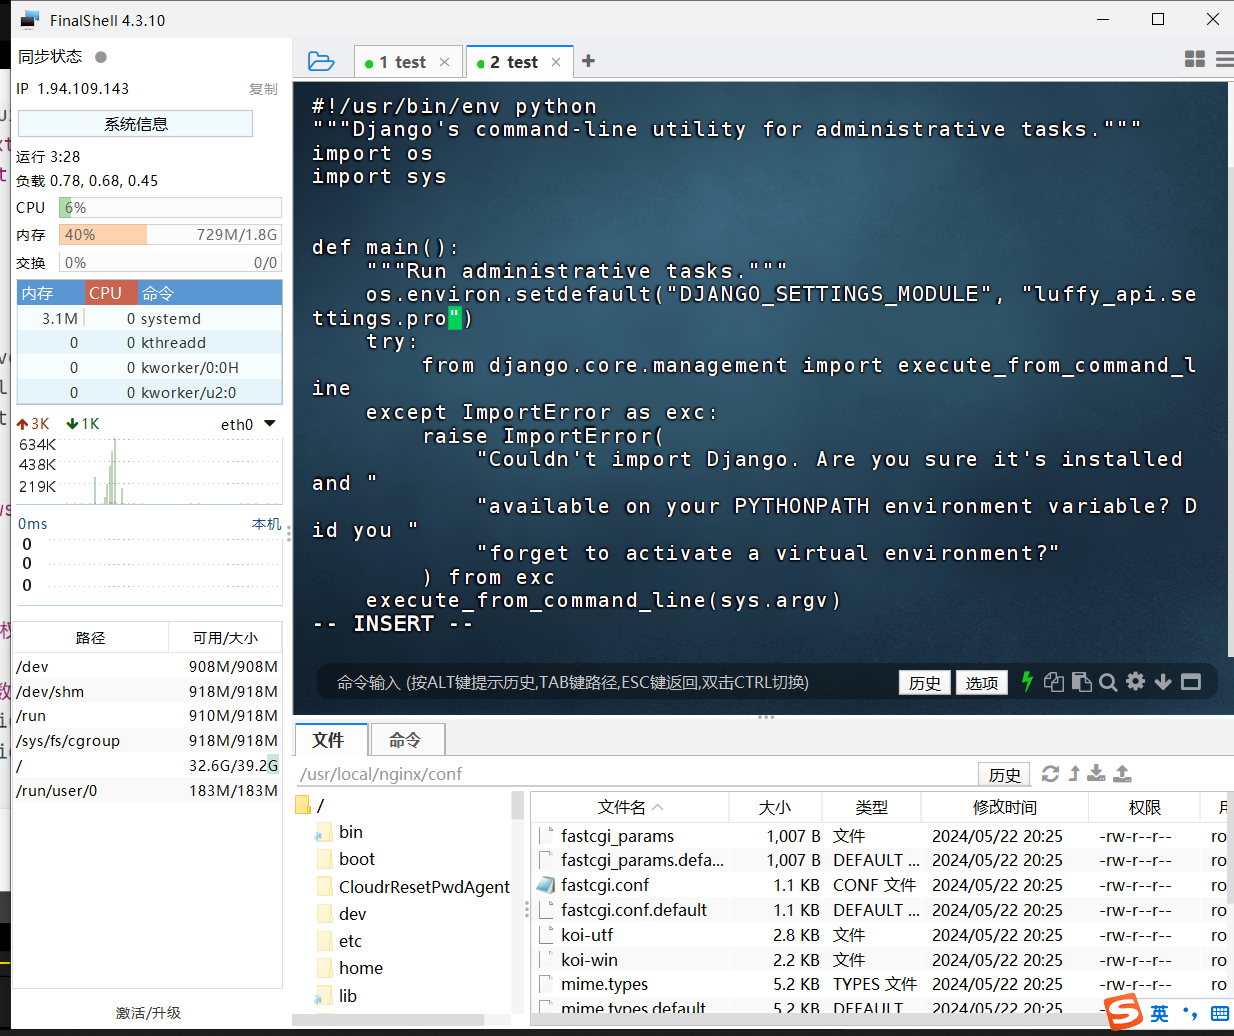
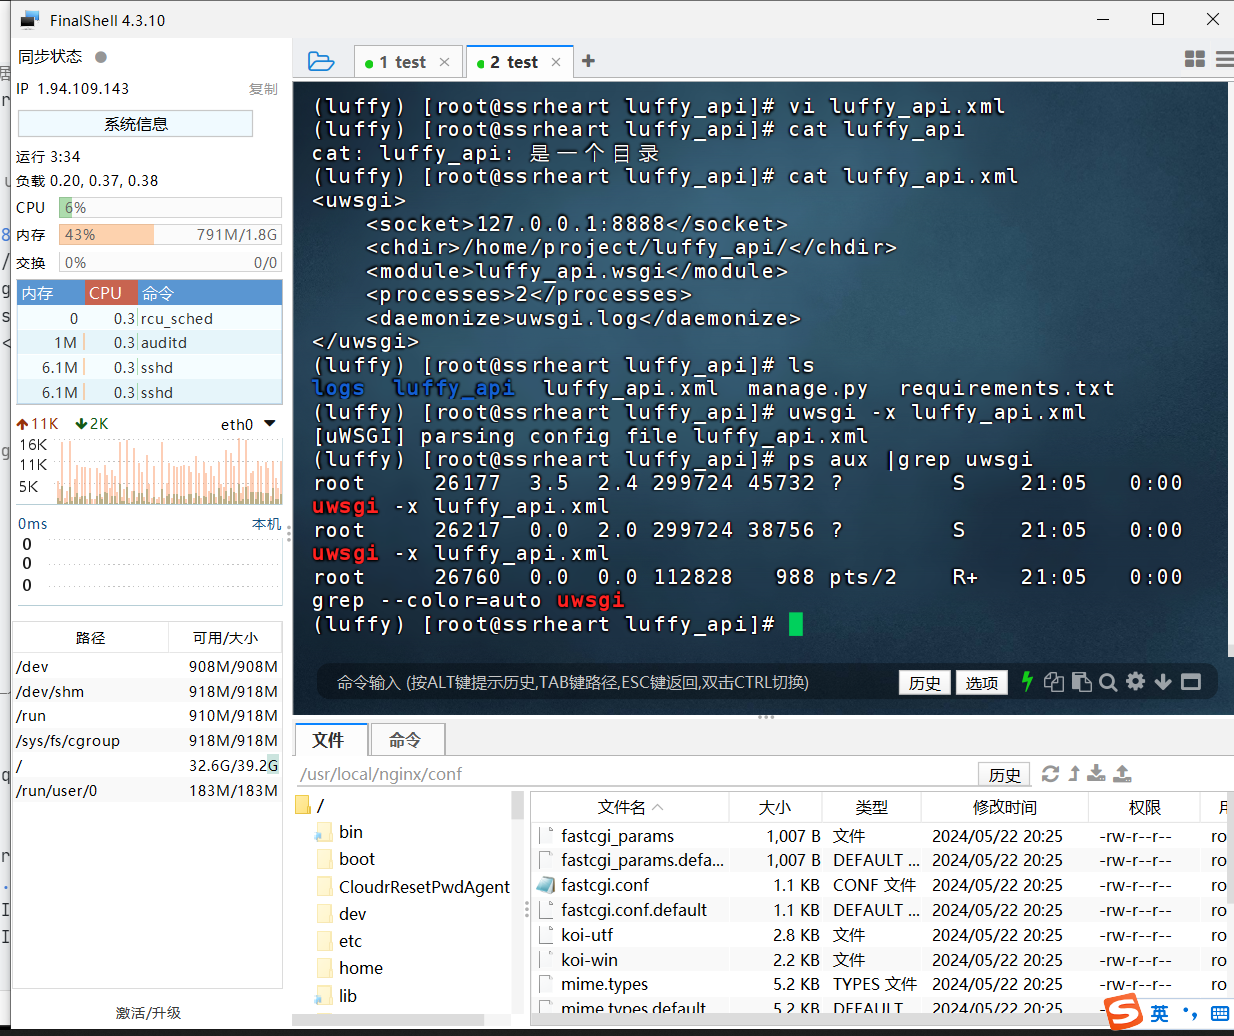
后台管理样式
# 1 如果使用uwsgi部署项目,它只能代理动态请求

	-动态请求:有路由的路径

    -静态文件:static下的,都不会返回,静态交给ngix--》nginx处理静态资源性能最高

    -因为uwsgi为了提高性能,不处理静态资源

    -下面地址就是:

    http://www.ssrheart.top:8000/static/admin/simpleui-x/elementui/theme-chalk/index.css

# 2 把项目中所有静态资源统一收集到一个文件夹下

	-simpleui

    -drf

# 3 在配置文件中加入:

# pro.py中加入   把静态资源收集到这个文件夹下

    STATIC_URL = '/static/'

    STATIC_ROOT = os.path.join(BASE_DIR, 'static')

# 4 创建文件夹

mkdir /home/project/luffy_api/luffy_api/static/

# 5 执行收集命令(manage 的配置文件一定是pro) 虚拟环境中操作

python manage.py collectstatic

# 6  修改nginx配置

location /static {

    alias /home/project/luffy_api/luffy_api/static;

}

# 7 整个nginx配置

events {

    worker_connections  1024;

}

http {

    include       mime.types;

    default_type  application/octet-stream;

    sendfile        on;

    server {

        listen 80;

        server_name  www.ssrheart.top;

        charset utf-8;

        location / {

            root /html;

            index index.html;

            try_files $uri $uri/ /index.html;

        }

    }

    server {

        listen 8000;

        server_name  www.ssrheart.top;

        charset utf-8;

        location /static {

            alias /home/project/luffy_api/luffy_api/static;

        }

        location / {

            include uwsgi_params;

            uwsgi_pass 127.0.0.1:8889;

            uwsgi_param UWSGI_SCRIPT luffy_api.wsgi;

            uwsgi_param UWSGI_CHDIR /home/project/luffy_api/;

        }

    }

}

#8 重启nginx

nginx -s reload

#9 django  必须要运行

# 访问

http://www.ssrheart.top:8000/admin/login/?next=/admin/
坑:
Redis : "MISCONF Redis is configured to save RDB snapshots, but it's currently unable to persist to disk. Commands that may modify the data set are disabled, because this instance is configured to report errors during writes if RDB snapshotting fails (stop-writes-on-bgsave-error option). Please check the Redis logs for details about the RDB error."
https://blog.csdn.net/fasheng0102/article/details/136872668
Wget换源 : https://blog.csdn.net/qq_40713201/article/details/124759424
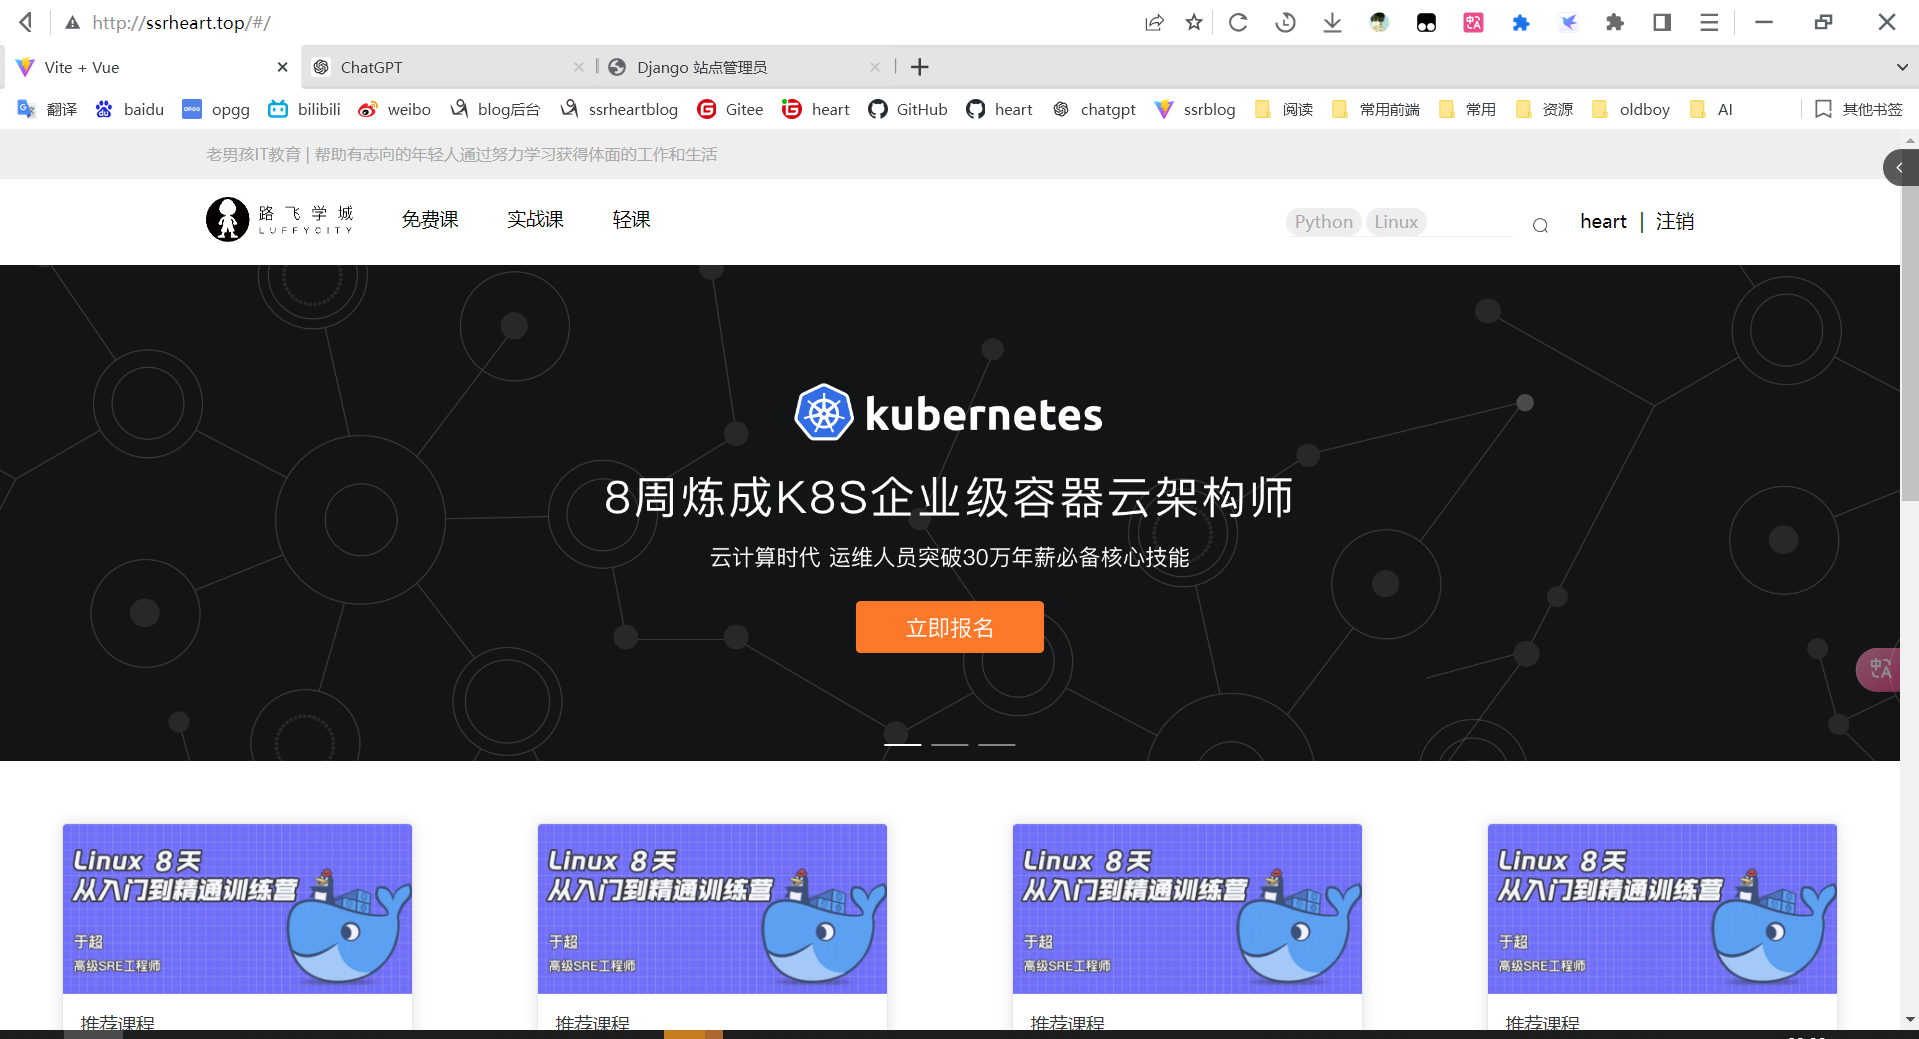
补充
ForeignKey中参数
# 1 to:跟哪个表管理,需要配合to_field,如果不写,会关联主键

# 2 to_field=None

---------------------------

# 3 on_delete:当这条记录删除时--》外键

	-CASCADE:级联删除:用户和用户详情,课程和章节,章节和课时

    -SET_NULL:关联的删除,这个字段设为空,但是需要配合:null=True

    -SET_DEFAULT:关联的删除,这个字段设为默认值,但是需要配合:default=xx

    -SET(函数内存地址):关联的删除,会触发这个函数执行

---------------------

# orm查询,正向和反向

	-基于对象的跨表查询

    	-book.publish --> 正向

        -publish.book_set.all()-->反向

    -基于双下划线的跨表查询

    	-book__publish_name-->正向

    	-publish__book_name-->反向

    -正向按字段

    -反向:按表名小写(是否带set取决于是否是多),基于双下划线的都是表名小写

# 4 related_name=None:基于对象跨表查,反向查询的名字 (原来:按表名小写-是否带set取决于是否是多),现在按这个字段

	-原来:course.coursechapter_set.all()

	-现在course.coursechapters.all()

# 5 related_query_name=None 基于下划线跨表查,反向查询的名字,现在按这个字段

	publish__指定的字段_name

# 6 db_constraint=False  不建立强外键关系,默认是True

    -强外键--》er图上有条线--》关联操作时,会有限制,会有约束

    	-会消耗性能

    -实际工作中,不建立强外键,但是有外键关系--》er图上没有有条线--》orm关联操作一样用

    	-以后存数据,删除数据,就不会检索关联表,性能高

        -可能会录入 脏数据 :程序层面控制
视频托管
# 1  视频托管

	-1 放在项目media中(图片还行,视频不好)

    -2 第三方视频托管

    	-保利威视频

        -文件托管

            -七牛云托管

            -阿里oss

            -腾讯云:文件存储

    - 3 自己搭建文件服务器

    	-ceph

        -fastdfs

        -minIo

# 2 七牛云视频托管

	-1注册账号

    -2 创建空间,会自动绑定一个测试域名

    -3 手动,代码上传视频

    	-地址

    -4 通过地址访问视频

# 3 代码上传

	-pip install qiniu

# 4 代码

from qiniu import Auth, put_file, etag

import qiniu.config

#需要填写你的 Access Key 和 Secret Key

access_key = 'Access-Key'

secret_key = 'Secret-Key'

#构建鉴权对象

q = Auth(access_key, secret_key)

#要上传的空间

bucket_name = 'lqz-test'

#上传后保存的文件名

key = '爱的色放.mp4'

#生成上传 Token,可以指定过期时间等

token = q.upload_token(bucket_name, key, 3600)

#要上传文件的本地路径

localfile = './1.mp4'

ret, info = put_file(token, key, localfile, version='v2')

print(info)

assert ret['key'] == key

assert ret['hash'] == etag(localfile)
VUE3中的播放器
无法选择清晰度,还未解决...
参考:https://blog.csdn.net/weixin_56709740/article/details/136855807
npm install vue-video-player video.js
main.js
import VueVideoPlayer from 'vue-video-player';

import 'video.js/dist/video-js.css';
<template>

  <div style="width: 51%; height: 51%">

    <video-player

      class="video-player vjs-custom-skin"

      ref="videoPlayer"

      :playsinline="true"

      :options="playerOptions"

    ></video-player>

  </div>

</template>

<script setup>

import "video.js/dist/video-js.css";

// eslint-disable-next-line no-unused-vars

import VueVideoPlayer from "vue-video-player";

const playUrl =

  "";//替换你的视频地址

const playerOptions = {

  autoplay: true,//自动播放

  muted: false, //静音播放

  loop: false, //循环播放

  preload: "auto", //预加载

  language: "zh-CN", //语言

  aspectRatio: "16:9", //宽高比

  fluid: true, //父容器的大小而自适应

  sources: [

    {

      type: "",

      src: playUrl,

    },

  ],

  notSupportedMessage: "此视频暂无法播放,请稍后再试",

  controls: true, // 视频播放器的控制条

  controlBar: {

    timeDivider: true,

    durationDisplay: true,

    remainingTimeDisplay: false,

    fullscreenToggle: true, // 全屏播放

    playToggle: true, // 播放/暂停

    volumePanel: true, // 音量控制

    qualitySelector: true, // 清晰度选择

  },

  qualitySelector: {

    default: "high", // 默认的清晰度

    options: [

      { value: "high", label: "高清" },

      { value: "ultra", label: "超清" },

    ],

  },

};

</script>

<style></style>
minio
#pip install minio

from minio import Minio

# 使用endpoint、access key和secret key来初始化minioClient对象。

minioClient = Minio('192.168.1.252:9000',

                    access_key='B1SKQVR6PRS1DT0NCSYM',

                    secret_key='Nqk3O0lHsbrv58OtyiMoCI41ZnTmSCMhsZZ2hptS',

                    secure=False)

# 调用make_bucket来创建一个存储桶。

# minioClient.make_bucket("maylogs", location="us-east-1")

# test01 为桶名字

res = minioClient.fput_object('lqz-test', 'lqz.jpg', './lqz.jpg')

print(res.object_name)

print('http://192.168.1.252:9090/lqz-test/lqz.jpg')

print('文件地址为【文件在浏览器打开会直接下载,放到index.html 中使用img引入查看】:\n', 'http://192.168.1.252:9000/test01/' + res.object_name)
fastdfs
# pip3 install py3Fdfs

from fdfs_client.client import get_tracker_conf, Fdfs_client

tracker_conf = get_tracker_conf('./client.conf')

client = Fdfs_client(tracker_conf)

#文件上传

# result = client.upload_by_filename('./lqz.jpg')

# print(result)

# {'Group name': b'group1', 'Remote file_id': b'group1/M00/00/00/rBMGZWCeGhqAR_vRAAIAABZebgw.sqlite', 'Status': 'Upload successed.', 'Local file name': './db.sqlite3', 'Uploaded size': '128.00KB', 'Storage IP': b'101.133.225.166'}

# 访问地址即可下载:http://192.168.1.252:8888/group1/M00/00/00/CgAAzmSihyKAUybqAAH8LXKkrrY060.jpg

#文件下载

# result = client.download_to_file('./xx.jpg', b'group1/M00/00/00/CgAAzmSihyKAUybqAAH8LXKkrrY060.jpg')

# print(result)

# #文件删除

result = client.delete_file(b'group1/M00/00/00/CgAAzmSihyKAUybqAAH8LXKkrrY060.jpg')

print(result)

# ('Delete file successed.', b'group1/M00/00/00/rBMGZWCeGhqAR_vRAAIAABZebgw.sqlite', b'192.168.1.252')

# #列出所有的group信息

# result = client.list_all_groups()

# print(result)
支付宝支付
# 1 支付

	-1 支付宝支付

    -2 微信支付

    -3 银联支付

    -4 自己支付:支付牌照

# 2 支付宝支付

	-商户号:别人把钱付款--》付到商户里面

    -商户再提现

    ----需要营业执照----没有可以使用沙箱环境测试----

    -扫码登录:沙箱环境--》不需要申请条件--》可以测试

    	-https://open.alipay.com/develop/manage

    -网站支付:https://opendocs.alipay.com/open/270/105899

    -手机网站支付:可以掉起支付宝app

        -咱们不会:输入账号密码支付

    	-https://opendocs.alipay.com/open/270/105898?pathHash=b3b2b667

    -网站支付:

    	-跳转到支付宝支付页面

        	-手机扫码付款

            -在网页上输入支付宝账号密码付款

# 3 申请支付宝商户号,限制条件

#申请条件

 支持的账号类型:支付宝企业账号、支付宝个人账号。

# 签约申请提交材料要求如下:

• 提供网站地址,网站能正常访问且页面显示完整,网站需要明确经营内容且有完整的商品信息。

• 网站必须通过 ICP 备案,且备案主体需与支付宝账号主体一致。若网站备案主体与当前账号主体不同时需上传授权函。

• 如以个人账号申请,需提供营业执照,且支付宝账号名称需与营业执照主体一致。

注意:需按照要求提交材料,若部分材料不合格,收款额度将受到限制(单笔收款 ≤ 2000 元,单日收款 ≤ 20000 元)。若签约时未能提供相关材料(如营业执照),请在合约生效后的 30 天内补全,否则会影响正常收款

# 4 沙箱环境--》测试环境

	-https://open.alipay.com/develop/sandbox/app

	-商户号:

    	nqbrxo4836@sandbox.com

        111111

    -买家号:

    	mixnmd6217@sandbox.com

        111111

    -安卓沙箱app--》跟支付宝一样

# 5 web端,集成,支付流程

	-1 前端:购买按钮

    -2 点击支付按钮,触发后端下单接口:生成支付链接,生成订单[订单表生成一条记录]

    -3 用户扫码付款[登陆后输入密码付款]

    -4 支付宝收到付款成功---》get回调--》回调到前端--》前端支付成功页面

    -5 支付宝收到付款成功---》post回调--》回调后端---》修改订单状态--》已支付状态
# 快速体验

# 1 API 接口和sdk

	-早期没有python的sdk---》只能使用api接口--》第三方基于api接口封装了非官方sdk

    	-https://github.com/fzlee/alipay

        -pip install python-alipay-sdk

    -后期有了官方sdk:

    	-https://opendocs.alipay.com/common/02np8q?pathHash=7847ca4f

# 2 支付宝支付通信,验证签名,都是使用非对称加密--》支付宝提供的软件

	-软件:https://opendocs.alipay.com/common/02kipk?pathHash=0d20b438

	-公钥

    -私钥

# 3 在支付宝沙箱环境中[正式环境]

	-把刚刚生成的公钥填入

    -会生成一个支付宝公钥--》把这个东西复制出来

# 4 在代码中,使用【支付宝公钥】和刚刚生成的【私钥】,放到代码中
官方sdk测试
from alipay.aop.api.AlipayClientConfig import AlipayClientConfig

from alipay.aop.api.DefaultAlipayClient import DefaultAlipayClient

from alipay.aop.api.domain.AlipayTradePagePayModel import AlipayTradePagePayModel

from alipay.aop.api.request.AlipayTradePagePayRequest import AlipayTradePagePayRequest

if __name__ == '__main__':

    """

    设置配置,包括支付宝网关地址、app_id、应用私钥、支付宝公钥等,其他配置值可以查看AlipayClientConfig的定义。

    """

    alipay_client_config = AlipayClientConfig()

    # alipay_client_config.server_url = 'https://openapi.alipay.com/gateway.do'  # 真实环境

    alipay_client_config.server_url = 'https://openapi-sandbox.dl.alipaydev.com/gateway.do'  # 沙箱环境

    alipay_client_config.app_id = '9021000129694319'

    # 应用私钥

    alipay_client_config.app_private_key = ''

    # 阿里公钥

    alipay_client_config.alipay_public_key = ''

    """

    得到客户端对象。

    注意,一个alipay_client_config对象对应一个DefaultAlipayClient,定义DefaultAlipayClient对象后,alipay_client_config不得修改,如果想使用不同的配置,请定义不同的DefaultAlipayClient。

    logger参数用于打印日志,不传则不打印,建议传递。

    """

    client = DefaultAlipayClient(alipay_client_config=alipay_client_config)

    """

    页面接口示例:alipay.trade.page.pay

    """

    # 对照接口文档,构造请求对象

    model = AlipayTradePagePayModel()

    model.out_trade_no = "000010004"

    model.total_amount = 999

    model.subject = "重启娃娃-保密发货"

    model.body = "重启娃娃"

    model.product_code = "FAST_INSTANT_TRADE_PAY"

    request = AlipayTradePagePayRequest(biz_model=model)

    # 两个回调地址:get回调  post 回调

    request.return_url='http://www.baidu.com' # get回调

    request.notify_url='http://www.baidu.com/post' # post 回调  我们看不到

    # 得到构造的请求,如果http_method是GET,则是一个带完成请求参数的url,如果http_method是POST,则是一段HTML表单片段

    response = client.page_execute(request, http_method="GET")

    print("alipay.trade.page.pay response:" + response)
第三方sdk测试
from alipay import AliPay

from alipay.utils import AliPayConfig

# 支付宝网页下载的证书不能直接被使用,需要加上头尾

# 你可以在此处找到例子: tests/certs/ali/ali_private_key.pem

app_private_key_string = open("./private_key.pem").read()

alipay_public_key_string = open("./al_public_key.pem").read()

alipay = AliPay(

    appid="", # 商户申请好久有了

    app_notify_url=None,  # 默认回调 url

    app_private_key_string=app_private_key_string,

    # 支付宝的公钥,验证支付宝回传消息使用,不是你自己的公钥,

    alipay_public_key_string=alipay_public_key_string,

    sign_type="RSA2",  # RSA 或者 RSA2

    debug=False,  # 默认 False

    verbose=False,  # 输出调试数据

    config=AliPayConfig(timeout=15)  # 可选,请求超时时间

)

# 老版本

order_string = alipay.api_alipay_trade_page_pay(

    out_trade_no="10001010",

    total_amount=99,

    subject='Go语言入门',

    return_url="https://example.com",

    notify_url="https://example.com/notify" # 可选,不填则使用默认 notify url

)

print(f'支付地址:https://openapi-sandbox.dl.alipaydev.com/gateway.do?{order_string}')

# 新版本--暂时没通

# res=alipay.client_api(

#   "alipay.trade.page.pay",

#   biz_content={

#     "out_trade_no": "100212",

#     "total_amount": 8889,

#     "subject": "性感内衣"

#   },

#   return_url="https://example.com", # this is optional

#   notify_url='https://example.com'

# )
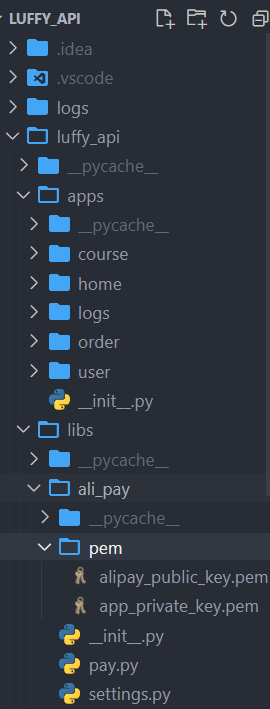
支付宝二次封装
libs

    ├── al_pay  							# aliapy二次封装包

    │   ├── __init__.py 				# 包文件

    │   ├── pem							# 公钥私钥文件夹

    │   │   ├── alipay_public_key.pem	# 支付宝公钥文件

    │   │   ├── app_private_key.pem		# 应用私钥文件

    │   ├── pay.py						# 支付文件

    └── └── settings.py  				# 应用配置
pay.py
from alipay import AliPay

from alipay.utils import AliPayConfig

from . import settings

alipay = AliPay(

    appid=settings.APP_ID,

    app_notify_url=None,  # 默认回调 url

    app_private_key_string=settings.APP_PRIVATE_KEY_STRING,

    # 支付宝的公钥,验证支付宝回传消息使用,不是你自己的公钥,

    alipay_public_key_string=settings.ALIPAY_PUBLIC_KEY_STRING,

    sign_type=settings.SIGN,  # RSA 或者 RSA2

    debug=settings.DEBUG,  # 默认 False

    verbose=False,  # 输出调试数据

    config=AliPayConfig(timeout=15)  # 可选,请求超时时间

)
settings.py
import os

#### 替换应用私钥   支付宝公钥  和 应用ID即可

# 应用私钥

APP_PRIVATE_KEY_STRING = open(os.path.join(os.path.dirname(os.path.abspath(__file__)), 'pem', 'app_private_key.pem')).read()

# 支付宝公钥

ALIPAY_PUBLIC_KEY_STRING = open(os.path.join(os.path.dirname(os.path.abspath(__file__)), 'pem', 'alipay_public_key.pem')).read()

# 应用ID

APP_ID = ''

# 加密方式

SIGN = 'RSA2'

# 是否是支付宝测试环境(沙箱环境),如果采用真是支付宝环境,配置False

DEBUG = True

# 支付网关

GATEWAY = 'https://openapi-sandbox.dl.alipaydev.com/gateway.do' if DEBUG else 'https://openapi.alipay.com/gateway.do'
init.py
from .pay import alipay

from .settings import GATEWAY
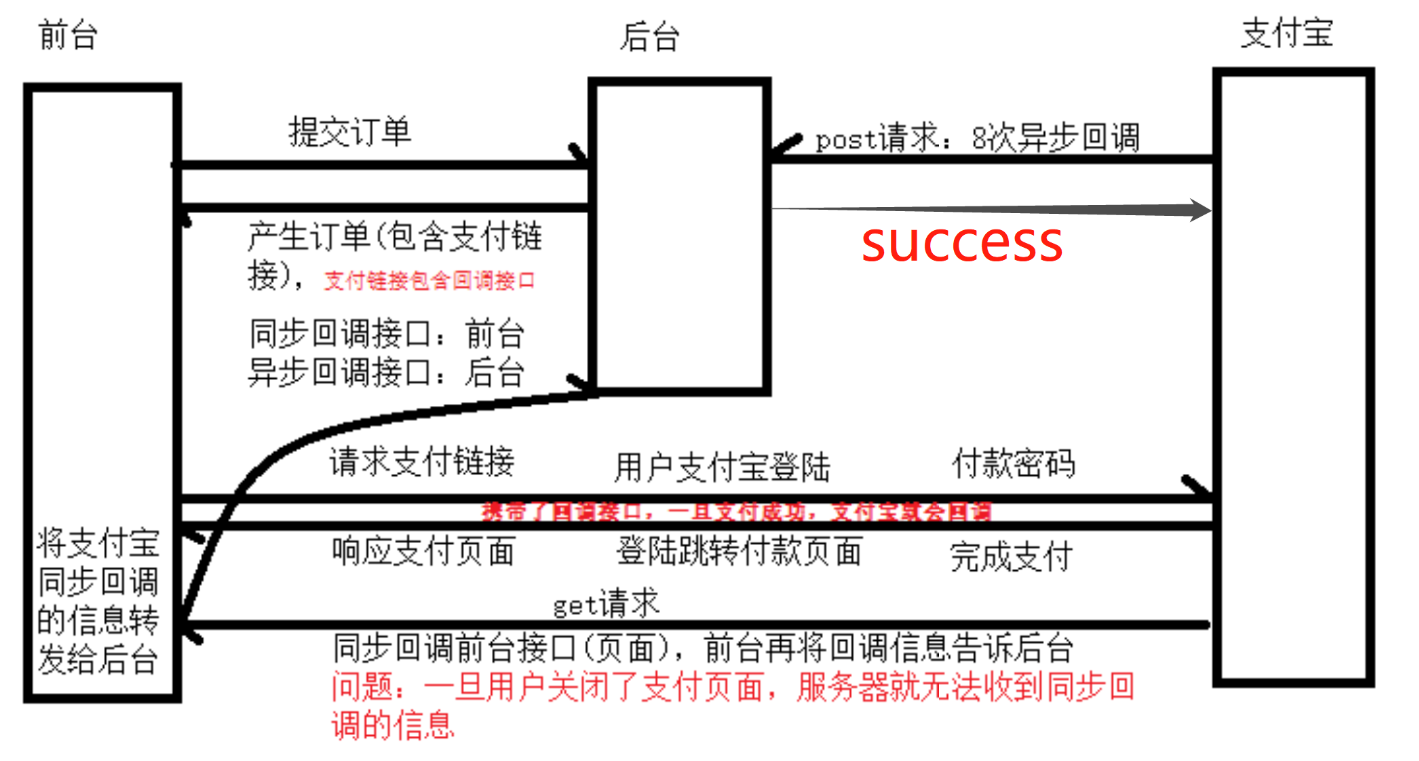
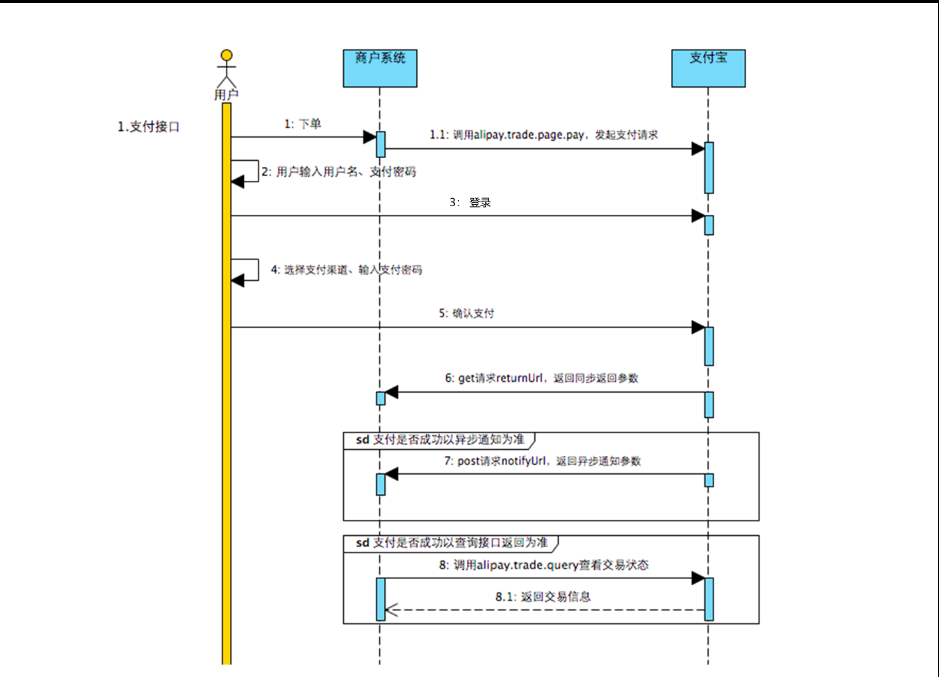
支付宝回调数据格式
#  回调数据格式

data = {

     "subject": "测试订单",

     "gmt_payment": "2016-11-16 11:42:19",

     "charset": "utf-8",

     "seller_id": "xxxx",

     "trade_status": "TRADE_SUCCESS",

     "buyer_id": "xxxx",

     "auth_app_id": "xxxx",

     "buyer_pay_amount": "0.01",

     "version": "1.0",

     "gmt_create": "2016-11-16 11:42:18",

     "trade_no": "xxxx",

     "fund_bill_list": "[{\"amount\":\"0.01\",\"fundChannel\":\"ALIPAYACCOUNT\"}]",

     "app_id": "xxxx",

     "notify_time": "2016-11-16 11:42:19",

     "point_amount": "0.00",

     "total_amount": "0.01",

     "notify_type": "trade_status_sync",

     "out_trade_no": "订单号", # 咱们的uuid

     "buyer_logon_id": "xxxx",

     "notify_id": "xxxx",

     "seller_email": "xxxx",

     "receipt_amount": "0.01",

     "invoice_amount": "0.01",

     "sign": "签名" # 验证签名

}
内网穿透
https://zhuanlan.zhihu.com/p/370483324
luffy的更多相关文章
- poj 2723 Get Luffy Out(2-sat)
Description Ratish is a young man who always dreams of being a hero. One day his friend Luffy was ca ...
- luffy项目后台drf搭建(1)
一 进入虚拟环境 打开crm,输入命令 workon luffy 虚拟环境使用文档 二 安装基本类库 pip install django pip install PymySQL pip instal ...
- 项目部署Vue+Django(luffy)
部署路飞学城 部署整体框架图: 1 熟悉linux操作 2 上传路飞学城项目到linux服务器 xftp上传到服务器 lrzsz工具 3 完成python3解释器的安装 在linux命令行模式下, 输 ...
- Luffy之课程详情页
Luffy之课程详情页 提前写好课程详情的template,并放入到Vue中 注册路由 import CourseDetail from "../components/CourseDetai ...
- Luffy之支付宝支付开发API
发起支付 接入支付宝 支付的大致流程如下图: 部分节点详解: 沙箱环境 是支付宝提供给开发者的 ...
- Luffy之结算订单页面(订单模型表的创建,订单的生成,以及订单详情展示等)
订单页面 在前面我们已经构建了,购物车的页面,接下来到了结算页面 1.首先,在购物车页面点击去结算按钮时,我们需要做如下动作 .前端发送生成订单的请求,点击标签内触发事件 create_order t ...
- Luffy之购物车页面搭建
前面已经将一些课程加入购物车中,并保存到了后端的redis数据库中,此时做购物车页面时,我们需要将在前端向后端发送请求,用来获取数据数据 购物车页面 1.首先后端要将数据构建好,后端视图函数如下代码: ...
- luffy之多条件登录与极验滑动验证码
多条件登录 JWT扩展的登录视图,在收到用户名与密码时,也是调用Django的认证系统中提供的authenticate()来检查用户名与密码是否正确. 我们可以通过修改Django认证系统的认证后端( ...
- Luffy之Xadmin以及首页搭建(轮播图,导航)
1. 首页 1.1 轮播图 admin站点配置支持图片上传 pip install Pillow 默认情况下,Django会将上传的图片保存在本地服务器上,需要配置保存的路径.我们可以将上传的文件保存 ...
- Luffy之虚拟环境.项目搭建,目录日志等配置信息
1. 项目开发前 1.1 虚拟环境virtualenv 如果在一台电脑上, 想开发多个不同的项目, 需要用到同一个包的不同版本, 如果使用上面的命令, 在同一个目录下安装或者更新, 新版本会覆盖以前的 ...
随机推荐
- 2025成都.NET开发者Connect圆满结束
大家好,我是Edison. 2025年成都.NET开发者Connect线下聚会活动于3月29日圆满结束,本次活动吸引了约30位.NET开发者朋友参与,他们分别来自成都各家技术公司,我们相聚城南华府国际 ...
- 再说PG的连接
前面说过连接PG的方法,但是遇到问题又不通了. 按照前面的做法还是不行,正是鼻子气歪了. 到pg老家下载PGODBC,安装了,还是不行. 其实仅仅copy一个libpg.dll是不够的.因为libpg ...
- 头晕的android SDK Manager and 找不到真机
这张图很完美!可是出问题就头晕了. 问题场景:执行Andriod.bat出现下面界面后,然后跳出Andriod SDK的界面: android SDK Manager的界面就孤零零的几条记录挂在那里. ...
- cursor的mcp服务器安装(nodejs,npx安装和uv工具安装)
一.前言: 1.近期MCP服务器非常火爆,作为LLM大模型的通用工具手脚,MCP可以帮助LLM大模型实现更好的功能.本人经常使用cursor来进行代码的编辑,正巧cursor在0.47版本之后,MCP ...
- jmeter实现幂等测试的一种方法(案例)
最近在研究怎样对电商系统的业务进行幂等测试,利用jmeter对单独业务开展幂等测试可能简便.直接有效吧 场景描述:买家每一笔订单选中商品后,系统会生成一个"ShopCartIds" ...
- C# 线程(一)——基础概念(线程与进程、前后台线程)
一.基础概念 1.1线程与进程 线程--是一个可执行路径,它可以独立于其他线程执行. 进程--每个线程都在操作系统的进程(Process)内执行,而操作系统则提供了程序运行的独立环境,它提供了一个应用 ...
- Kreuzberg:本地OCR+多格式解析!Kreuzberg如何用Python暴力提取30+文档格式?程序员看完直呼内行!
嗨,大家好,我是小华同学,关注我们获得"最新.最全.最优质"开源项目和高效工作学习方法 我们经常需要从各种不同类型的文档中提取文本内容,无论是办公文档.图像还是PDF文件.而Kre ...
- 漏洞预警 | Netis Wifi路由器信息泄露漏洞
0x00 漏洞编号 CVE-2024-48455 0x01 危险等级 高危 0x02 漏洞概述 Netis Wi-Fi路由器以其稳定的性能.易用的管理界面以及较高的性价比受到许多用户的青睐. 0x03 ...
- 【ROS】6.1 中间人攻击移动过程
原视频 中间人攻击 实验目的 ARP欺骗可以作为中间人攻击的一个起手式.前一个实验我们完成了ARP欺骗,在本章实验中,我们将会在上一个实验的基础上,针对键盘控制过程的报文进行修改,使键盘控制异常. 本 ...
- dom操作补充
s5.html <!DOCTYPE html> <html lang="en"> <head> <meta charset=&qu ...