【WCF】利用WCF实现上传下载文件服务
引言
前段时间,用WCF做了一个小项目,其中涉及到文件的上传下载。出于复习巩固的目的,今天简单梳理了一下,整理出来,下面展示如何一步步实现一个上传下载的WCF服务。
服务端
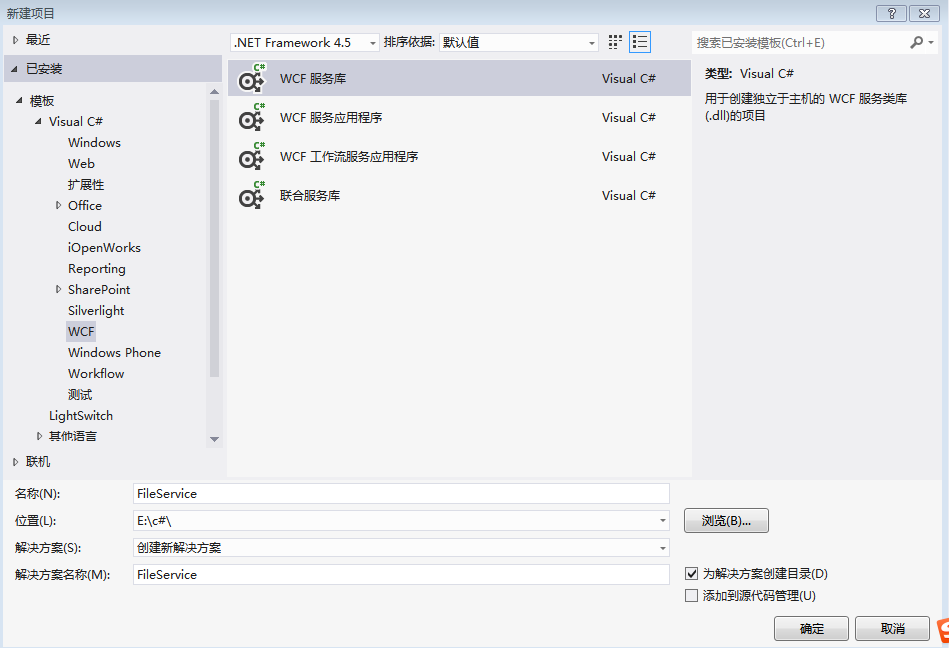
1.首先新建一个名为FileService的WCF服务库项目,如下图:
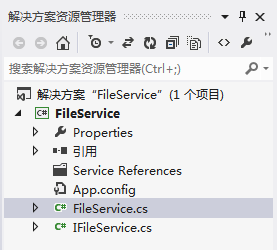
2.将Service,IService重命名为FileService,IFileService,如下图:
3.打开IFileService.cs,定义两个方法,如下:
    [ServiceContract]

    public interface IFileService

    {

        //上传文件

        [OperationContract]

        bool UpLoadFile(Stream filestream);

        //下载文件

        [OperationContract]

        Stream DownLoadFile(string downfile);

    }
4.上面方法定义了输入参数和返回参数,但是实际项目中往往是不够的,我们需要增加其他参数,如文件名,文件大小之类。然而WCF中有限定,如下:
保留要进行流处理的数据的参数必须是方法中的唯一参数。 例如,如果要对输入消息进行流处理,则该操作必须正好具有一个输入参数。 同样,如果要对输出消息进行流处理,则该操作必须正好具有一个输出参数或一个返回值。
参数和返回值的类型中至少有一个必须是 Stream, Message 或 IXmlSerializable。
所以我们需要用Message契约特性包装一下参数,修改代码如下:
    [ServiceContract]

    public interface IFileService

    {

        //上传文件

        [OperationContract]

        UpFileResult UpLoadFile(UpFile filestream);

        //下载文件

        [OperationContract]

        DownFileResult DownLoadFile(DownFile downfile);

    }

    [MessageContract]

    public class DownFile

    {

        [MessageHeader]

        public string FileName { get; set; }

    }

    [MessageContract]

    public class UpFileResult

    {

        [MessageHeader]

        public bool IsSuccess { get; set; }

        [MessageHeader]

        public string Message { get; set; }

    }

    [MessageContract]

    public class UpFile

    {

        [MessageHeader]

        public long FileSize { get; set; }

        [MessageHeader]

        public string FileName { get; set; }

        [MessageBodyMember]

        public Stream FileStream { get; set; }

    }

    [MessageContract]

    public class DownFileResult

    {

        [MessageHeader]

        public long   FileSize { get; set; }

        [MessageHeader]

        public bool IsSuccess { get; set; }

        [MessageHeader]

        public string Message { get; set; }

        [MessageBodyMember]

        public Stream FileStream { get; set; }

    }
5.现在服务契约定义好了,接下来实现契约的接口。打开FileService.cs文件,编写代码,实现服务端的上传下载文件服务,代码如下:
 public class FileService : IFileService

    {

        public UpFileResult UpLoadFile(UpFile filedata)

        {

            UpFileResult result = new UpFileResult();

            string path = System.AppDomain.CurrentDomain.BaseDirectory +@"\service\";

            if (!Directory.Exists(path))

            {

                Directory.CreateDirectory(path);

            }

            byte[] buffer = new byte[filedata.FileSize];

            FileStream fs = new FileStream(path + filedata.FileName, FileMode.Create, FileAccess.Write);

            int count = ;

            while ((count = filedata.FileStream.Read(buffer, , buffer.Length)) > )

            {

                fs.Write(buffer, , count);

            }

            //清空缓冲区

            fs.Flush();

            //关闭流

            fs.Close();

            result.IsSuccess = true;

            return result;

        }

        //下载文件

        public DownFileResult DownLoadFile(DownFile filedata)

        {

            DownFileResult result = new DownFileResult();

            string path = System.AppDomain.CurrentDomain.BaseDirectory + @"\service\" + filedata.FileName;

            if (!File.Exists(path))

            {

                result.IsSuccess = false;

                result.FileSize = ;

                result.Message = "服务器不存在此文件";

                result.FileStream = new MemoryStream();

                return result;

            }

            Stream ms = new MemoryStream();

            FileStream fs = new FileStream(path, FileMode.Open, FileAccess.Read);

            fs.CopyTo(ms);

            ms.Position = ;  //重要,不为0的话,客户端读取有问题

            result.IsSuccess = true;

            result.FileSize = ms.Length;

            result.FileStream = ms;

            fs.Flush();

            fs.Close();

            return result;

        }

    }
6.至此,具体实现代码完成,但是我们还需要配置一下App.config,设置地址,契约和绑定。这里绑定采用NetTcpBinding,我们还需要为NetTcpBinding具体配置,如maxReceivedMessageSize(配置最大接收文件大小),transferMode(传输模式,这里是Streamed)等。最终代码如下:
<?xml version="1.0" encoding="utf-8" ?>

<configuration>

  <appSettings>

    <add key="aspnet:UseTaskFriendlySynchronizationContext" value="true" />

  </appSettings>

  <system.web>

    <compilation debug="true" />

  </system.web>

  <!-- 部署服务库项目时,必须将配置文件的内容添加到

  主机的 app.config 文件中。System.Configuration 不支持库的配置文件。-->

  <system.serviceModel>

    <bindings>

       <netTcpBinding>

        <binding name="MyTcpBinding" maxBufferSize="2147483647" maxReceivedMessageSize="2147483647" sendTimeout="00:30:00" transferMode="Streamed"   >

          <security mode="None"></security>

        </binding>

      </netTcpBinding>

    </bindings>

    <services>

      <service name="WcfTest.FileService">

        <endpoint address="" binding="netTcpBinding" bindingConfiguration="MyTcpBinding" contract="WcfTest.IFileService">

          <identity>

            <dns value="localhost" />

          </identity>

        </endpoint>

        <endpoint address="mex" binding="mexHttpBinding" contract="IMetadataExchange" />

        <host>

          <baseAddresses>

             <add baseAddress="http://localhost:8733/Design_Time_Addresses/WcfTest/Service1/" />

            <add baseAddress="net.tcp://localhost:8734/Design_Time_Addresses/WcfTest/Service1/" />

          </baseAddresses>

        </host>

      </service>

    </services>

    <behaviors>

      <serviceBehaviors>

        <behavior>

          <!-- 为避免泄漏元数据信息,

          请在部署前将以下值设置为 false -->

          <serviceMetadata httpGetEnabled="True" httpsGetEnabled="True"/>

          <!-- 要接收故障异常详细信息以进行调试,

          请将以下值设置为 true。在部署前设置为 false

            以避免泄漏异常信息-->

          <serviceDebug includeExceptionDetailInFaults="False" />

        </behavior>

      </serviceBehaviors>

    </behaviors>

  </system.serviceModel>

</configuration>
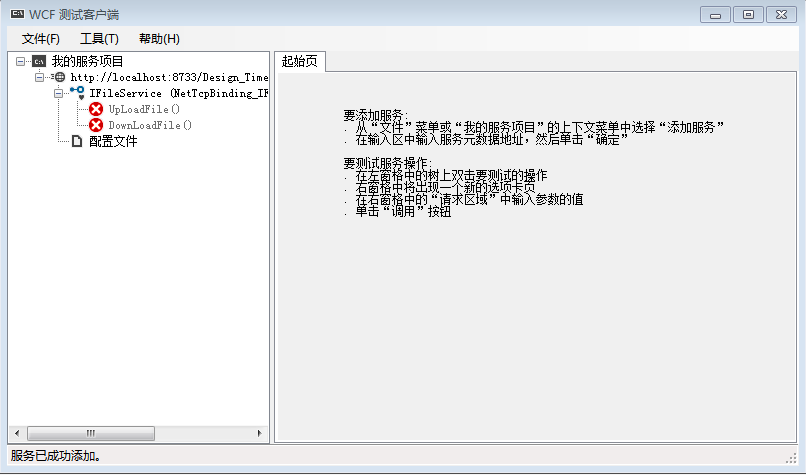
7.这时可以运行服务,如果没有问题的话,会看到如下截图。
客户端
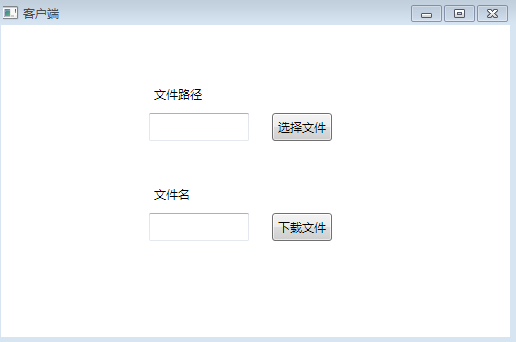
1.首先新建一个WPF应用程序,在MainWindow.xaml添加控件,得到下图:
2.在引用中右击,选择添加服务引用,出现对话框,我们需要填上刚才打开的服务的地址,然后按旁边的转到,会看到显示找到服务,接着更改命名空间为FileService,得到如下图。

2.按确定之后,在资源管理器里的引用下面会多出一个FileService命名空间,里面包含我们的刚才写的FileServiceClient服务代理类 ,现在我们可以通过它调用服务了。编写代码如下:
  public partial class MainWindow : Window

    {

        FileServiceClient client;

        public MainWindow()

        {

            InitializeComponent();

            client = new FileServiceClient();

        }

        private void Button_Click_1(object sender, RoutedEventArgs e)

        {

            OpenFileDialog Fdialog = new OpenFileDialog();

            if (Fdialog.ShowDialog().Value)

            {

                using (Stream fs = new FileStream(Fdialog.FileName, FileMode.Open, FileAccess.Read))

                {

                    string message;

                    this.filepath.Text = Fdialog.SafeFileName;

                    bool result = client.UpLoadFile(Fdialog.SafeFileName, fs.Length,fs, out message);

                    if (result == true)

                    {

                        MessageBox.Show("上传成功!");

                    }

                    else

                    {

                        MessageBox.Show(message);

                    }

                }

            }

        }

        private void Button_Click_2(object sender, RoutedEventArgs e)

        {

            string filename = this.filename.Text;

            string path = System.AppDomain.CurrentDomain.BaseDirectory + @"\client\";

            bool issuccess=false;

            string message="";

            Stream filestream=new MemoryStream();

            long filesize = client.DownLoadFile(filename, out issuccess, out message, out filestream);

            if (issuccess)

            {

                if (!Directory.Exists(path))

                {

                    Directory.CreateDirectory(path);

                }

                byte[] buffer = new byte[filesize];

                FileStream fs = new FileStream(path + filename, FileMode.Create, FileAccess.Write);

                int count = ;

                while ((count = filestream.Read(buffer, , buffer.Length)) > )

                {

                    fs.Write(buffer, , count);

                }

                //清空缓冲区

                fs.Flush();

                //关闭流

                fs.Close();

                MessageBox.Show("下载成功!");

            }

            else

            {

                MessageBox.Show(message);

            }

        }

    }
3.运行程序,上传下载文件,会在服务端和客服端运行目录下分别找到上传的文件和下载的文件,测试通过。界面如下:


小结
本文通过图文一步步介绍了如何实现上传下载文件功能,其中涉及到WCF知识点其实是不少的,但是都是简单地带过。如果有不明白的地方,可以查阅Google,百度,也可以留言。如果您有更好的建议,请不吝指教,感激不尽!
【WCF】利用WCF实现上传下载文件服务的更多相关文章
- 【ARM-LInux开发】利用scp 远程上传下载文件/文件夹
利用scp 远程上传下载文件/文件夹 scp [-1246BCpqrv] [-c cipher] [-F ssh_config] [-i identity_file] [-l limit] [-o s ...
- 利用scp 远程上传下载文件/文件夹和ssh远程执行命令
利用scp传输文件 1.从服务器下载文件scp username@servername:/path/filename /tmp/local_destination例如scp codinglog@192 ...
- linux利用scp远程上传下载文件/文件夹
scp是secure copy的简写,用于在Linux下进行远程拷贝文件的命令,和它类似的命令有cp,不过cp只是在本机进行拷贝不能跨服务器,而且scp传输是加密的.可能会稍微影响一下速度. 当你服务 ...
- 利用scp 远程上传下载文件/文件夹
scp [-1246BCpqrv] [-c cipher] [-F ssh_config] [-i identity_file] [-l limit] [-o ssh_option] [-P port ...
- 利用 secureCRT 直接上传下载文件 (sz,rz)
在window下向linux传送文件的方法. 首先在window中安装SecureCRT,然后在快速连接中建立一个到linux的连接,当然,你要先知道你的系统的ip,在终端中键入ifconfig可以查 ...
- 利用WCF实现上传下载文件服务
使用WCF上传文件 在WCF没出现之前,我一直使用用WebService来上传文件,我不知道别人为什么要这么做,因为我们的文件服务器和网站后台和网站前台都不在同一个机器,操作人员觉 ...
- linux利用sh脚本上传下载文件到ftp服务器
####本地的/app/awsm/csv2 to ftp服务器上的/awsm/#### #!/bin/sh export today=`date +%Y-%m-%d` ftp -v -n 10.116 ...
- 如何利用京东云的对象存储(OSS)上传下载文件
作者:刘冀 在公有云厂商里都有对象存储,京东云也不例外,而且也兼容S3的标准因此可以利用相关的工具去上传下载文件,本文主要记录一下利用CloudBerry Explorer for Amazon S3 ...
- rz和sz上传下载文件工具lrzsz
######################### rz和sz上传下载文件工具lrzsz ####################################################### ...
随机推荐
- 提交cookie登录
# coding:utf-8import requests # 先打开登录首页,获取部分cookieurl = "https://passport.cnblogs.com/user/sign ...
- 019-Spring Boot 日志
一.概述 spring-boot默认支持info级别的日志. 日志级别:trace.debug.info.warn.error.fatal.off[关闭] 二.配置日志级别 2.1.配置文件配置日志级 ...
- Android studio 相关下载
Android studio http://www.androiddevtools.cn/ Oracle的VirtulBox https://www.virtualbox.org/wiki/Down ...
- pip升级或卸载安装的包的方法
先 pip list 看看包的具体名字是什么,然后 pip uninstall **包名** ===== 打印出有新版本的包: pip list --outdated --format=freeze ...
- Symfony 一些介绍
Symfony 一些介绍: 路由:能限制 hostname,这就让有大量公共功能的网站可以共用一套代码:URI 识别支持 Reg 检测,让 url 能定义的随心所欲:支持前缀,import,便于模块化 ...
- MySQL的SQL MODE
SQL MODE:定义mysqld对约束等的响应行为: 查看当前模式: mysql> SHOW GLOBAL VARIABLES LIKE 'sql_mode'; 修改 ...
- GPS USB驱动串口被占用
1.一般是装了错误的驱动,显示如下 2.实际装好应该是显示的 3.驱动选择,先卸载了上面的virtual驱动,安装下面箭头指向的驱动 这里的卸载很重要,先点设备管理器的--查看--显示隐藏设备, 然后 ...
- 剑指offer 面试37题
面试37题: 题:序列化二叉树 题目:请实现两个函数,分别用来序列化和反序列化二叉树 解题思路:首先来看二叉树的序列化,二叉树的序列化就是采用前序遍历二叉树输出节点,再碰到左子节点或者右子节点为Non ...
- Python之内置函数再总结
一.数字相关 1.绝对值:abs(-1) 2.最大最小值:max([1,2,3]) ,min([1,2,3]) 3.序列长度:len('abc') , len([1,2,3]) , len(( ...
- Linux安装Mycat
1.官网下载mycat到/home/install目录下 2.解压到/usr/local/mycat目录下 tar -zxvf Mycat-server-1.6-RELEASE-20161028204 ...