Android代码实现控件闪烁效果
前言
在项目开发过程中,我们有时会遇到需要控件闪烁和停止的问题,这个用xml是可以实现的,但是为了在使用时控制方便,这里我写了一个工具类,方便在代码中控制view的闪烁与停止。
本文将涉及以下类容
- 闪烁实现原理
- 在MainActivity中的使用
- 效果图和项目结构图
实现过程
下面作以讲解
一.闪烁实现原理
闪烁是通过android中的动画类Animation实现的,
我在实现view闪烁动画的时候,涉及到Animation的 以下方法:
1. alphaAnimation.setInterpolator(new LinearInterpolator());
这是给动画设置插值器,默认线性插值器
要实现闪烁的话,就是一个重复的过程,于是Animation需要设置重复次数,因为是点击开始在结束之前不停止的,所以会一直重复,则设置重复次数如下:
alphaAnimation.setRepeatCount(Animation.INFINITE);
最后在设置完动画的model后启动动画:
alphaAnimation.setRepeatMode(Animation.REVERSE); view.startAnimation(alphaAnimation);
这样一个不断闪烁的动画便完成了,接下来是停止闪烁动画,Animation 有一个类似clear的方法,可以清除加在view上的而动画效果,停止闪烁动画的话,则需要这样:
view.clearAnimation();
当然,以上便是Animation实现动画实现view闪烁与停止的原理,这些只要理解就好,你不需要为怎么调用烦恼,因为我将view动画闪烁及停止的方法封装到demo中的FlashHelper中
FlashHelper类有两个公开方法,开始闪烁与停止闪烁。如果你想让你的view闪烁起来,你可以这样:
//开启闪烁,其中mTvText为view对象

FlashHelper.getInstance().startFlick(mTvText);
若想要闪烁的view停止下来,你可以这样:
//停止闪烁,其中mTvText为view对象

FlashHelper.getInstance().stopFlick(mTvText);
下面看看FlashHelper在MainActivity中是如何调用的吧.
二.在MainActivity中的使用
FlashHelper在MainActivity中使用样例如下:
package com.android.testdemo;

import android.view.View;

import android.widget.Button;

import android.widget.TextView;

import com.android.base.BaseActivity;

import butterknife.BindView;

public class MainActivity extends BaseActivity {

    @BindView(R.id.button1)

    Button mBtn1;

    @BindView(R.id.button2)

    Button mBtn2;

    @BindView(R.id.tv_text)

    TextView mTvText;

    @Override

    protected int getContentViewId() {

        return R.layout.activity_main;

    }

    @Override

    protected void initView() {

    }

    @Override

    protected void initData() {

    }

    @Override

    protected void setListener() {

        mBtn1.setOnClickListener(this);

        mBtn2.setOnClickListener(this);

    }

    @Override

    public void onClick(View v){

        switch (v.getId()) {

            case R.id.button1:

                FlashHelper.getInstance().startFlick(mTvText);

                break;

            case R.id.button2:

                FlashHelper.getInstance().stopFlick(mTvText);

                break;

            default:

                break;

        }

    }

    @Override

    protected void onDestroy() {

        super.onDestroy();

    }

}
MainActivity的xml文件很简单,就是一个按钮点击开启闪烁,然后一个按钮点击停止闪烁,闪烁效果在一个TextView上呈现,下面也简单的给出activity_main.xml的代码吧:
<?xml version="1.0" encoding="utf-8"?>

<android.support.constraint.ConstraintLayout xmlns:android="http://schemas.android.com/apk/res/android"

    xmlns:app="http://schemas.android.com/apk/res-auto"

    xmlns:tools="http://schemas.android.com/tools"

    android:layout_width="match_parent"

    android:layout_height="match_parent"

    tools:context="com.android.testdemo.MainActivity"

    tools:layout_editor_absoluteY="81dp"

    android:background="@color/white">

    <Button

        android:id="@+id/button1"

        android:layout_width="wrap_content"

        android:layout_height="wrap_content"

        android:layout_marginTop="100dp"

        android:text="開啓閃爍"

        app:layout_constraintEnd_toEndOf="parent"

        app:layout_constraintHorizontal_bias="0.501"

        app:layout_constraintStart_toStartOf="parent"

        app:layout_constraintTop_toTopOf="parent" />

    <Button

        android:id="@+id/button2"

        android:layout_width="wrap_content"

        android:layout_height="wrap_content"

        android:layout_marginEnd="8dp"

        android:layout_marginStart="8dp"

        android:layout_marginTop="40dp"

        android:text="停止閃爍"

        app:layout_constraintEnd_toEndOf="parent"

        app:layout_constraintStart_toStartOf="parent"

        app:layout_constraintTop_toBottomOf="@+id/button1"

        tools:ignore="MissingConstraints" />

    <TextView

        android:id="@+id/tv_text"

        android:layout_width="120dp"

        android:layout_height="40dp"

        android:layout_marginEnd="8dp"

        android:layout_marginStart="8dp"

        android:layout_marginTop="112dp"

        android:text="控件閃爍測試"

        android:gravity="center"

        android:background="@color/green"

        android:textColor="@color/black"

        android:textSize="14sp"

        app:layout_constraintEnd_toEndOf="parent"

        app:layout_constraintStart_toStartOf="parent"

        app:layout_constraintTop_toBottomOf="@+id/button2" />

</android.support.constraint.ConstraintLayout>
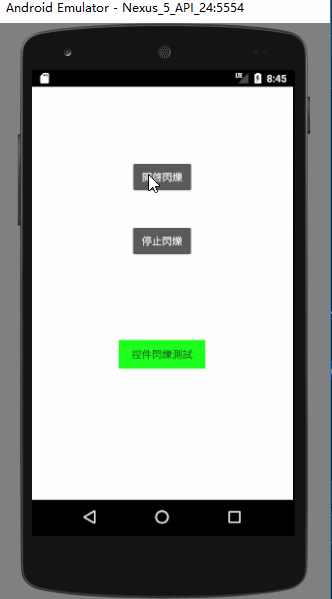
ok,使用方法介绍完了,现在来看看效果图和项目结构图吧
运行效果图
项目效果图
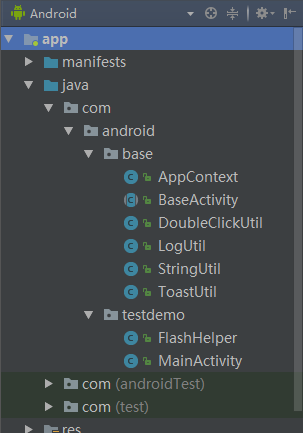
项目结构图
项目结构图
Android代码实现控件闪烁效果
注:本文著作权归作者,由demo大师代发,拒绝转载,转载需要作者授权
Android代码实现控件闪烁效果的更多相关文章
- android 代码控制控件的长宽,小技巧
要在代码里改变ImageView 的长宽,如图 通过拿到contentImage这对象的控件参数,再去改变,再设置 , 上图的contentImage为ImageView对象: 而这里 要提醒的是,L ...
- Android 代码写控件
1.设置dialog弹出anthor public static SearchDialog getSearchDialog(Context context,OnDismissListener list ...
- Android 一个日历控件的实现代码
转载 2017-05-19 作者:Othershe 我要评论 本篇文章主要介绍了Android 一个日历控件的实现代码,小编觉得挺不错的,现在分享给大家,也给大家做个参考.一起跟随小编过来看 ...
- Android 中常见控件的介绍和使用
1 TextView文本框 1.1 TextView类的结构 TextView 是用于显示字符串的组件,对于用户来说就是屏幕中一块用于显示文本的区域.TextView类的层次关系如下: java.la ...
- Android中ListView控件的使用
Android中ListView控件的使用 ListView展示数据的原理 在Android中,其实ListView就相当于web中的jsp,Adapter是适配器,它就相当于web中的Servlet ...
- 五、Android学习第四天补充——Android的常用控件(转)
(转自:http://wenku.baidu.com/view/af39b3164431b90d6c85c72f.html) 五.Android学习第四天补充——Android的常用控件 熟悉常用的A ...
- 【转】Android M新控件之AppBarLayout,NavigationView,CoordinatorLayout,CollapsingToolbarLayout的使用
Android M新控件之AppBarLayout,NavigationView,CoordinatorLayout,CollapsingToolbarLayout的使用 分类: Android UI ...
- 【转】Android M新控件之FloatingActionButton,TextInputLayout,Snackbar,TabLayout的使用
Android M新控件之FloatingActionButton,TextInputLayout,Snackbar,TabLayout的使用 分类: Android UI2015-06-15 16: ...
- 【风马一族_Android】第4章Android常用基本控件
第4章Android常用基本控件 控件是Android用户界面中的一个个组成元素,在介绍它们之前,读者必须了解所有控件的父类View(视图),它好比一个盛放控件的容器. 4.1View类概述 对于一个 ...
随机推荐
- 关于oracle的sqlplus的另一些小技巧
执行脚本的命令在上一节已经讲过,不再重复. sqlplus user/password@ip:port/servicename @/path/sqltest.sql; sqltest的内容及注释: - ...
- css :not 选择器
:not 选择器是css3里面的 :not([class]){color:red;} // 没有class属性的元素都设置为红色 p:not([class]){color:red;} // 没有cl ...
- create table select from
CREATE TABLE new_table AS SELECT * FROM old_table
- 【找规律】Gym - 100923L - Por Costel and the Semipalindromes
semipal.in / semipal.out Por Costel the pig, our programmer in-training, has recently returned from ...
- Exercise02_03
import java.util.Scanner; public class Mi { public static void main(String[] args){ Scanner input = ...
- Problem J: 零起点学算法34——3n+1问题
#include<stdio.h> int main() { ; int n; scanf("%d",&n); ) { ==) n=n*+; else n/=; ...
- golang设计模式-成员变量赋值
常见golang的struct赋值有两种: 1)定义变量同时初始化 val := &Options{ UID:int(1), } 2)先定义变量,再赋值 val := new(Options) ...
- 移除tabBar 重影
-(void)viewWillLayoutSubviews{ [super viewWillLayoutSubviews]; for (UIView *child in self.tabBar.sub ...
- VMware三种网络模式组网(转)
VMware为我们提供了三种网络工作模式,它们分别是:Bridged(桥接模式).NAT(网络地址转换模式).Host-Only(仅主机模式). 打开VMware虚拟机,我们可以在选项栏的“编辑”下的 ...
- Saga的实现模式——控制者(Saga implementation patterns – Controller)
https://lostechies.com/jimmybogard/2013/03/14/saga-implementation-patterns-controller/ 之前的文章中我们介绍了观察 ...